|
Opening salvoes. HMS Impetuous takes a
couple of critical hits, its speed reduced. |
Following on from the previous posting, here is a pictorial narrative of the rest of the action. The fleets on opposite parallel course, the affray was brief...
 |
Ruberian gunfire concentrates upon the
lead Azurian ships. |
The immediate effect of the Ruberian envelopment move was that much the lead two Azurian ships, Vigilant and Ixolite, came in for early attention. Second Squadron was practically 'crossing the T'. A lucky 12-inch shell from Infernal struck Vigilant's bridge, knocking out its command and control. For almost the whole remainder of the action, Vigilant was fixed upon its course and speed, and, lacking direction, its guns out of action.
 |
Having 'crossed the T', 2nd RED Squadron alters
course to southeast. RNS Vigilant has taken a
hit to the bridge. |
RNS Vigilant fixed upon its course, the rest of the Azurian fleet had little option bit to follow along. HMS Impudent shoved a torpedo into Ivrian, though the damage was fairly minor. Xaviera lost its starboard secondary weapons.
 |
| 2nd Squadron's gunnery is impressive! |
Meanwhile
HMS Impetuous, having taken heavy punishment, was left dead in the water, with its forward main guns and port side secondaries out of action. The other two ships of 1st Squadron altered course due east to close the range and possibly to cross the T of the retreating Azurian column.
 |
...but so is the Azurian. Implacable, Infernal and
Intrepid all take heavy damage. |
The Azurian fleet gives as good as it is getting.
Ivrian avenges itself against
Intrepid with a torpedo strike of its own.
Intrepid finds its wallowing in the water, its speed halved.
Infernal takes damage to its secondary weapons, as does
Implacable.
 |
RNS Icarus's command knocked out, it carries on the
same course. The remainder of the fleet has little option
but to follow along. |
For some reason, the above pic refuses to take a caption. As the Azurian fleet follows the stricken Vigilant, still struggling to restore command and control, the gunfire from four ships concentrates upon the rear squadron. HMS Impetuous having taken heavy damage is stopped in the water, half its guns out of action. HMS Intrepid engages the rear of the leading Azurian squadron. RNS Valiant takes fearful punishment, and loses its starboard secondary armament. Nine hits reduce the vessel into a wreck - but one that can still swim, and still shoot.
 |
Azurian gunfire concentrates upon HMS Intrepid,
damaging the engines and the steering. RNS Valiant
scores zero hits - even its torpedoes missing.
|
As the Azurian fleet carries on its northwest course, much of its fire concentrates upon the rearward two shops of Second Squadron:
Infernal and
Intrepid.
Infernal loses its starboard secondary weapons, but a potentially serious fire in soon put out.
Intrepid takes a hit to the engines, halving it speed. It might have been more serious for
Infernal, but, under the concentrated enemy fire,
Valiant's gunfire and torpedo attack is totally ineffective.
 |
Azurian fleet escapes - but for RNS Valiant, which
sinks under the weight of incoming from
HMSS Implacable, Impudent and Intrepid |
At last Vigilant recovers its command and control as Lieutenant Pascal establishes a command centre in the shattered bridge. However he carries on his present course, the rest of the fleet following. Except for Valiant. A shattered wreck in an almost sinking condition, it still has its primary weapons, and manages three hits upon Infernal. That - and the serious fire that began - would have been enough to pull Infernal out of the battle line, but Valiant's brief but gallant fight against three adversaries could have but one outcome. Blazing from many fires, Valiant went down.
It was left to the Ruberians to pick up survivors, and, of course, they claimed the victory. But they also knew they had been in a fight. Impetuous had been badly knocked about and had to be taken in tow. Infernal's crew struggled to put out its fires, but at least were unhampered by enemy gunfire. Intrepid also had to effect repairs to its steering.
But the Azurian fleet had taken worse damage, quite apart from the loss of Valiant. The whole of Second Squadron, leading the Azurian line, had taken enough damage to discourage a renewal of the battle. It was fortunate that by continuing on their course, as the damage to Xaviera's engines reduced the speed of the column.
***
So much for the test of Bob Cordery's 'Belle Epoque' pre-dreadnought naval battle rule set. Tell you what: the action was pretty brisk, and full of incident! Keeping a kind of battle log is essential, of course, and some kind of marker indicating temporary damage, such as fires or loss of command and control.
 |
| A hastily drawn up battle log chart. |
I have to confess to a mistake in my gunfire for the first couple of turns, counting 'dice per broadside' (in effect). That was just absent-mindedness, not really a misinterpretation. It didn't affect anything. But the error corrected in subsequent turns the damage to both sides mounted very quickly. From the first salvo to the last, the battle lasted six turns only. Had the fleets been on parallel courses on the same bearing, I doubt it would have lasted beyond even a seventh turn.
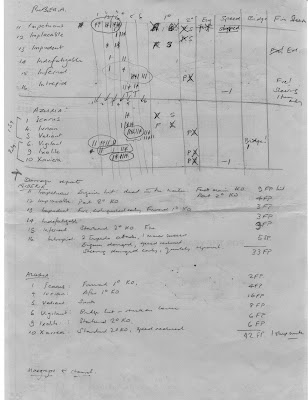 |
The completed battle log. A bit of an ad hoc mess
but the information is all there.
|
I'm almost inclined to suggest that to achieve hits, a 6 is required. That of course would entail a different approach to determining critical damage. It would have the effect of slowing down the action - but also would make it probably more chancy.
I'll leave that as a very tentative suggestion, however. As it stands, La Belle Epoque is very playable for fleet actions. I didn't time the battle, but I doubt it took more than an hour or so.