Saturday, August 10, 2019

More From the Chronicles of Rajistan...


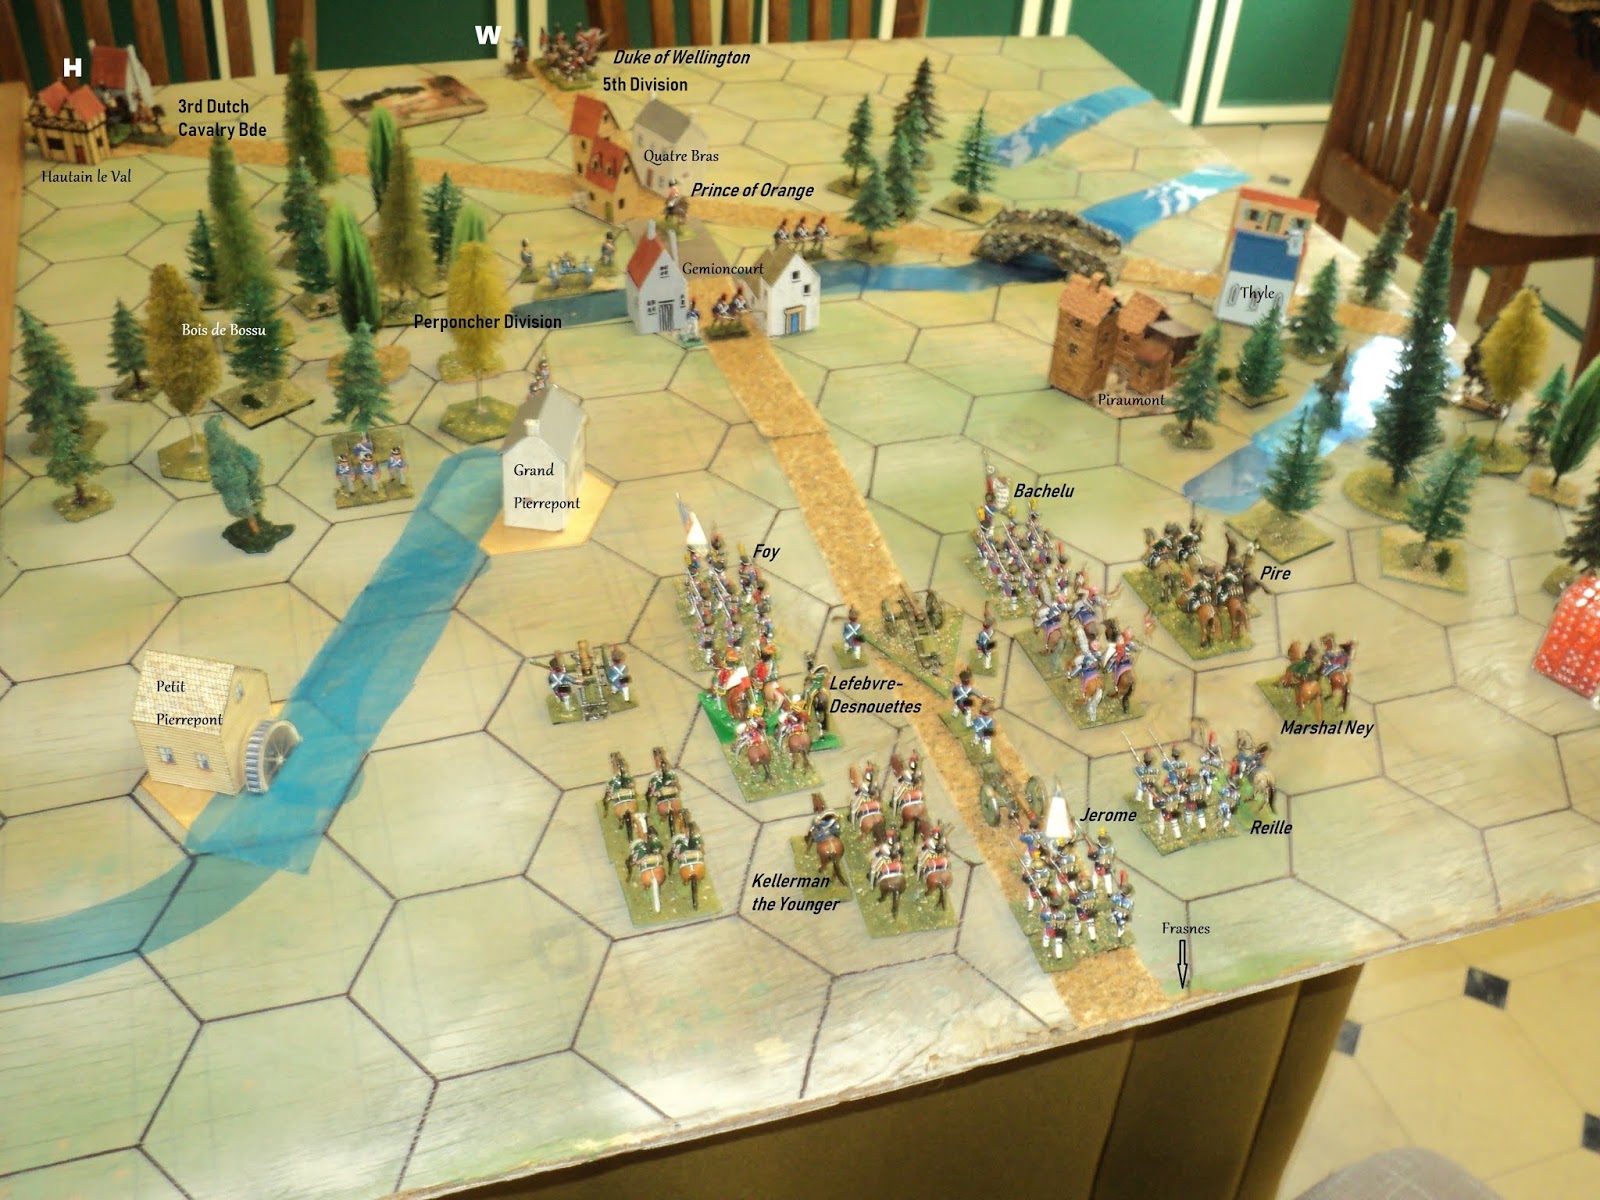
A general view of the encounter at Cpistupon*

Following the check at Hak-al-Amara, Major-General Scarlett found a good deal of rest, recreation and reorganisation required before he could contemplating a further drive up the Pardis River to the goal he craved: Sakhdad - and the longed-for promotion to Lieutenant-General. Sixteenth Brigade had been particularly badly cut up, and the 18th had taken a serious mauling as well. Both required a battalion to be stricken from the Order of Battle, and the 16th lost their Gatling detachment as well.
The battlefield.  The light green patches signify light scrub;
the dark green, heavy. 

To be sure, Nasr-Ed-Din Pasha's army had been no less roughly handled.  After a day or so waiting behind the river at Hak-al-Amara, the Turkowaz Army of Medifluvia retreated north several tens of miles, to prepare a another reception for the Rajistan Expeditionary Division should they venture northward. Whilst preparing his lines about the famous site of the ancient Farsistan city of Cpistupon*, Nasr-Ed-Din welcomed the addition of a shore battery.  This he placed on the west bank a mile or so south of his HQ at Qusabah overlooking the length of a west-east reach of the Pardis River. The battered and attenuated 35th Division occupied nearby trenches by way of protection. Their sole communication with the main army was by way of a bridge of boats not far from Qusabah village.


To his dismay, however, the Pasha became soon bereft of his strongest Division. Called for elsewhere, the 37th, which had hardly been engaged at Hak, was badly needed at quite another theatre. Without it, Nasr-Ed-Din despaired of ever holding his position against a determined attack. As news arrived that the  Ruberian Army had resumed its advance, with an accompanying gunboat flotilla, his appeals for reinforcements to Sakhdad and to Ionople became increasingly urgent and strident.


Looking northwards upriver; HMS Shoofly in the foreground
somewhat protected by heavy scrub.

Not before time, the Army of Mesofluvia received replacements comprising not one, but two fresh Divisions, 45th and 51st, both including a detachment of mitrailleuse 'machine' guns. The Army now comprised:

Turkowaz Army of Medifluvia (TURQUOISE):

Command:  Nasr-Ed-Din Pasha 6SP

35th Division: Duya-ed-Din Pasha (and entourage) (1SP - Elite)
     137th Regiment (3SP - Poor {levy})
     138th Regiment (3SP - Poor)
     139th Regiment (3SP - Poor)
       Naval Shore battery (under command (2SP - Average)    
38th Division: Ali Sait Akbaytogan (1SP - Elite)
     149th Regiment (4SP - Poor)
     150th Regiment (4SP - Poor)
     152nd Regiment (4SP - Poor)
     38th Mountain Artillery (2SP - Average)
45th Division: Abdul Jabbar Emir (1SP - Elite)
     177th Regiment (4SP - Poor)
     178th Regiment (4SP - Poor)
     179th Regiment (4SP - Poor)
     180th Regiment (4SP - Poor)
       45th Division Mitrailleuse Detachment (2SP - Average)
     45th Mountain Artillery (2SP- Average)
51st Division: Suleiman Jaya (1SP - Elite)
     201st Regiment (4SP - Poor)
     202nd Regiment (4SP - Poor)
     203rd Regiment (4SP - Poor)
     204th Regiment (4SP - Poor)
      51st Division Mitrailleuse Detachment (2SP - Average)
     51st Mountain Artillery (2SP- Average)

14th Cavalry Division: Ahmed Fayzi Pasha (1SP - Elite)
     40th Cavalry Regiment  (3SP - Average)
     41st Cavalry Regiment  (3SP - Average)
     42nd Cavalry Regiment (3SP - Average)

13th Field Artillery: (2SP - Average)

29 units; Median 15
85 Strength Points; Exhaustion Point = -29


38th and 45th Division trench lines

Points to note:

1.  35th Division was so badly knocked about in the previous action that one regiment (140th) had to be disbanded, and the other three had all lost a strength point each.  Further to that, the Division had lost all its artillery.  This was partly offset by the attached shore guns, but they, of course, could not be moved.

2.  38th division had also taken heavy losses at Hak, most notably the surrender of 151st Regiment.  So, it too was reduced to three regiments, but they at least kept the original SPs.

3.  It is still a ragtag army!


View from behind 16th Brigade ('C' Column)

Meanwhile, their energies more or less restored, the Rajistan Expeditionary Division troops were marching rapidly upriver, until on 21st November, 1875, their arrival at the point at which lines of entrenched Turkowazians confronted them.  

Major-General Scarlett had with him:

Rajistan Expeditionary Division (RED): Major-General Sir Grinmore Scarlett   6SP

View from behind 'A' Column


16th 'Poona' Brigade ('C' Column): Lieutenant-Colonel  Sir Halibut Sangwigne  (1SP - Elite)
    2nd Dorsets  (3SP - Elite)
    114th Duke of Wellesley's Rifles (3SP - Average)
    117th Madasahatta Infantry (3SP - Average)
    
17th 'Ahmednagar' Brigade ('A' Column): Brigadier Sam Vermilion-Jones  (1SP - Elite)
     1st Ox and Bucks (4SP - Elite)
     22nd Punchnjab Infantry (4SP - Average)
     103rd Madasahatta Infantry (4SP - Average)
     119th Myulshuh Infantry (4SP - Average)
     'Ahmednagar' Gatling Company (2SP - Average)

18th 'Belgaum' Brigade ('B' Column): Colonel Sir Redfers Carmine, Bart. (1SP - Elite)
     2nd Norfolk Infantry (4SP - Elite)
     110th Madasahatta Infantry (4SP - Average)
     120th Rajinbul Infantry (4SP - Average)
     'Belgaum' Gatling Company (2SP - Average)

6th Cavalry Brigade ('D' Column) : Brigadier Salmond Lord Garnet (1SP - Elite)
    7th Lancers (3SP - Elite)
    16th Dragoons (3SP - Elite)
    33rd Queen Victoria's Own Light Horse (3SP - Average)
    Gatling Detachment, RHA (2SP - Average)

Division Artillery:
   'X' Mountain Artillery Brigade (2SP - Average)
   1st Rajistan Mountain Artillery (2SP - Average)
   5th Hants Field Howitzer Battery (2SP - Average)
HMS Shoofly

Pardis River Flotilla:
   HMS Shoofly ('Fly' Class Gunboat) (5SP - Average)


25 Units; 13 Median.
73 Strength Points; Exhaustion point -25SP.

Turkowaz 35th Division and the shore battery.

Points to note:

1.  Sir Rubeus Redmayne having been wounded at Hak and not yet recovered from his injuries, Lt-Col Sir Halibut Sangwigne assumed command of 16th Brigade.

2.  16th Brigade having taken heavy losses at Hak, has been reduced to 3 battalions, each with just 3SP.  It has also lost its Gatling detachment.

3.  18th Brigade has also lost one of its battalions in the attack at Hak.  The remaining 3 battalions have retained their SP values.
4.  Taken overall, a very slightly weakened Rajistan column is about to take on a somewhat strengthened Turkowaz corps.  How will this turn out?

To be continued...
* Afterword on 'Cpistupon'.  This battle is based upon the historical World War One Mesopotamian action at Ctesiphon (22-25 November, 1915).  That battle, for its size, was probably one of the bloodiest history can show.  A reaction among the British soldiery was to render the name famous from antiquity into something more evocatively modern: 'Cpistupon'.  How could I possibly let that one go by?


Tuesday, August 6, 2019

Portable Napoleonic Wargames: More Combat Mechanics.

French Division column of 3 regiments attacking a
British line of 2 Brigades.  Generals accompanying;
the pluses and minuses cancel out.  An even fight.
I admit to procrastinating on this post.  In the previous, I suggested slight amendments to The Portable Napoleonic Wargame to resolve what I considered to be a problem with the (close) combat mechanics.  The 'problem', as I saw it, was that in certain, not rare, situations, one side would be entire immune from harm.  Not even rolling a '1' would incur a hit.

Nor did I like the notion of arbitrarily deciding that rolling a natural '1' on a D6 would be a hit, regardless of modifier (that a '6' on a D6 might be insufficient to 'save' a unit from harm doesn't seem to come into consideration, the way the mechanics work).  Hence the methods I've suggested.  Before leaving this, it was remarked in response to my last posting that the effect of a supporting stand being a 'plus' for its own side and a 'minus' for the enemy was perhaps to skew the results too much in favour of which side had the edge.  That is a reasonable argument, but there are two reasons for my deciding to set it aside:

  • I wanted to change the published game mechanics as little as possible - to stay with 'the spirit' of the original game;
  • A change to an 'asymmetric' system of adding only or subtracting only seemed likely to lead to rather more sweeping changes being required to the combat mechanics.  That of course doesn't rule the notion out of court if I couldn't make the system 'work' they way I wanted within the parameters I had set for myself.

British line attacking a French column.
 Not the best approach (piecemeal) - a losing proposition for the
Redcoats.
Now, we could leave the matter here, but it seemed to me a week ago that the game rather omitted the 'column vs line' theme that was such a feature of many of the battles, especially of the Revolutionary and Peninsular Wars.  Looking back to the Brigade and Divisional sets - yep: there they were.  Why not at Army Corps or Army level?
French columnar attack:
Here the Redcoats can claim flank support from the right -
in contact, otherwise not engaged, but not from the left
(not in contact with the French column).
I admit it took longer than it ought to ask myself this.  It should to have occurred to me sooner.  In trying out a new rule set, it is usually a very good idea, when encountering something hard to understand or to accept, to ask: 'Why has the author done it this way?' Why has he omitted this; why has he included that; and why choose such-and-such a method?  I could of course ask Bob Cordery himself, but I think I pretty much had an answer already.  Column and line combat was to be subsumed by the scale.  The two, three or four elements to a grid area were pretty much cognate to 'stacking' the unit chits in board war games.

In the light of this, what have now to suggest is rather less compelling.  However, I have decided that for my own purposes, and given the grid size compared with my own elements (see the picture below), even at this scale, there remains scope for 'column' vs 'line' combat.  Hence my suggestion of +2 for friendly supporting flanking unit  in the same grid area; and -2 to a unit attacking an enemy unit  that has  a supporting flanking unit in the same grid area.  Recall from last time, that who has the more 'pluses' adds 1 to his die roll; who has the more 'minuses' takes 1 from his die roll.  The presence of generals, by the way, only adds to his own side, and has no effect - not even if he is Napoleon himself - upon the enemy.
French column overlapped on both flanks by the British line.
Not a healthy place for the French to be!


But even that doesn't seem to me to be quite enough.
Let's repeat the second diagram here:

Check it out.  A French Divisional column of 4 stands, led by the Divisional commander, advances into contact with the main body of a British Division of 3 brigades.  For some reason the British Division commander is no longer commanding (possibly taken by a cannonball or something).

French Roll: n + 4 (General + 3 supporting units) - 3 (enemy flanking supporting units 1 in same hex plus unengaged enemy contacted in adjacent hex)
British Roll: m + 2 (Flanking support in same hex) - 3 (enemy rear supports in same hex)
French have the extra 'plus', so can add 1 to the D6 roll.
Minuses are equal, and so neither side subtracts from the die roll.
The French will be hit if they roll '1'; the British will be hit on a roll of 1 or 2.

Now it is the British turn, and the whole Division counterattacks.  As they are already in contact, it is just a matter of their 'initiating' the combat this turn.  Now there are two combats.  Given that the advantage in both lie with the French, one feels that this is too much a losing proposition for the British.  Mind you, it is aruable that this is too piecemeal an approach.  The Redcoats would do better concentrated in the one grid area.

I'm very tempted to suggest that a line of two elements as depicted here, both elements initiate combats, still counting their fellow as a flanking supporting rank.   But it is still a losing proposition, even with a general present.

However, there is a solution.  If the third British brigade were in the same grid area as the main body, it would add a (rear) supporting element.  The presence of a general will then put 3 British Brigades, in line with integral rear support, on a par with the four French in Divisional column.

If were are to continue placing negatives for enemy in contact and pluses for for friends in flanking adjacent grid areas, - in effect an overlap - then we might have to look at something a little extra (in the negative direction) for being in contact with enemy on flank or rear.


The next few diagrams are part of a play test of the ideas I had been mulling around.  In the above diagram A French infantry Division and light horse brigade attack a British Division strung out in the dear old 'thin red streak'.  The French infantry can count a general and 3 rear supporting ranks.  The light horse count 1 rear supporting rank.


The British facing the French infantry can count one flanking support unit within the same grid area (+2), and one unengaged flank support from the adjacent grid area (+1) to their left.  As the right flank brigade is under attack by French horse, it can not help the rest of the division.  That brigade can count no pluses at all, and will have to subtract 1 from the die roll owing to the cavalry's rear support.
In the above diagram, the French cavalry are in line.  I am inclined, however to reserve the +2 for flank support in the same grid area to infantry, and possibly supporting cannon. 

The above diagram presents a thicker line for the French to face, equalising the 'minuses'. French have 4 'pluses' to 3; and 3 'minuses' to 3.
Here, the French have caught a Tartar: a powerful British Division of 4 brigades, in two successive lines.  Even with no general present on the British side, the prospects are in favour of the British: pluses even, and the French have to take the minus.
Even worse for the French, this strong enemy has a general present.  The Column will take a minus on its die roll; the British will take a plus.   But ...
... Here come the French cavalry!  Led by Marshal Davout, no less.  It is the French turn.
French Infantry: Roll i; +5 (General + 3 rear support +  flank support*) - 4 (1 flank and 2 rear enemy supports in same grid area.
British Infantry vs infantry: Roll j; +5 (General + 2 rear support + 2 for in-hex flank support); -4 (3 enemy rear supports, and contact with unengaged enemy).
French Light Horse: Roll h; +3 (Marshal + rear support + flank support), -4 (enemy 1 flank and 2 rear supports).
British Infantry vs cavalry: Roll k: + 5 (General + 2 rear support +2 for in-hex flank support), -2 (Cav rear support + flank support)

French Infantry vs British Infantry: plus modifiers equal; minus modifiers equal means no adjustment to the die rolls. 
If i = 1 or 2, the French infantry take a hit
If j = 1 or 2, the British take a hit.
French Cavalry vs British Infantry: Plus modifiers favour the British (5 to 3); Negative modifiers also favour the British (-2 to -4).  British add 1 to their roll; French subtract 1).
If h = 1, 2 or 3, the French cavalry take a hit.
If k = 1, the British infantry take a hit.

* Flank support from adjacent grid areas are cancelled if the 'supporting' unit is in close combat itself with another unit.  In the above diagram, if a second British unit or formation stood to the immediate right of the one shown, then it would be engaged by the French cavalry.  Neither would get the flank support.

French light horse, led by Marshal Davout, encounters a
formation of Austrian cuirassiers.  Should the linear supporting
element modify die rolls by 1 or 2 in this case?  Should the
appearance of line and column be ignored on account of scale?
After all this, I'm simply not sure I want to go down this track - at least not so far.  That won't stop me play testing the idea in the fairly near future!  What I will have to investigate is whether any added complication adds anything to the game system; and whether it adds or subtracts from the play and the satisfaction from it.


Friday, July 26, 2019

Portable Napoleonic Wargames: Combat Mechanics

A small play test of mechanics.  Both sides rolling '6's'
wasn't much help!
My recent Portable Quatre Bras game, along with the earlier Army (Corps) games (Wavre and Grand Rosiere) have led me to think about ways to obviate combats that (a) guaranteed immunity from harm, and (b) guaranteed susceptibility to harm.  During the course of the Quatre Bras action, the British Guards Division, in column, ran into Foy's Division. 

Foy had the deeper column (3 stands against 2); both could claim a general officer present.  As the combat mechanics stand, there was no way the French could sustain a hit.  As it transpired, the Guards rolled '2' to determined what happened to them; and the French rolled a '1'.


Incident in Quatre Bras action.  French roll of '1' was
still not low enough to register a hit on them.
This seemed to me not an especially desirable outcome.  Why shouldn't the French at least have had some chance of taking a hit?  In the write-ups of those battles, I made certain proposals, but have since decided that they aren't quite satisfactory.  I want to stick as close to the 'spirit' of the original rule set as may be, and felt that my suggestions did that.  But they also seemed rather hard to remember.  So I have had a considerable rethink.

First of all, a reminder of the Portable Napoleonic Wargame Combat Rules.  I'll rearrange the text slightly, but otherwise the meaning is the same.  Close combat is between opposing stands (figure bases) in adjacent grid areas.  Whose turn it is 'initiates the combat' (I infer even if it is an ongoing one).   IThe original rules are in italics, and I have added amendments to these in roman.


Both sides roll a D6 die for their (own) figure base involved in combat and add or subtract any relevant modifiers.

Add 1 to the D6 die roll score for:

  • Each friendly supporting stand in the same grid area as the stand initiating the combat;
  • Each friendly supporting stand in the same grid area as the stand being attacked;
  • If the stand initiating the combat is cavalry attacking infantry or artillery;
  • If a friendly commander or subordinate commander is present in the same grid area as the stand for which the D6 is being rolled;
  • If the stand being rolled for is in contact with the flank or rear of the enemy stand or formation of stands.
Add 2 to the D6 die roll score for:
  • For friendly flanking support stand in the same grid area as the stand initiating combat OR being attack or in contact.
Reduce by 1 the D6 die roll for:
  • Unit is being attacked (or has been contacted) in flank or rear by enemy;
  • Enemy unit or stand is uphill(1) or in cover;
  • For each enemy supporting stand in the same grid area as enemy initiating combat;
  • For each enemy supporting stand in same grid area as enemy being attacked (contacted).
Reduce by 2 the the D6 roll for:
  • Enemy unit is in fortifications (or strongpoints);
  • For enemy flanking supporting stand in same grid area as the stand initiating combat OR being attacked or in contact.
BLUE column vs RED line.  The dark numbers represent
'unsafe' unmodified D6 rolls; the lighter numbers, the 'safe'.
Note 1:  I am disinclined to offer a bonus for being uphill or a penalty for being downhill, whether shooting or in combat.  My own reading seems to indicate that, owing to a tendency, especially among unpractised troops, to firing high, being downhill might actually have been the favourable position, even though at the time it might not have been perceived as such.   That the perception and reality might have been at odds sounds plausible to me, and for that reason am inclined to leave the matter open.

But now we come to the substance of my proposed amendment.  It is this.  When rolling their respective D6s, the players also determine their bonuses (pluses) and penalties (minuses).  The side with the higher 'plus' count adds 1 to his D6 roll, and the player with the higher 'minus' count reduces his D6 roll by 1.  The effect of this is that in no combat is the risk of a hit less than 16%, nor greater than 50% (2).

Note 2: I did consider that the higher minus count reduce his D6 roll by the difference, but for now, prefer the 'gradualist' approach.

Examples:

1. A single French (BLUE)  stand (figure base) advances 
into contact with a British (RED) stand accompanied by its Division commander (denoted by the flag).  The numbers indicate the D6 scores that will result in a hit being received.

BLUE: D6 score: 2 + 0 (no modifiers) = 2 Hit
RED: D6 score: 1 +1 (GoC Div) = 2 Hit
RED: D6 score: 2 +1 (GoC Div) = 3 Not hit.


 2.  A BLUE column of 2 stands, led by a Division commander, advances into contact with a RED brigade stand also accompanied by its divisional commander.

BLUE: D6 score: 1
Pluses: Goc Div + supporting stand = 2
Minuses: none

RED: D6 score 3
Pluses: GoC Div = 1
Minuses: Enemy supporting stand

BLUE has more 'pluses' so adds 1 to his D6 roll.
RED has more 'minuses' so reduces his D6 roll by 1.

BLUE final score = 1+1=2 Takes a hit (A D6 roll of 2 would have been safe)
RED final score = 3-1=2 Takes a hit (A D6 roll of 4 would have been safe)


3.  A BLUE column of 2 stands, led by a Division commander, advances into contact with a RED Division column also accompanied by a general. 

BLUE: D6 score: 3
RED: D6 score: 1

BLUE pluses: GoC Div + 1 support stand = 2
RED pluses: GoC Div + 2 support stands = 3
RED adds 1 to his D6 score.

BLUE minuses: 3 enemy support stands = 3
RED minuses: 2 enemy support stands = 2
BLUE reduces his D6 score by 1

BLUE final score = 3 - 1 = 2 Takes a hit (A D6 score of 4 would have been safe)
RED final score = 1 + 1 = 2 Takes a hit (A D6 score of 2 would have been safe) 


4.  A BLUE column of 3 stands, led by a Division Commander, advances into contact with a RED line of 2 brigade stands.

BLUE: D6 score: 1
RED: D6 score: 2

BLUE pluses: GoC Div + 2 support stands = 3
RED pluses: 1 flank support stand in hex = 2
BLUE adds 1 to D6 score.

BLUE minuses: 1 enemy flank support = 2
RED minuses: 2 enemy rear support = 2
NO modification to either D6 roll.

BLUE final score: 2 Takes a hit (A D6 roll of 2 would have been safe)
RED final score: 2 Takes a hit (A D6 roll of 3 would have been safe).

Here I'll pause, and add more examples next time.
To be continued...


Tuesday, July 23, 2019

Look what arrived...

Just arrived yesterday! (H'mmm.  I took these photos with my
smart phone.  They really don't do their subjects justice.)


Comparison of format size.  All three volumes are
hardback.
 ... upon my front doorstep yesterday afternoon!  Rather unexpected; I thought it would be another week at least before I could expect to see these items.  But Lulu Enterprises has consistently given me good service.  Here are the two Bob Cordery 'Mini-Campaign' books, Trouble in Zubia, set in a Nile-istic sort of country; and A Winterish War based loosely upon a certain sub-Arctic conflict that began in late 1939.


The first (pleasant) surprise was their format size - very close to A4. The picture here was to compare with the format of The Portable Wargame series.   The hard cover copies I bought weren't cheap - Bob was right about that! The prices, though, seemed to me commensurate with the production quality.  Overall the books look and feel superb.  The pages open reasonably flat without trouble. But then game the second surprise: glossy paper.


One of the battles in the Winterish War.
Now, these books I would class as 'picture story books', in which, though the text carries most of the narrative, by adding a little something to the tale the pictures are a welcome accompaniment.  Together, they tell the story.  Usually, I find the gloss finish somewhat 'distancing', but here that effect is I think mitigated by the colourful and crisp photography.  I have presented an opening at random from both as impressions of how they look.

The Trouble in Zubia book, though nominally  32 pages, numbers the pages 1-24 for the narrative and the brief closing bibliography. But the 8 pages of front matter - Title page, Little Title page, etc, including an Introduction, have their own page numbering in lower case Roman numerals.   The larger A Winterish War follows the same system of pagination.

These are nice books just to have, let alone to read!  I think maybe Bob has discovered a new genre for the coffee table.  I also think either or both would make a fine gift for a young person with an interest in war games or history.

Now, these are narratives rather than 'how to', but with sufficient information in terms of background, geography, forces and characters that one could easily adapt the campaigns according to one's own set up, rules preferences and soldiery.

Overall, I am impressed with the content, presentation and quality of the finished product.  Bob: congratulations!  I'm glad I got these.  I'd recommend them highly to anyone.
Bright and colourful: Trouble in Zubia.


Tuesday, July 16, 2019

Portable Quatre Bras 2 - Action


We left the battle narrative last time with Bachelu's Division having forced the passage of the Gemioncourt stream; that village under attack by Jerome, the Highlander garrison barely holding, and Kellerman's cuirassiers and Foy's Division assaulting the gun line between Gemioncourt and the Bossu Woods. Meanwhile, reinforcements in the shape of Alten's and Cooke's Guards Divisions were hurrying up from Hautan le Val.  


The already arrived Brunswicker Line Brigade looked set to contest the Quatre Bras crossroads, whilst the Advance Guard penetrated the Bossu Woods to contest Foy's push. On the far eastern flank, a rather desultory cavalry combat ensued, neither side able to achieve decisive results - not even when Lefebvre-Desnouettes's Guard light horse arrived late in the day.
The French push, though here and there checked for a while, proved inexorable.  The Highlanders in Gemioncourt finally succumbed to the pressure. Quatre Bras could not be held, even though Bachelu had at one point to fend off a flank attack whilst closely engaged at that village. Perponcher's guns were finally overrun; and the Brunswicker advance guard were too few to stop Foy's victorious infantry from pushing almost as far as the Hautan le Val road.
The attempted intervention by the Guards Division didn't stop Foy's Division, either - which led to a lengthy reappraisal of the combat system, which I shall shortly discuss.
Driven out of Quatre Bras and the Bossu Woods, and having reach their exhaustion point in terms of SPs lost, the Anglo-Dutch infantry formed a cordon to the north, where they remained until nightfall.  The French has lost barely half the SPs required to reach their exhaustion point. So it was a pretty decisive French victory.
The remaining pictures depict the final moments of the battle as night draws in.


But right now I want to go back to the picture of the Guards Division's battle with Foy. Let's redraw the picture, below. (The die showing '6' seems to be Wellington's SP die somewhat misplaced. Ignore it.) What we are interested in is the blue-red pair showing '1'and '2'. These were combat dice rolled.  By the way, although the fight was taking place with both sides inside the woods, I ignored the modification for cover.  


Let us now examine the results 'as per book'.
French: Roll 1, + 1 (General with) + 2 (supporting ranks) - 1 (enemy supporting column) = 3 - French unscathed.
British Guards: Roll 2, +1 (General with) + 1 (supporting ranks) -2 enemy supporting ranks = 2 - Guards take a hit.

This seemed to me a bit wrong. That the French had an extra rank over the British indicated a 1-pip edge, fair enough.  But this led to a bigger edge. So I retried a system I thought up in the third of the 'Mini-Campaign' series, in which ones own supporting ranks cancelled enemy supports. The results then were:

French: Roll 1, +1 (General with) -1 (enemy supporting rank) +1 (own supporting rank cancels negative from enemy supporting rank) = 2.  French take a hit
British: Roll 2, +1 General with) - 2 (enemy supporting ranks) +1 (Own supporting rank cancels one of the negatives from enemy supporting rank) = 2 Guards take a hit.


Such a solution seems reasonable, but it is not easy to remember how it goes. Perhaps a simpler solution is called for, somewhat suggested by my ignoring cover for this combat. It also requires a less cumbersome amendment to the rule book:


All bonuses for cover, presence of generals, supporting ranks, and such-like are cancelled if the enemy can also claim the same bonus.  In this instance:


French: Roll 1,  +0 (General with, cancelled), +1 (2 supporting ranks, 1 cancelled) = 2
Guards: Roll 2, +0 (General with, cancelled), +0 (1 supporting rank, cancelled) = 2.

We could 'add in' the cover, which would also be cancelled.

On balance, I prefer this system of cancellations. It could be extended, rather than bonuses being cancelled by type, to all bonuses cancelling each other out until one side gets the benefit of the difference.  

Supports to a flank.

In the course of this action, the Anglo-Dutch forces tended to a linear defence approach,  as they could not claim supports from the same grid area. Of course, I could have placed stands side-by-side in the same grid area (they would have fitted), which would have thickened up the line a bit. Even so, there seemed to me that columns had too much of an edge.

I am proposing, quite tentatively at this stage, that

Flank supports in the same grid area.
A1.  Reduce the D6 score of the stand being attacked and/or initiating the attack by 2 for enemy flank support in the same grid area.  
A2. Cancel 1 point of reduction for each enemy supporting stand in the same grid area (whether flank or rear)


Flank supports from other grid areas.
B1.  Reduce the D6 score of the stand initiating the attack only, by 1 for each adjacent enemy-held grid area that is not itself in close combat or contact with other friendly stands. (There has to be a better way of wording this!)
B2.  Same as A1.


Effect of Flank Attacks:
A unit attacked in flank or rear can not claim flank supports, not from within nor from adjacent grid areas.

More on Flank Attacks.

There arose a situation in which Bachelu's Division, attacking Quatre Bras, was itself attacked in flank by 4th Hanoverian Brigade of 5th Division. This didn't seem to faze the French column, much.  

Claiming pluses for general and 2 supporting ranks (+3) they took minuses for opponents in cover (one in village, the other on the edge of a wooded grid area; -1) and being attacked in flank (-1), which still left them with +1 onto the die roll. Only a roll of '1' would have yielded a 'hit'.  The unit in the town (9th Bde) - the main focus of the French column, and their combat of choice - could add for general (when there was one present) +1, but -2 for enemy supports : -1 on the die roll.  Hits on '3' or less.  

Assuming no one was driven away or destroyed in these combats, the flanking unit would be diced for only in its own turn.  It had no general present, and no other bonuses. So it would be facing -2 for its die roll - hits on '4' or less.

Now, neither Anglo-Dutch unit being in contact with any other French unit(s), only Bachelu's Division column in the one grid area, then it seems to me that each could cancel one of the enemy support stand reductions to its own roll, as suggested in the previous section on flank supports.  This would have brought the 9th Bde to 'evens' on the die roll, and the flanking unit to -1. Still favourable to France, but not to the same extent.

Cancel the generals, and all 3 units would have been rolling at -1 on the die rolls - which seems to me a lot more satisfactory a situation.  (Actually, the column could still have counted the general against the flank attack, which could claim none).

Though I shall probably adopt permanently the system I finally proposed in respect of supports in the same grid area (in bold italics above), the suggested system in respect of supports to a flank are at the moment very tentative. We might be forced 'redo' Quatre Bras in order to test them.

I may reprint this half of this posting next time, more to focus on what I've suggested here.  Suffice to say, than even with the 'rub of the green' I felt that the French victory came a bit too easily this time around.

To be ... revisited.


Sunday, July 14, 2019

The Portable Quatre Bras: 1. Introduction

As foreshadowed, this begins the account of Quatre Bras as fought using Bob Cordery's The Portable Napoleonic Wargame (PNW).  I thought this would form a suitable finale to the series of PNW actions related earlier in this blog, beginning with :

... and continuing over the next five postings with a series of four battles, played as though they were part of a campaign. These began with a brigade level action, then continued on with a divisional level, Army Corps, and finally an Army level game based on Wavre. This Quatre Bras action is a little out of time sequence, but I had for some time been meaning to give it a try.

Initial deployments for the Portable Quatre Bras 
For this action I took as a species of model, the scenario offered in the Col Wilbur E. Gray rule set Age of Eagles. Napoleon's strategy for the Armee du Nord was pretty much the same as he adopted in his first campaign in Italy, nineteen years before. This was to fight for the central position between separate wings of the enemy, then to defeat one wing whilst the other was held up by a small part of his own force.

The Duke of Wellington's over-sensitivity to his western flank led to a wider separation between the Anglo-Dutch and Prussian armies, scattering the former, and might have made Napoleon's strategy even more effective, by inflicting defeats upon the enemy not only in the main engagement at Ligny, but also in the secondary at Quatre Bras. Let's see how it might have gone.

The rules used were Bob Cordery's Portable Napoleonic Wargame set, with a couple of small changes that I discussed in the Wavre game. However, my organisation was more 'per spec' in terms of strength points (SP). As the top layer of command was 'Army' (Wing; 6SP)), the second was Corps (3SP), and the third (Division)  was given just 1SP. This, by the way, was a saving on SP dice!  I left them off, as the command stand survived a hit or it didn't.


Forces engaged:

French Left wing: Marshal Ney 6SP

II Corps: Reille 3SP
     5th Division: Bachelu 1SP
          2nd Light  2SP Elite
          61st Line  2SP Average
          72 & 108th Line 2SP Avg
     6th Division: Jerome Bonaparte 1SP
          1st Light 2SP Elite
          3rd Line 2SP Avg
          1st Line 2SP Avg
          2nd Line 2SP Avg
     9th Division: Foy 1SP
          92nd & 93rd Line 2SP Avg
          4th Line 2SP Avg
          100th Line 2SP Avg
     2nd Light Cavalry Division: Pire 1SP
          1st Chasseur-a-Cheval 2SP Avg
          6th Chasseur 2SP Avg
          5th Lancer 2SP Avg
          6th Lancer 2SP Avg
     Combined divisional artillery: 2SP Avg
     II Corps Artillery Reserve: 2SP Avg
III Cavalry Corps (elements):  General Kellerman the Younger 3SP
     11th Cavalry Division: L'Heritier 1SP
          2nd Dragoon 2SP Avg
          7th Dragoon   2SP Avg
          8th Cuirassier  2SP Elite
          11th Cuirassier 2SP Elite
          Horse Artillery 1SP
Imperial Guard Light Cavalry: Lefebvre-Desnouettes 1SP
          Lancers of the Guard 2SP Elite
          Chasseurs of the Guard 2SP Elite

32 units.
64 Strength points; exhaustion point: -22SP

The French forces begin on table as pictured.

Anglo-Dutch Army: Duke of Wellington 6SP

I Corps: Prince of Orange 3SP
     1st (Guards) Division: Cooke 1SP
          1st (Guards) Brigade 2SP Elite
          2nd (Guards) Brigade 2SP Elite
          Foot Artillery 2SP Avg
     3rd Division: Alten 1SP
          5th Brigade 2SP Avg
          1st (Hanoverian) Brigade 2SP Conscript (*Poor: see note)
          Foot Artillery 2SP Avg
     2nd (Dutch-Belgian) Division Perponcher 1SP
          1st (D-B) Brigade (Bylandt) 2SP Conscript
          2nd (Nassau) Brigade (Saxe-Weimar) 2SP Conscript
          Foot Artillery 2SP Avg
 Reserve Corps (elements): Rowland Hill 3SP
     5th Division: Picton 1SP
          8th (Highland) Brigade 2SP Elite
          9th Brigade 2SP Elite
          4th (Hanoverian) Brigade 2SP Conscript
          Foot Artillery 2SP Avg
Brunswick 'Black' Corps: Duke of Brunswick 3SP
          Light Infantry Brigade: 2SP Conscript
          Line Infantry Brigade: 2SP Conscript
          Light Cavalry Uhlan: 1SP Elite
          Light Cavalry Hussars 2SP Elite
          Brunswick Artillery: 2SP Avg
3rd Dutch-Belgian Light Cavalry: Merlen 1SP
          6th Dutch-Belgian Hussar 2SP
          5th Belgian Light Dragoon 2SP
     
29 units.
59 Strength Points; exhaustion point: -20SP

* The several units marked as Conscript from Age of Eagles,  I have assumed to be 'Poor' according to the Portable Wargames terminology. Actually, I don't recall in the actual game treating any units as 'Poor'. Nor do I recall making the decision one way or the other, though I do remember thinking about it. This might be one for any who might want to give this PW scenario a crack 'to suck it and see.'

Only Perponcher's 2nd Dutch-Belgian Division begins on table deployed behind the stream passing by Gemioncourt, and at the edge of Bois de Bossu facing Grand Pierrepont.  The rest of the Anglo-Dutch forces arrive from off-table.  I suggest placing them at the beginning of the Turn of arrival on the table edge road hex, prior to dicing for initiative.


Turn 1:
Road H: 3rd Dutch Cavalry Bde
Road W: Duke of Wellington; Picton's 5th Division

Turn 3:
Road W: Duke of Brunswick, Brunswick cavalry and Brunswick Light Infantry

Turn 6: 
Road H: Alten's 3rd Division

Turn 7:

Road H: Cooke's 1st Division

Turn 8:
Road W: Brunswick Line Brigade, and artillery.

Game lasts for 12 turns.

I'll offer only a brief narrative of events in this action.  As I kept the French advance fairly compact, the advance up the road proved straightforward, with Marshal Ney in the middle of his troops, directing operations.  However, the wings weren't always so easy to shift into motion.Despite being only 2 or 3 grid areas distant from Marshal Ney, Foy's Division incurred some delay in delivering his attack into the woods behind Grand Pierrepont, whilst Pire's Light Cavalry's sweep to the right toward the bridge on the Thyle road also floundered occasionally.
The delay there allowed Picton to establish a flank guard in ambush within the wooded tract on the north side of that bridge.

Meanwhile, Perponcher's Division was coming under increasing pressure from whole of the French infantry and most of their artillery. The Nassauer garrison of Gemioncourt was pounded by gunfire out of the place, though the French were unable to enter before the British Highland Brigade seized the place from under their noses. The cuirassiers lost their 8th Regiment attempting to storm the Dutch-Belgian gun line between Gemioncourt and the Bossu Woods; and Foy's Division's progress through the trees, though steady, was taking time. Bachelu's Division bypassed Gemioncourt, splashed across the stream and in short order put Perponcher's left flank to flight. Having placed himself there, the Prince of Orange suddenly found himself alone on the field.  He hastily made off.  

     
Eventually, Perponcher's entire Division had been destroyed, but for its artillery, still in action. Eight SPs lost to the Allies; the French had lost little more than half so many, though the loss of 8th Cuirassiers' 2SPs was a blow. Gemioncourt had been reoccupied by the Highlanders of Picton's Division. The rest of 5th Division had encountered Pire's light cavalry on the Thyle road. Though the woods favoured the infantry, the French horsemen came rather well out of the encounter. Though driven off themselves, they had induced one of the Allied brigades to fall back, with loss, into Quatre Bras itself. At this time, the Iron Duke himself stood in imminent danger of capture, as Bachelu came bursting over the stream in the wake of the Prince of Orange and the vanishing defenders of the riverbank.

To be continued.