Showing posts with label Pike and shot. Show all posts

Wednesday, June 12, 2024

The Portable White Mountain (2)

 So begins the narrative of White Mountain: a refight of the battle that kicked off a European-wide war that lasted 30 years. The text will be by way of captions for the pictures immediately preceding.


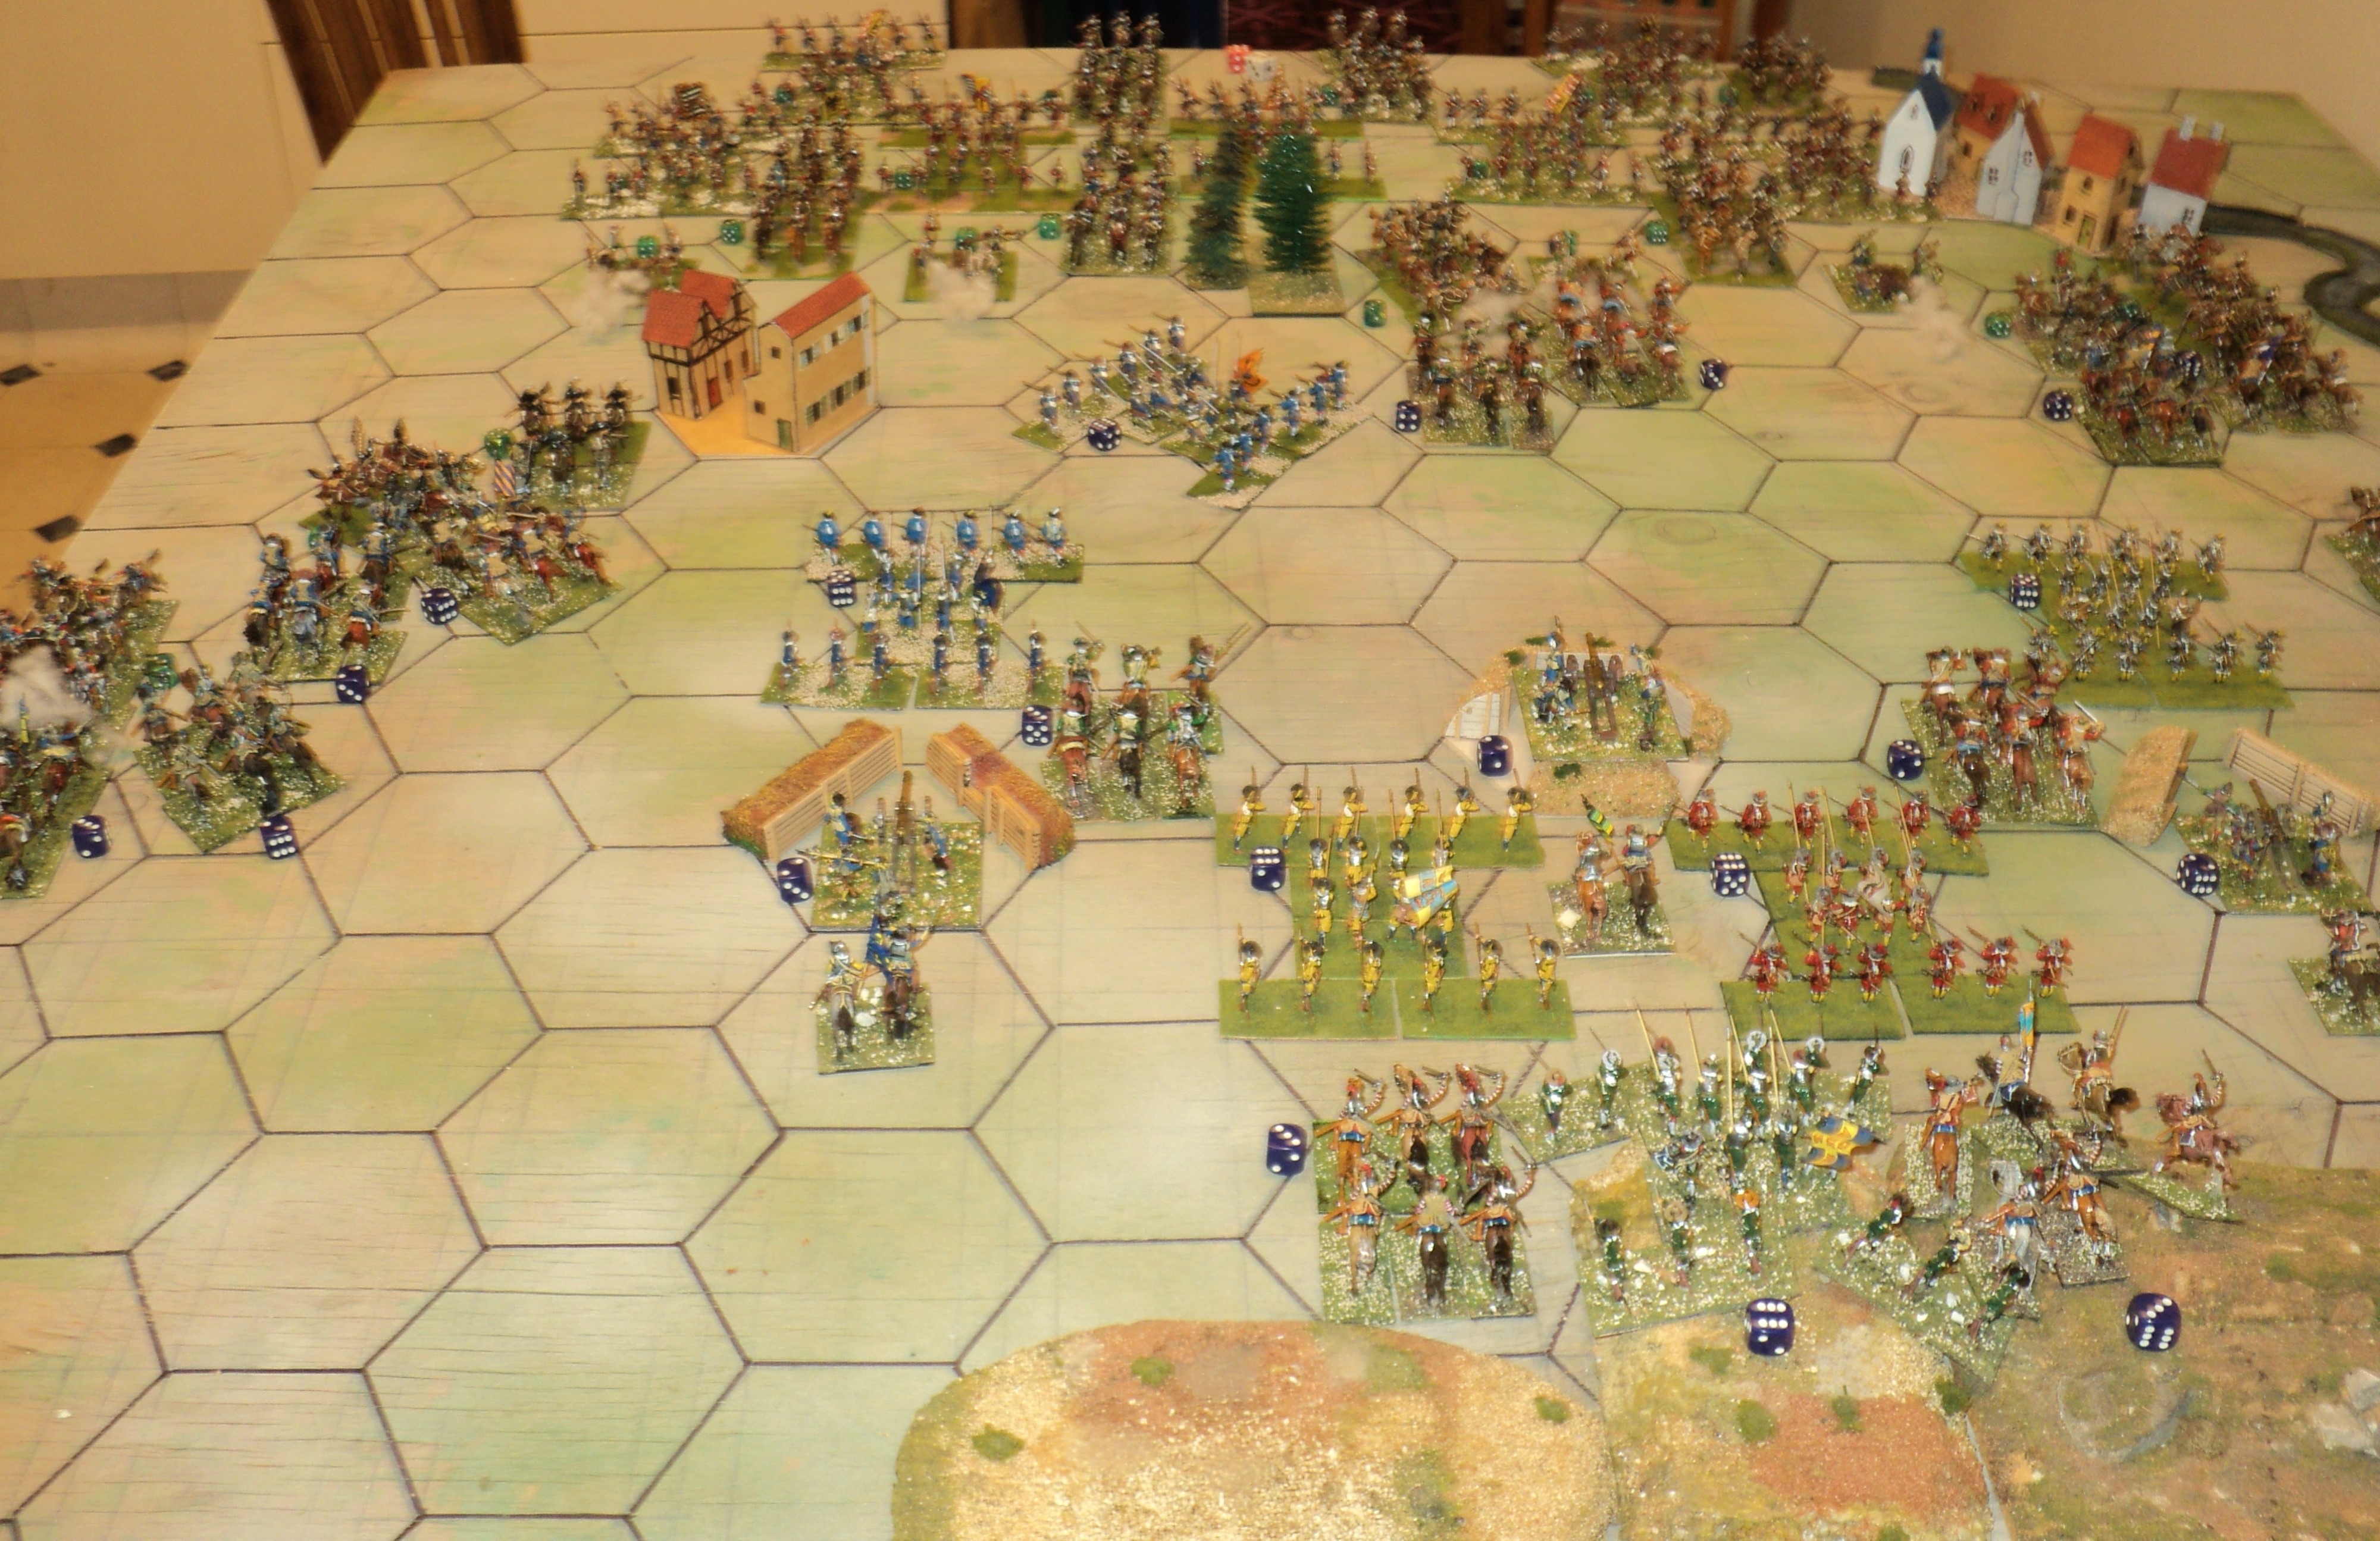
Facing the Imperialist host, the Bohemian Confederation Army lines the forward slopes of the Witteberg - White Mountain. Observe the very Swedish look to the Confederation Army. I had to use Swedish 'proxies'. I could instead have called the feature 'Cremefarbenberg' - Off-white Mountain - and the armies the bitter enemies, the Austerian Empire and the Kingdom of Severia.


Before them, the Imperialists advance: gun batteries in front; horse interspersed among the tercios. Note that, absent horsed teams, the guns of neither side can move. A bit of a nuisance for the infantry, but no real obstacle to friendly cavalry.


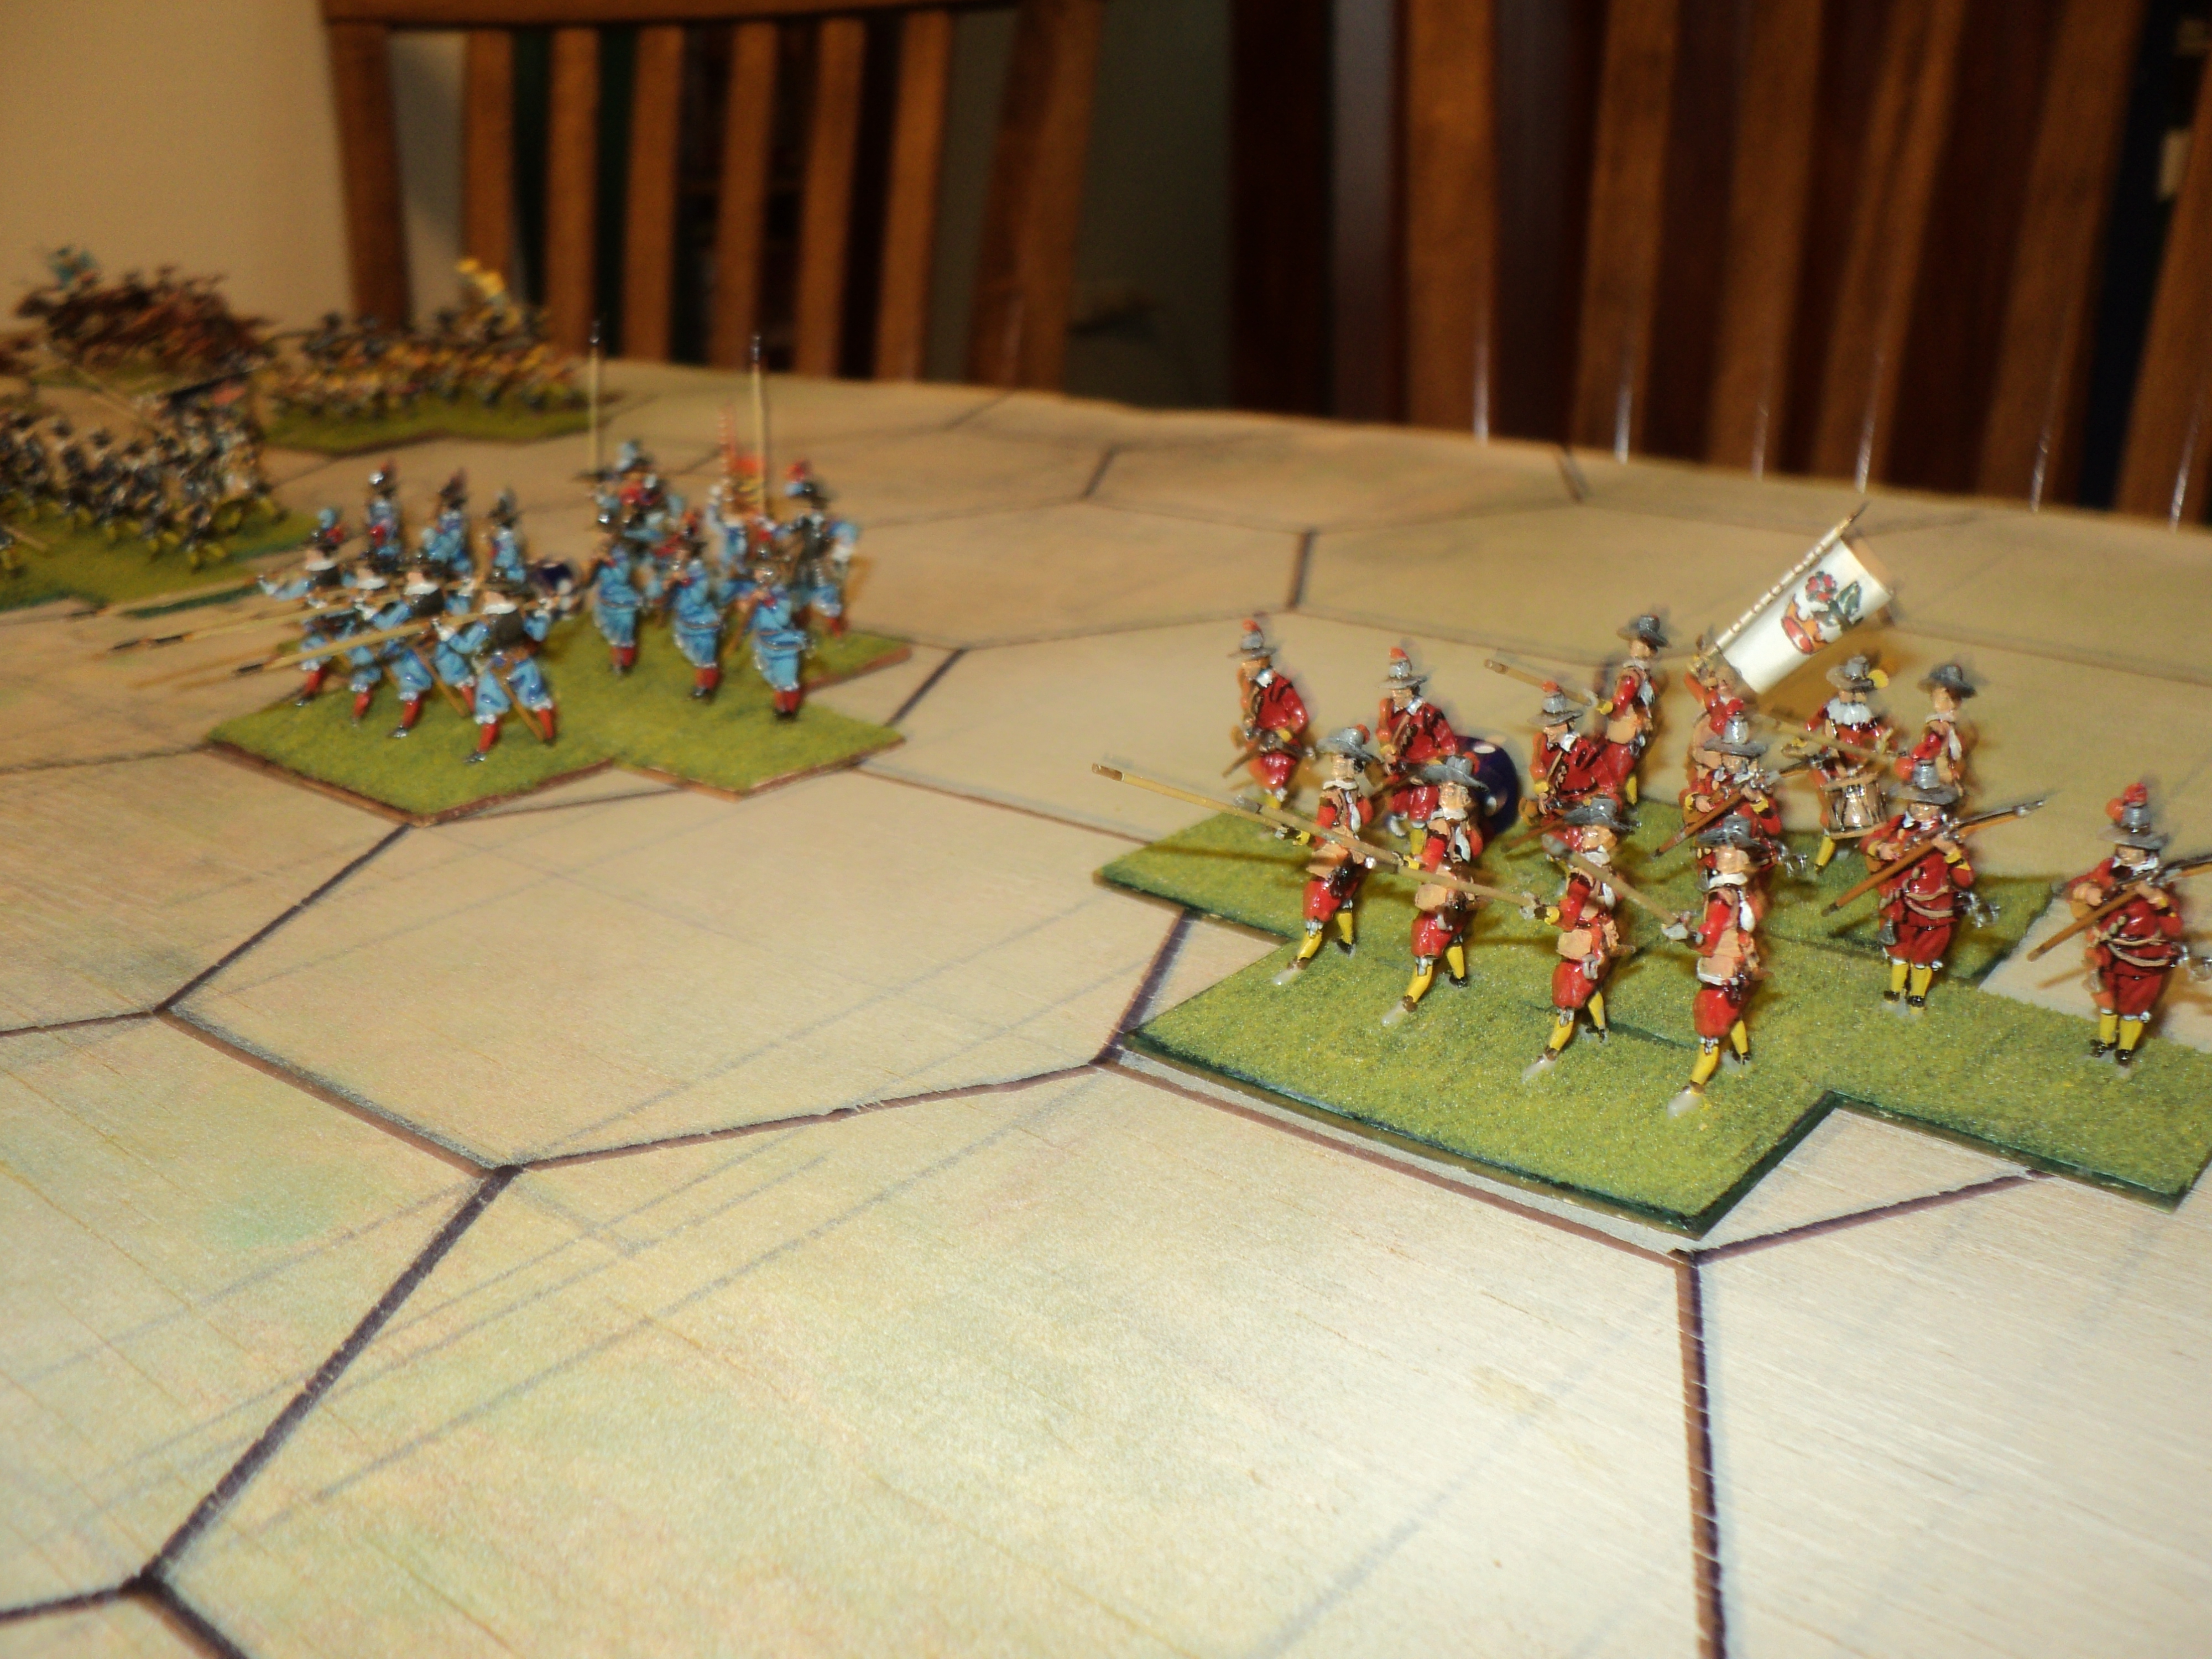
Beginning with the initiative, the Imperialist activation dice roll is truly dismal. The number of dice rolled is equal to the number of generals (three) plus whole multiples of 6 units (23/6 => 3), that is to say, 6 dice. That score is divided by 2, so the 6 dice must have rolled 14 to get to the 7 displayed in the battle box. All four gun batteries having fired, that left just three units to be activated. The Imperialist right flank cavalry, two cuirassier and one harquebusier units, move forward. That's it.

The second cuirassier unit beginning near the rear of the Imperialist army has a long way to catch up! The hope is that the Confederation's line might be outflanked and rolled up.

Well... the Confederation's activation roll wasn't a whole lot better than the Imperialists'. But as the artillery, masked by tercios in front, didn't fire, the army has a lot more flexibility. Question, then: should they wait on the defensive, or take the fight to the enemy? I'll give you three guesses...


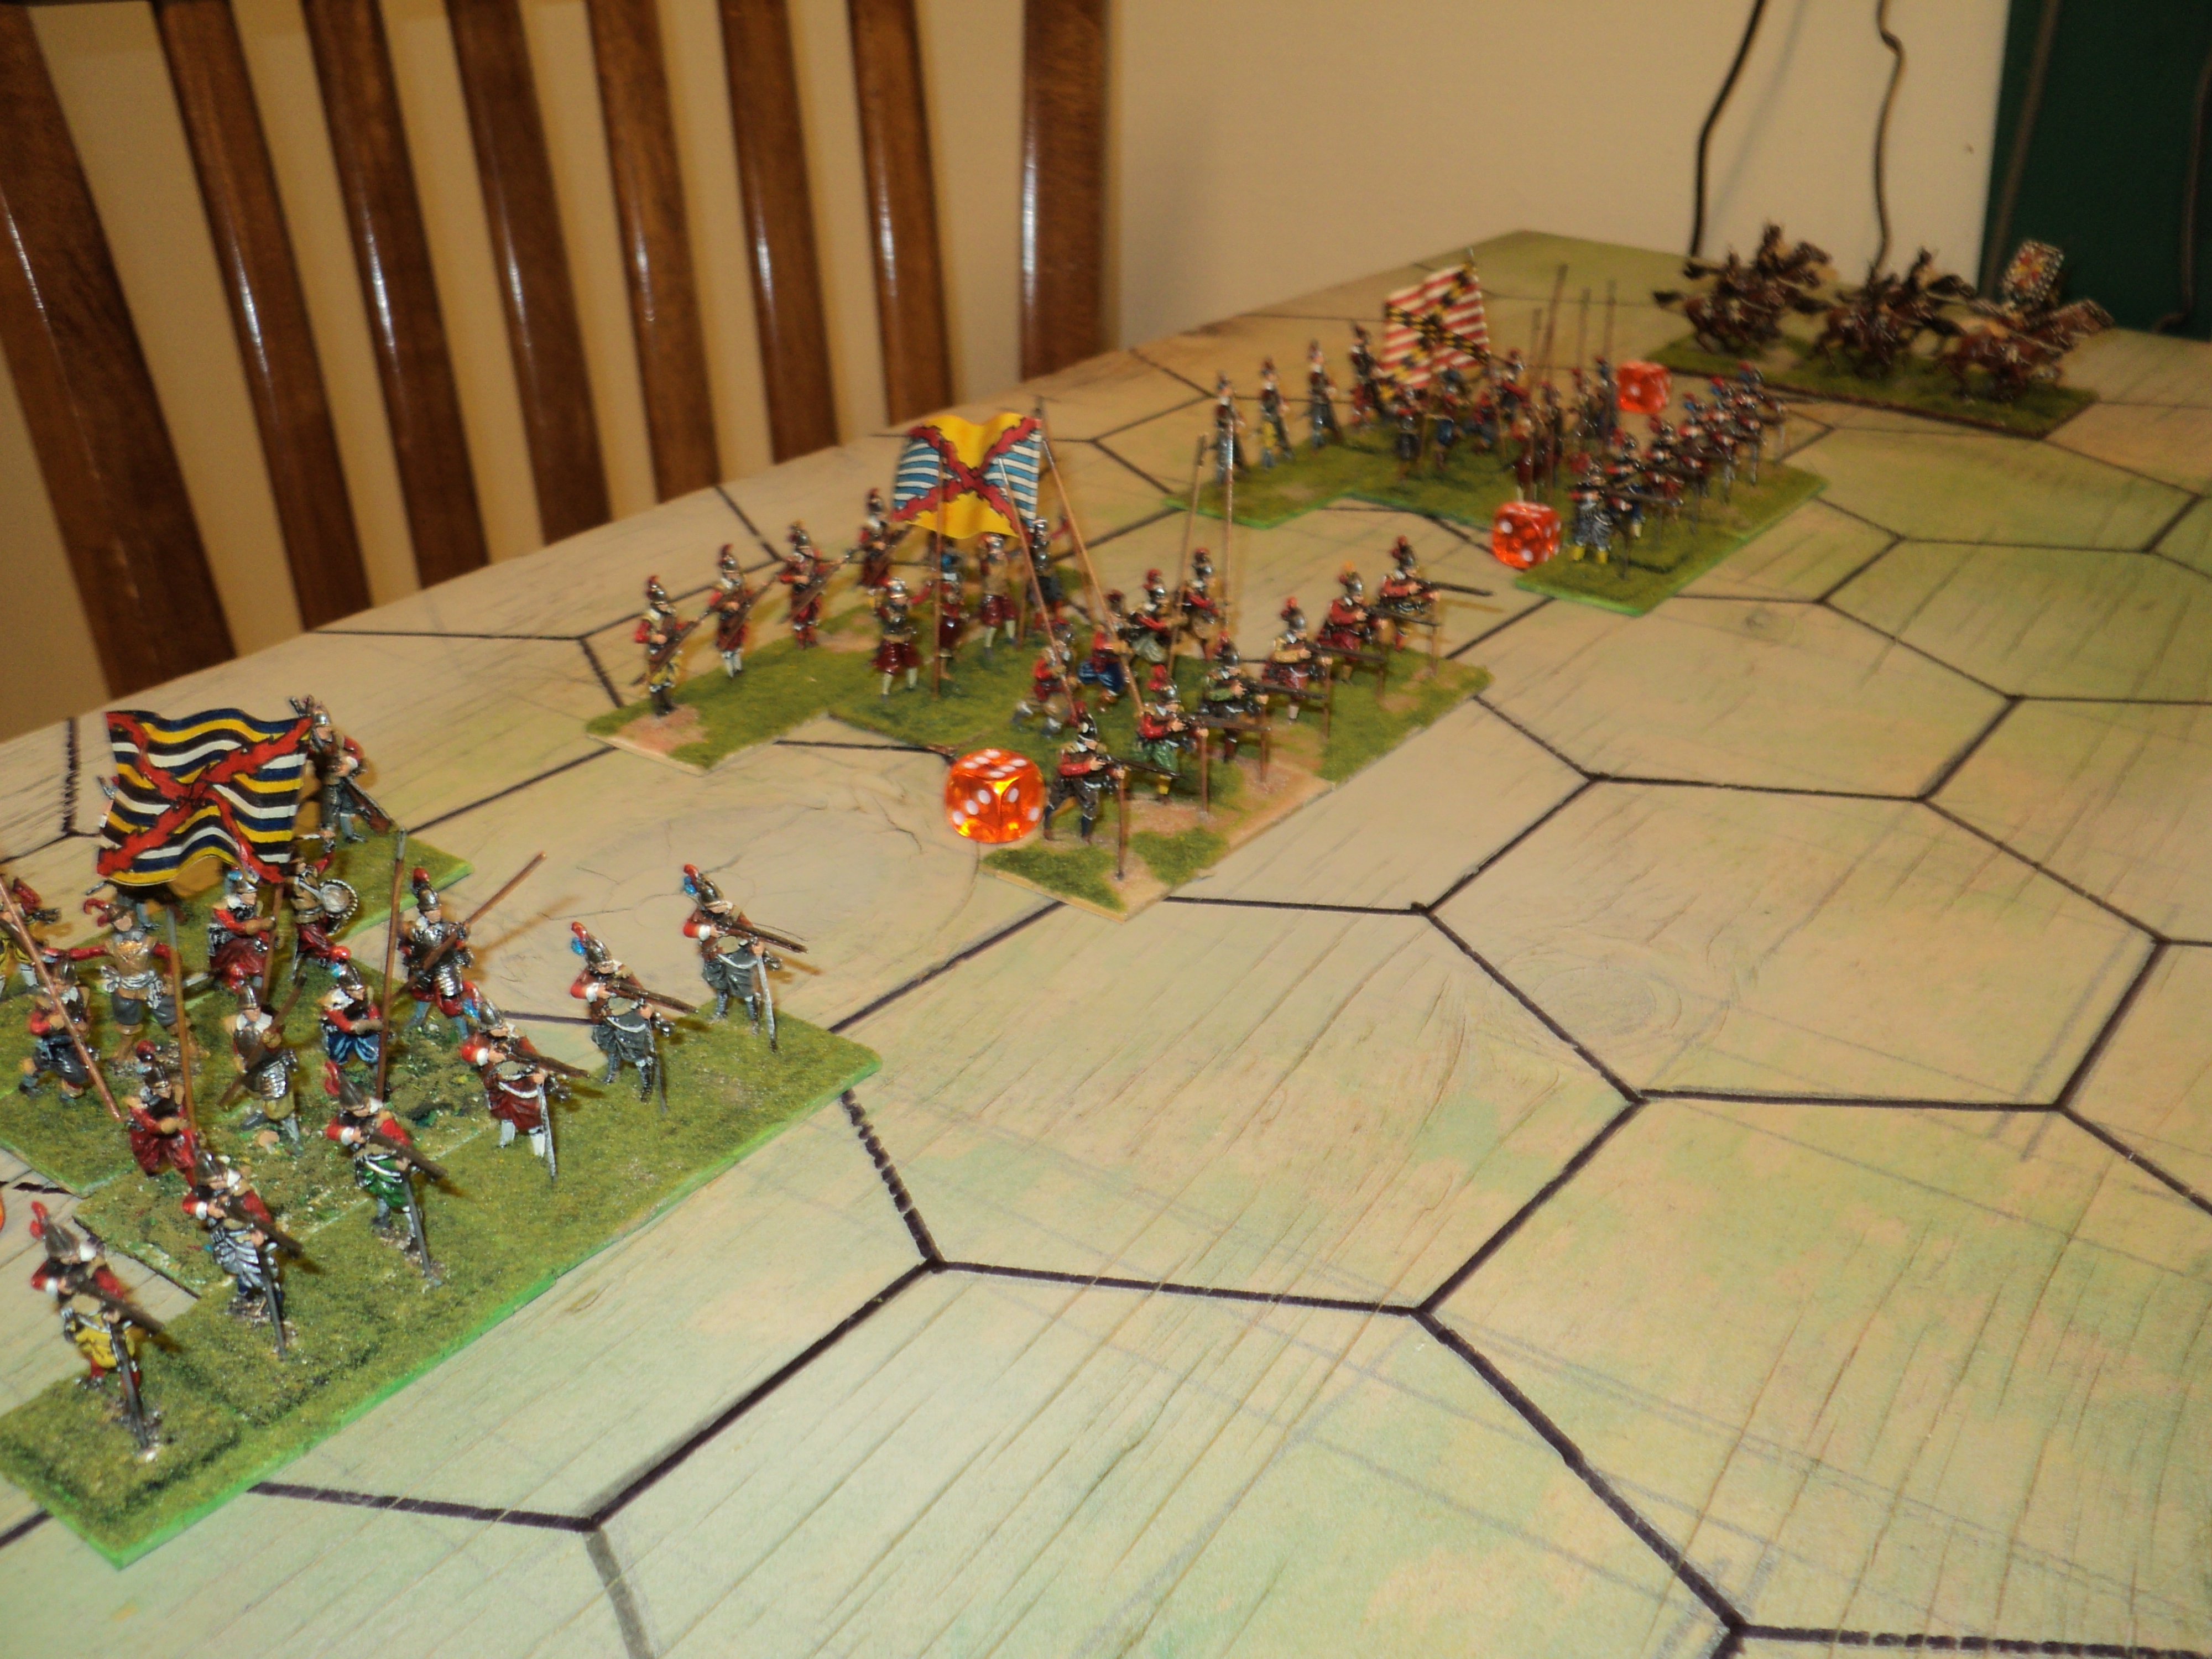
Of course, they take the fight to the enemy. On the left, four cavalry units thunder out to meet the three oncoming Imperialist horse units. Close by the Remy hamlet a swirling cavalry fight develops that was to last more than half  the duration of the battle, with heavy losses on both sides.


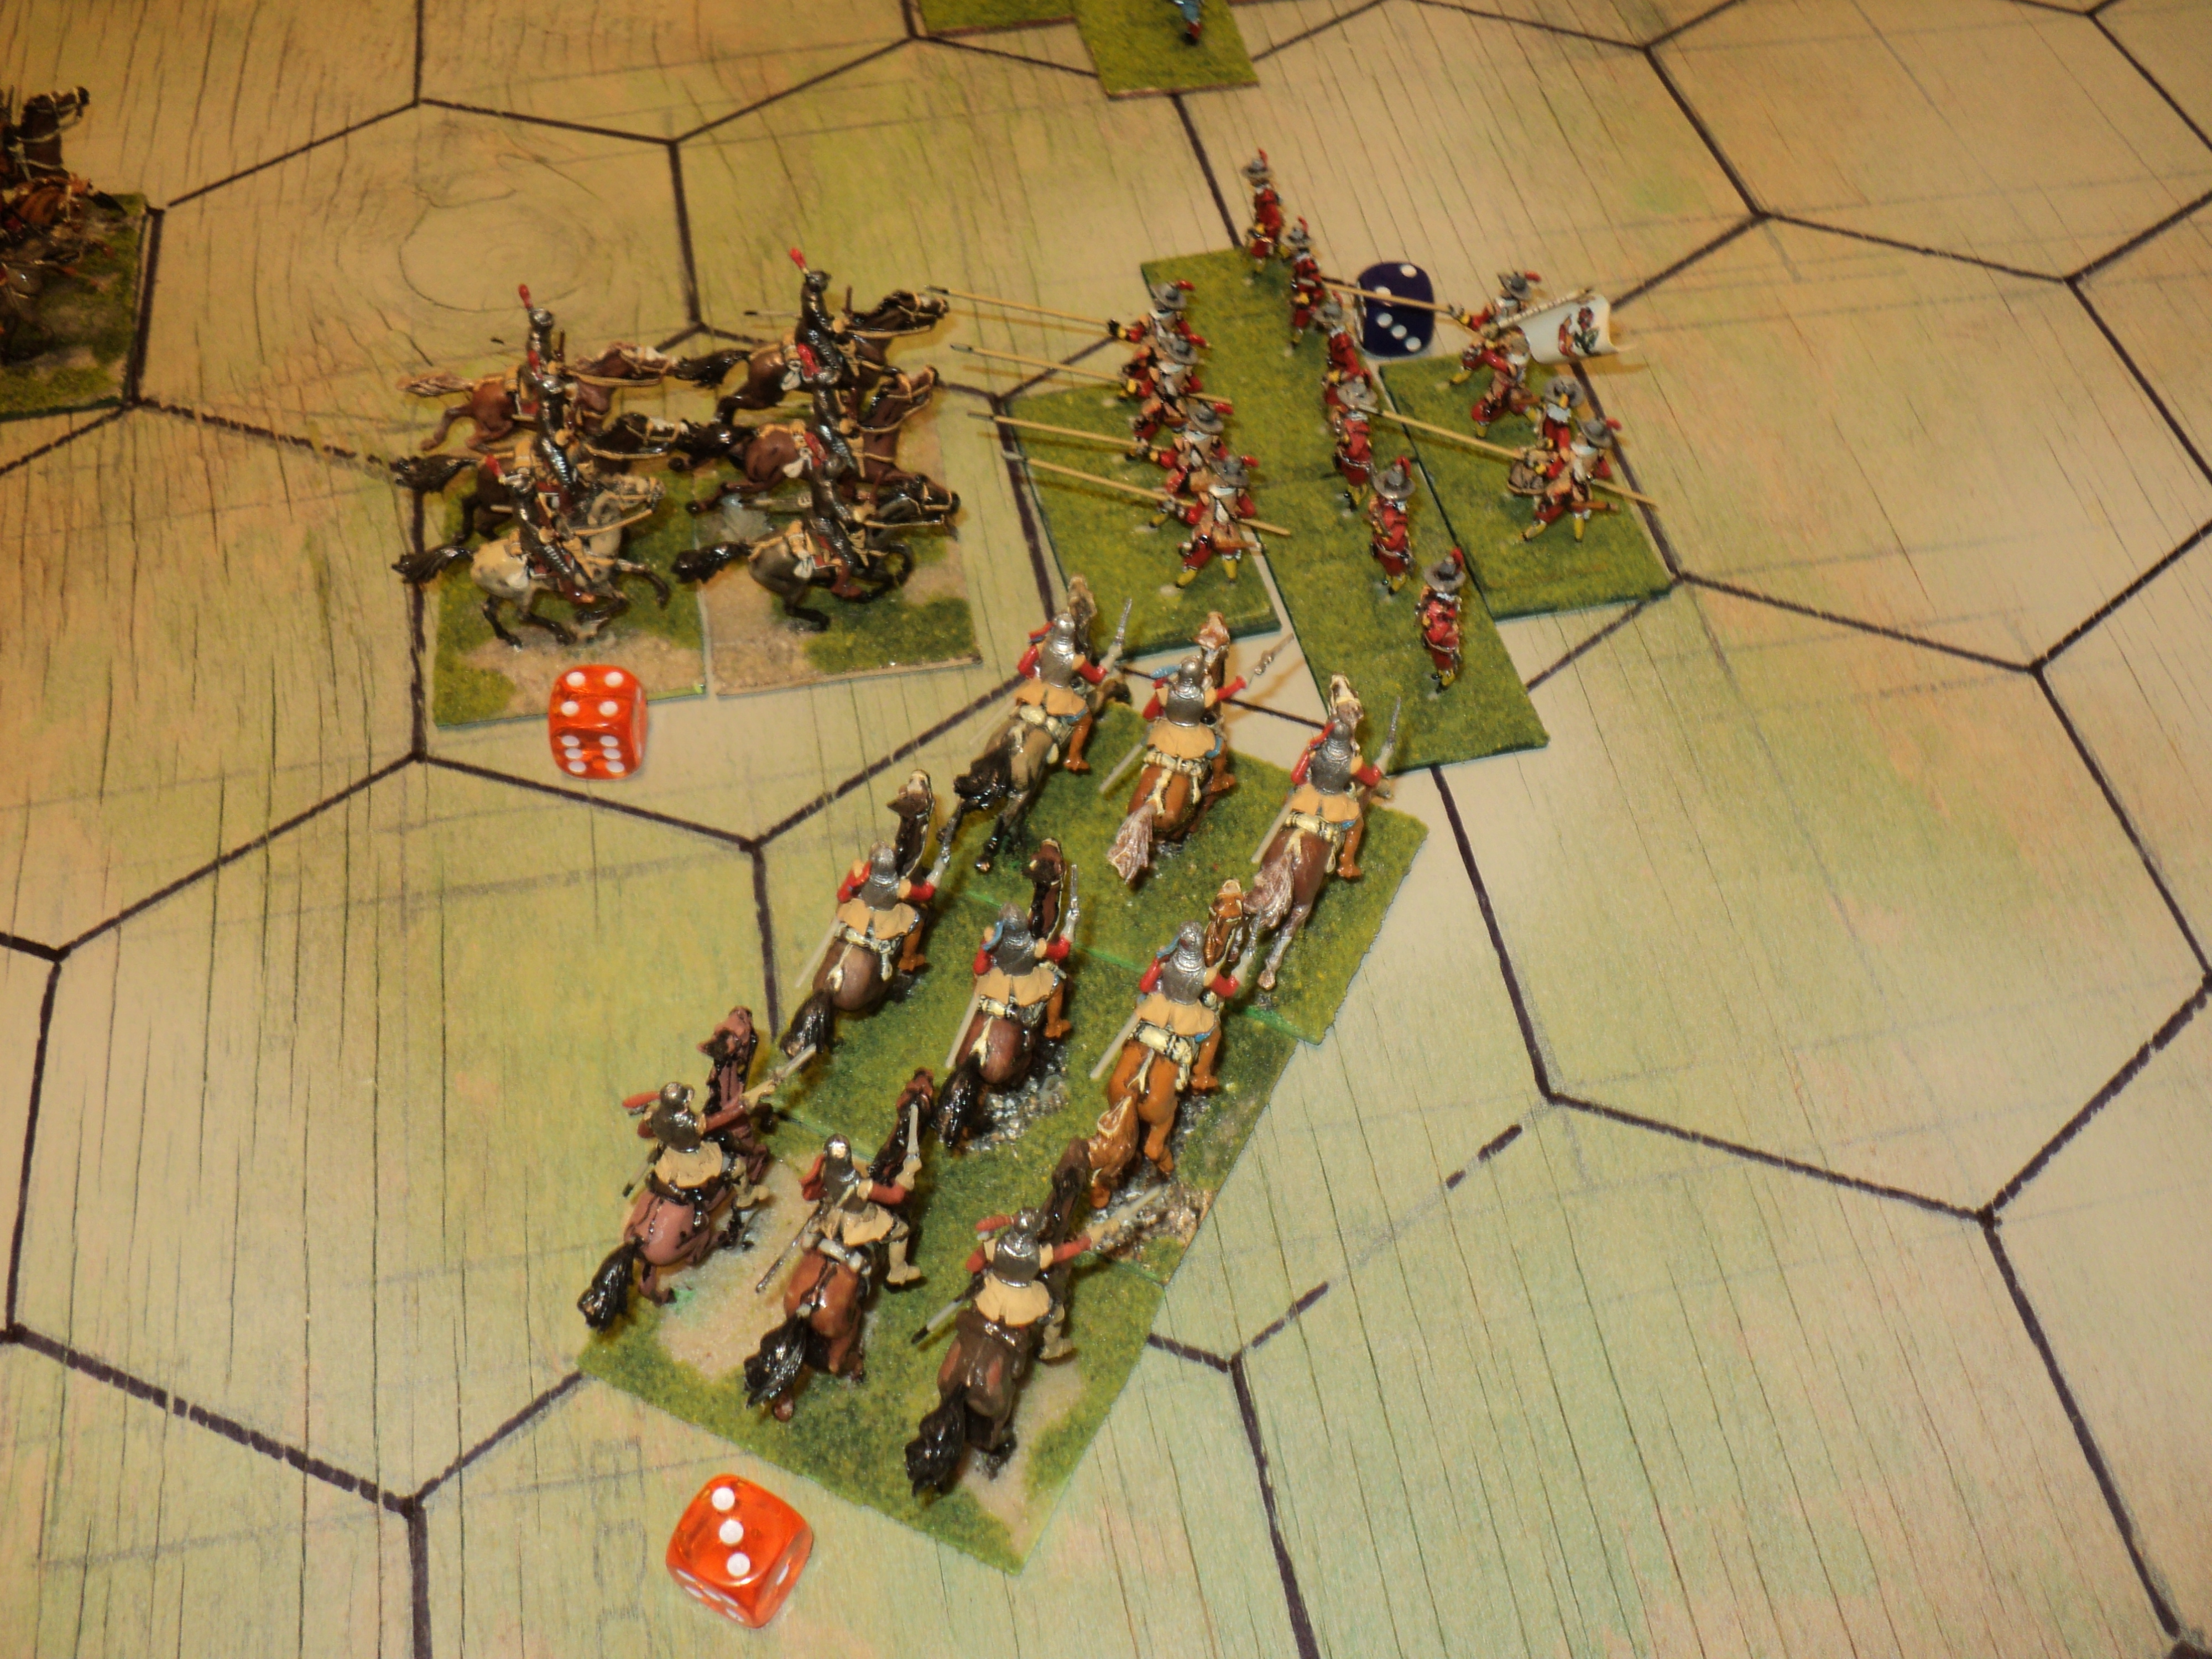
In the centre, two Confederation horse units attack one of the Imperialist gun batteries. They do some damage, but are in turn  counter-attacked by couple of harquebusier units.  Partly to clear the front of the centre gun emplacement, the centre Confederation tercio pushes forward and veers to their left, aiming for the gap between Remy and the nearby copse. The Imperialist gun battery there has already taken some toll upon the left hand Confederation tercio, standing guard over the left flank.  


A couple of Confederation cavalry units attack the cuirassier and harquebusier units on the Imperial left in front of the Ruzyne village. Both sides take early hits.

Turn three: the Confederation activation roll is pretty good this time. The situation on the Imperialist left and left-centre: under attack by four Confederation cavalry units, with more coming up. Gradually the forward Confederation tercios also grind forward.


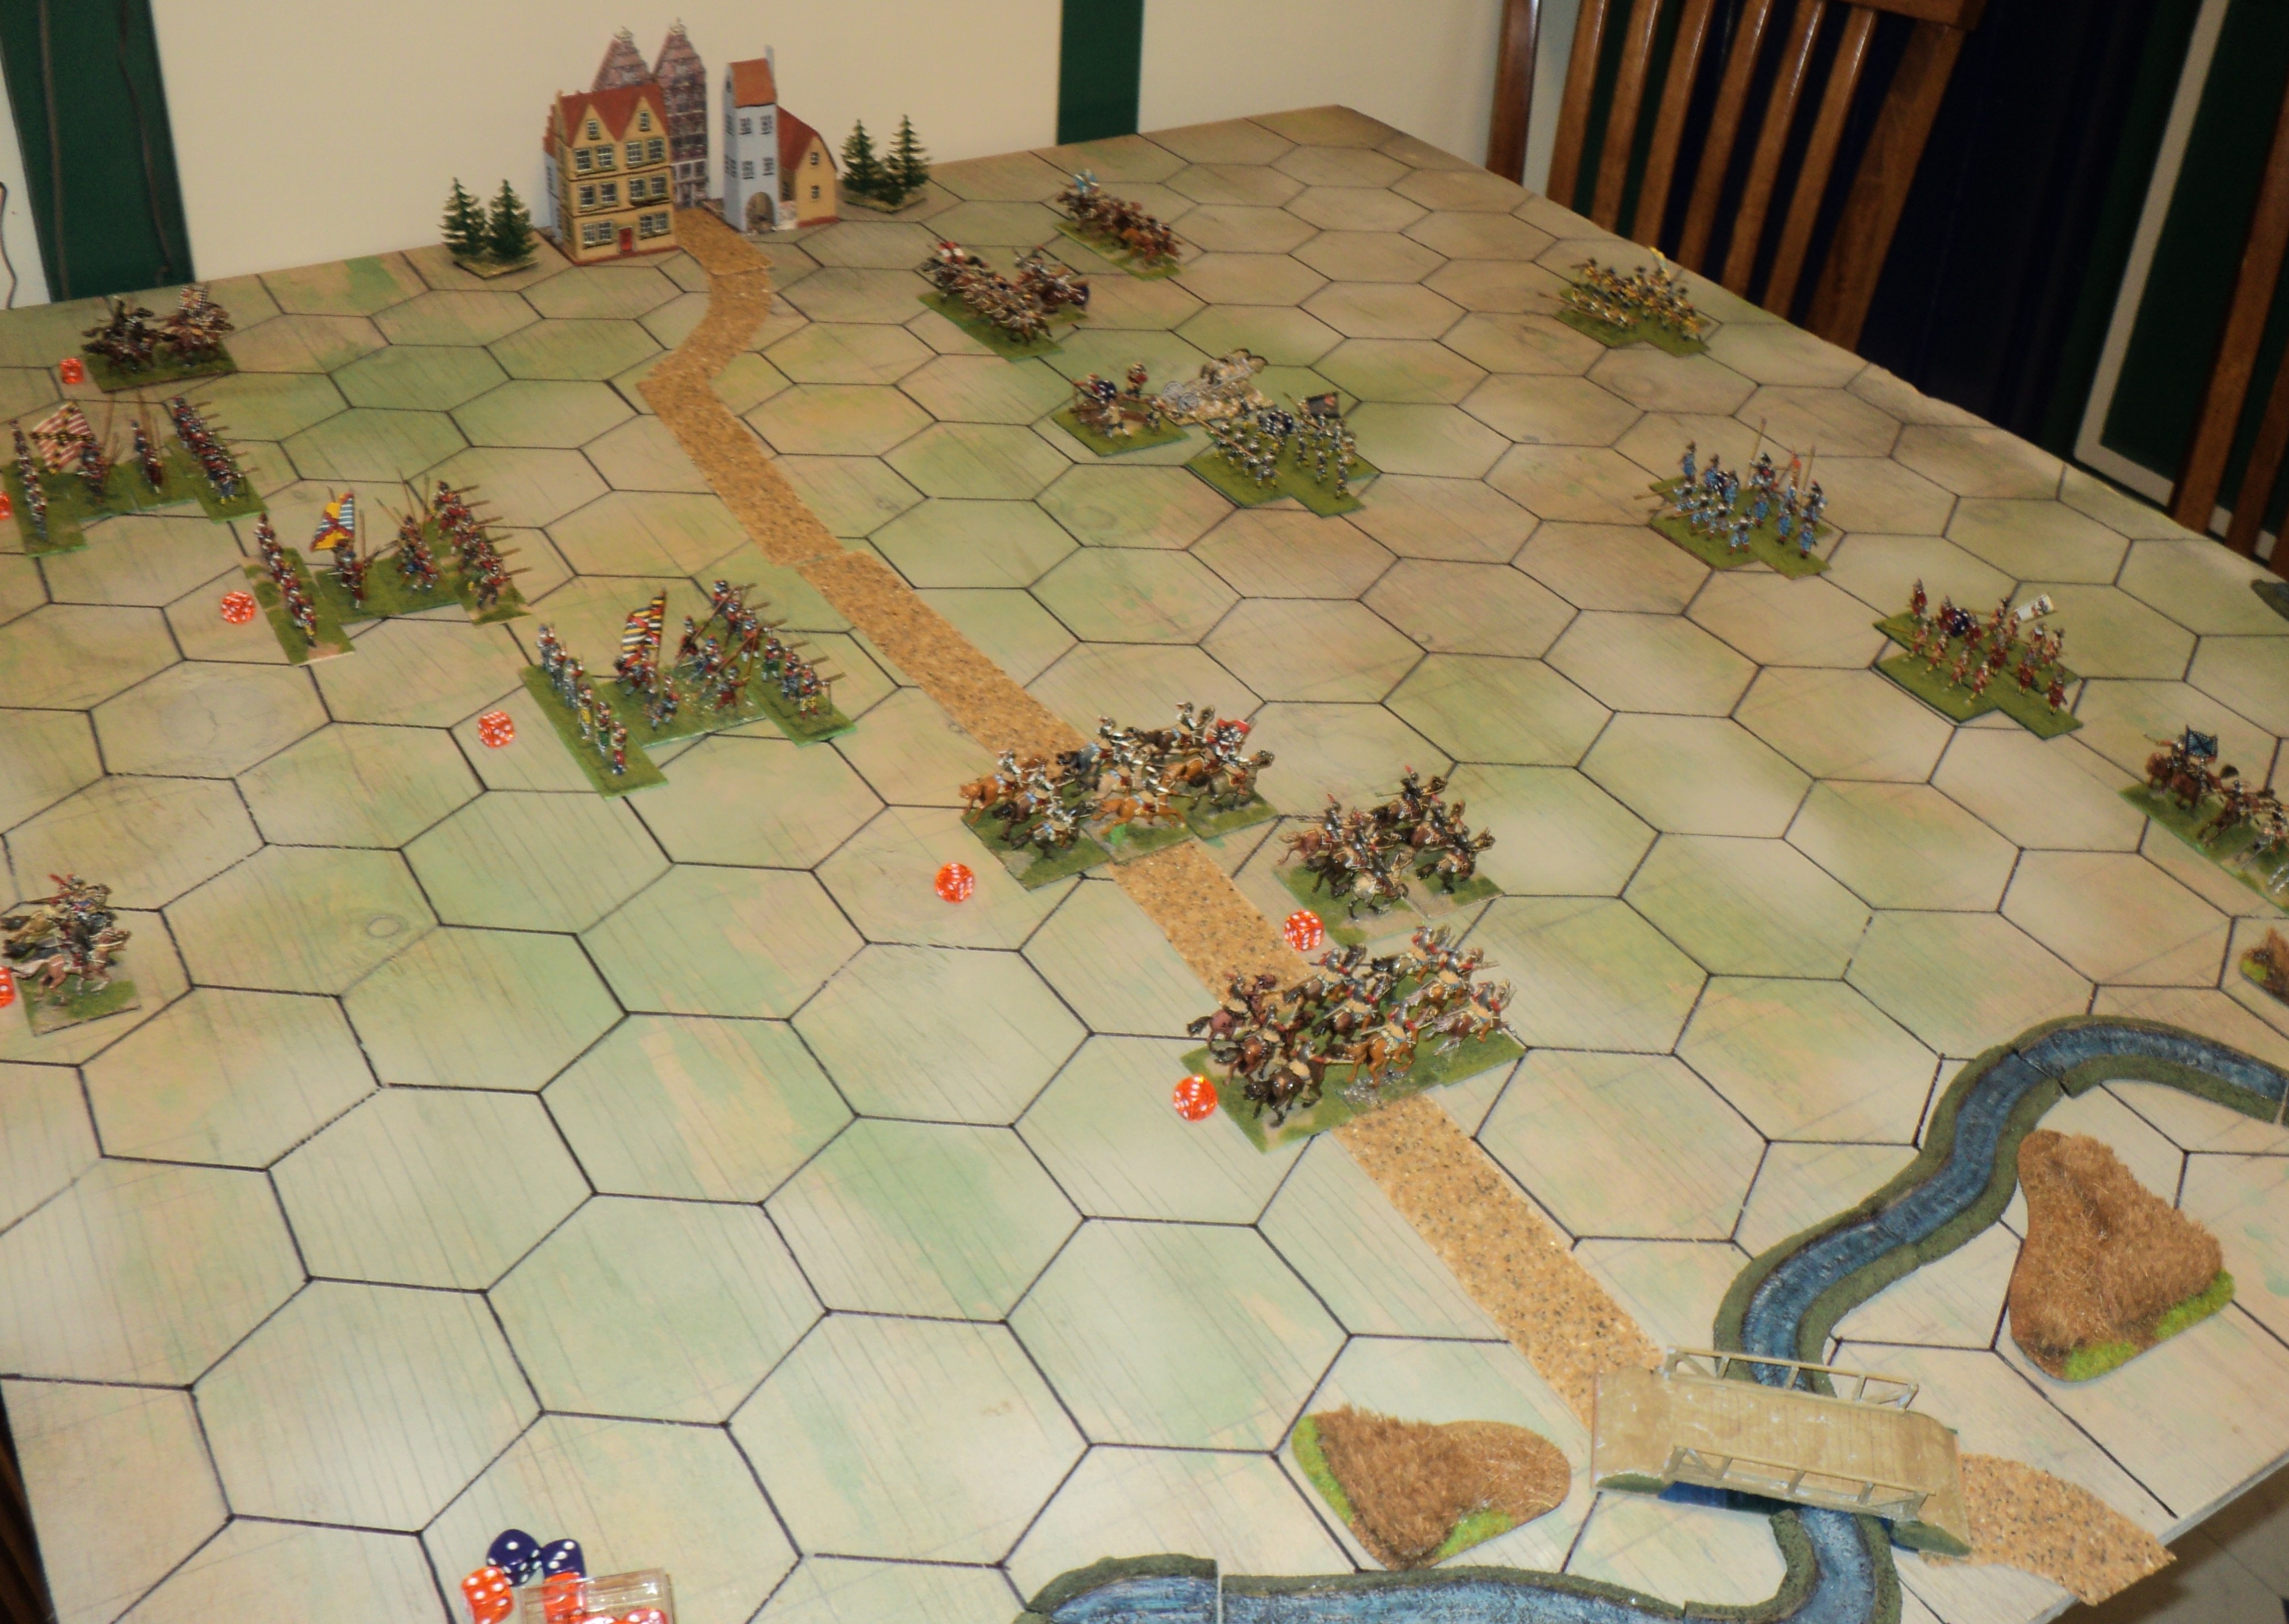
General view after three turns. Cavalry battles have developed all along the Imperialist front, which has the effect of stymying their push forward. The fighting is pretty savage, with most 'hits' being counted as SP losses. They mount up pretty quickly!


Reaching the Imperial battery between Remy and the wood, the Confederation tercio come under attack from two harquebusier units. The harquebusiers don't charge home; they do what they do best: engage the enemy in a fire fight. 


Behind the battle lines about Remy, stand an Imperialist gun battery and tercio, awaiting the outcome...


The cavalry battle on the Imperialist right is thinning out, with fearful losses to both sides. The Imperialist harquebusiers have disappeared, and one of the cuirassiers units is badly depleted. The Confederation cavalry is in not much better shape. One of their cavalry units has also been dispersed, another - faced by a fresh cuirassier unit - is barely staying in the fight.


To the left of the copse, the Imperialists mount a telling fire action counter-attack upon the two Confederation cavalry units there. The latter badly need help, but it is not forthcoming.


The opposite is true about Ruzyne. Somewhat isolated beyond the village, the two Imperialist horse units find themselves under attack by Confederation charging Confederation cavalry. Both have taken hits. 


Much of the Confederation's cavalry having carried the fight to their opponents, they are holding up the Imperialist advance. Meanwhile, the bulk of the Confederation stands to await the outcome. This was partly due to the generally woeful activation rolls on both sides, the Confederation Turn 3 roll being something of an exception. The early exchanges marginally in Imperialist favour, during Turns 3 and 4 the losses were fearful. Both sides lost heavily, but the Imperialists got the worse of it. The 'score' so far: Confederation lost 17SP, the Imperialists 21! 

The larger picture shows the general situation at the end of Turn 3.

By now the Imperialist horse on the right has been badly worn down - just 3SP remaining of the 11 they began with. The Confederation horse still have 7SPs of their original 12.  


Then, at the beginning of Turn 5 (and a reasonable - that is to say, about average - activation roll by the Confederation) one of the cuirassiers breaks and scatters, leaving a tired lone unit facing three, and odds of 6 to one.


Turn 5 and one of the better Imperialist activation
rolls: just half a pip-score below the
statistical average!
Even so, the last remnants of the Imperialist horse don't go without handing out a few licks of their own. Surrounded, facing odds of five to one, they finally break. But just 5SP remain of the Confederation horse, and two of the three units are badly depleted. The fourth unit has long since disappeared.


Meanwhile, on the other flank, matters are also going well for the Confederation. The harquebusiers conquered, three cavalry units assail a lone, battered unit of cuirassiers. The nearby tercio might have plodded around the village to lend a hand, but not whilst the situation nearer the centre remained problematic. 


Instead, a unit of harquebusiers began filing across the river bridges and through the town...


... to fall, betimes, upon the flank rear of the Confederation unit itself attacking the flank of the cuirassiers.


Matters begin looking up for the Imperialists in the left centre as well. Although taking heavy losses themselves, the harquebusiers have been gradually asserting an ascendancy over their adversaries, helped of course by the musketry of the tercio between the two horsed units. 


The encounter between horse, foot and guns near Remy was also stalled in a prolonged fire fight. Between them, the two harquebusier units have lost half their strength. Although having lost 2SP themselves, the Confederation tercio, with another looming up to assist, is maintaining itself amid gunfire and assaults from front and flank.

At this point, the end of Turn 5, we will defer the conclusion for another time. Losses have been heavy on both sides, with the Confederation down 25SPs, the Imperialists down 27. Pretty steep, considering that the Imperialist tercios in particular have hardly seen action!

To be concluded...

Wednesday, March 6, 2024

Thirty Years' War: Work in Progress

What's in front of where I an sitting right now
Reading another blogger's progress 'decluttering' in preparation for moving house, I bethought myself of the chaos I present here. Good morning Bob! This is my working upon completing and sorting out my long neglected Thirty Years' War (30YW) project. In front of me there's 60 horses, 22 riders, 16 figures for a couple of pike blocks and a couple of musketeers...
Early morning cuppa...


The board I used for spray undercoating
Guns, including a little battalion gun(one of five) for the Swedish Army. I have 9 Revell cannon, of which probably 5 will go to the Imperialists (Austereia), 4 to the Swedes (Severeia) along with the 5 battalion guns.There are also on this board 38 horsemen, 9 artillerymen,  and an overlooked horse...
More horsemen. The polystyrene board on the left houses a whole 
other project. That really ought to be decluttered!

Bur wait!  There's more: 33 more horses and their riders... I quick estimate indicates I have over 250 horse to distribute between the two armies. The Imperialists are slightly the larger force, but the Swedish, supposedly, the harder hitting


Finished Imperial stands of horse and foot, and, in the smaller box, some commanded musketeers...


Yet more horse - 49. Finished, but never properly based upon their 3-figure stands..  Most of these will fetch up in the Swedish army.
Oh yes: the chessboard. For analysing my online 
games. I no longer play 'real time' but more in the 
way of 'correspondence chess'.

Another view of my desk top. I am starting to form the habit of listening to stuff on YouTube and elsewhere whilst painting stuff.
  
Among the clutter, an almost finish 6-figure unit of Imperialist pistoleers ('Dutch cavalry' under the Portable Pike &Shot Wargames convention...


... and here, in front of some scattered Swedish pikemen, a 6-figure unit of Swedish Cavalry, counting as 'Swedish Cavalry' under the PP&S Wargaming convention. 

When I began this project, I had the numbers - the whole aimed-for armies -  clear in my mind, and I was able to get the figures for those numbers. Unfortunately I have after near-on 30 years no clear memory of the numbers involved. I think the Imperialist army was going to have 188 foot and 120-odd horse, not counting command stands, plus 5 cannon. Something over 300 figures. The Swedish were to be a deal smaller - a little south of 300 figures, at any rate. As the project now stands, the latter will comprise, apart from the horse, seven 20-figure battalia (140 figures right there), with several 6-figure (2 stand) units of commanded musketeers. I have yet to decide whether the kneeling fellows with light muskets/carbines(?) will be dragoons and forlorn hope, or that the forlorn hope to be a line of single commanded musketeer stands. 

Now, I'll have to sort out who goes where...


Sunday, May 28, 2023

Pike and Shotte - a PW 30YW action.

Battle of Tulzen - the Imperialists facing north

A few weeks ago, reading up on someone's pike and shot postings on facebook or blog, I bethought myself to my long neglected Thirty Yaers' War (30YW) armies of Sweden and the Hapsburg Empire - or, as I sometimes prefer, between the warring realms of Severeia and Austereia. I wanted to try out the "Portable Thirty Years ... War Wargame" - Antoine Bourguilleau - from the Portable Pike and Shot book. It became fairly clear early on that I would be shoehorning the system onto my hex table (so why didn't I use my square grid table instead? I don't know...).  
The Grabbenfloss stream east of the 
battlefield
There was no particular reason for going for the unit sizes that I did, either, except for wanting to test out some ideas that sprang from them. The respective forces were lined up east of the little town of Tulzen, along a flat plain flanked at the eastern edge by the marshy Grabbenfloss stream. The armies dispensed with such refinements as forlorn hopes, dragoons and battalion guns, though the Swedish Army did include a battery of heavy guns. The Armies comprised:

Swedish:
Command: Feldmarschall Lennart Blixtensson (4SP)
3 x 'Swedish' Cavalry @ 3SP = 9SP
2 x Battalia @ 4SP = 8SP (Elite)
2 x Battalia @ 4SP = 8SP 
1 x Artillery = 2SP

Totals: 8 units plus general; 31SP
Except where stated, all units are average.

Imperial:
Command: Count Albrecht Eusebius von Steinwald (4SP)
2 x Cuirassier horse @ 4SP = 8SP (Elite)
2 x 'Dutch' Cavalry @ 3SP = 6SP
3 x Tercio foot @ 6SP = 18SP

Totals: 7 units plus general; 36SP


Something about the units:
'Swedish' cavalry were 'get tore in' types - no faffing around popping pistols, but stuck in with sword and anything else sharp or heavy.  They get some benefit in close combat.  These I hade 2 x 3-horse elements strong, the bases being place side by side across the middle of the hex.
Swedish cavalry, guns and battalia. 
The pikes seem to be over- represented, but the 
formation looks OK. All figures and gun Revell;
the limber and team ... not sure...


'Dutch' cavalry relied more on firepower. These I made into columns, a single element wide and 3 deep. I gather Graf zu Pappenheim, the famous Imperial cavalry commander, favoured deep columns of horse. 
Cuirassiers flanked by 'Dutch' pistoleer cavalry


Cuirassiers.  In the pictures I have shown them also in 3 deep columns, but later I removed one element. I would have liked to have represented them in a 2x2 array, but that really does stretch the capacity of my 10cm hexes. probably I ought to have retained the 3-deep columns for these.

Battalia, I have represented by a 2-elementline of shot, with a single pike element in front and another behind in a sort of lozenge formation.  That seems to be the convention for this type of war game, with armies built in this fashion.

Tercios, as I have organised them,  really do push the boundaries of my hex grid. After some deliberation, I decided they would cover two hexes in depth, 4 ranks, with 2 shot elements in first and fourth ranks, single pikes in second and third.  The depth of this formation, and possibly the 'Dutch' cavalry as well, would have some implications when the fight got to close quarters.


For the most part, the game was played 'according to book', which rather meant pretty slow going as it would take a very good roll just to move half the army. This sort of thing works for Memoir '44, why should it not for this game?  I'm not sure. Maybe it does 'work', and I'm just impatient. At any rate, the effect on the Imperial side in particular was an advance in oblique order, the strong cavalry wing leading. The Swedish forces also tended to advance on the right, the slow moving tercios doing little enough to close the range.

Early on the Imperialists won an important initiative, which brought the cuirassiers and the flanking pistoleers into shooting range of the Red Brigade - the left-most battalia. This was one of the units for which I supplied the deficiency of pikemen in the Revell pack by removing waving muskets and replacing them with modelling wire pikes. This defined this unit as one of the 'average' ones. The other was the Black Brigade, close by the artillery
As it transpired, the Imperial shooting was very good, both sides scoring hits. Now, this was where a certain absence of mind set in that I didn't notice until after the game: I treated all 'hits' as SP losses. As it happens, I don't think it did the game any harm, and it certainly led to decisive action. The Red Battalia lost half its strength at first 'contact'. Of course there was no immediate reply to Imperialist shooting, but it left the Swedish foot to decide whether to close up into close combat, or to stand off to bring their musketry into play.
Whatever their decision, it was not effective.  But this does bring us to what seems to me an odd situation. Suppose the foot charge in to close combat. The result is inconclusive, and the opposing units remain in situ.  Now this might have occurred 
(a) - the foot had won the initiative, and the turn passes to the enemy.  Are the units still in close combat, or may the enemy simply shoot in its turn?
(b) - the horse had won the initiative; the foot's reply was to bring on a close combat; and now we have reached another initiative roll. If the foot wins, they will probably continue the close combat.  But if the horse wins, may they break of the close combat to resume their short-ranged shooting? 
My inclination is that in situation (a) the units remain in close combat for the whole turn, and the 'second' side has no choice in the matter until it wins an initiative roll. In situation (b) I would allow the choice whoever wins the initiative roll. Of course, all this pre-supposes that the respective activation rolls permit the units to fight or shoot at all.


Parlous as the situation was for Red Brigade, the flanking cavalry came charging up to strike the Imperial pistoleers in the flank. The whole irruption was a frost. The pistoleers shrugged off the enemy attack (the '5' was good enough for a SP loss to the Swedes; the 2 far too low to concern the Imperialists).
Of course, the latter had in their turn to wheel and face the enemy, whereat they shot up more of them.  This eased the pressure upon Red Brigade, of course, but now the Swedish cavalry was in peril. They did not survive much longer as a formed unit. 
By now the centres were closing, the Swedish Blue and Grey Brigades in shooting range of the second unit of pistoleers, and the right-hand tercio. Their shooting was at once successful, both Imperial units taking a SP loss. That didn't stop the latter from closing the range, whereat the Blue Brigade came under close musket and pistol fire from enemy horse and foot.
From the eastern end of the battle lines, the close action had spread through to the centre. Yet, apart from a near contact nearer the Tulzen town where Marshal Blixtensson's peronal cavalry unit had strayed too close to the left-hand tercio, a considerable distance remained between the respective battle lines.

However, Blixtensson's drawing of the tercio's attention permitted the remaining Swedish cavalry, hard by the village, to charge the cuirassiers covering the Imperial left flank. The fortunes of war having so far fallen upon the side of the Imperialists seem to see no reason to change their allegiance. Despite the impetuosity of their charge (plus 1 on their combat die), it was the Swedish horse who took the hit.


I do believe that the gunnery ranges ought to be increased. All day the Swedish guns had been seeking out a target - not easy when its arc of fire is restricted to a single 'column' of grid areas. I stayed with that rule for this action, but in future recommend, for hex fields, the immediate adjacent hex forward, and thereafter the same column of hexes and the columns adjacent. For the square grid, I would recommend simply the three columns. The 3 grid-area range seemed to me could stand some increase, the 3 maximum applying to battalion guns.  I may come back to this some time.  
By now the situation on the Swedish left was beginning to deteriorate. Against all the odds, the east pistoleers had seen off their adversaries, and were attacking the Red Brigade in flank as the cuirassiers continued to engage from the front. Blue Brigade had taken some hurt from the attacks by Imperial horse and foot. Black Brigade surged in upon the flank of that tercio. This is where the depth of the tercio got interesting, for it was the flank of the rear hex that the Black Brigade struck. Because the tercio was heavily engaged with the Blue Brigade in front, this flank attack counted as such. From here on, that tercio was to take heavy losses before the battle drew to a close.
On the Imperial left, not much was happening, though the steady, grinding advance of the left-hand tercio was threatening to isolate the enemy cavalry still entangled with the cuirassiers.
All the action was on the other wing. Red Brigade overcome and destroyed, the Imperial horse thundered on to engage the already embattled Blue Brigade. The reserve Yellow Brigade, another elite unit, intercepted the pistoleers, but the situation remained dire. It was all up for the Swedish Army when the centre tercio at last reached the fighting and hit the Black Brigade in flank.  
Final moments of the battle, as the Imperialists begin 
to roll up the Swedish line.

All attacking impetus had gone out of the Swedish Army. At once Marschall Blixtensson sounded the retreat, and the army began to pull out. I admit, I could have played on with the Swedes trying to get off with their embattled units, and the Imperialists in pursuit, but the result was already clear cut. The Swedish Army lost 11SP - and reached its exhaustion point.


The Imperialists had been very fortunate, losing just 6SP, two-thirds of them from one tercio. 

I think on this table I'd be inclined to ad one grid area to movement, and to increase the gun range to 6 hexes, apart from battalion guns, which would have 1 Strength point only, and have a range of 3 SPs.  For the rest - maybe another play test is in order.

Finally, I promised someone I would add a 'me' pic. This one is from 3 years ago - I'm not sure I have one more recent.  Even on a day as grey as this, my photochromatic lenses kick in.


Outdoors action - 'Unquiet Flows the Mius'
A fairly mild day for April, shortly after the 
COVID shut down.