Monday, September 2, 2024

Revisiting Byzantium - Playtest narrative

Byzantines moving up past Mesymbria village

As this was something of an encounter battle, a die roll decided who opened the ball; the Bulgars 'seizing the initiative'. And at once the activation roll was complete frost: a '1' on the die, and hence just 4 units stirring. The light troops on the east flank pushed forward beyond the Heos village. The Byzantine activation roll was equally dismal.  The best they could do was to respond to the Bulgar moves. The right flank heavy horse (kavallarioi) moved forward to cover the right beyond the village of Mesymbria together with light horse prokoursatores.

Map of my table set up for the Battle of Potamos Creek

Winning the initiative for Turn 2, the Bulgar activation roll was average, so were able at least to begin a general advance. Their light horse archers pushed up to about half way between Heos and Mesymbria, whilst the javelin light infantry entered the former village. The Byzantines responded sluggishly at first - another '1' on the die roll, but they were able at once to engage the enemy light horse with two units of heavies and their own lights. 

First clashes - not a lot happening here
...A-a-a-and the dice tell the tale. Both sides scored nothing from the shooting before contact. In the close quarter combats, the heavier Byzantine horse rolled an extra die (SP+1), with the lacklustre outcomes you see in the above picture. True, the horse archers close by Heos were driven back behind their comrades, but that was the sum total of the opening clash.
Bulgar horse archers under the hammer...
Emerging from the Mesymbria village, the light infantry showered the Bulgar light horse with javelins, to no effect (the double-4).  Although having so far little effect on the Bulgars, perhaps encouraged by such success as had so far been achieved, the Byzantines at Turn 3 not only out-rolled the Bulgar initiative dice, but rolled the maximum activation as well!  

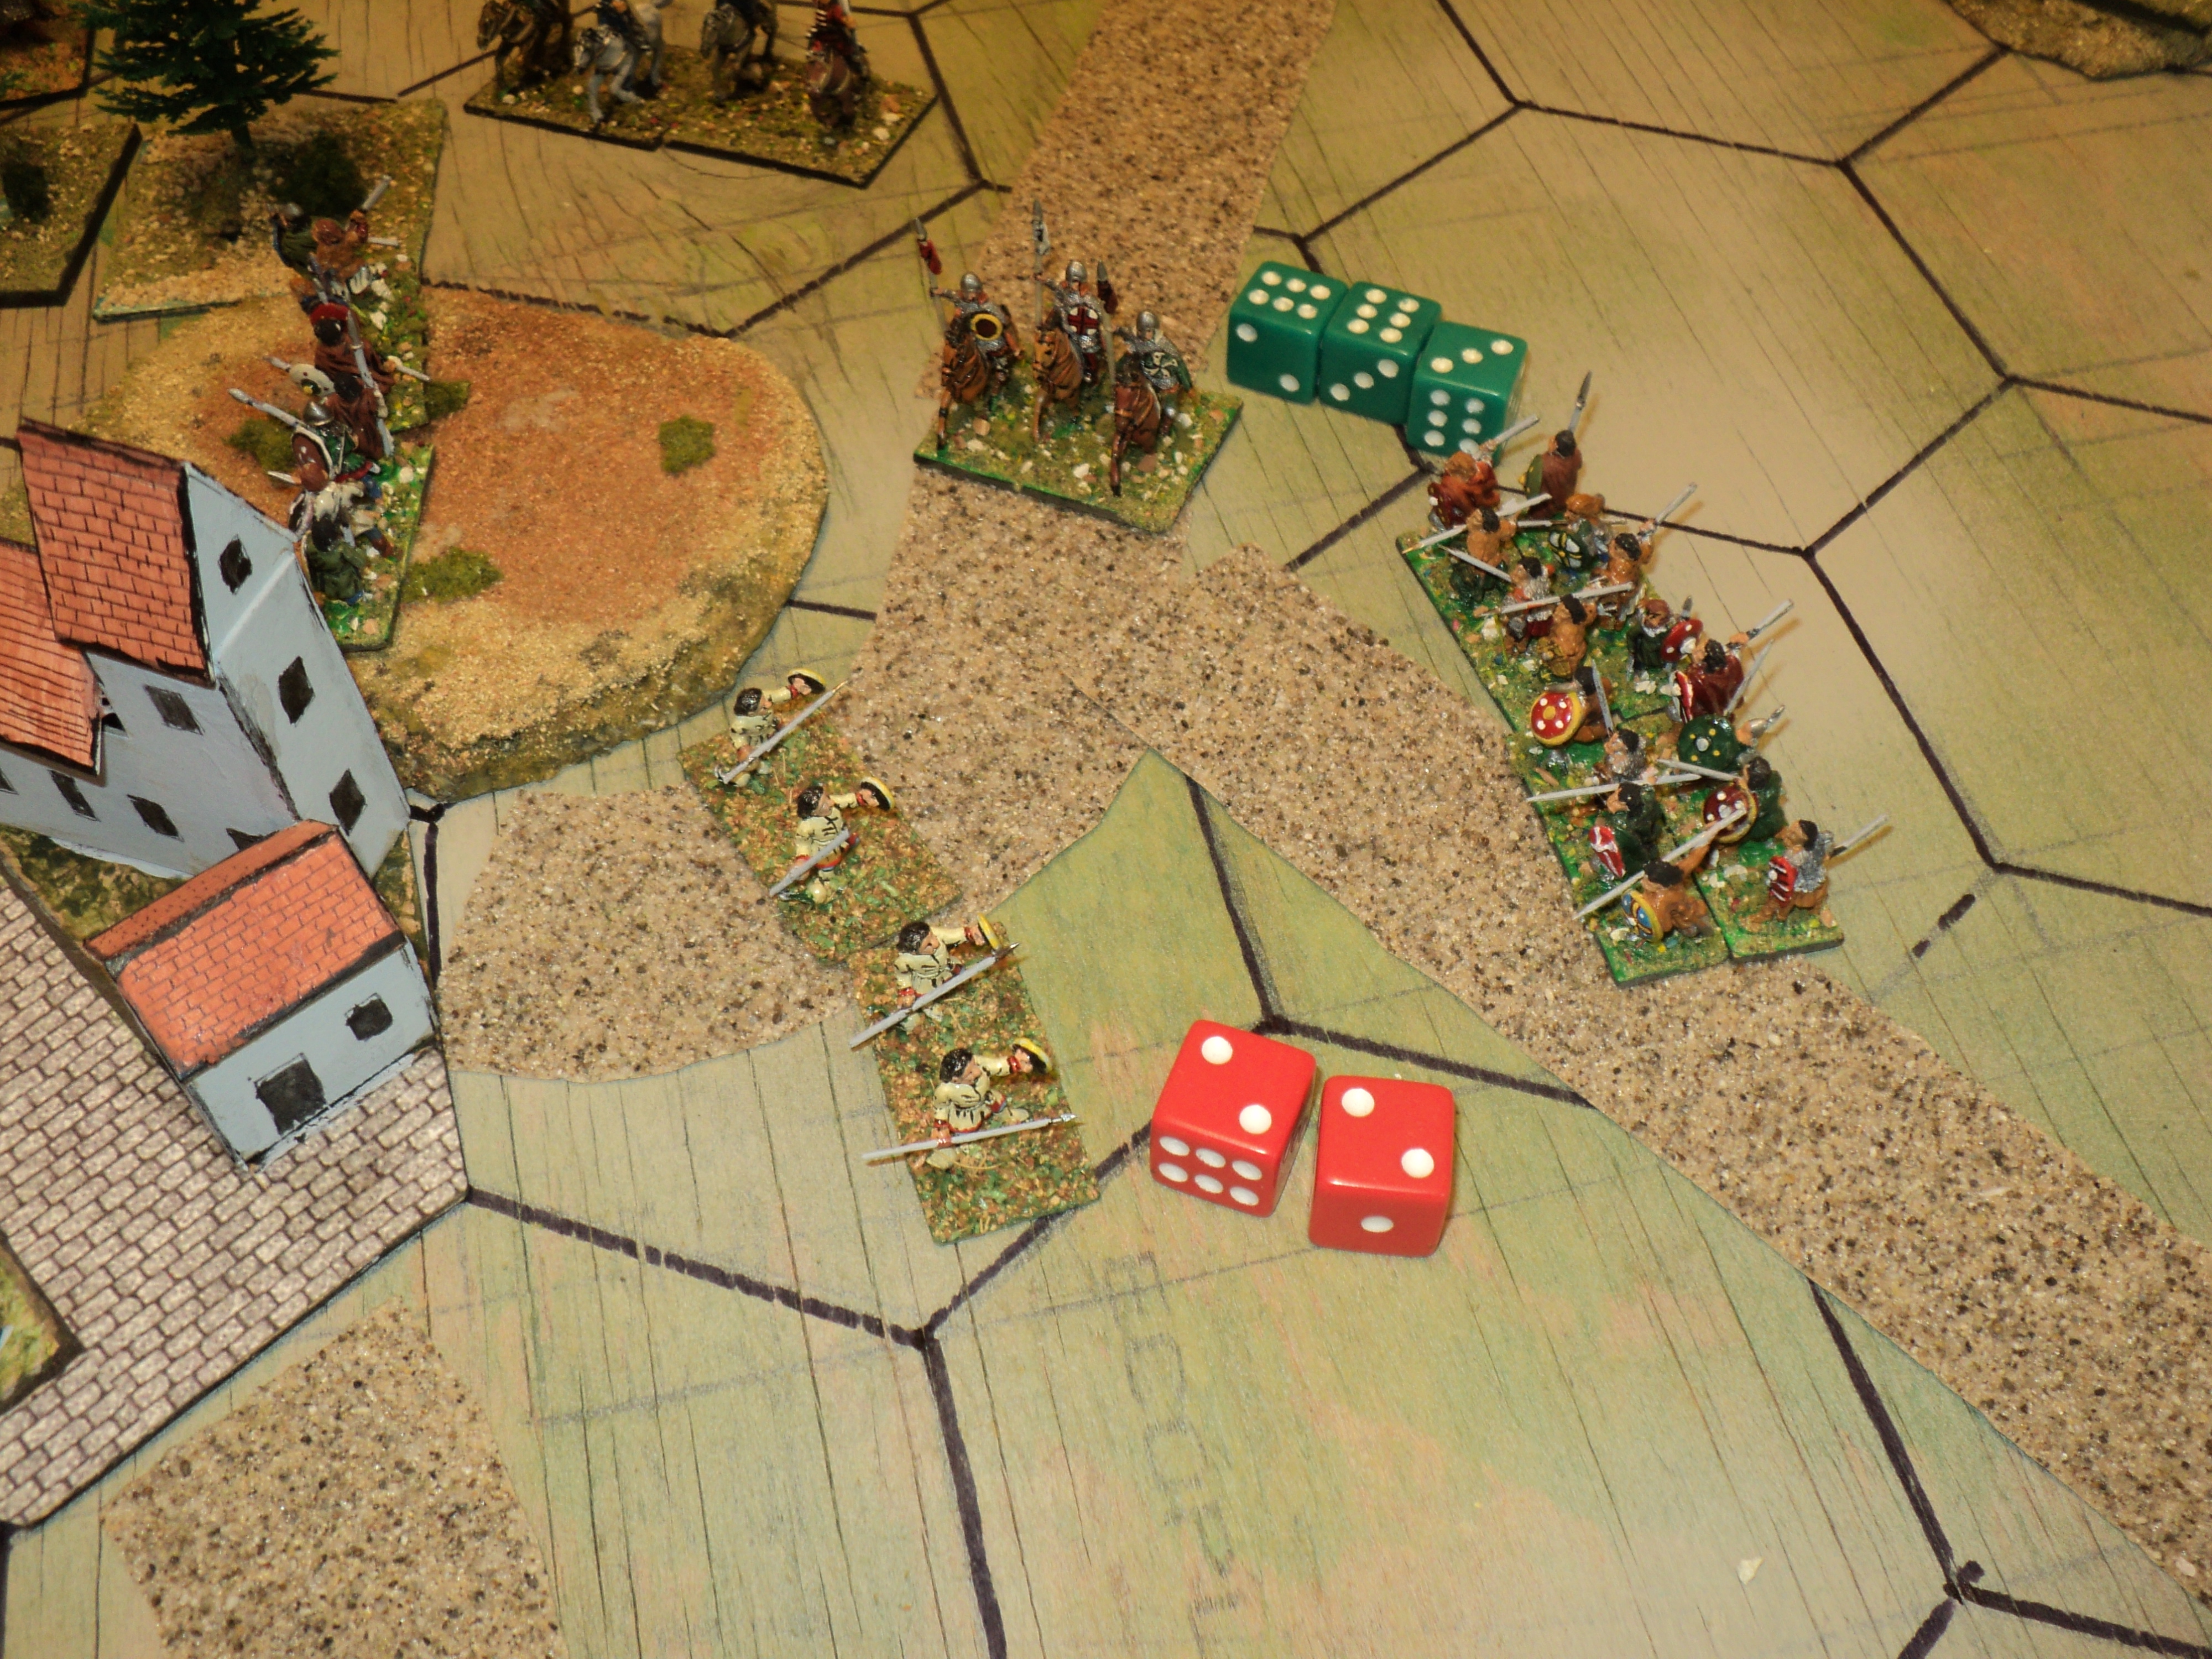
The javelins of the akontistai this time caused a stir among the Bulgars: the pair of twos forcing the Bulgars to retreat two hexes. This proved impossible, as the one possible escape route lay through the hex immediately behind, occupied by their recently defeated compatriots. Had the facing been the same, no doubt the forward unit could have passed through them and beyond, but as it was, no retreat was possible, and the forward light horse unit was destroyed.

(This was decided during the game, but I now think it would have been fairer to let the retreat happen. So this remains the first 'thought point' arising from this play test
Forced retreat with nowhere to go...

Now the Byzantines began pressing: the red cloak kavallarioi attacking the remaining horse archers. Again, the 'shooting before contact had no effect - this really was pretty dismal so far - and both sides fell back, the clash inconclusive. 
Another Bulgar light horse unit holds its own against 
heavier opponents.
The blue kavallarioi attack upon a body of Bulgar heavy horse was even less effectual. 
Heavy horse stand-off
So far, the fighting between the eastern flank horse had been a whole lot of very little happening, but then came a disaster for the Byzantines.  Following up the Bulgar light horse retiring from their recent clash with the kavallarioi, the prokoursatores light horse decided to chance their arms against them. Though they pushed the horse archers back a space, the latter exacted a fearful toll. The prokoursatores vanished from the field.
Bulgars avenge their lost light horse!

Apparently gaining an ascendancy, the Bulgars upon their own turn - with a pretty reasonable activation roll - also put their main effort into wining the battle near the east villages. A unit of heavy horse charged the 'blue' kavallarioi, with the solid result that both sides lost a stand - a strength point. 
A blood letting among heavy horse. One SP 
lost by both sides


Now the Byzantines were being served the same as they had earlier delivered. Weakened as they saw off a horse archer attack, but the Bulgar javelinmen emerging from Heos finally put the Byzantine heavies to rout.
A depleted kavallarios unit outnumbered 5 to 1.
It can end but one way...


So far, the Bulgars had gained more than their share of the honours: for the loss of one light horse unit, they had destroyed a heavy and a light, though one of their heavy cavalry units remained depleted. Four SP lost to the Byzantines; three to the Bulgars. That rather left the remaining Byzantine heavy cavalry isolated, and the akontistai light infantry exposed in the open in front of the Mesymbria village. By this time, Demetrios Psychopathes was leading the heavily armoured cataphracts up the east bank of the slight stream of the Potamos. He had at the same time, called one of the left flank cavalry from the far side, over the bridge, to follow the heavier unit.  
In the distance, Demetrios leads his kataphraktoi
past the woodland
All this while, a unit of protected bowmen - skoutatoi - had been moving slowly up to crest the hill standing between Mesymbria and a small wood. From there, they could spray the approaching Bulgar spearmen with arrows. 

Very little was happening west of the creek. Bulgar light horse appeared to be manoeuvring towards the flanks of the Byzantine lines, but they were facing a formidable array of horse and foot.
Very little action on the other side of the river!


The main action continued on the eastern flank, as the Bulgars made a determined effort against the Byzantines defending their village. Whilst the javelin light infantry tried to hold off some Byzantine cavalry from the spearmen's flanks, one unit attacked the akontistai whilst another, supported by light horse, made a trial of the skoutatoi on the hill. 


Action at Mesymbria
The results were as you see them. The akontistai held off the spearmen - neither side inflicting any harm upon the other. The battle for the hill was bloodier. The light horse archery was ineffective, but both sides' heavy foot lost a SP (the fives). But the Bulgars got the better of the struggle, and forced the Byzantines off the feature (the green four).

Note that, against 'protected bowmen', the spears would have got an extra die for close combat, but for the fact they were fighting close combat uphill

Whilst I think of it, I'm also considering re-working of the whole close combat scheme between spearmen and the mixed skoutatoi units. Rather than adding 1 die to the spearmen, they simply get their 4SP worth of dice: four. But perhaps the skoutatoi ought to get 2 dice for their bowmen, and 2 for their spears. The action would go like this:
(a) At range shooting, the skoutatoi get 2 dice. 
(b) If a close combat is brought on, the skoutatoi 'shoot before contact' - 2 dice only. This is regardless of which side brings on the close combat
(c) In the hand-to-hand phase, the spears get 4 dice (supposing all have survived the missilery) and the
skoutatoi 2, again. 

My Georgian army has some close-order bowmen. Now a 4-stand unit is a formidable volume of incoming for some poor wights. However, as they lack shields, and don't have the agility of light infantry, opposing
skoutatoi would get an extra die for shooting and for close combat, i.e. 3 for each. That still leaves the bowmen with the 4-3 advantage in shooting and hand-to-hand. It seems reasonable to limit the bowmen hand-to-hand to 2 dice only. 

As a stocktake indicates 6 Georgian bow stands, I'll probably make them into 2 units @ 3SP, getting 3SP for shooting, and 2 SP for hand-to-hand. Opposing spearmen would get 0 for shooting and 4+1 (shieldless) for close combat; opposing
skoutatoi, 2+1 for shooting and 2+1 for close combat. 


Following up this success, the weakened body of heavy horse attacked the akontistai. Having but one stand (SP) remaining it ought to have received just two dice instead of the three shown in the picture (one for the SP, one for the target being lights). Rather than reroll I just rolled for which of the dice to remove. Instead of being ridden down, the akontistai lost a stand. 
The extra green die removed

However, the akontistai showed at least they had teeth, the twos rolled causing the Bulgar horse to retreat two hexes. 


The Bulgar advances around the village of Mesymbria were leading them into some danger unless they could reinforce their successes. The Byzantines were still, rather tenuously, holding the village, and were steeling themselves to counter-attack. But the real danger took the form of the powerful body of kataphraktoi, led by Demetrios himself, pushing forward between the wood and the stream.
Overview. Byzantine right flank under pressure.


Shrugging aside a body of horse archers to be dealt with by the kavallarioi following behind, the super-heavies made straight for the nearest body of spearmen, hard by the riverbank. Quailing before the thundering oncoming mass, the spearmen failed in the test - not a single hit scored, as the four '5's' show (see below). With Demetrios wielding his sword, the kataphraktoi had 5 dice to roll, enough to knock off a SP from the spears, and force a retreat. Rather than retreat to incur yet another drubbing from lance, mace and sword, the spearmen took the extra SP loss.

Note: my comments regarding the mixed archer-spear skoutatoi ought possibly also to apply to  the kataphraktoi. However, the 2 dice for shooting and 2 for close combat would put them on a par with the other horse, with the sole advantage of being the larger, 4SP, unit. It might be reasonable to add an extra dice for close combat against lighter horse. Yet another idea that will call for testing!  
Demetrios Psychopathes and his kataphraktoi
smash into Bulgar spearmen


Meanwhile, the following kavallarioi sailed into the Bulgar horse archers hovering on Demetrios's flank. The picture immediately following tells the story...
Following kavallarioi go after some inconvenient
horse archers...


... as both sides vanished from the field. They had destroyed each other! 

The tide of Bulgarian success now began to recede, as the left wing began to receive reinforcements from their second line. 


Of course the Bulgar light infantry could not hold the heavier Byzantine horse for long, and they began to be forced back upon the Heos village. Shooting before combat (for a wonder!) knocked off one light infantry stand, for no loss to incoming... 

Heavy horse versus light infantry

... and the close combat forced the remainder of the enemy to retreat through the village to the hex beyond. The cavalry saw fit themselves to pull back a space.

Meanwhile, following up their charge, the kataphraktoi simply rode down the remaining spearmen facing them (three 6's!). The victorious kataphraktoi rallied back a short distance (the red 2 forcing a retreat). although they too thought it well to pull back slightly. 

I seem to have omitted the pictures of the Byzantine counter-attack that retook the hill near Mesymbria village. Themselves weakened in the earlier fighting, the spearmen on the hill had to face the incoming javelins and arrows from front and flank, and then the skoutatoi closed in. The spears routed and scattered, their unit destroyed. The akontistai felt emboldened thereafter to re-emerge from the village to shower the other spear unit with javelins, occasioning some loss.

The tale of disasters to the Bulgar foot - two units destroyed and a ninth SP also lost - took the Bulgars well past their exhaustion point and very close, withal, to their rout point. They had lost a further 5SP from their horse, and one more from their light infantry - a total of 15SP lost.  For their part, the Byzantine losses, though substantial, did not reach their exhaustion point. Nine SPs: three mounted units destroyed, two SP from one of the skoutatos units, and one from the javelinmen.  For most of the battle the losses were tracking close together, until the disastrous finale the routed the Bulgar army...
The Bulgars never got close to the action beyond the river.

There was plenty of food for thought arising from this action. I've noted a few here and there throughout this narrative, but there is one other I shall have to bear in mind. The 'shoot before contact' as a phase separate from the hand-to-hand battle itself, and hence a complication. But at the moment, it seems to be adding something to the game system, creating distinctions between the Byzantines and their disparate enemies...

Another play test will follow ... sometime!

Friday, August 30, 2024

Revisiting Byzantium - A Play Test

Earlier in the week, knocked together a 'pickup' solo game to play test some of the ideas I had expressed in a blog posting just over a week ago. I had it mind to try out the 'half-hex' idea I had discussed earlier, but I rather think it were better suited to a smaller set-up than my usual hex table.

The Bulgar left.
The action purported to be yet another clash between the rival empires of Byzantium and Bulgaria, fought somewhere in the Balkans. The terrain I set up using Bob Cordery's method, but even though I 'thinned out' my usual adaptation for this table, ended up with a rather more cluttered battlefield than one usually finds with the 'Ancients' genre of war gaming. I decided the country was hilly, so plenty of hill, not too thickly populated, a few tracts of wooded country dotted about, and a creek running through the area.  I think another time, though, I will examine ways to thin out the battlefield a little more, but with larger tracts of interestingness.

The Byzantine left. Lacking light troops, they have left 
the flank 'unguarded'. See below on 'deployment'.
Now, the question was, who was the invader? That role was assigned by that capricious Muse, Hexahedra, to the Bulgarians, led by the Kavkhan Attaboi. How was the table to be oriented? I rather figured on the action being 'against the grain' of the hexagons, with the invaders having to cross the creek, or the defenders lining it. However, I decided the direction from which the invaders came by once more invoking the the Goddess of the Dotted Dice, assigning the rolls:
1, 2 from the wall end (i.e. west);
3 from the north side;
4,5 from the outer end;
6 from the south side. 

The roll of '3' meant we could look northwards towards the tell-tale smoke of burning villages for the imminent arrival of the bellicose Bulgars. 
Part of the Bulgar army marching by the small
villages. On the far right flank, two light horse archer 
units advance...

Bulgar Army:

Commander Kavkhan Attaboi with personal retainers: Heavy Cavalry = 1SP. 
3 units Heavy Cavalry @ 2SP = 6SP
4 units Light Horse archers @2SP = 8SP
4 units Spearmen @ 4SP = 16SP
1 unit Light Infantry javelins = 2SP

12 units: activation range 4-8 units per turn.
33 Strength Points: Exhausted at minus 11SP; Rout at minus 17SP
Byzantine deployment, split by the creek.

To face the barbarous Bulgar horde, the Count Demetrios Psychopathes brought with him:

Byzantine Army:

Commander Demetrios Psychopathes: Heavy Cavalry = 1SP
1 unit kataphraktoi Cataphracts = 4SP
5 units kavallarioi Heavy cavalry @2SP = 10SP
1 unit prokoursatores Light Horse @ 2SP
4 units skoutatoi Protected Bowmen @4SP = 16SP
1 unit akontistai light infantry javelins = 2SP

12 units: activation range 4-8 units per turn.
35 Strength Points: Exhausted at minus 12SP; Rout at minus 18SP.

Notes:

1. Each unit's stand counts as a Strength Point, to be removed as SPs are lost. The double stands of the skoutatoi and kataphraktoi have to be marked, and are removed only when 2 or 4 SPs are lost.

2. The commander's single stand is the type upon which he his mounted. It does not count as a unit as such, but may be combined with other units, adding 1 (temporary) SP and 1 extra die to the combat dice. 

3. Combined with another unit, the commander's single stand may move with it at no extra cost to the movement allocation.

4. On its own, the commander's stand requires an activation point drawn from the activation point roll.

5. The commander's stand on its own counts as 1SP only (see list).

6. Omitting the 'standard' 6SP for the commander seemed at the time a reasonable thing to do, as his loss (if lost) deprived his army of his support in crucial combats.
 
7. The activation allocation at each turn is determined by a die roll with this result:
  1. = median - 2 units (4 units)
  2. = median -1 units (5 units)
  3. = median units (6 units)
  4. = median units (6 units) 
  5. = median + 1 units (7 units)
  6. = median + 2 units (8 units)
This system seemed to work OK, leading to a fairly volatile sort of action, but nothing to complain of. The Byzantine (moving second) threw miserable activation dice in the first two turns, but then 'won' the initiative at Turn Three, with a huge activation roll into the bargain!

8. I was working to a 'standard' army size of 12 units plus commander - quite an arbitrary decision, but one suggested by the size of the table. Possibly the army sizes could be greater with this size (in grid terms)  of table, but I don't reckon to go past 15.

9. I almost forgot: in deployment, the flanking two hexes on either may hold only light infantry or light horse. As oriented, that meant the heavy troops could deploy only in the 11 'centre' hexes. The Byzantines had one each of light horse and foot that might have been deployed in the flanking 'zones'. The Bulgarians in this respect could deploy more flexibly, having 1 foot but 4 light horse that could so deploy. I think some such convention would 'fit' the smaller table, even down to the 6x6 squares, with heavy units restricted at deployment to the centre 4 squares. Note that no such restriction need apply to a 'reserve' zone behind the main battlefield.

An account of the action follows... 
 

Saturday, August 24, 2024

Revisiting Byzantiad - ideas for a rule set.

Some recent ideas from the ever fertile region of Mark Cordone, has, along with some of my own have bethought me to reexamining a rule set I proposed about 6 years ago, but in another context. The earlier rule set I added to a few articles I wrote concerning the Vales of Lyndhurst Chronicles authored by the late Barry Taylor. Some of the ideas I used there I incorporated into the 'Map Games' I began exploring about 18 months ago.

The 'new' skoutatos unit. Just 6 men in the rear rank
(spears and bows on double depth stands) gives a 
14-figure unit - more in keeping with the 700 of close order troops 
of the unit as a whole


The new context is Mediaeval, specifically, but not exclusively, concerning events within and surrounding the Byzantine Empire c.1000AD/CE. I have put together a rule set for a FP3x3PW Byzantiad, some ideas of which appear in Bob Cordery's 'Green Compendium'. In this posting I will lay out some ideas for a 6x6 or larger grid war game. 
Most of my Byzantine horse are 'Tin Soldier',
as are the archers here. Of the provenance of the 
lancers I have no idea, or even why I have them.
Two stands  (the red shields) have had their shields
 repainted to form a new 2-stand unit


The occasion for this was that about a fortnight back, I was hunting through some boxes of stuff, and lit upon a weighty chocolate box of obscure provenance that, when opened contained a surprising surprise. Years ago, I sent off a consignment of surplus Byzantine figures to a fellow blogger in Australia (which, unasked, he reciprocated very generously). Now, among those figures were 5 klibanophoros figures. There ought to have been a sixth, but for the life of me, I couldn't find him. 

Well - there he was, in this box, with a whole bunch of works in progress. So much so, that I have been able to create a seventh unit of skoutatoi, and add a double-stand to two 3-stand units to form 4 2-stand units. I even found some armoured archers that I hadn't seen for at least 20 years!

I still have more than I ... erm ... need, but, having recruited many of these extra figures into my Byzantine Army, what is left over are oddments - like my orphaned klibanophoros dude. I do have a small number of trapezetai and heavy cavalry archers I'm not sure what to do with...

Scattered additional foot figures and 
trapezetai light horse. Four of the foot will become 
menaulion, the rest might fetch up as 
Armenians or something.

This led me to rethinking how my armies are organised. Central to the project, my Byzantines will be the benchmark, and cleave as closely as may be to the Praecepta Militaria of Nikephoros II Phokas. Although the older units and stands remain unchanged, I've placed just 3 archers in the rear rank of the new heavy infantry stands. The 14-figure 2-double-stand units represents the 700-strong close order body of a unit of troops. At 1 figure to 50 men, the skirmishing troops - slingers and javelin men - from each unit would be represented by a single 2-figure stand. These will however be brigaded together as 2 (or possibly 3) stand units.

The tricky ones are the menavlioi - a peculiar troop type capable of skirmishing, or standing in the front rank of the main body. At 4 figures the stand, they would represent 100 from each of 2 units. I have 2 such stands, and the figures to make a third. I could make a fourth, but I prefer to leave them slightly under represented. 

A 'general's' stand. Added to a 2-stand unit, it will 
add a SP. Integral to a 2-stand unit, it will add a 
SP to combat only. 


My Byzantine army won't include any of the more arcane specialist types. I'm none too clear what their artillery looked like (being unconvinced of the wagon mounted affairs), and I doubt if anyone makes fire syphoners, and I don't imagine them easy to employ on an open battlefield. Attacking or defending strong places, sound like their métier.

What about the enemies? I find I have enough Pechenegs for a DBA game, except that it is wanting a couple of War Wagons. I shall have to do something about that. Best represented are my Bulgars, but even that army is woefully dwarfed by my Byzantines. I might I think be forced to purchase a consignment of Barbaric types - Lombards, horse and foot, Bulgar heavy horse, Rus axemen, ... nothing too extreme, you understand... Many of the types can stand in for other armies, e.g. the Georgian and possibly Seljuk Turks.

For the rule set, let's start with a
Table of Troop Types:

The observant reader will at once notice that all the mounted units have been given TWO strength points (SP) only. For one thing, each stand represents 1 SP, each double-stand represents 2. The Byzantine heavy cavalry units comprised 300 men (theoretically, of course) - 180 lances and 120 archers arranged in 5 ranks. At 1 figure to 50 men, that gives us a 6-figure, 2-stand unit.  The exception is the unit of kataphraktoi (klibanophoroi, according to most sources, but I prefer the nomenclature of Nikephoros II). This unit formed a trapezoid something over 500 strong. Rounded, this allows us a 4SP unit. At the Battle of Silistria, the Emperor John Tzimiskes fielded two units of such kataphraktoi (as distinct from the heavy kavallarioi), but they were each only about 380-odd strong. I daresay I could split my unit into two separate wedges of 2SP each!

The battle reported earlier this month features 4-stand cavalry units, which look good, but I want to examine the smaller 2-stand units. 

Now, this list fits in with the rule set I have in mind. This could be played on a field 6x6 or larger of squares, or a field of hexagons instead. Note that in the above list, distance is determined in 'squares', but hexagons is implied if played on a hex field.

This will be a kind of hybrid Portable Wargames/ Command & Colours set, using my system of combat resolution. We'll start with this. In combat, roll as many dice per unit as its Strength Points. The results to be:

1 = hit on artillery, vehicles, war wagons fortifications or camp.
2 = hit on cavalry (optional retreat or SP loss)
3 = hit on cavalry
4 = hit on infantry (optional retreat or SP loss)
5 = hit on infantry
6 = hit on infantry

Now, though theoretically the Byzantines at least fielded artillery, they don't actually feature in my armies. However, my Pechenegs will have at least one war wagon, probably two for a DBA-sized game (12 units a side). 
  • Each unit rolls 1D6 per SP for all shooting and close combat. 
  • A general with a separate stand accompanying the unit adds 1SP for combat, and 1SP for the unit.
  • A general integral to the unit adds 1SP for combat only.
  • The number of combat dice might be added to or subtracted according to target or circumstance.
There are still one or two gaps and areas to play test.

1.  The menavlatoi. This really is a peculiar troop type, and might well be disregarded. DBM/DBA treats them as 'Blades (Exception)' Bd(X) - highly manoeuvrable, capable of standing in the front rank of the main body of its unit at need, but also may support the unit's sphendonistai (sling) and akontistai (javelin) skirmishers.  The chappies count as Bd(S) (superior) against 'knights' (as defined in the DB* rule sets), and as Bd(F) (fast) otherwise.  I was considering treating them a 'Axemen' but with just 2SP. Probably I should add another line to the list above: 
Menaulion 2SP, Move: 3, Weapon Range: (-), Close Combat modifier: +1 vs charging cavalry or cataphracts

2.  I have given the artillery just 1SP. One imagines that if any enemy actually makes contact with them, they wouldn't last long. But even just 1SP shooting at long range is likely to do some damage before the enemy get close. However, it may turn out to be desirable to add +1 to shooting at all but light troops (foot or horse).

3.  I want to look at extending the Portable Wargame unit activation system.  After rolling for initiative for each IGoUGo turn, the side moving rolls for the number of units that may do something
1 = median -2
2 = median -1
3 = median
4 = median
5 = median +1 
6 = median +2 
The result, if an army has, say, 12 units, is that it may move anything from 4 to 8 units, depending on the roll.                          

4.  Close Combat is initiated by moving the front of a unit to overlap a grid area containing an enemy. This counts as moving 1 grid area. If the combat remains unresolved at the end of the turn, it continues to be fought out in subsequent turns unless and until one or other side breaks off, is destroyed or retreats. The idea behind this is the notion of 'holding attacks' to pin the enemy down and/or to gain time to bring up reserves. The foot troops in particular are suited for this role; less so the horse.

5. At just 2SP, the horse will be pretty fragile for the most part, especially compared with close order foot. This is experimental, but I am hoping it will lead to more 'realistic' handling and effects.                                                                                        

Extra double-stands to be added to the other 
red and blue-shield units.

A play test to come...


Tuesday, August 13, 2024

Insurrection: The Gatonegro War of Independence


I discover that it was six years ago (!) that I began what was to be a 'campaign of battles' - a war of independence set somewhere in Latin America. Somehow, I became distracted, and never got back to the battles.  This, despite doing a fairish bit of on-line searching out the campaigns and battles of the real wars of Independence. 


Well, a couple of weeks ago, I played out what was based (supposedly) on the Battle of Maipu, April, 1818, between the Royalist Army and the insurrectionists styling themselves as 'Patriots'. This was the decisive action of the Chilean campaign of that year. As it turned out, 'Maipu' this Gatonegro battle was not, as the narrative of events will reveal.

After the early success at Arabispo, the insurrection caught popular fire, and the Reine de Oro had a serious rebellion on its hands.


Seeking to break the centre of the rebellion, the Royalists gathered what strength it could to confront the growing menace. For their part, the self-styled Patriots found recruits flocking to the nascent colours. When the clash came as the Royalist Army marched upon Maipu del Guano, they were to find themselves considerably outnumbered. Confident in the superior training of his army, General Mariano Osario drew up his force along a line centred upon rising ground close by Casa de la Espagne, a hamlet set among cherry orchards.

The Royalist Army comprised:
Commander: General Mariano Osario

1st Brigade: Colonel Ordonez
    Regiment Concepcion ... 28 figures
    Regiment Infante Don Carlos ... 28 figures
    Coy Sappers ... 7 figures
    Dragoons Ordonez ... 9 figures (under strength)
    Artillery ... 3 figures, 1 cannon
        Brigade totals: 63 foot, 9 horse, 3 artillery = 75 figures

2nd Brigade: Colonel Morta
    Regiment Arequipa ... 28 figures
    Regiment Burgos ... 28 figures
    Lancers Morta ... 9 figures (under strength)
    Artillery ... 3 figures, 1 cannon
        Brigade totals: 56 foot, 9 horse, 3 artillery = 68 figures

3rd Brigade: Colonel de Riviero
    Converged light and grenadier companies ... 28 figures
    Artillery ... 3 figures, 1 cannon
        Brigade totals: 28 foot, 3 gunners = 31 figures

Army totals: 147 foot, 18 horse, 9 artillery = 174 figures, 3 cannon

Marching to meet them, the Patriot Army comprised:
Commander: General Jose de San Martino

Division Las Heras:
    3 Regiments @ 19 figures = 57 figures
    Mounted grenadiers ... 12 figures
    Artillery ... 4 figures, 1 cannon
        Division totals: 57 foot, 12 horse, 4 artillery = 63 figures

Division Alvarez: 
    3 Regiments @ 19 figures = 57 figures
    Caballeros de los Andes horse ... 12 figures
    Artillery ... 4 figures, 1 cannon
        Division totals: 57 foot, 12 horse, 4 artillery = 63 figures

Division Quintana (Patricio Hernandez O'Hogg commanding):
    3 regiments @ 19 figures
    Escort Cavalry ... 6 figures
    Husares de la Muerte ... 6 figures 
    Artillery ... 6 figures, 2 cannon
        Division totals: 57 foot, 12 horse, 6 artillery = 65 figures

Army totals: 171 foot, 36 horse, 14 artillery = 221 figures, 4 cannon

A couple of points here:
1. My original order of battle had four Divisions, each with just two infantry regiments. A 'Reinforcement Division' under Bernardo O'Higgins would have been the fourth formation. I have no recollection as to why I changed it!

2. The considerable disparity in numbers I thought would be offset by the superior training and morale of the Royalist regulars. We'll see how that turned out.    
Regiment Concepcion's first volley.
Woeful: the pips scores count only on rolls of 4 or less... 


Prospects to begin with seemed unpromising for the Royalists, drawn up in a single line with, apart from the insignificant sapper company, not a single reserve. By contrast, the Patriots began advancing with two of their Divisions, Las Heras on the left and Alvarez on the right. As the leading Divisions engaged the flanks, O'Hogg's Reserve marched onto the field, straight towards the centre of the Royalist line. 

Just about the first Royalist unit to give fire, Regiment Concepcion, let fly a woeful volley. Where it went no one knew - certainly not the intended target. Under my own combat system, at this moment, the 'Die Range' for shooting was 4 - that is to say, the pips scores counted only for dice rolls of 4 or less.  This is precisely the same as subtracting 2 from the raw pip score, but without the actual subtraction. The unit could reasonably have expected to score 6 or 7 hits (modified by my 'normalising' system, which would have yielded 4 or 5 casualties). 

This was more than matched by the Regiment Infante Don Carlos, whose valley shredded the 1st Regiment of Las Heras Division. Perhaps the powder had been left too long in the breech, and damp reduced the effectiveness of the first volley. 

At any rate, as the action became general along the front, Royalist fire became much more accurate and effective.  The Patriot columns came on, to form lines of battle to engage in a protracted firefight all along the front. And they were getting the worst of it.
Outnumbered, the Royalist Dragoons put the 
Patriot horse to the rout!

Hoping to sweep aside the dragoons guarding the Royalist right flank, Las Heras's mounted grenadiers were brought up on the extreme patriot left. The royalist horse didn't hesitate. Though outnumbered 4 to 3 (which actually made the combat equal given Royalist training) the Royalists gave rather better than they got, inflicted 5 casualties for 2, and sent the Patriot horse packing.
The height of the Patriot attack: all along the line.
So far losses have not been too serious...


The Patriots seemed to be doing better on the other flank. The Caballeros de los Andes horse braved Royalist gunfire to ride over the de Riviero's guns. Incoming musketry also caused Regiment Burgos to fall back a short distance although they maintained their good order, and continued to face the enemy.

That was pretty much all the success, as it transpired, that the Patriot Army was to show this day.  Accurate Royalist musketry cut Patriot infantry to ribbons. De Riviero redeemed the loss of his guin battery with a devastating counter-attack onto the Patriot right flank. Soon, all over the field, routed patriot foot and horse could be seen making their way to the rear.
It's all to no avail. Apart from forcing back Regiment Burgos,
and overrunning a battery, the Patriot Army has hardly dented 
the Royalist line. Several Patriot units have broken and are
fleeing in rout.

There was no doubt about this result: a devastating Royalist victory.

Somehow, I think I got the balance totally wrong. Such a one-sided result simply wasn't supposed to happen! I rather think this battlefield will be revisited, but with the 4 division, 8 regiment ORBAT for the Patriots, and their soldiery having the battlefield experience, next time around, to match the Royalist firepower...


Border Troubles (2)


The Nimruz Expeditionary Force (NEF) made first contact  upon the round hill marking the right flank of the Tchagai garrison defence line. There Brigadier Mugglethwaite had placed the Recon Group: a motor rifle company with Spartan APCs and Saladin armoured cars. 


Three of the Tchagai rifle companies formed the rest of the front line: 'A' about the railway station, 'B' on the ridge nearby, and 'D' upon Snake Ridge on the other side of the road. 'C' Company occupied the town with the 25pr batteries emplaced on either side, and the armoured squadron on the other side of the railway. Mugglethwaite could call on air support - a flight of Spitfires.


The Nimruz forces advanced on a broad front. First Battalion's objective was Snake Ridge, to drive off the defending company and take the 17pr gun position. Second Battalion aimed for the ridge flanking the railway station, whilst 3rd Battalion stormed the station itself (bypassing the clearly visible minefield), as well as the round hill. In support of the latter, the SU85 and SU76 assault guns kept pace with the infantry, the latter adding its firepower to the Battalion's mortars upon the occupants of the hill. The Support group's SU122 company added its firepower to 2nd Battalion's assault upon the middle ridge.


The middle ridge pounded, not very effectually, by 2nd Battalion's mortars, the SU122s and even machinegun fore from the Tank Battalion's BA64 armoured cars, 'C' Company of 2nd Battalion was the first to begin mounting the slopes. Their assault was immediately successful (requiring a '6' to hit, the effect was a '4', driving the defending company's right back upon the Coy HQ). 


Following up, the attackers scattered the enemy as they retreated. By this time the other two companies, 'B' frontally and 'A' from a flank, attempted to storm what remained of the Tchagai company's defence line... 


... whilst 'C' Company pushed their attack upon the enemy HQ and Battalion support weapons. Here they met a check. The early success had yet to effect a complete breakthrough.


First Battalion, facing Snake Ridge, advanced with 'A' and 'C' Companies leading, 'B' Coy in reserve. 
Very soon they were clambering up the northern slopes of the ridge, the defenders' fire seemingly insufficient to slow them down, let alone stop them.

Meanwhile, at quite the other end of the battlefields, Tchagai's Muddi River Horse were fairly easily driven off the round hill. Combined gun, mortar and machinegun fire were enough to force the motor company to give up the position. The armoured cars exchanged a brief fire with the Nimruz Support Group before they, too, slid back down the rear slope of the hill. 

Following up this success, Third Battalion met an immediate check by the half of Tchagai's 'A' Company entrenched close by the railway station. 

An immediate check: Tchagai 'A' Coy rolls a '6' to hit; a '1' for 
an SP loss. This is the second SP lost to 'A'/3 Coy.
The '3' rolled = no damage to the garrison.

Tchagai 'D' Coy rolls '5' to hit and '5' again to force a retreat.
Nimruz 'C' Coy rolls the '6' they need to hit, and the '1' to
inflict a strength point loss.

Returning to the other wing finds a fierce battle raging over the Snake Ridge defence line. The right half of Silliputti 'D' Coy throws back their assailants, but at some cost. So began the loosening of Tchagai's grip upon Snake Ridge.

A strafing attack knocks over a strength point.

'B' Coy under heavy pressure from the whole of Nimruz's 2nd Battalion, Mugglethwaite at last called up his supporting air - the flight of Spitfires with which to strafe the enemy infantry close by the road. This attack had some immediate success, a quarter of 'A'/2 Coy biting the dust, thereafter the fighter was unable to achieve much. 

A brief word on this. The rules seem to indicate that single seater fighters strafing get 12 dice (4MGs, notionally) in attack.  To my mind, that seems a tad generous, unless, perhaps, a '6' is required to hit. So I have formed a convention of just one D6 per MG, still requiring 5 or 6 to hit. That seems to me reasonable, with a better than 80% chance of scoring a hit, and a decent show of scoring more. With 12 dice, you could expect 4 hits (if a '5' is sufficient) and a fair chance of a whole 4SP (4-stand) company obliterated. Mind you, I could be selling air power short!

Middle ridge cleared, 'A'/2 Coy catches the retreating 
Tchagai 'B'/Silliputti Coy on the road.


1st Battalion overruns the Tchagai trench line

That success did not stop 2nd Battalion. Aided by a flank attack from 'A', 'B' Coy swept over the last of the Tchagai troops on the middle ridge. As the survivors fled towards the town, 'A'/2 coy, having shaken off the shock of air attack, intercepted the fugitives on the road.  The brisk fire fight there finally broke 'B' Coy, but weakened 'A'/2 Coy further.

Upon Snake Ridge, the leading companies of 1st Nimruz Battalion threw the defending company 'D' right off the feature and into the plain below. The battalion commander brought up his supporting mortars, whilst 'B' company assaulted the anti-tank battery position entrenched in a col near the eastern end of the ridge. 'C' Company joined in a flank attack from the heights to the right. It would not be long before the entire ridge was in Nimruz hands.

Nimruz has cleared the whole of the Tchagai front line.

Apprehending a breakthrough in the centre, Brigadier Mugglethwaite brought forward his armoured reserve. This move was probably premature, as the Nimruz T34 tanks were still out of range, and seemed to have no particular desire to close. But the Nimruz infantry were by now swarming all over the front line positions that had been held by the Tchagai task force, including the fortified line in front of the railway station. Little remained of the Tchagai companies that had defended those lines.


On the other hand, the Nimruz infantry were paying a fearful price for their successes. Pressing on past the railway station, 3rd Battalion ran into stiffening resistance from the Tchagai Recon group and what remained of 'A' Company. Third Battalion's own 'A' Company briefly overran the whole terminus, before being driven back to the rail construction timber piles at the north end. 

Nimruz attempts to push on and captures the 
railway station, they are reaching the end of 
their resources.


Frustrated by the tack of meatier targets, the Centurions engaged and destroyed the BA64 platoon before it could bug out. Whilst 'A'/2 Coy scuttled up the east end of Snake Ridge out of the way (and forcing the 17pr AT guns to hitch up and drive off), the leading T34s pushed though the pass between Snake and middle ridges.  


The exchange of fire between the respective armoured groups was brief and inconclusive. Neither side took harm, but the T34s bethought it meet to permit the Centurions to come to them, neutralising, with luck, the latter's superior gun range.


It was becoming plain that their very success had led the Nimruz assailants to outrun their remaining strength. Having reached their exhaustion point, they lacked the strength to push on to clear the town and the plantation. 


The action didn't end there - not yet. It was just possible that the Tchagai forces might be induced themselves to attempt to recover the lost trench lines. Accordingly, the Nimruz drew back a little, to take up reverse slope positions along the ridge lines. Although not yet 'exhausted', as Mugglethwaite could see, yet there seemed little prospect of successfully chasing the Nimruz forces out of their positions. They would have to be waited out. The battle sputtered to a close, neither side willing or able further to try conclusions.


A tactical draw was of course a strategic victory for the defenders, although three of Tchagai's infantry companies were scarcely even shadows of their former strength. For their part, the forces of Nimruz debated whether, regathering their own strength overnight, a renewed effort might be made on the morrow... 

POSSIBLY to be continued...