For this event quite a lot of figures had to be gathered from several collections, especially as we were to be using the General de brigade rule set, modified for this action. To the forces involved, contributions came from Basil Moscovis, Mark Ottley, Mike Thorby, Paul Jackson, and myself. Richard Shields came up from Dunedin with several more figures from his collection. He was also resplendent as Prince of Orange in dress uniform for the occasion. I know that there were contributions from at least two others, but didn't discover who they were.
I was supposed to Napoleon for the weekend, but, still flattened by a virus that I'd already had for several days, didn't make it for the event as a whole.
 |
Looking east, mid-afternoon 18 June 1815. The serried ranks
of Bulow's IV Prussian Korps look menacing and powerful. |
On the Friday before the weekend I had laid out what troops were to be transported. Entrusting the lads (some 520-odd with 11 guns) to the tender care of others for a couple of days doesn't come easy to me. But in the event there were no losses, not too much damage, and I indeed acquired 6 extra figures somehow. I'm not sure to whom they belong, but I think I can hazard a guess... I stayed home, feeling like two ton of old fish heads, all day Saturday. Finally, on Sunday afternoon I felt sufficiently recovered to crawl down to the club and observe the last hour or so. Whilst there I took some indifferent photos of the troops.
 |
Action around the Hougoumont Chateau. Paul was commanding in this sector,
and faced by large columns also off to the left of the picture, was treating this
as something of a holding action. |
 |
| General view of the field looking eastward from west of the Hougoumont. |
 |
Of course I had to include pix of my own troops. Count Lobau's VI Corps
advancing towards La Haye Sainte (My guys, based in ones and twos,
are those on sabots specially made for this event). |
I was told that Lobau's Corps had been ordered forward from the 'Reserve Table' to exploit a success earlier won at La Haye Sainte, where Anglo-Allied defenders had been brought to the verge of collapse. Unfortunately it took more time for the orders to take effect than had been hoped - their receipt, and action upon them, subject to a die roll. So by the time Lobau was well on the way, the Allies had somewhat restored the situation, by the look. At that I might have been inclined myself (who was also intended to play the role of Count Lobau in addition to Napoleon) to bring forward all thirteen battalions (312 figures) and 22 cannon (11 models) into the assault. But there was the small matter of the Prussians to influence the decision of the French command.
 |
Prussians advancing past Frischermont into the French
right flank. |
 |
Bulow's IV Korps
|
 |
More general view of the Prussian menace. The available French resources
are not over-abundant to offer resistance. |
 |
| The view from Anglo-Allied positions as Count Lobau advances. |
 |
| Nassauers? At Papelotte. |
 |
| British under pressure, east of La Haye Sainte. |
 |
A not well constructed photo, this.
French cavalry at the left of the picture making a determined effort to carry the ridge... |
 |
If earlier the Anglo-Allied hold upon La Haye Sainte was
beginning to slip, they have recovered their grip by now... |
 |
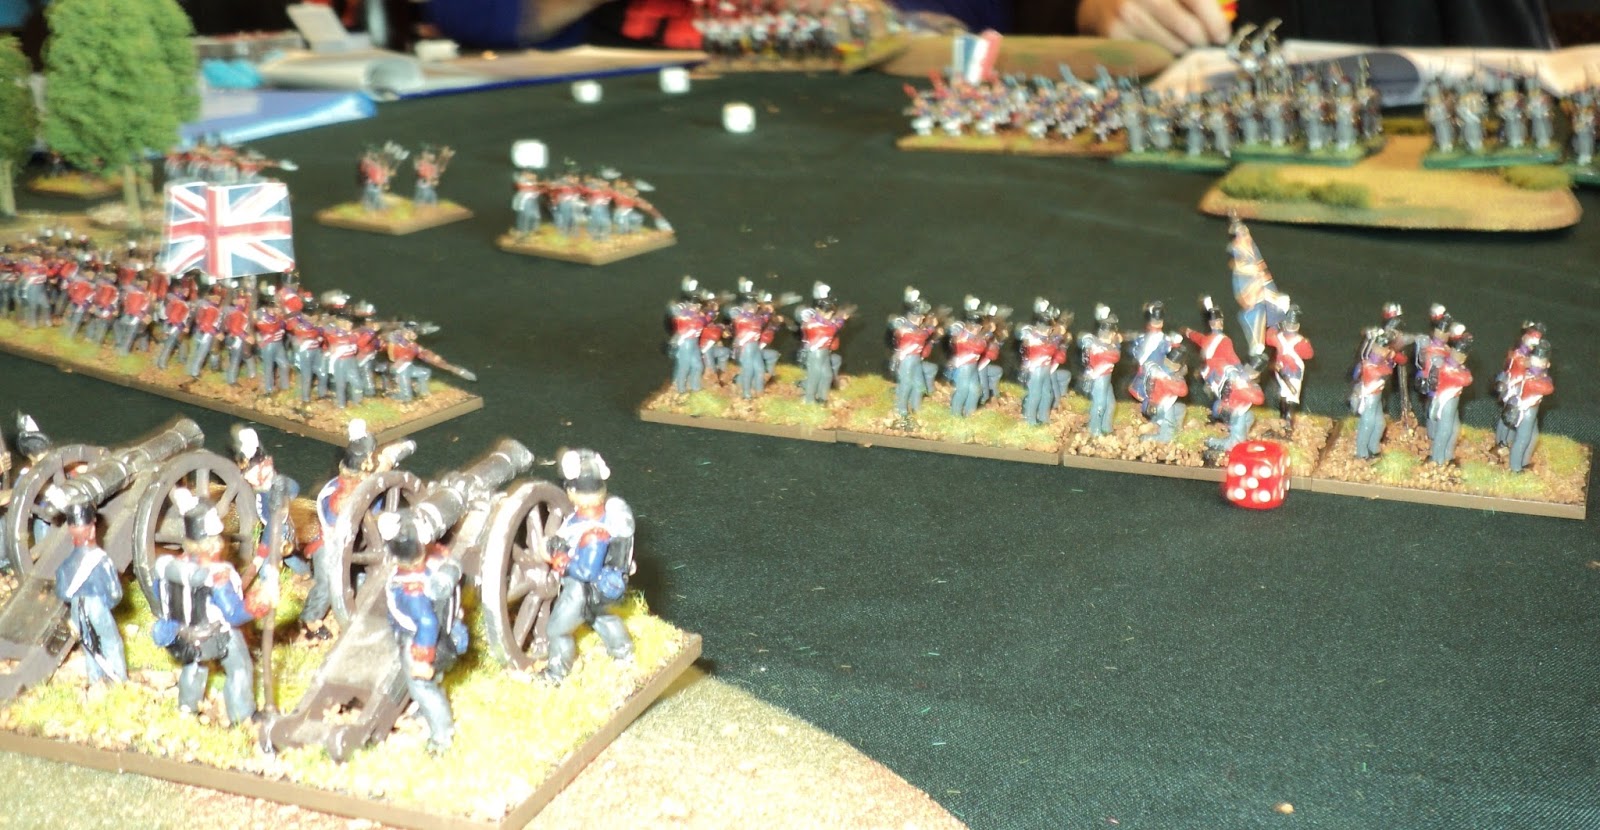
Immediately in rear of the Hougoumont, Mitchell's Brigade.
These figures were my contribution to the Allied war effort:
Minifigs, except for the light infantry of the 2nd West Riding:
Hinchliffe. |
 |
| Northeast of the Hougoumont. |
 |
British Footguards, eyeing the approach of the Divisions of Foy and Bachlu,
and the cavalry of Kellerman and Guyot. |
 |
The stretch of Allied ridge carried and cleared by elements of General
d'Erlon's I Corps commanded by Tony and (I think) Nigel. This
seemed to be a considerable success that might yet have been exploited, given time. |
 |
More French success (this might have been Nigel). However,
this penetrations looks too localised and lacking in follow-up
to permit a lasting penetration of the Allied line. |
Having taken this many pictures, the day was already far advanced and pack-up had to begin at 4pm. Although not fought to a finish, the occasion was, I am told, enjoyed by everyone, and, considering the size of the project and the absence of formal game directors to keep people focused, the thing went off very well. I was impressed by what I saw, anyhow, in the 90 minutes or so I was there.