Monday, August 15, 2022

Sengoku Wars... Azukizaka 1542

Battle of Azukizaka, 1542


This particular battle seemed to me good for a good and proper playtest of the Portable Sengoku Wars (PSW) rule set 'as she was wrote'. But... not... quite. I still wanted the Army HQs to be static pavilions.  But otherwise, there was to be but one 'general' only. I won't go into the historical background, but summarise the action, with particular comments upon the activation of units. The diagram was taken from the Zvezda Art of Tactic  scenario, translated onto my Memoir '44 battle board.


The armies were fairly evenly matched and very similar, though not exactly the same. For the purposes of PSW, archer and arquebusier ashigaru were conflated into arquebusiers (ashigaru tepo), and all samurai units were capable of shooting. 
Purple Army wins the first initiative
dice roll...


The forces were:

Clan Yoshimoto (Purple):
1 Commander (Yashimoto) and HQ in pavilion (elite) : 4SP*
2 Mounted Samurai (units) (average) @ 3SP = 6SP
2 Foot Samurai (elite) @ 4SP = 8SP
4 Ashigaru Yari (average) @ 3SP = 12SP
4 Ashigaru Tepo (average) @ 2SP = 8SP

13 units, 38 SP 
Exhausted on losing 13SP, rout on losing 19SP
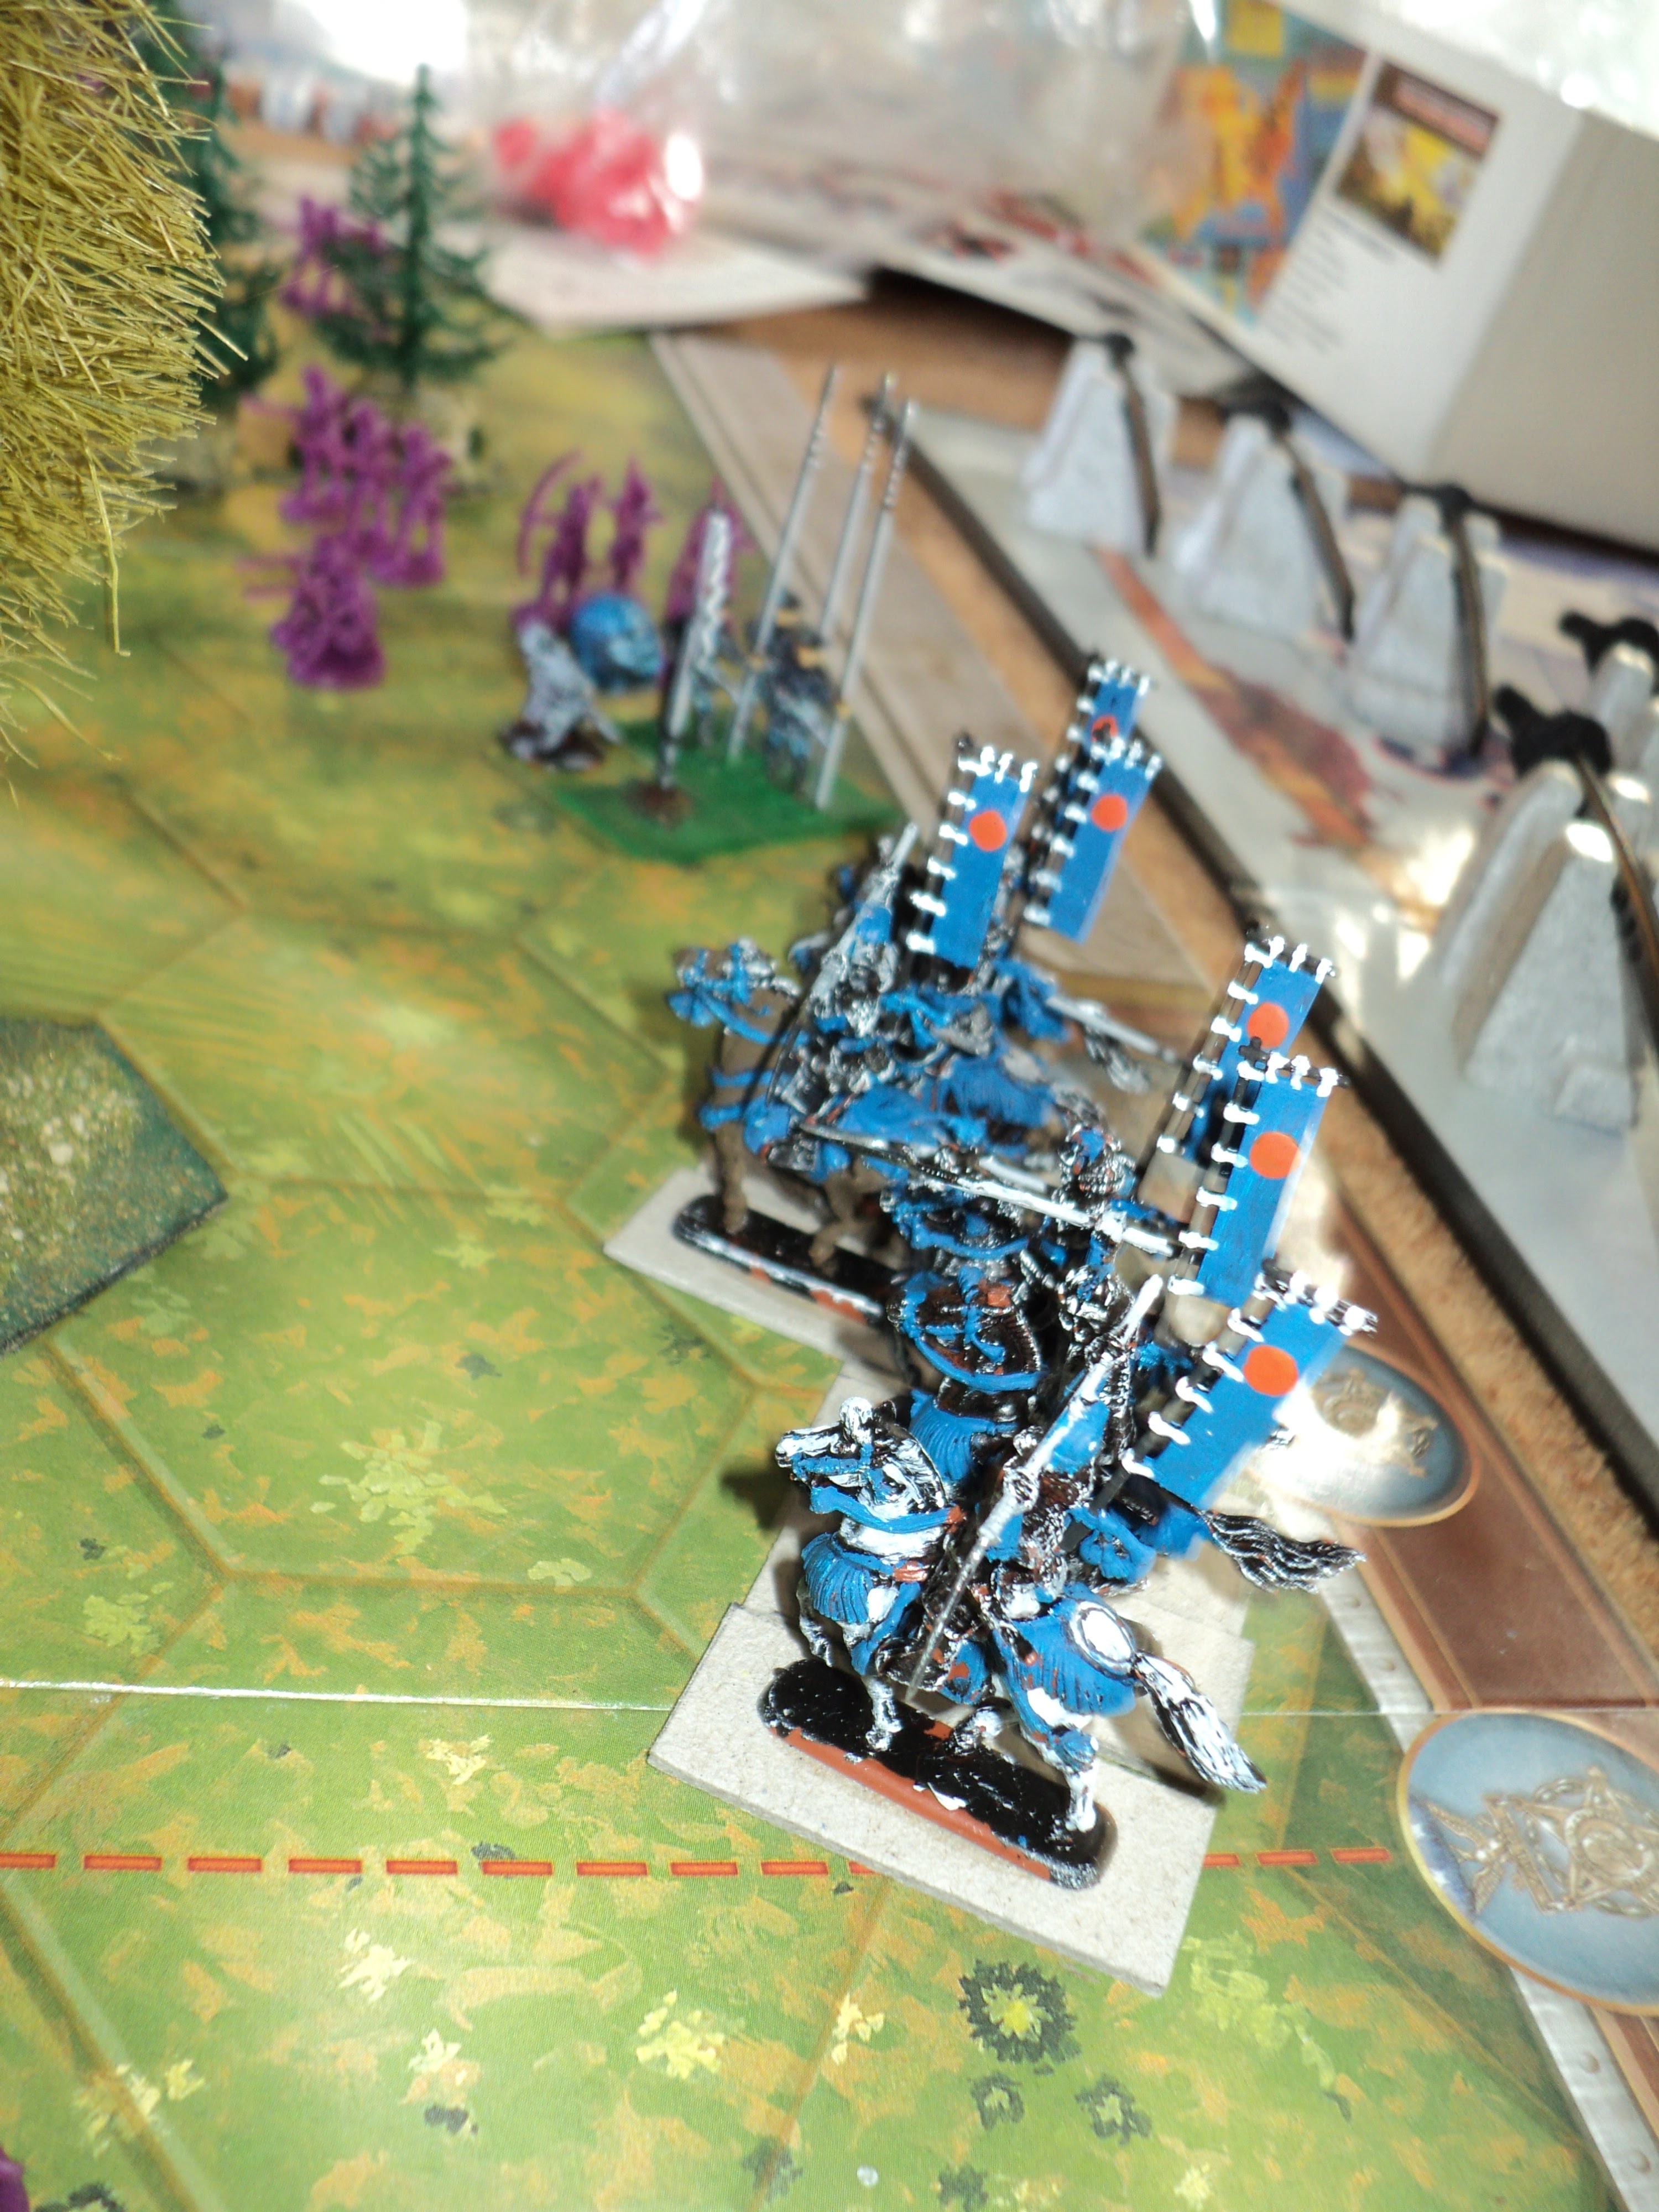
Yoahimoto Cavalry and HQ in the 
distance.  The latter is indicated by the 
white fan-like flag.


Clan Nobuhide (Red):

1 Commander (Nobuhide) and HQ in pavilion (elite): 4SP*
2 Mounted Samurai (average) @ 3SP = 6SP
2 Foot Samurai (elite) @ 4SP = 8SP
5 Ashigaru Yari (average) @ 3SP = 15SP
3 Ashigaru Tepo (average) @ 2SP = 6 SP

13 units, 39SP
Exhausted on losing 13SP, rout on losing 20SP

*the HQ SPs are associated with the Daimyo's immediate bodyguard and entourage, not the commander  himself. That august personage lends the weight of his leadership to this elite unit, and lives and dies by it. Neither may move, nor may they initiate a close combat. 
Nobuhide cavalry and HQ 'pavilion'.
The latter is represented by the seated
diamyo, the parasol, and the spearmen.


What I wanted to do was to examine closely the workings of the activation system with just one overall commander in each army. With 13 units the side, divided by 6, we get 2D6 plus 1 for the commanders. Three D6 dice rolled for activation, the scores divided by two.
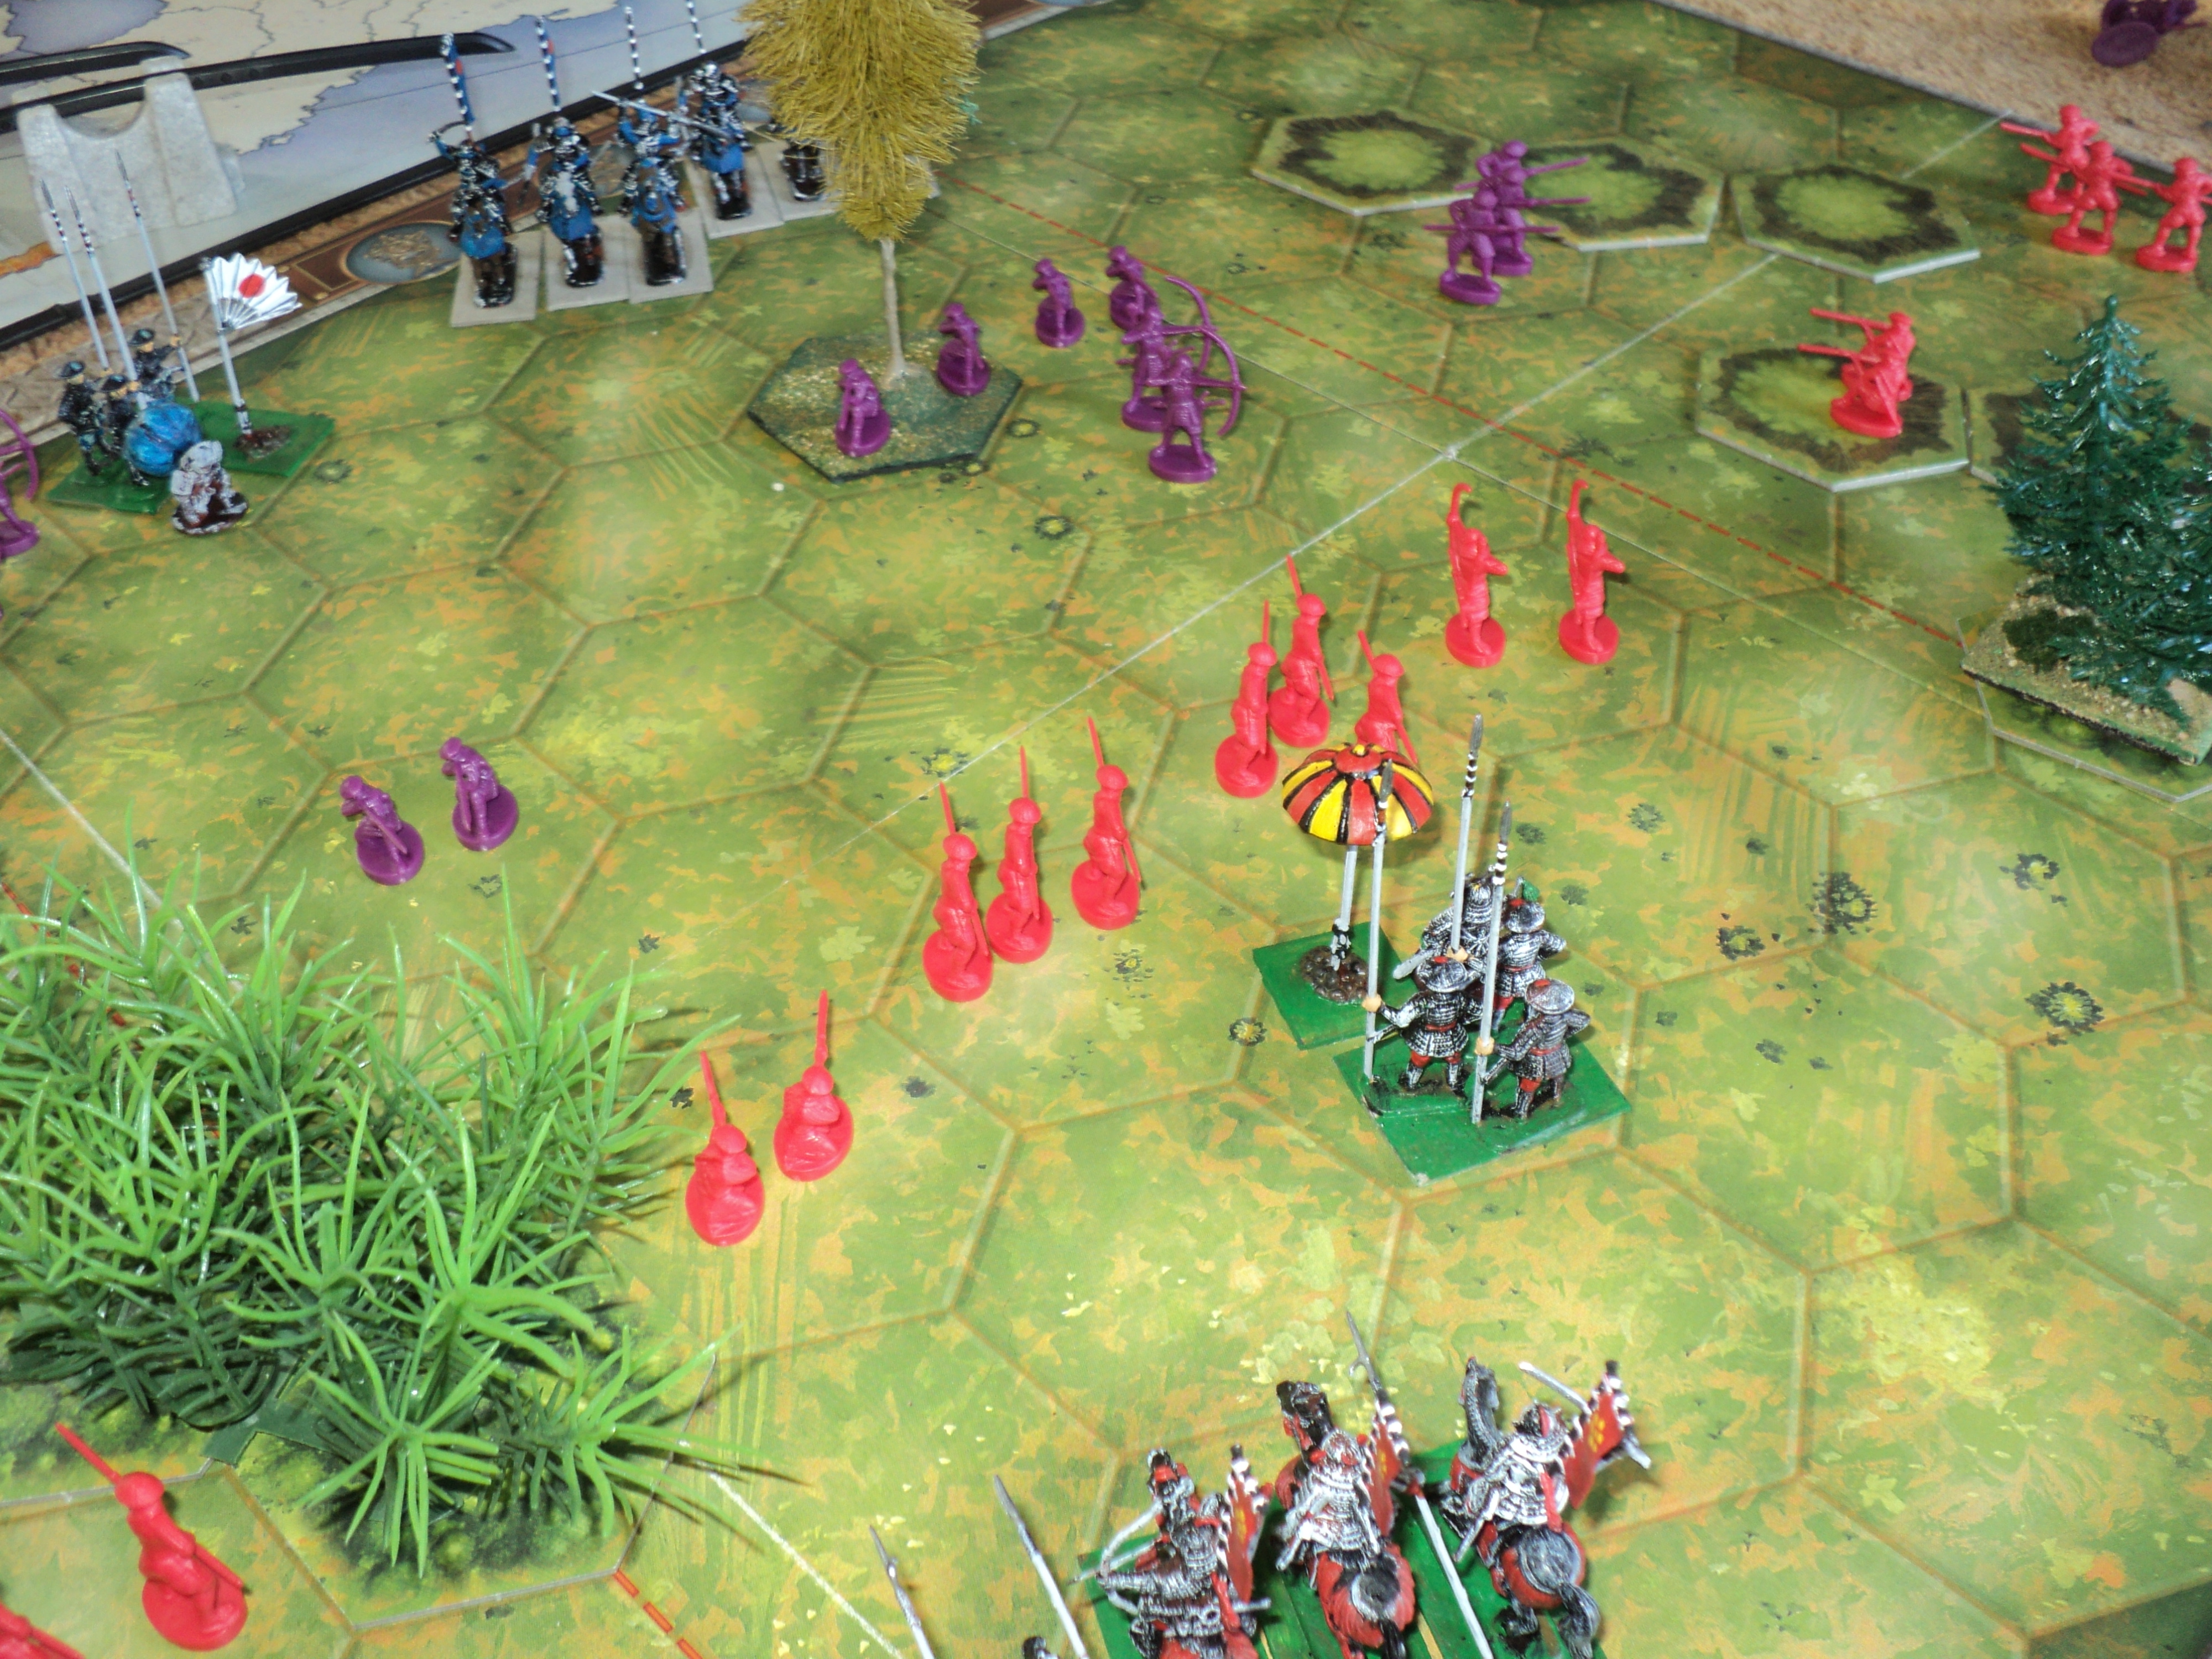
First blood to Yoshimoto: a Red ashigaru tepo
bites the dust.


Yoshimoto (Purple) won the first turn initiative, and then rolled 3D6 for activation. The scores were 4,1,1. Summed and then divided by 2, yielded just 3 units activated. Purple contented himself with some indifferent arquebus fire and a small local attack, although a Red tepo figure was knocked over on their left wing. Nobuhide's activation roll was no more impressive: again just 3 activations, with not a lot achieved. Three activations from thirteen units, ain't exactly clobbering time!


The beginning of Red assault upon the Purple 
right wing.

Things improved subsequently, with activation rolls yielding 5 and 6 units getting into the action, but it would have taken a roll of 14 with three dice (e.g. 4,5,5, or 3,5,6) to activate 7 units - only barely more than half the army. During this battle such a score was never achieved. Not to be wondered at: the probability of scoring 14+ with 3 D6 dice is a whisker less than rolling a 6 on a single D6 die.
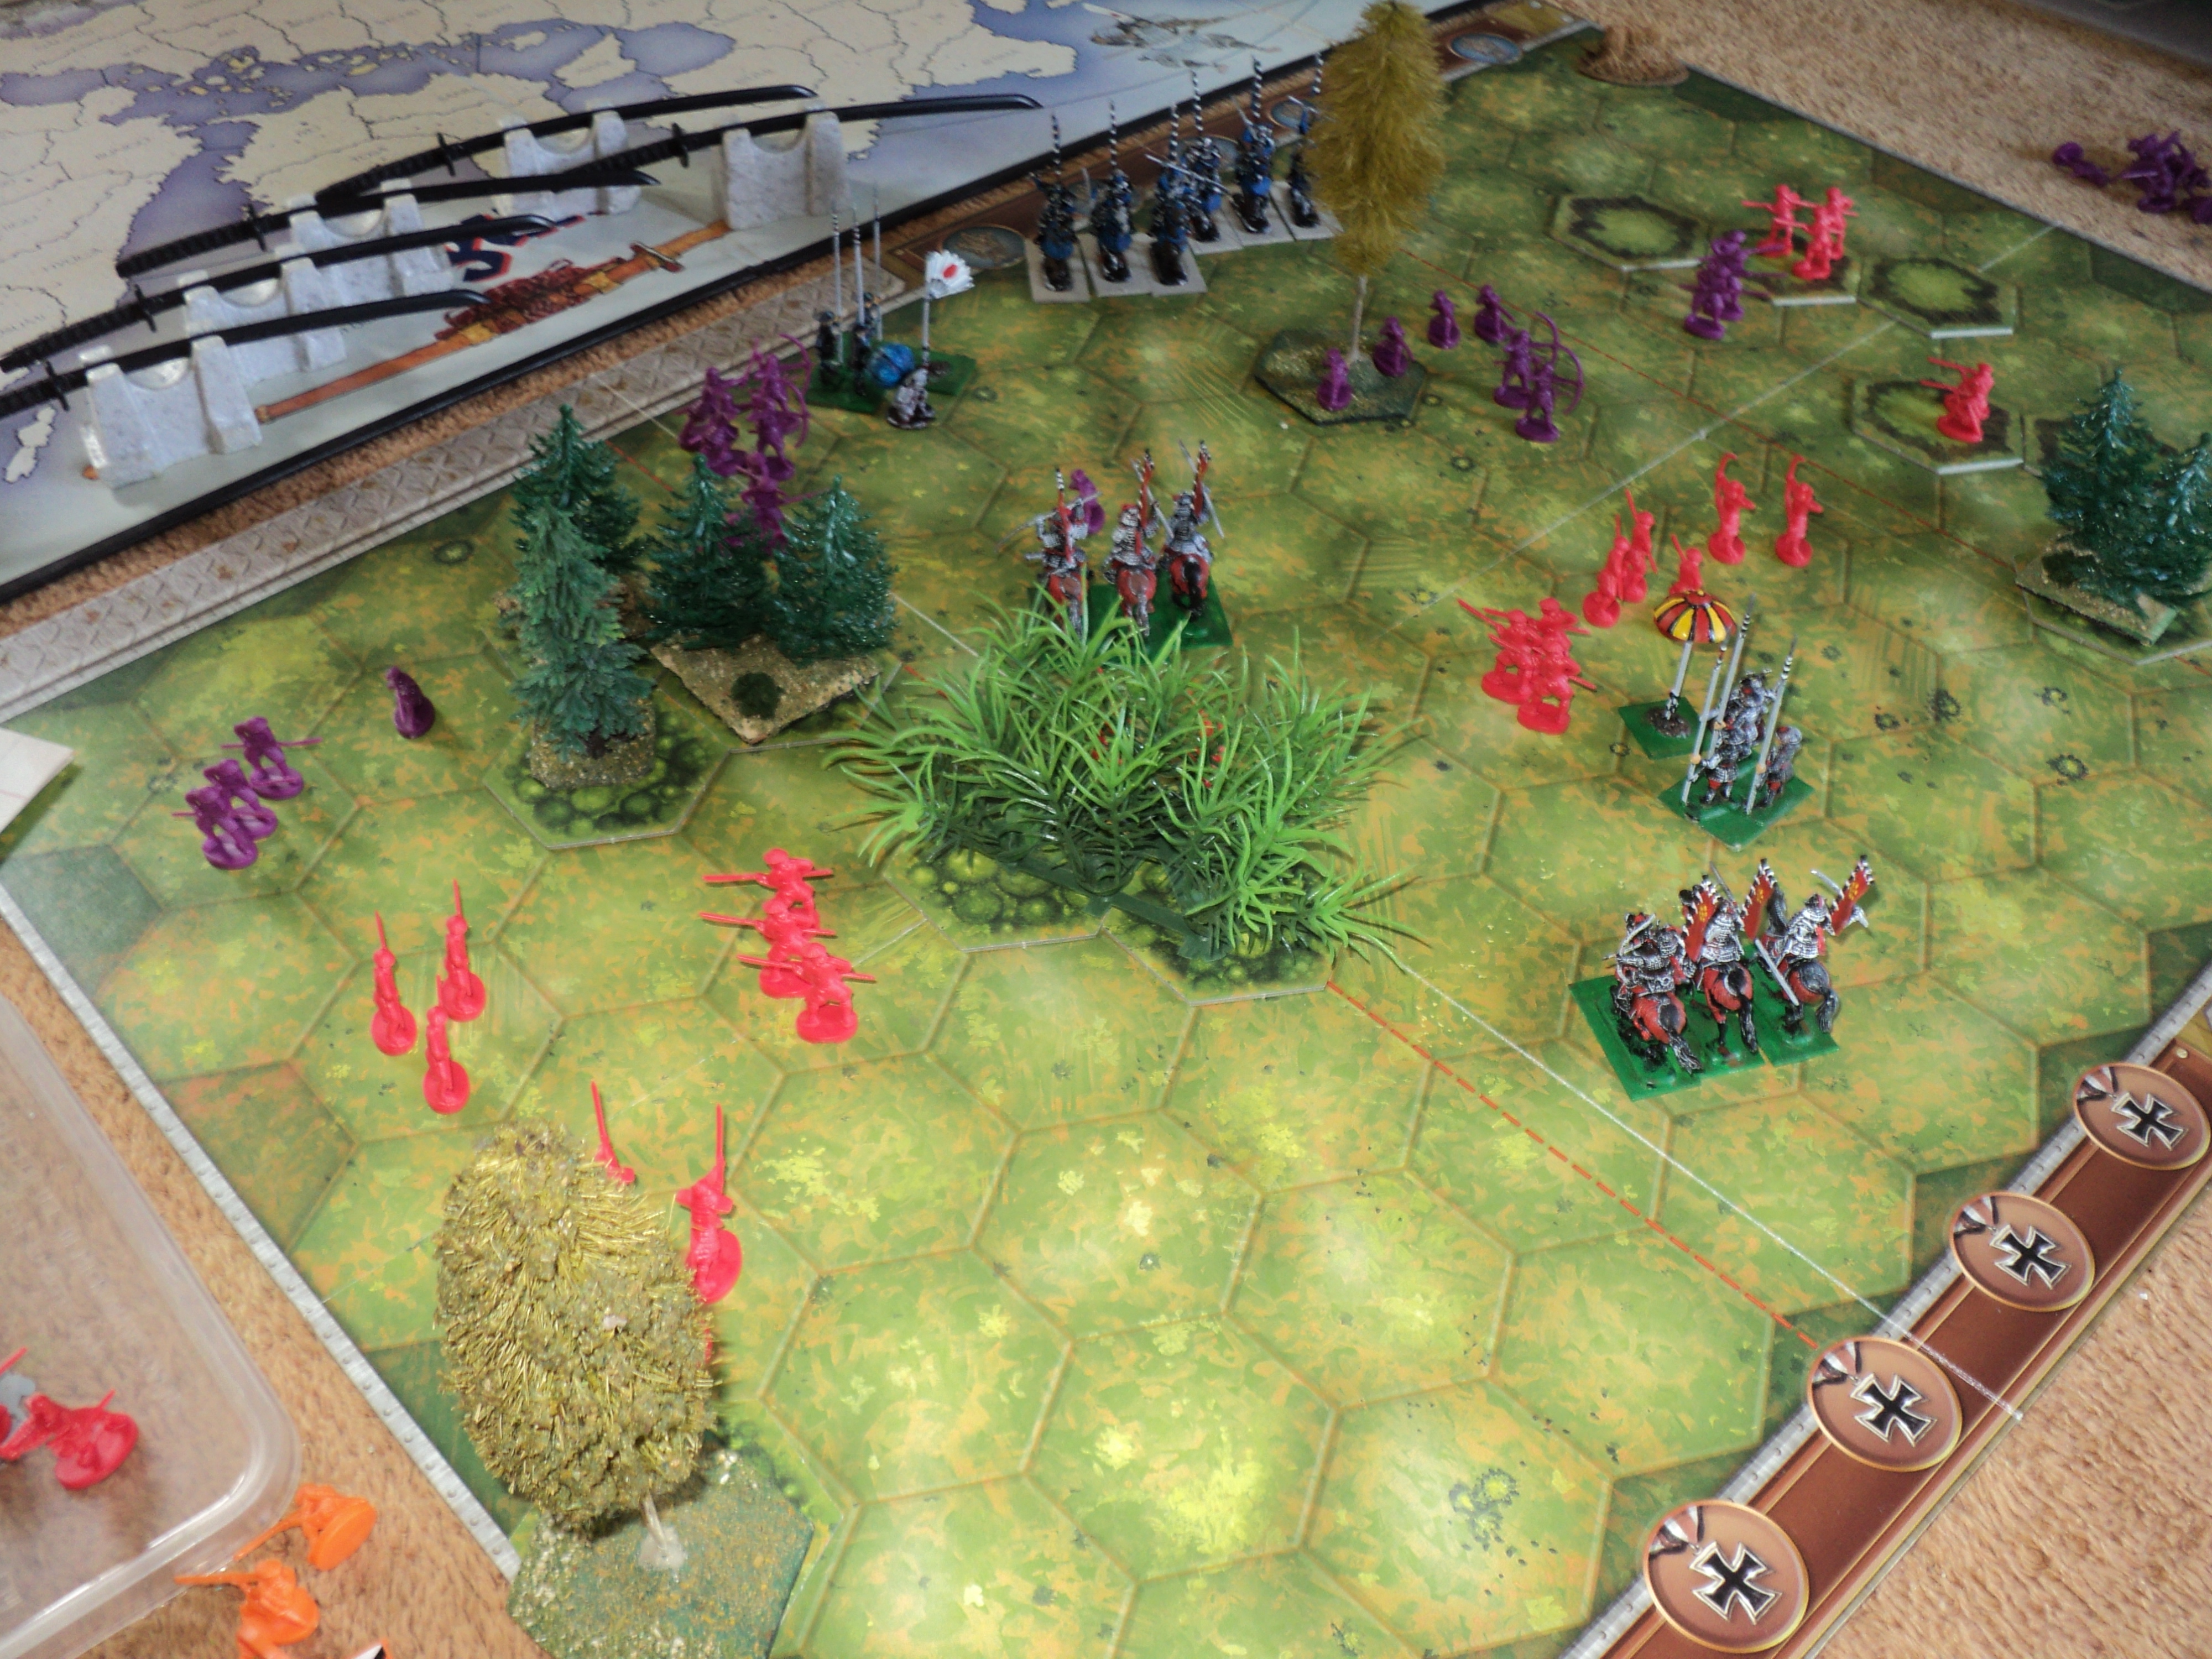
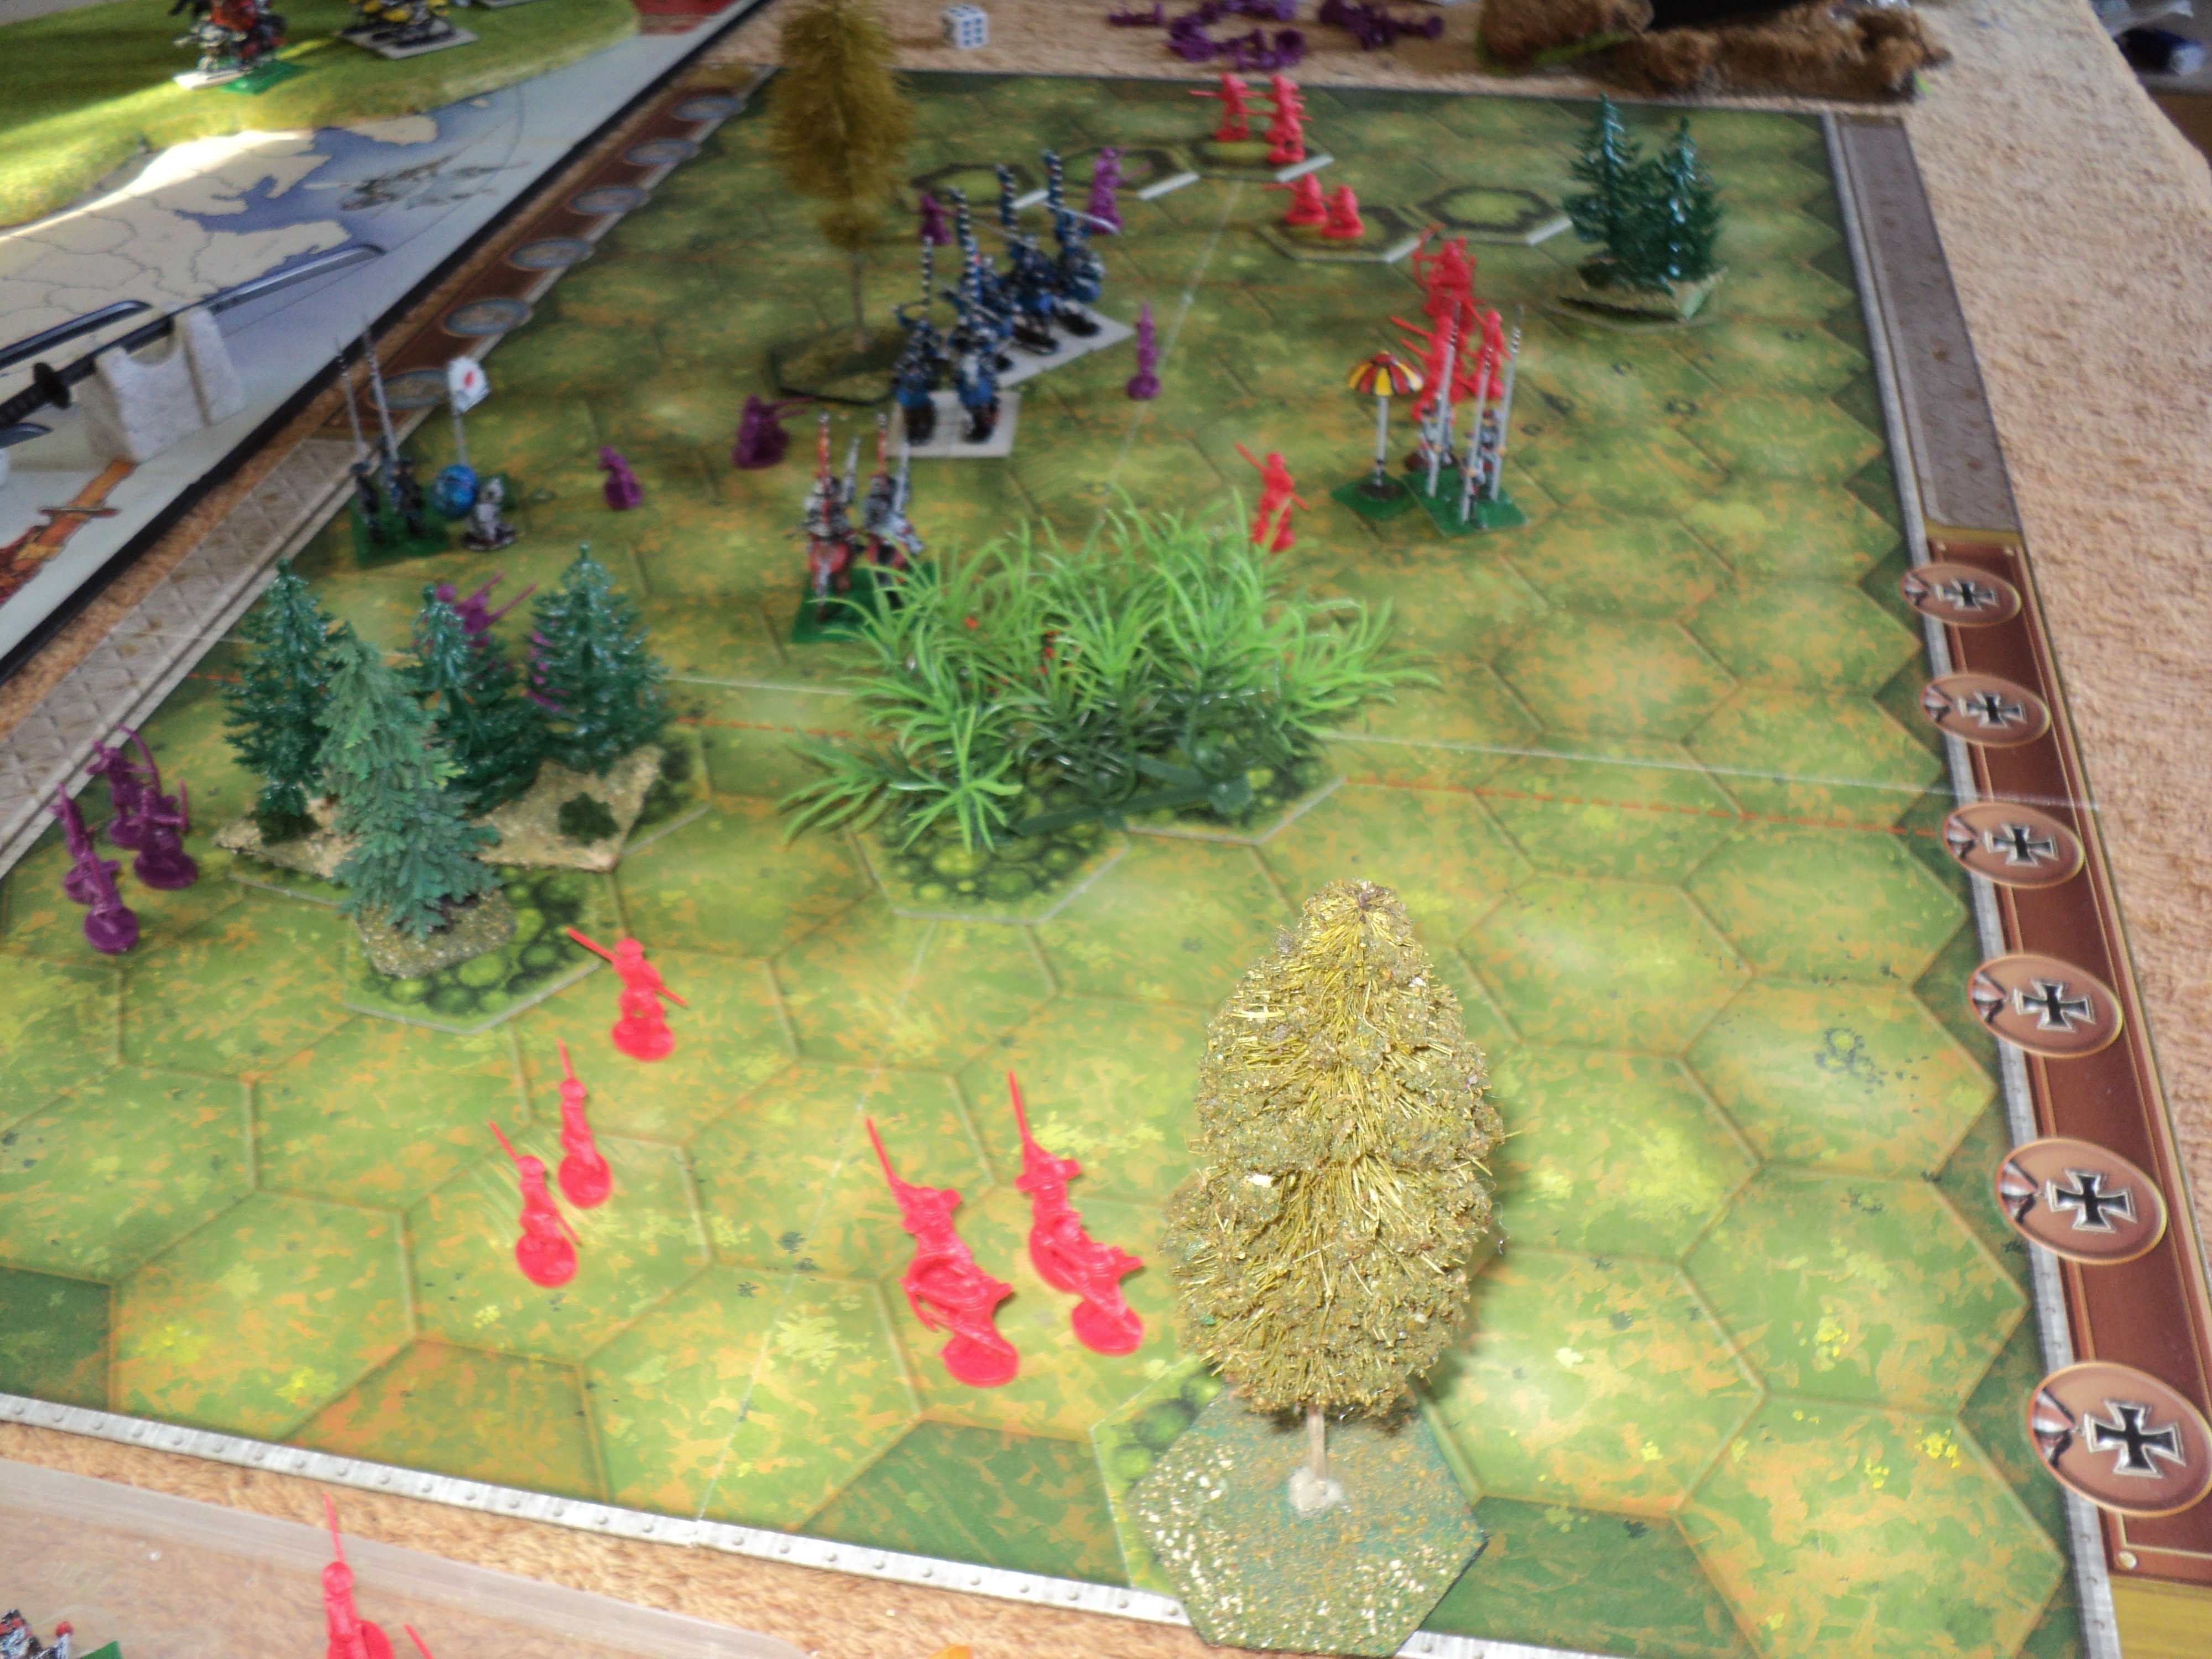

General view
Henceforth, Nobuhide tended to focus on his left flank, where he had a superiority of force, even when his ashigaru tepo unit there was destroyed. Whenever the Red activation rolls exceeded 3, he set things in motion on the opposite flank, a unit of ashiguru yari marching along the 'long ridge' to outflank the Purple line. The opportunity for a cavalry charge against an isolated unit of arquebusiers was, of course, not lightly to be passed up.  

Big melee in the centre

For 'his' part, Yoshimoto seemed more interested in smashing through Nobuhide's centre, aiming for the latter's HQ pavilion. A considerable battle developed in that sector, which gradually sucked in the cavalry of both sides. Although the Purples got rather the better of the cavalry fight (Reds lost 2SPs to 0) overall honours remained fairly even. Yoshimoto's army never even got close to Nobuhide's pavilion.

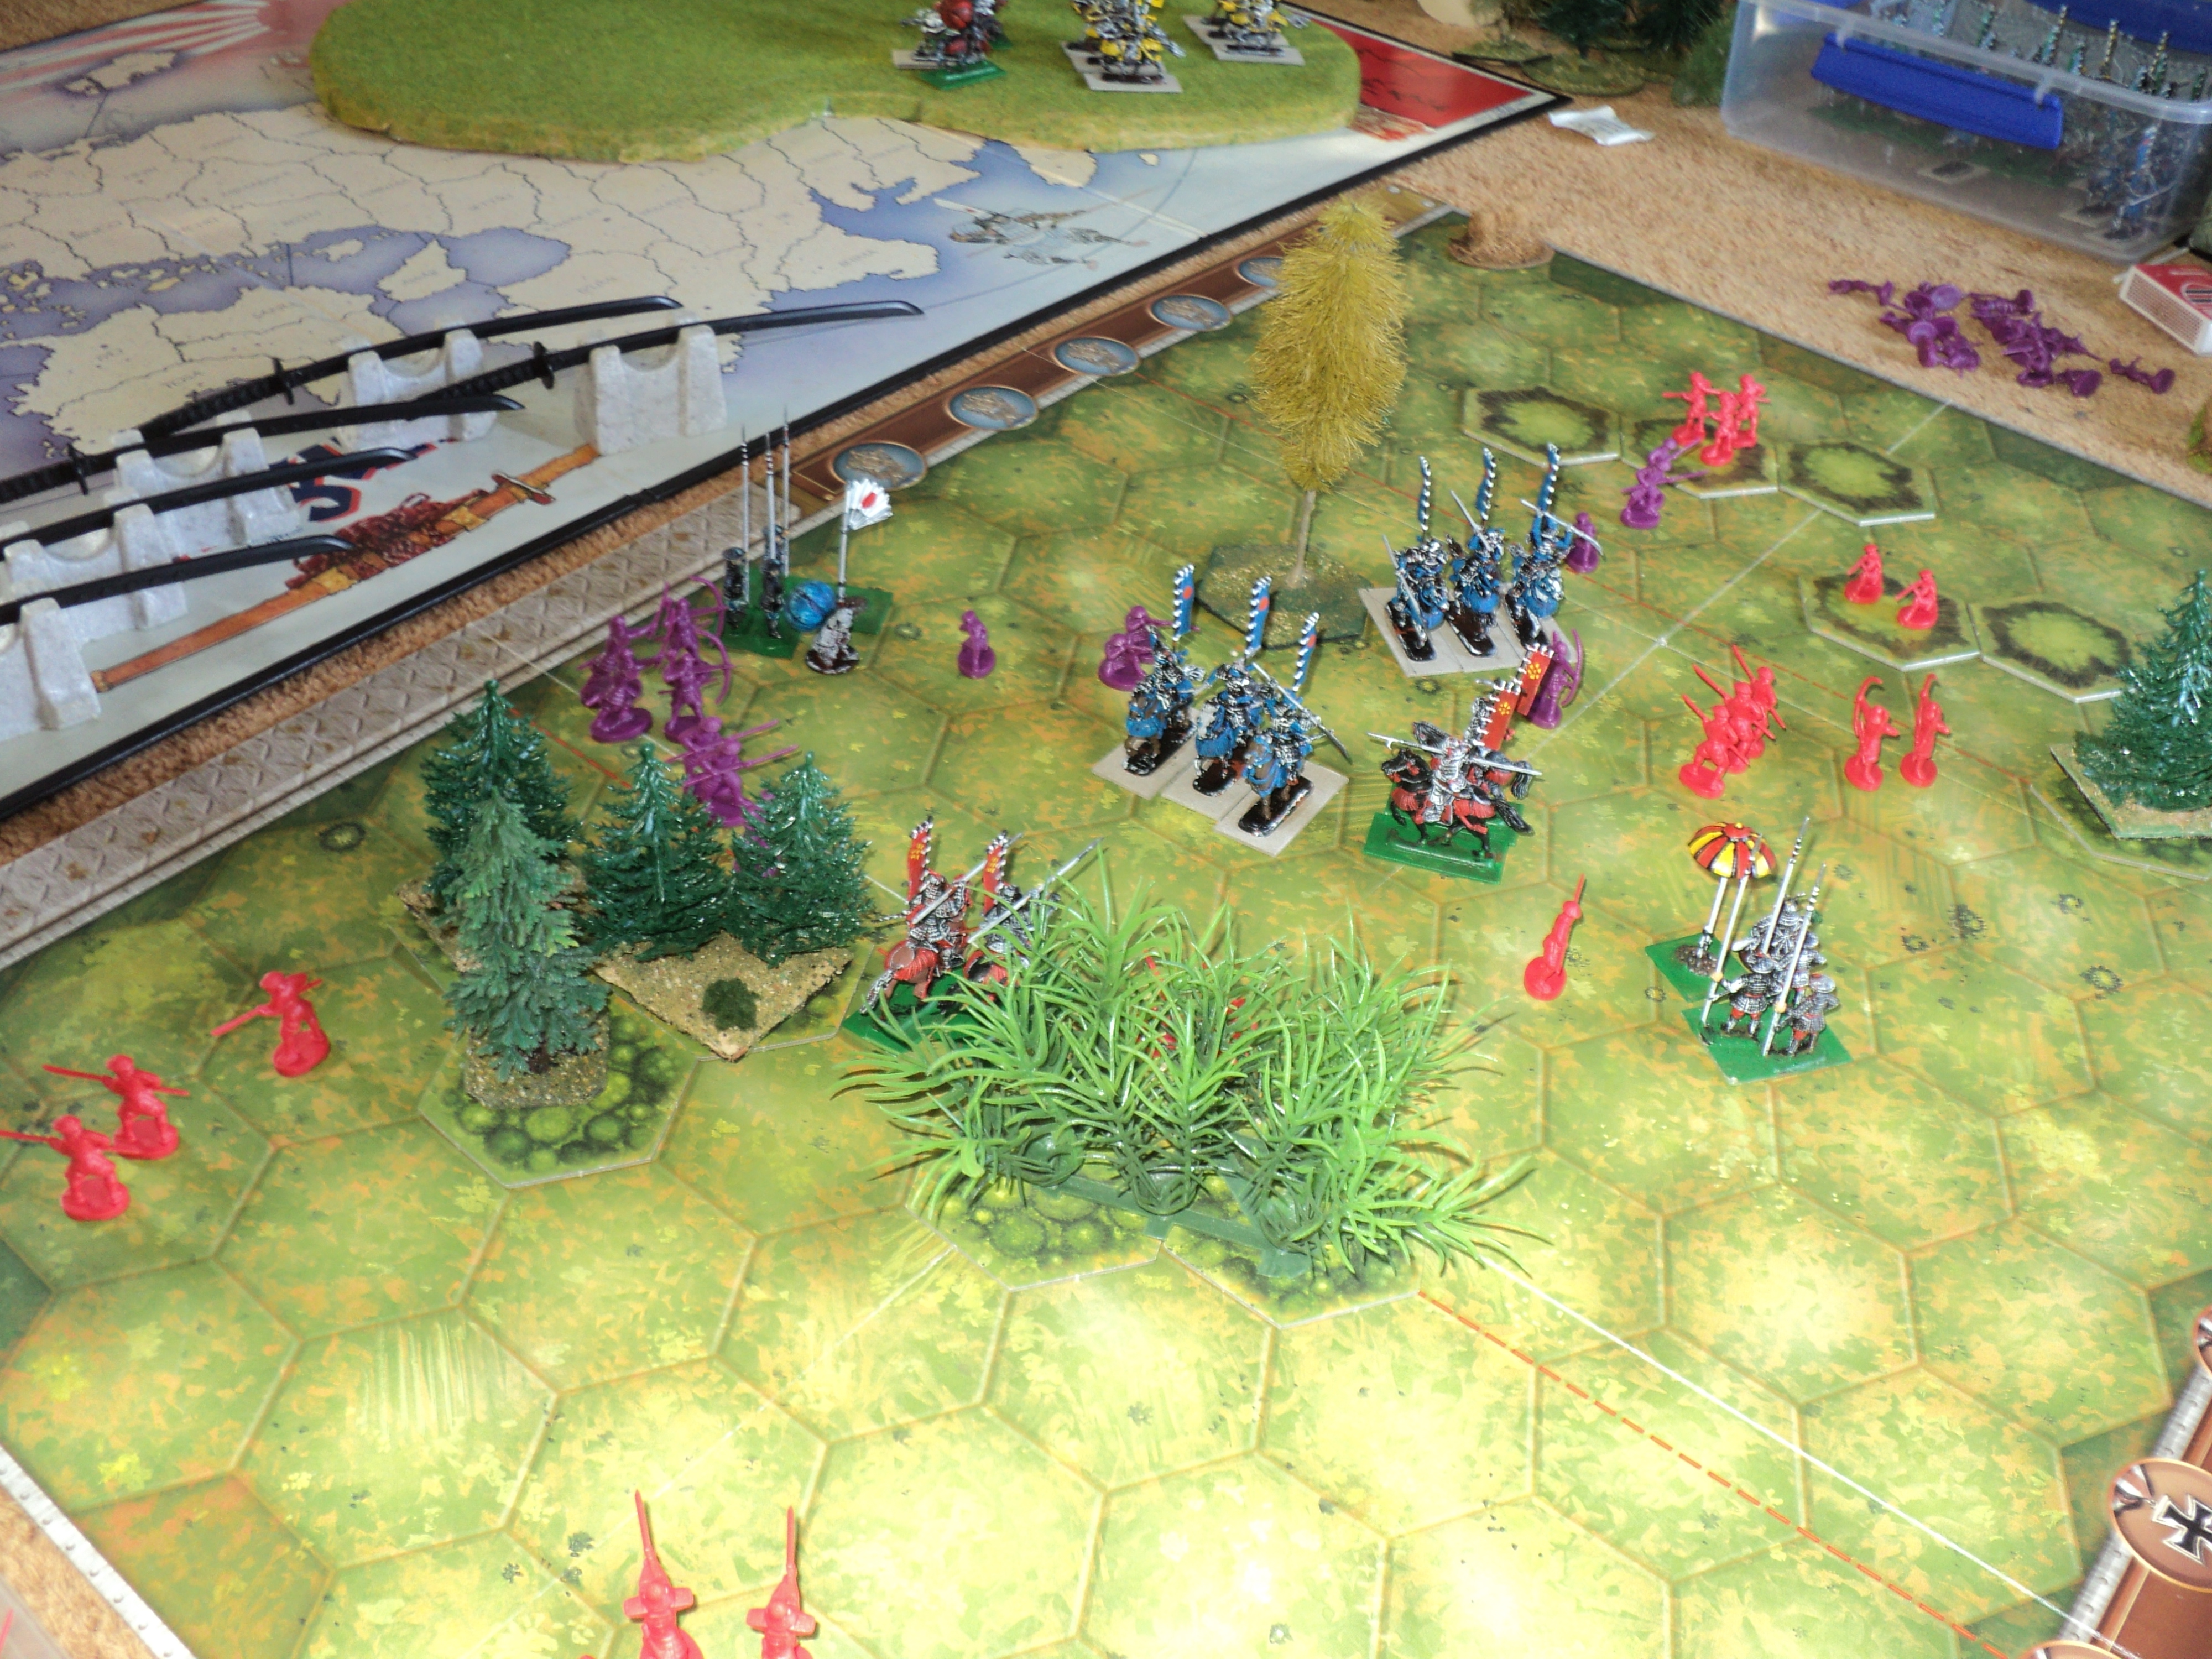
Red crushes the Purple right wing.

The Red's push on the left yielded dividends, the entire Purple wing being pushed back, shedding dead and wounded all the way, until driven altogether from the field (the 3 units there, 8SPs, were completely destroyed). This success came at some cost, of course. Along with the 2SPs of the arquebusiers, the Reds lost 3SP from the ashigaru yari as well. The intervention by a unit of Yoshimoto's foot samurai was too late to turn the battle.
Mutual exhaustion, losses nearly equal.

The loss of three units of course brought the Purple Army's activation dice down to two, with consequent difficulty in putting any weight into its manoeuvres and attacks. This advantage the Red army sought to make good with attacks in the centre. The attempted flank attack by one of the cavalry units against mounted enemies led to disaster. Although causing an SP loss to Purple, the Red horsemen took 2SP loss in the subsequent fight, destroying the unit. This was enough to bring the Red activation dice down to two.

By this time, the Purple army had been reduced by losses to below its exhaustion point. In trying to hustle the enemy from the field, the Red army also fell below its exhaustion point (13SP lost). The battle sputtered to a close, the outcome indecisive.

* * *

It felt to me frustratingly difficult to get much action going in this battle. At no time was even as much as half the army able to move, shoot or engage in close combat. But why am I complaining? Am I complaining? I'm not sure! That is the way Memoir '44 often plays, and I have no problem with that!

I still like my addition of sub-generals, though, to Antoine Bourguilleau's activation procedure. In addition to the overall Army commander, one might be allowed 1 sub-general for every whole multiple of 6 units in the army. The number of activation dice is equal to
  • 1 for every whole multiple of 6 units (another way of expressing the 'book' method);
  • +1 for the Army commander;
  • +1 for every sub-general.
In the previous battle, the Red army had 18 units.  It was allowed 1 army commander, plus 18/6 = 3 sub-commanders.  So the number of activation dice was 3+1+3 = 7, the scores being halved for unit activation.

What would be the statistical expectation of the number of units of this army activated in any given turn?  The expected score with 7 dice is 24.5.  Then the expected activation is half that, that is to say 12 units - two-thirds of the army.  Note that, the moment this army lost a unit, its activation dice gets reduced to 6 - the expected unit activations reduced to 10 or 11. The activation dice go as much for command and control as for the size of the army. I should mention that, as in my suggested scheme of things a general lives and dies with his unit, the loss of a general implies an immediate loss of an activation die, and the loss of the unit as well might imply the loss of yet another activation die.

For mine, what appeals is that you get enough uncertainty to satisfy that criterion for solo games.  In fact you get quite a spread of possibilities.  It is possible, however remotely, that in a given turn the whole army might be activated; but also possible that you might get to move just 3 or 4 units.  You can develop large scale attacks and manoeuvres, but there is always a chance that a poor activation roll will bring it all to nought. 

This notion will come in for more play tests in due course.  


Tuesday, August 9, 2022

Sengoku Wars - Battle of Mikatagahara (2)

Both armies on the start lines - Takeda (Red)  in 
'fish scale' formation.


Heavily outnumbered as his army was, Tokugawa Ieyasu elected to get in his attack first, a course of action that his adversary, Takeda Shingen, not only welcomed, but had by his formation sought to encourage. That is to say, instead of rolling for the initiative in the first turn, Tokugawa (ORANGE) went first. Thereafter, for each turn a die was rolled for each army, and the high score went first.  If it could be said that the first mover in each turn held the initiative, one might argue that Ieyasu never lost it. However, in the end, numbers told. 
Tokugawa Ieyasu's early attacks gain ground
All the same, the early exchanges went well and truly in favour of the Tokugawa army, with fearful execution amongst Takeda's ashigaru tepo. The Orange right wing commander, Sadai Todakatsu, waded into the Red left wing, and even broke through the first line. The battle quickly became genral all along the line.  With 13 units and 3 generals, Orange got 5 activation dice, and was rolling high even at that - 11 (eleven!) units being activated for the first turn.  In response, with 7 activation dice, Red barely matched those numbers, this out of 18 units.

Takeda's horse counter-attacks seal off the centre

The Orange army did well for the whole day, but the Reds were soon counterattacking strongly as their extra numbers of activation dice started to tell. Two of the Red tactical units charged into the gap widening in the centre, and Sadai Todakatsu found himself under heavy attack by several samurai units, two commanded by Takeda's generals. Practically surrounded, Sadai expired with his trapped command. Whenever a unit with a general in command took a hit, I didn't attempt to transfer this to the general - but rather took it that the general shared his fate with the unit as a whole. This seemed to me a simple method. The result, of course, meant an immediate reduction in activation dice. The loss of the general took one off, and the loss of a unit might well bring the number down one more. Three activation dice only!
Takeda strongly counter-attacks Tokugawa's right
Of course, the Reds were having to undergo similar hazards. An early loss of an Ashigaru arquebusier unit lost them at once an activation die (number of units reduced from 18  to 17), and the loss in the midst of seesaw fighting on the Orange right of the Takeda adherent, Naito Masutoyo, brought the dice down to 5.  

Tokugawa's lines being edged back...
In the early fighting, Tokugawa's army established a lead over Takeda in strength points destroyed, a margin that was never really narrowed, let alone closed. Even so, the Orange army reached its exhaustion point soon enough, and began to break off the action. in an attempt to bring Tokugawa to the point of routing, Takeda possibly overpressed his advantage. Though crumbling, the Orange line continued to take out SPs until finally Takeda forebore further assaults.  
... and begins to crumble
Even the outstanding activation roll (see picture) was not enough to tip Tokugawa's men over the edge into a panic rout. Not even close. The attempts to cut off  Tokugawa's left wing samurai unit were twice frustrated.
Attempt to cut off Tokugawa's left wing fails 
(but look at that activation score: 22/2=11 units can 
do something!)

Even so, this was an undoubted victory for Takeda Shingen, even though he lost 18SPs against 14. Tokugawa's quick early attack was quickly held, and then his army was gradually edged back with increasing rapidity until he was persuaded to break off the action.

Having reached their own exhaustion point,
Takeda's army calls of the pursuit.
On the whole, I was reasonably pleased with my modification  - extra dice for extra generals - of the  original system of unit activation. Actually, it probably isn't even a modification - the original rules don't actually prescribe a single command figure for a given army. OK, then, how many generals?  I'm thinking that in addition to the overall army commander, a sub-commander might be added for every whole multiple of 6 units in the army. With 18 units, Takeda got 3 sub-commanders; with 13, Tokugawa Ieyasu got 2.  

Next time.  A battle with just one commander each.

Sunday, August 7, 2022

Sengoku Wars - Battle of Mikata-Ga-Hara


Set up for Battle of Mikatagahara.  The flagged units are those 
commanded directly by generals.  The parasol is where 
Takeda Shingen has set up his pavilion.
Diagram of battle set-up.  The 'fish-scale'
formation may be just discernable...

Lacking much in the way of motivation, lately, I thought I'd try something fairly easy to set up - another Sengoku action.  The previous one was related here:

This action was based upon the 1572 battle of Mikatagahara, between the two redoubtable foes Takeda Shingen and Tokugawa Ieyasu.

After having neutralized, by securing alliances with, his rivals to the east, and awaiting the snows to close off the mountain passes to his great northern enemy, Uesugi Kenshin, the formidable Takeda Shingen led a 30,000-strong army south from his own capital, Kofu, into Totomi province from whence he aimed to march on Kyoto. His advance was to be opposed by the local warlord, Tokugawa Ieyasu. Heavily outnumbered as his own army was, Ieyasu overrode the advices offered him by representatives from his ally, Oda Nobunaga, as well as some of his own retainers, and chose to oppose Takeda's passage through his territories. For his part, Takeda actually hoped to avoid any direct clash with Ieyasu. That hope was to be denied him.

Encountering Ieyasu's army at Mikatagahara, a high plain in Totomi, Takeda drew up his army in a 'fish scale' formation - one that combined the virtues of defensibility and aggression - in the hope of inducing his outnumbered adversary to attack. In this, Takeda got his wish.


As can be seen from the pictures, this action was set up on my Memoir '44 game board, using Shogun game pieces, and Zvezda figures. A few trees representing small woodland areas added to the 3D look of the thing.  Those Shogun game pieces are really very nice figures in their own right.

I adapted the game set-up from the Zvezda Art of Tactic Samurai Warriors scenario. The SW game board as slightly narrower along the battle front but deeper by a couple of grid rows.  The game was played under the Antoine Bourguilleau 'Sengoku' rule set found in the Portable Pike & Shot Wargame book.  


Command and control:

Planning to play test an idea about command and control, I did not use the 'Heroes' or 'Co-located Generals' rules. The generals being fixed to particular units, they survived, or otherwise, with their units. That is to say, if their unit was wiped out, the general went with it. This was to have certain implications in respect of command and control.

Although M. Bourguilleau's army lists included just one general (army commander), it seemed to me that the rule set offered room for more than one. I have also been concerned that his method of unit activation would lead to rather 'piecemeal' sorts of battles: in general, less than half the army doing anything. This concern I found particularly acute given that close combat is not - and can not be - mandatory between enemies in adjacent grid areas. Now, it is possible, of course, that battles of the Sengoku wars tended to develop the way the rule set seemed to me to indicate.

At any rate, methought this could be mitigated by having several commanders. I notice in reading accounts of the Sengoku wars that they are replete with personalities, including sub-commanding retainers or allies of some central figure such as Takeda Shingen and Uesugi Kenshin. The Samurai Warriors scenario having so many commanders, I reduced these to four on the Takeda side, and three on the Ieyasu. The units directly under their command may be seen in the leading picture and the hex-map.
Early attacks by Ieyasu's army


There was one other idea I had in mind: a special Army Commander's unit.  We'll come back to this.

Recap of unit activation:

Following artillery fire (there being none in this game), both sides roll a die for initiative. In this battle I had Ieyasu's army (Orange) lead off, as they opened the ball by attacking.  Subsequently the sides both rolled, high roll going first.  As it happened - Ieyasu 'won' every such roll in this action!

Then whose move it was went through the following procedure to determine how many units could be activated.  Let's go through Ieyasu's first turn by way of example.

1.  Ieyasu's army comprised 13 units (I'll draw up the lists later on).  This number is divided by 6, the quotient truncated, to yield a base line of 2 x D6 to be rolled.

2. A further D6 is added for an 'extant' general.  There being 3 such worthies at the outset, we now have 5xD6 to be rolled.

3.  I rolled these 5, the total to be divided by 2 and, again, the quotient truncated to a whole number.

4. The count is, of course, repeated turn by turn, so, as losses of units and generals mount, the fewer will be the dice activated.  This got quite noticeable as the battle ran its course.
Ieyasu's quick strike did some execution among 
Takeda's hand gunners - one such unit being 
destroyed early on...


It so happened that Ieyasu rolled huge in its first turn 5 dice, something like 6,5,4,4,4 - a total of 23. Divide by 2 to get 11. Eleven units moved out of thirteen! The army made good use of that, got tore in, and did a fair amount of damage. Out of 18 units (18/6 +4 generals - 7D6), from memory Takeda's army activated 10 or 11 in its own turn - slightly below average, as we will see.  

It is not a bad idea to work out what might have been the expected  mean activation scores for the two armies in their first turn:

Ieyasu: 5D6/2 = ((7/2)x5)/2 = 35/4 => 8 units out of 13.
Takeda: 7D6/2 = ((7/2)x7)/2 = 49/4 => 12 units out of 18.
It seemed to me that activating two-thirds of the army in a given move meant you could do a fairish bit, whilst retaining a level of uncertainty desirable for solo war games.

Late in the action, with Ieyasu hard pressed (having lost a general and several units, and reached his 'exhaustion point'), his army rolled a 9, and was able to activate just 4 units. Not a great roll when trying to break off an action!

(By way of comparison, suppose Ieyasu had only the 'per book' 3D6 to roll, and rolled 6,5,4 a total of 15.  That would have reduced to 7 units activated out of 13 - a little over half the army.  I think I like having the extra generals!)


Army Lists for the Battle of Mikatagahara:

Red Army:
6 Foot Samurai units @ 4SP (Elite) = 24SP
3 Ashigaru Tepo units @ 2SP (Average) = 6SP
5 Ashigaru Yari units @ 3SP (Average) = 15SP
3 Mounted Samurai units @ 3SP (Average) = 9SP
1 Commander's Pavilion (Takeda Shingen) and bodyguard unit @ 4SP (Elite) = 4SP*
3 Sub-generals, each attached to a foot samurai unit.

Totals:
18 units, 58 strength points
Exhaustion Point -20SP, Rout Point -29SP

The commander's pavilion (or 'tent') was the 'special unit' I had in mind. I see this as a static unit that can fight, but does not move.  It still adds, however, to the number of units counted for activation purposes.
Takeda Shingen in his 'pavilion' (the parasol)
overseeing a mounted counter-attack. I'm thinking 
Of making a special pavilion stand - the Zvezda 
model being far too large for this board.


Orange Army:

4 Foot Samurai units @ 4SP (Elite) = 16SP
3 Ashigaru Tepo units @ 2SP (Average) = 6SP
4 Ashigaru Yari units @ 3SP (Average) = 12SP
2 Mounted Samurai units @ 3SP (Average) = 6SP
1 Commander (Tokugawa Ieyasu) with foot samurai unit.
2 subgenerals, each attached to a foot samurai unit.

Totals: 
13 units, 40 strength points
Exhaustion point -14SP, Rout Point -20SP  


Losses: 8 Red and 5 Orange (each representing a SP)
 - but the latter much heavier among the samurai.