|
| Arrival of lead elements of the Commonwealth Army. |
Dawn, 26 July 1725, broke fine and sunny, though still damp from the previous evening's showers. As the Commonwealth Army, led by the Duke of Norfolk lurched into motion along the Broad Street road towards London, the head of the column had to pass through the gap between the Telford's Tavern forest to the left and the marshy banked Pincey Brook to the right. There, less than a mile to the south, the leading cavalry scouts could descry Royalist horse, foot and guns, arrayed as for battle.
 |
| Map of the Battlefield, showing opening moves |
It was from the point between forest and stream, that the road branched, Broad Street itself veering slightly to the the right to pass by Greenhill Woods and Farm, through the hamlet itself, and on south. A side-road cut sharply towards the east, through the woods past Telford's Tavern, then south again through Aldbury village, whence, two or three miles further on, this road rejoined Broad Street. A lateral east-west road linked Aldbury with Broad Street, just south of Greenhill. It was along this line that Major-General Preston had drawn up his army to contest the Commonwealth advance.
 |
| General view of the battlefield looking westward. |
The Royalists' broad plan was to hold the Greenhill and Aldbury places in some strength, in order to channel the Commonwealth advance into a sack and killing zone in the open centre. Accordingly, the Royalist Cavalry was drawn up in the centre, supported by the artillery and but one regiment of foot - the 93rd - drawn from the Gloucester Brigade (5th). The rest of the Gloucester Brigade was deployed in and around Aldbury, whilst the Midlands (6th) Brigade garrisoned Greenhill Village, with 36th Foot holding the orchard adjoining the north side of Greenhill Farm.
 |
| Two Royalist foot battalions encounter CW dragoons. |
Norfolk's quick survey of what confronted his army quickly decided him that he ought as quickly as possible seize, take or carry the flanking strongpoints of Aldbury and Greenhill, to unhinge the Royalist line, whilst pounding the centre with artillery. Then, with his cavalry and reserve foot brigade, smash through the centre. Such a plan seemed to offer promising results.

For his part discontented with merely awaiting the enemy assault, General Preston gave orders for his Aldbury units to counter-attack early - to meet the enemy advance. The terrain around Greenhill less conducive to such an effort, he dispatched 3rd Dragoon Regiment far to the left, to cover that flank, or perhaps even to fall upon the enemy right, if the opportunity presented. The centre could wait, though Preston kept an eye to possible cavalry charges if and when chances arose.
The first actions developed on the east flank, when the dragoons leading Sir Horace Malvoisin's (2nd) Brigade encountered two Royalist foot regiments coming the other way, just beyond the stretch where the Aldbury road passed by some enclosed fields. A brisk and bloody action there ensued, in which 11th Foot took very heavy losses (2SP) and were driven back, 10th Foot came off lightly (no loss), and the dragoons were also driven back with loss (1SP).
 |
11th Royalist foot take heavy casualties, but the
Dragoons are driven off. |
The clash to the east was soon followed by an all-cavalry fight on the west flank, beside Greenhill Farm. The Royalist 3rd Dragoon almost overwhelmed the Duke of Norfolk's Own Light Dragoons (2SP), but, though taking minimal hurt themselves, fell back beyond the farm. For their part, though badly mauled, Norfolk's Own presented a bold front to the enemy, determined to protect the flank of the infantry assault that was soon to come against the Farm garrison.
Perhaps here was an opportunity missed for the farm garrison to come out and drive off the Commonwealth light horse once and for all, but the rapidly approaching enemy foot might well have caught the Royalists in the open, thrown them back through the farm and beyond, and thereby unhinging at least one of the Royalist flanks.
 |
| Royalist Dragoons vs CW Light Horse. |
The preliminary clashes on the flanks being inconclusive - though perhaps slightly to Royalist advantage, General Preston ordered a quick blow to be struck against the somewhat tentative Commonwealth advances in the centre. A telling salvo already having caused disruption to the leading Commonwealth cavalry here, it seemed only right to complete their discomfiture. Forward went 2nd Royal Dragoons, only to be forced back in a brief, indeterminate encounter. It was true, however, that the enemy horse also deemed it prudent to fall back behind the heavy guns.
 |
Royalist Light Dragoons strike at a Commonwealth
Heavy cavalry unit already depleted by gunfire. |
Between the enclosures and the mere flanking the Aldbury road, 11th Battalion had been forced back into the hamlet. but the 10th, soon to be assisted by the 33rd, stood to contest the approach of Malvoisin's Brigade. The lead Commonwealth battalions, 12th and 13th Battalions, soon halted to face the 10th, hard by the mere; but the 13th had also to contend with the 33rd, which had entered the enclosures flanking the road.
 |
| Battle of the Enclosures - Royalist delaying action. |
The 10th soon fell back, though casualties were light (no SPs, just a 'force-back' option), as their counter-attack had been intended merely to delay. On the other hand, between them the 10th and 33rd inflicted considerable damage to the Commonwealth infantry (3SP altogether). The 10th's withdrawal, however, rather left the 33rd in the lurch, though that unit at least enjoyed some protection from the hedgerows and walls of the enclosed fields.
 |
| General view. |
It was not long before the 33rd had to endure the whole weight of Malvoisin's Brigade attacking from the north and east. The 13th (CW) battalion pushed down the road before swinging to attack the enclosures, whilst the 12th wheeled behind them and joined the attack to their right. The next battalion, the 94th, pressed into the enclosures from the north. The Royalists caused some loss to the 12th and 13th both (1 SP each) but themselves took damage (1 SP and a 'force-back' option).
 |
| The trials of 33rd Foot. |
Falling back from the enclosures, they ran into the 12th Light Infantry (CW) advancing between tracts of woodland. Hurrying forward, the lights hit the Royalist left rear, whereat a fierce combat ensued. Hit in flank, the Royalist combat dice was reduced from three to two; the Commonwealth correspondingly increased from three to four. Both sides scored 1 hit, the Royalists added a 'forceback' option; the light infantry two 'forceback' options. Both sides took the options instead of the hits. The light infantry fell back into the woods to their rear; the 33rd Foot, drew back alongside the supporting 9-pounder battery.
 |
| Further trials of 33rd Foot. |
As the combat raged about the enclosures, the Commonwealth dragoons charged the Royalist 10th, still in the open, its withdrawal not having taken it as far back as the Aldbury village. Bayonet met sword in a brief, though vicious little scrimmage, in which the dragoon were hit and thrown back, but not before they had laid low nearly half the infantry (1SP lost plus force back on the Horse; 2SP lost to 10th Battalion).
 |
Royalist Foot vs Commonwealth Horse. The Foot drive
off the cavalry - but at a high cost. |
 |
| View from behind Malvoisin's Bde |
With the retreat of the dragoons, something of a lull descended upon the eastern third of the battlefield. The depleted battalions of Macclefield's Brigade (the 93rd had remained in the centre) formed a line about Aldbury, all three battalions somewhat battered (reduced from 4 to 2 SP each). But the Commonwealth had not got off unscathed, Malvoisin's Brigade (6SP) and the dragoons (1SP) equally knocked about.
 |
| General view late morning. |
Meanwhile, how were fortunes shaping elsewhere on the field? The Brigade of Mugglesworth (6th) had at last got into action against the Greenhill Farm garrison (36th Royalist); 35th Foot and 14th Light leading the assault. Norfolk's battered Light Horse gallantly sustained the flank of the assault, and even saw off (though with no significant loss) an attempted intervention by Royalist dragoons (3rd). It was no easy matter to assault an enclosed orchard, even at odds approaching two to one. The desperate defenders clung on despite heavy losses (2SP), and even gave better than they got (2SP on the Lights, 1SP on the Foot). Even so, at that rate of attrition, surely the farm could not much longer be held.
 |
| Greenhill Farm under attack. |
With the Commonwealth attention focused upon clearing the flanks of the Royalist position, little enough was happening in the centre. Some desultory artillery shooting proved by and large ineffective at the longish ranges, and Norfolk himself was too busy directing operations to order up the other half of his artillery and Warwick's Brigade, waiting close by (off the table, but ready to hand).
 |
A rather vacant looking Commonwealth centre - but
Warwick's brigade, heavy cavalry and two batteries
are immediately to hand off table. |
For their part, the Royalist command was still anxiously awaiting the arrival of their militia reinforcements. So far, their troops had acquitted themselves well, and given rather better than they had received (it was shortly after this point I counted 10 Royalist SP lost against 16 Commonwealth). But the difference was only to be expected in the early stages of an assault. Once the Commonwealth began to achieve the ascendancy, then the Royalists could count upon a bloody requital.
 |
| Royalist Horse showing a bold front. |
Though the situation had quieted down along the Aldbury road, the 36th Foot anticipated with apprehension the renewed attack by five times their number of adversaries. The dragoons were helping to keep some of the enemy foot at bay, but even so, once the Farm was lost, Greenhill village would probably fall soon afterwards, and the Royalist defence line rolled up from the left.
 |
| View from the Royalist left. |
The combat along the Aldbury road was not yet finished. After forcing the Royalists out of the enclosures, 13th Foot found itself practically enfiladed within grapeshot range of the Royalist cannon close by the village. The shooting was devastatingly effective: the remaining strength drained from the battalion as it fled down the road (I see I actually removed the unit from the board, though I ought not to have done. It would have been reduced to 0SP, forced to retreat 2 grid areas, and been out of the battle for the duration. I am also under the apprehension that the artillery ranges might be too generous - OK for the heavies, maybe, but this was a battery of mediums).
 |
Very effective gunfire. the SP dice has been knocked, but
it is easy to infer the unit has 2 SP remaining... Well,
it did have... |
 |
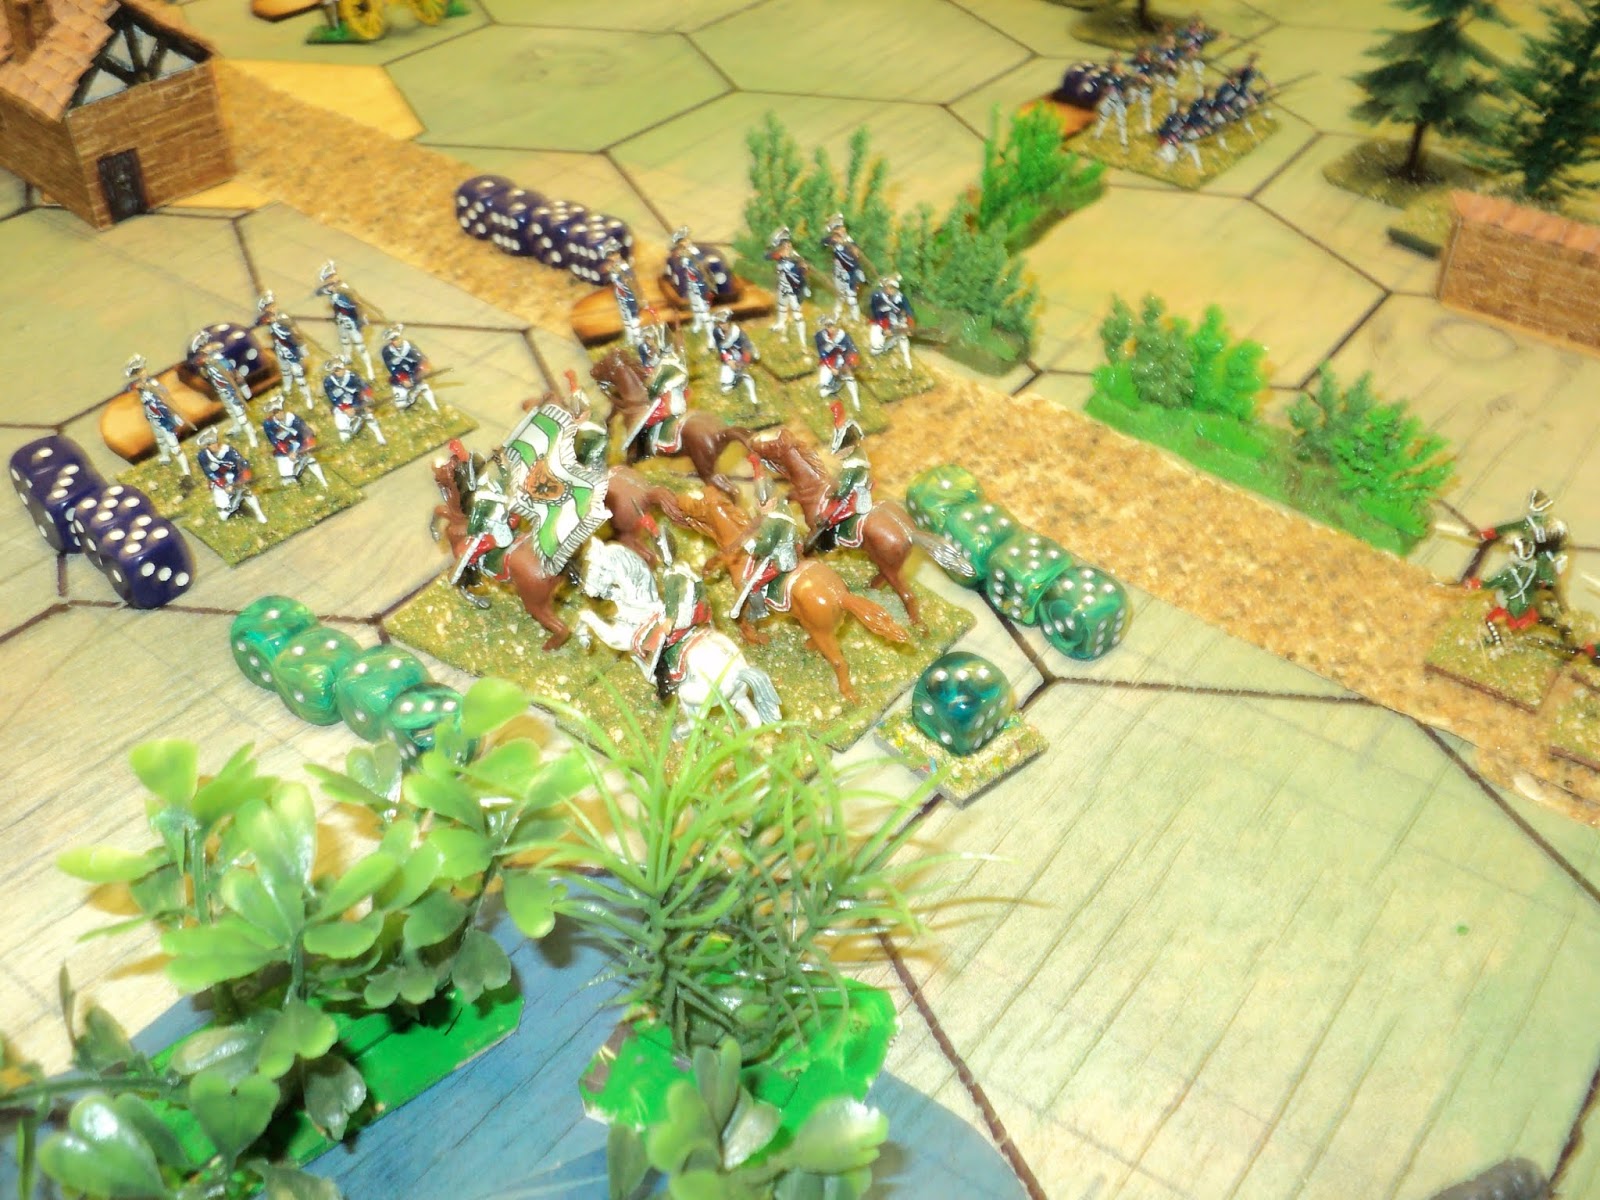
| Royalist Cuirassiers in action. |
With little going on for the moment in the centre, the Royalist command thought to initiate some action of their own in this sector. The 'Blues' carabiniers - elite horsemen who clung to their old-fashioned cuirasses and leather jerkins - thundered forward to strike at the nearest mounted adversaries. The melee, though brief, redounded to the glory of the Royalist horse: flinging the enemy back with loss. But they were glad enough rapidly to pull back out of the short range of the Commonwealth heavy cannon.
 |
| When heavy cavalry clashes. The Royalists get the better of this one. |

As the carabiniers asserted the ascendancy over the opposing horse, the 2nd Dragoon Regiment boldly charged the medium battery, which had been pushed rather in advance of the heavies, and had no immediate protection. In this, the Horse were taking only a slight risk, as the range allowed the cannon to double the combat dice (from 2 to 4) the odds were equal of the one scoring a telling hit upon the other. The consequences of a 'force-back' on the cavalry was matched by the higher proportionate harm a hit would have on the guns.
 |
Dragoons charging the guns: high risk, but they get away
with it! |
As it was, the Dragoons 'got lucky.' Their charge rode down part of the battery at once, and the intervention of the 12th Light Infantry was too late to prevent the whole remainder of the battery to be put to the sword. The dragoons lost hardly a man. It was fortunate that the dragoons scored such a quick victory, for in the distance they see the Commonwealth reserves beginning their advance in the centre.
The Dragoons overrun the battery,
just before the 12th Light intervenes...
During all this time, that the attacks upon Greenhill Farm continued. The 3rd Dragoons nerved themselves once more to charge the Norfolk Light Horse - and this time flung them back, through their foot and well to the rear. The Commonwealth foot had now to concern themselves about their right flank. The assault on the farm had suddenly, it seemed, become a rather more difficult undertaking.
 |
| The Battle for Greenhill Farm rages on... |
Sure enough, the lead battalions of Mugglesworth's brigade suffered a repulse. Fourteenth Light were scattered to the four winds, and 35th Foot were glad to drop back behind the second line and call it a day. For all that, only an exiguous garrison remained (1SP left) to defy whatever the Commonwealth might bring against them.
 |
| The first attacks are repulsed from Greenhill Farm. |
The active Royalist defence had earned them a respite, all along the line, their front undented. To be sure, the Aldbury road enclosures had been lost, but their occupation had been by way of an action to delay the main assault against Aldbury village itself. Losses among the Royalist foot so far engaged had been grievous enough, but they had inflicted worse hurt upon their enemy.
 |
| General view - a pause on the Commonwealth left. |
The battle came to a pause as Norfolk brought up his reserves. The attacks upon the flanking strongpoints were to be resumed, whilst the heavy cavalry and Warwick's foot advanced in the centre. There was still a very good chance to smash this stubborn Royalist army.
 |
| Malvoisin's Brigade resumes its advance... |
The Royalists were not yet driven into passive defence. Third Dragoons needed no persuasion to fall upon the flank of 39th Foot. This was not to be the Dragoons' finest hour: coolly meeting the charge, with Sir Herbert himself on hand, the infantry sent the Royalist horse to the right-about, and back beyond the farm they went.
 |
Royalist dragoons unsuccessfully charge the
Commonwealth flank. |
 |
| Warwick's advance |
 |
| A lull in the action. |
Now began a general Commonwealth advance, all along the line.Dense masses of foot and horse, guns among them, filled the space between Telford's Wood and Pincey Brook. The flanking assaults about the be resumed, prospects might have looked bleak enough for the Royalists, but for the arrival, betimes, of the long and anxiously awaited Militia Brigade. General Preston formed three of the battalions into a line defending the hedgerows along the lateral Greenhill-Aldbury road, whilst two others were detailed to sustain the defences around Greenhill Village. Were the farm to be lost, they might yet recover it. Meanwhile, 93rd Foot was to be returned to Macclesfield's Brigade to bolster the Aldbury defences. Macclesfield had more than mere defence in mind.
 |
| The Royalist Militia arrives. Will they be needed? |
Soon the Commonwealth opened a furious attack upon Greenhill Farm - three fresh battalions against the remnants of the Royalist garrison. Such an unequal combat could have but one result, and at last Greenhill farm fell into Commonwealth possession.
 |
General cavalry advance by Commonwealth Horse,
led by the Duke of Norfolk himself. |
Somewhat impatiently, Norfolk allowed a gap to appear between the leading cavalry and Warwick's Brigade in the centre. This allowed the Royalist cavalry to sally forth, strike heavy blows, driving one regiment completely from the field at trifling loss to themselves. (
Unfortunately I missed snapping that melee, the following and the final picture effective providing a distant 'before' and 'after' distant impression of the clash).
 |
General view. In the distance the CW cavalry are pushing
forward. |
The final act of the day was the intervention of the hitherto unengaged 93rd Foot, which launched a savage counterattack against Malvoisin's brigade. The centre battalion, the already weakened 12th, somewhat in advance of its flanking fellows (a bit of a mistake, that, on my part), the Royalists struck them before the others could intervene. The Commonwealth 12th infantry sure died hard, inflicting heavy losses to the enemy, before themselves breaking and falling back. (The following picture shows the blood-letting: Royalists 3SP and a forceback - overkill against a unit already down to 1SP! - Commonwealth: 2 SP and a forceback). It was a somewhat depleted 93rd Battalion that fell back to the Brigade line.
 |
| Terrible firefight between 93rd (Royalist) and 12th (CW). |
That seemed to be the signal for the Commonwealth Army to call off its attacks. The Army had reached the end of its tether, its losses too heavy, and the arrival of the Royalist Militia too opportune, to offer much hope to break through to London. The Royalists had won a signal victory!
 |
General view. CW cavalry defeated in the centre. Capture
of Greenhill Farm is all the CW achieved. |
I could not have foreseen this result, though in hindsight, the Royalists were luckier overall in their combat dice. The loss of 29 Strength Points (29SP - 20 Foot, 7 Horse, 2 Guns) the Commonwealth Army had reached its 'exhaustion point'. Even had the Militia not arrived (they turned up at move 7), the loss of 16SP (14 Foot, 2 Horse) was not enough to bring the Royalists to exhaustion.
The whole affair makes me begin to wonder whether attack is really viable with the rule set I am using. On the other hand, the Royalists conducted an active defence, in terrain that seemed to permit it, striking out from their main line. The Commonwealth plan overall seemed reasonable - even a good one, somewhat reminiscent of the Royalist victory at Lansdowne in 1643. It looks all the same, time for a thorough review of this rule set...
To be continued...


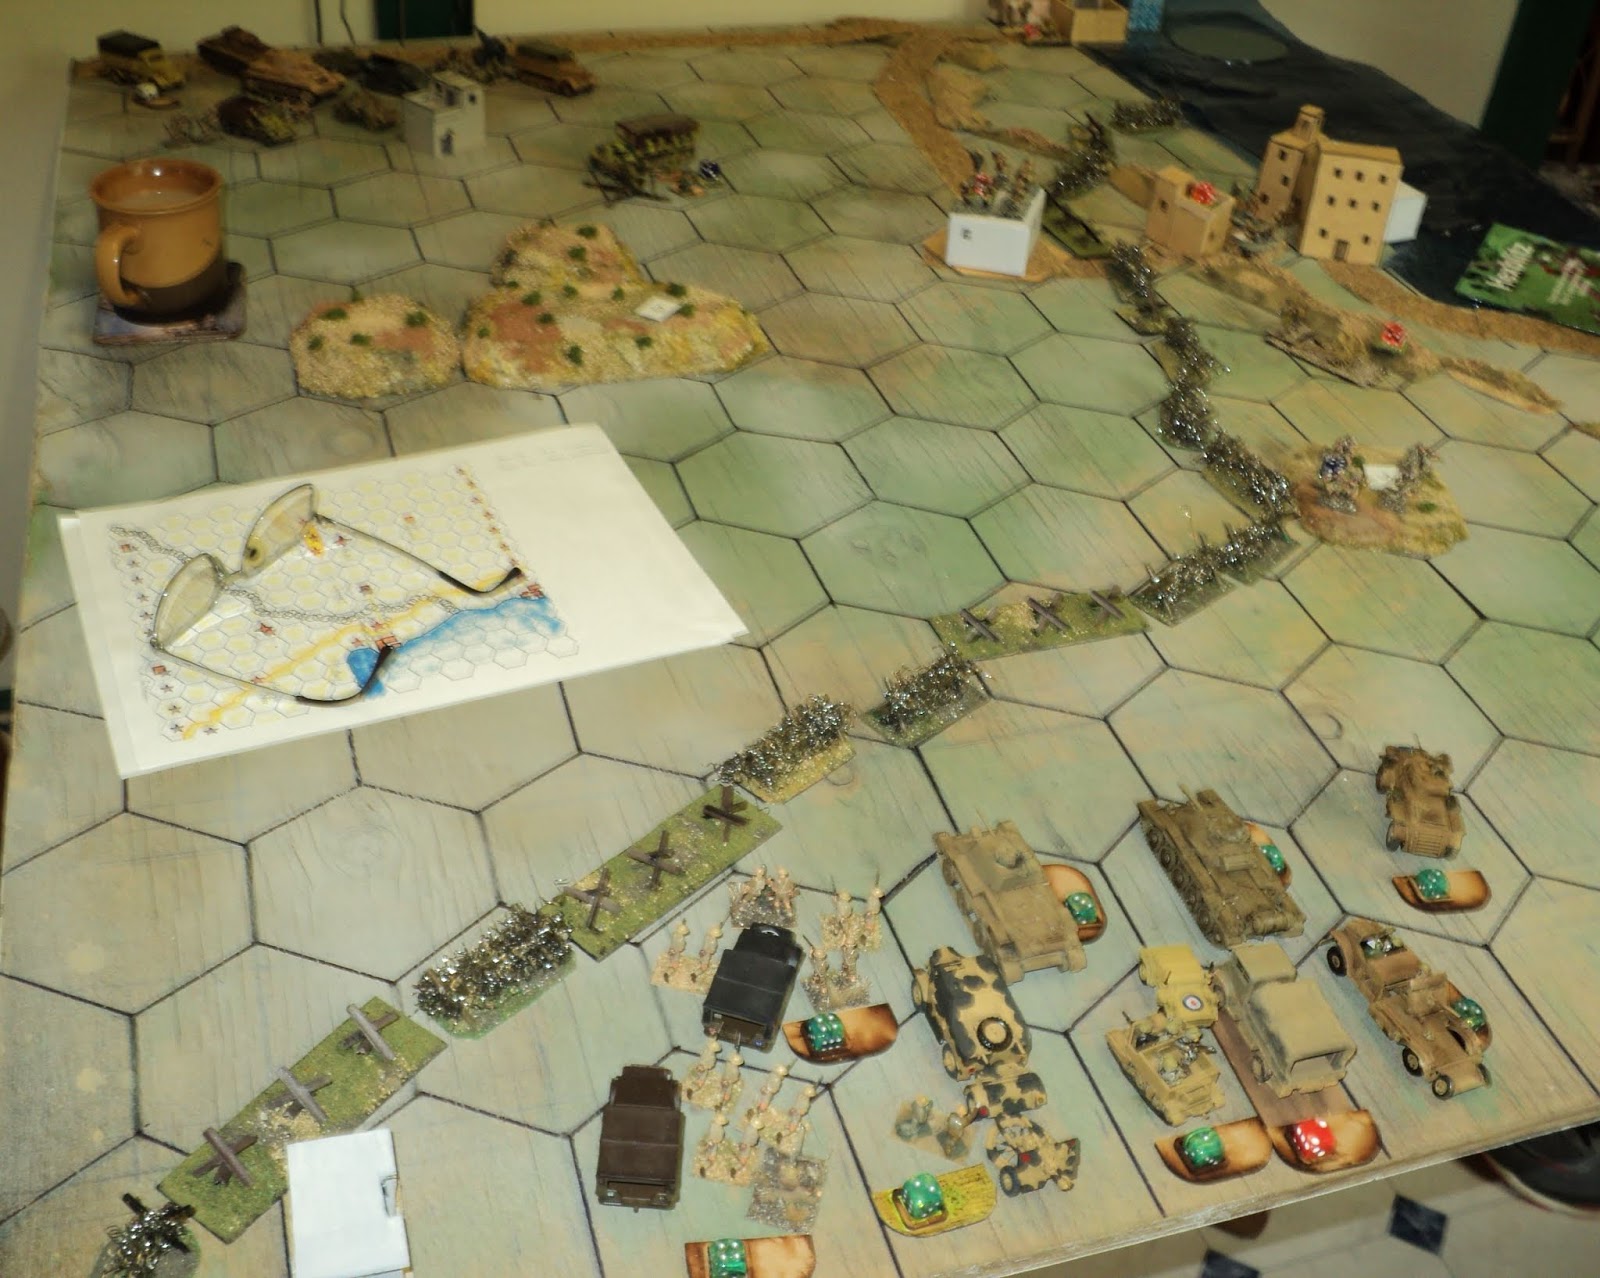
 Unfortunately a staff error (for which no satisfactory explanation was ever forthcoming, apart from the inability, twice demonstrated, of a certain general staff officer to count up to three) led to the Buffs and 2 Queen's Own Cameron Highlanders failing to appear on the start lines. The absence of one third of the infantry rather compromised Eighth Army's chances of success in this operation (and rather discouraged the writing of this After Action Report, truth be told). But it was a fairly involving battle all the same, and it was only when starting to write this article that I discovered the 'General Staff's' snafu.


 That was to be Eighth Army's sole achievement of the day.


 The King's Royal Rifle Corps was soon overrun by tanks, after which a considerable battle raged all over the desert floor between Hafid Ridge and the Wire. Almost from the start, the British defences began to crumble, though the Germans were taking heavy losses as well. As the late afternoon light began to fade, the Rifle Brigade was in turn driven in. The rest of 7th Armoured - what remained of the tanks and the artillery - gave up the struggle and retreated, back over the Wire.....