Sunday, March 19, 2023

Long Live the Revolution: the Whole Story

Here are the links to all the postings for the whole 'Long Live the Revolution' campaign narrative, from the small beginnings in a regional market town, reaching as far as the national capital, and finally receding to whence it came. This list means you won't have to fossick among a whole lot of other postings, especially for the last few chapters.


1.   The War Against the Raj

2.   The Opening Battle - Madasaiwannabe

3.   The Provincial Capital - Maimajikwand


4.   Battle of Maimajikwand - continued


5.   The Railway Station - Maibad Junction

6.   Battle of Maibad Junction - continued

7.   The Sea Port - Khandibar


8.   Battle of Khandibar - continued

9.   The Capital City - Nawabisbad


10.  Battle of Nawabisbad - continued

11.  Return to the Station - The Government Counter-Offensive


12. Second Battle of Maibad Station

13. Return to Khandibar 


14. Return to Maimajikwand - The Government Resurgent


15. Second Battle of Maimajikwand

16. Full Circle - The Final Chapter


Will there be a sequel?  Possibly.  And maybe we haven't heard the last of Colonel Peenut Buttahjars, either. The Nawab, Maibiwih Khan, forbore to visit much in the way of reprisals against the townspeople of Madasaiwannabe, figuring that those who didn't accompany the Colonel into the northern hills were probably not revolutionaries anyhow - or at least, not fanatical about it. He figured that some punishment against provable recreants - for a given value of the 'proofs' - were sufficient, lest he exasperate the populace into a more dangerous revolt.

More to be apprehended was a neighbour to the north. Nimruz, a semi-arid, half desert and half mountain country, was to develop a rather unhealthy interest in some rich mineral country along the Tchagai border. This would lead to border incidents, the Nimruz army fueled by large quantities of equipment supplied by the vast Confederation of Collaborative Collective Peoples - the CCCP.

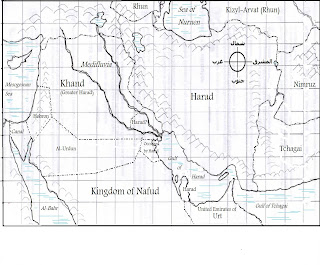
The Empire of Harad, and its neighbour, the 
Nawabate of Tchagai.


Wednesday, March 15, 2023

Long Live the Revolution - A Final Chapter?

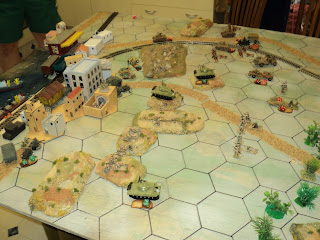
 At last driven back to the cradle of the BARFist Revolution, Colonel Peenut Buttahjars and his revolutionaries remained holed up in the regional capital, Madasaiwannabe, at the head of the Maimajikwand Valley. The months of battle that had taken him to the country's capital, Nawabisbad, and back again had depleted his revolution of personnel, equipment and enthusiasm.  A certain amount of fortification work was completed before the scouting screen espied distant clouds of dust - 'no bigger than a man's hand' - far to the west.  They were approaching fast.


At last, I finally got around to a closing-off episode in a major chapter of the History of the Nawabate of Tchagai.  Would it be a final stand? Might it yet lead to a resurgence? For the earlier narratives of the 'Long Live the Revolution' campaign, I commend you to the labels on the right. Once this is finished, I will be posting a 'Table of Contents' post for this campaign. Then one can read it as a continuous yarn. For now, here are links to 
... the previous chapter, and 
... the beginning of the campaign.

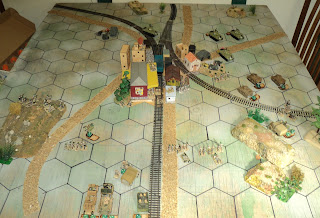
As the first battle in the campaign was fought on a square grid rather than the hexes for the other battles, I went back to the squares. Although the field is not as large as the hex board, I still went with my adaptation of the Portable Wargame method of allocating Strength Points for the respective forces; that is to say, increasing the base number and dice rolls by 50%. 

The Revolutionaries, defending, got 18 + 3D6 SP.  The roll was average: 11, so the BARF forces amounted to 29SP.
The Government, attacking, got 18 + 6D6.  Again, a fairly average roll: 21.  So they got 39SP. 

During the course of the campaign, I allowed the defenders half the difference in SP for defence works.  These amounted to 5 stretches of field works @ 1SP each. Two were placed each side of the town, somewhat refused from the west face of the built up area. The last extended the front of the town's face to the right.  Behind this last earthwork and the one on the ridge to the south, stood a company of infantry. The remainder protected a fixed anti-tank gun company either side of the town, and the Rebels' sole support unit of mortars. A third infantry company garrisoned the town, along with the machine guns. The Colonel's HQ was also within the town's precincts.


The Forces were:

Revolutionaries (defending):
Commander: Col Peenut Buttahjars, plus staff, stalwarts and stooges, and HQ truck = 6SP
3 (understrength) Infantry Companies (Nrr 1,2,3) @ 3SP = 9SP
1 MG Company = 2SP
1 Mortar Company = 2SP
3 (understrength) Light Armoured Squadrons @2SP = 6SP
1 6pr (medium) AT Gun battery = 2SP
1 2pr (light) AT Gun battery = 2SP
All units count as 'Average'. 

Totals:
11 Units, activate 5,6,7 depending on die roll
29SP, Exhaustion Point -10 (Rout Point - 15); 5SP of field works added.


Government (attacking):
Lt-Colonel E. Mugglethwaite, plus staff and scout car = 6SP
3 (understrength) Companies of the 18th Siliputti Regiment @3SP = 9SP
1 MG Platoon of 18th Siliputti Rgt = 2SP
3 (understrength) Companies of the 17th Choklit Ghandi Regiment @3SP = 9SP
1 MG Platoon of 17th Choklit Ghandi Rgt = 2SP
3 Sherman medium tank Squadrons (A, C, D) of 6th Bananarahmaputra Hussars @3SP = 9SP
2 x 25pr Field batteries @2SP = 4SP


Totals: 
14 Units (counting an artillery unit and its tow as a single unit, something I ought not to have done).
Activate 6,7, or 8 units, depending on die roll.
39SP, Exhaustion Point -13SP (Rout Point -20) 


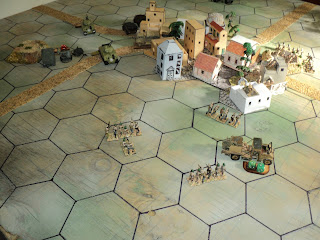
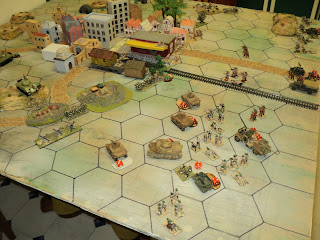
Colonel Mugglethwaite's plan was more a right hook than a double envelopment. The Siliputti Regiment, accompanied by the Bananarahmaputra Hussars' armour, was to storm the ridge south of the town, then exploit on into the rear of the place. A secondary left hook, supported by the artillery, was charged with seizing the heights flanking the rebel position, then take the enemy in flank. This 'left hook' was to be carried out by 'C' Company of Choklit Ghandi Rifles. The other two rifle companies and the machine guns would bring on a fire action against the main enemy front.


The Government artillery scored an early success, bringing accurate fire upon the trenches occupied by the rebel Nr 1 Company and causing several casualties (1SP = 1 stand). At the same time, 'C' Company Choklit Ghandi followed the road to bring the 6-pounder anti-tank position under fire. The guns having no transports - a chronic lack for the Revolutionaries - could defend themselves only with the small arms available to the crews for self defence. This minor attack was off to a flying start.


Much was expected of the main attack on the Government Forces' right wing. The Siliputti infantry, 'A' and 'C' Companies 'up' with the machine guns, and 'B' in immediate support, pushed towards the defended heights whereon the rebel Nr 3 Company was entrenched. To the left of Siliputti advanced the armour, 'A'and 'D' squadrons leading; 'C' squadron in close support. Facing them, the light, 2-pounder guns waited behind entrenchments, and Nr 2 Infantry watched from their corner of the town.

Now, Col Peenutbuttahjars had retained his armour directly behind the town, whence it could intervene wherever a major threat developed. Seeing how the assault was shaping, the Colonel at once ordered his armour to counter the enemy moves against his left flank. The campaign so far had worn down the armour of both sides, but the Rebels' had been harder to replace. They were reduced to just three weak squadrons (2SP apiece), totally perhaps half the size of a regular regiment. But the Government armour was lacking one squadron, they at least were more or less up to strength (3SP). Even so, the Government were to find that the boldly handled light tanks, which had continually outfought their opponents during the whole campaign, were not to go down easy.

Just as the Stuarts drove up, the rifles on the hill sharply repulsed the Siliputti attack just as it got fairly within range. The machine gun company was shot up and A Company reduced to about platoon strength (1SP remaining).  Overall, Siliputti had lost 5SP for no loss to the enemy. Not auspicious for the Government forces.  

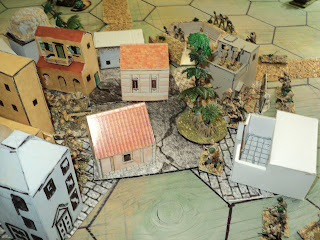
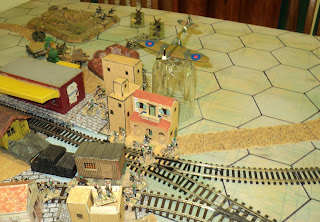
They were enjoying more success on their left. Mounting the high ground, C Company Choklit Ghandi brought the anti-tank gun position under close assault. The fighting was brisk and short. Half the gun crew was brought low, but their staunch defence threw back the Government infantry. The dice tell the story. Both rolled '6' on the 'to hit' dice, then rolled high on the effect. The guns being fixed had to take the SP loss (reducing it to the '1' shown in the pictures); I elected to pull the Government infantry back up the hill to bring the remaining guns under fire.


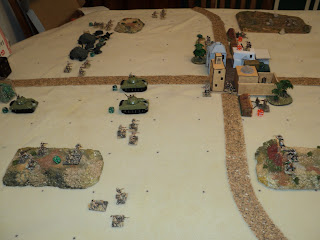
The situation on the south wing remained unpromising for government. Standing off to shoot up the 2-pounder anti-tank position, rather encouraged the rebel armour to advance. Meanwhile, the infantry had almost all been driven back almost behind the hill that formed their start line.


Forward came the Stuart light tanks of the Revolution - hastening to bring the enemy armour within range of their pop-gun 37mm cannon. The name of the commander of the light tanks has been lost to history, but would otherwise shone brightly this day. Outnumbered (3 to 2) and outgunned, the lights were, once more, not outfought. Almost at once 'A' Squadron found itself short two or three Shermans (1SP), burning or immobilised. The day was going badly, it seemed.


Not that the Government armour was too discouraged. Although never having established the expected ascendancy over the rebel tanks, they had at least kept themselves in the fight. They were rarely defeated outright.


The 2-pounders finally being knocked out, scene was set for the final showdown between the contending armour. Under cover of this fight, what was left of the Siliputti battalion once more tried the defence upon the heights facing them. 


The company-sized 'left hook' having been stalled, A and B companies of Choklit Ghandi were slowly closing in on the west face of the town. All day, the field guns had played upon defences on this end of the rebel position. The 6-pounders and mortar positions ground down, the former fieldworks were taken over by the rebel Nr 1 Rifle Company, itself badly depleted. The rebel machine gunners reoccupied the position formerly held by the rifles, and brought the Government C Company under fire. For all the losses the government forces had taken, the pressure was becoming intolerable. Nr 2 Company in the town had taken fearful losses from machine gun and artillery fire, its scant survivors falling back from the west face of the town.  But a few sharp words from Colonel Buttahjars was enough to drive them back again. Eventually the colonel himself would join the front line, determined upon, if the need arose, a final stand.


Both sides were running out of resources.  Under cover from the light armour counter-attack, Nr 3 Rifle Company abandoned their hilltop position, and made their best speed across to reinforce the town's garrison before the Government troops could force their way in. The effort cost the light armour several tanks - Nr 2 Squadron being effectively destroyed (both SP lost). The Revolutionary Colonel was determined, if the wings should be driven in, the hard core of his final stand would be the town itself. Let the Government dash itself to pieces upon that!


That Lt-Col Mugglethwaite declined to do. His small brigade group had almost exhausted itself, losses heavy amongst his infantry. But the Revolutionaries were in worse shape. No counter-attack was possible with what remained in hand, and the Government retained one weapon against which he had no counter: the field guns. 

It so happened that Government losses had slightly exceeded the BARFists' - 12SP to 10, but it was the latter army that reached its exhaustion point. Had the Government pressed its attacks, no doubt that one remaining SP loss to reach their own would have brought the battle to a halt anyhow.


The battle might be over, and the Revolutionaries remain undefeated in battle, the reality stared the Colonel and his commanders and staffs in the face:  the war itself was finished. The last stronghold gone, there was no longer any rallying point. The writing had been on the wall all those months ago when the BARFists had dashed themselves to pieces at Nawabisbad. After a council of war in a dimly lighted cellar in the middle of the town, the hard-core BARFist Revolutionaries slipped out of the town, and, trudging up the main road, disappeared among the hills at the head of the Maimajikwand Valley. Colonel Peenut Buttahjars had at least escaped Government retribution. 

The sun was well above the eastern horizon when Lieutenant-Colonel Ebeneser Mugglethwaite was made aware of the disappearance of the BARFist revolutionaries. He lost little time reoccupying the former rebel stronghold, and, with a few judicious arrests, restoring Government control. 

Of course, the Nawab Maibiwih Khan expressed his undiluted joy at the news. His seat as the nominal head of state of at least his portion of the Ruberian Raj remained secure, and kept him well placed once the Jewel in the Imperial Diadem had slipped from Imperial fingers. He could never be sure that the good Colonel Buttahjars and his Revolutionaries would have appreciated the political tightrope he had been walking all these years. No, it was well that the revolution had failed. The Nawab knew how to play the long game...

To follow: a post 'Table of Contents'.

Tuesday, March 7, 2023

Naval Matters - a new ship building programme.

In response to a posting on David Crook's 'A Wargaming Odyssey' I mentioned I had something of a ship building programme of my own. About to sign off, I realised I had a blog posting here - just without pictures. So methought to post the thing here, and add some pics of my sketches. Roughs, you might call them. Enough for me to work from, anyhow.


 I've been drawing sketch plans for my Ruberian Navy (RN) using  the pre-dreadnoughts Jacky Fisher so despised. I've drawn up plan and elevation sketches - and I mean sketches - for five classes of battleship, but I thought I would add just one vessel - the HRNS Dreadnaught itself. I thought of doing 2 of each of the pre-dreadnoughts.


This will make a very powerful navy in my Chromatic world - far more powerful than the Turcowaz and Hellenic navies at any rate. And  then... I'll have to come up with an OPFOR.

Destroyers for 'Mighty Armadas

I've also been drawing up sketch plans for destroyers for my 'Mighty Armadas'/ Jono's World navies.  I have 4 Narvik Class destroyers for the Kiivar Navy (Bismarck types), and will do 4 Fubuki class for the Ra'esharn, and two HMS Glowworm types for the Saabia Archipelago.


'Mighty Armadas' - Battle of Kantsi Strait. 
This action used my slight modifications to
KEV Robertson's simple naval rules.

Probably a project for the coming winter months.  

Friday, March 3, 2023

Sengoku Interlude...


Battle of Domyoji - early moves

The other day - well, about a fortnight three weeks back - methought to try out a game board I made recently. This was made from a plastic-laminated hardboard tile that was hanging around cluttering up the place, but which seemed as though it might come in handy for a convenient arena for small battles. Having already made a satisfactory 3x3 battlefield with flanks and reserve zones, this time, something a bit like the Memoir '44 board seemed a good idea. I probably rushed the hex field a bit, hence the slightly squashed look, but it is, I think, a step up from my offset rectangles idea. Mind you - one starts with offset rectangles...

I coloured the white board by drabbling green paint to give a textured look. For terrain I used Memoir '44 terrain tiles, but I rather think I'll have to make pieces specifically for this board.

Osaka Army reinforcements and high command.

I had also made a Sengoku Wars command pavilion to fit the single hex-grid area. It's just matchstick and heavy paper glued to a piece of cardboard - nothing flash. The Portable Wargames 'Sengoku Wars' rule set doesn't use such pavilions, but I made some 'stats' for such things. Being static, it has the added virtue of adding a unit to the army that does not require activation. Of course, it does present an objective at which to aim. The armies were made up otherwise of my Shogun board game figures, and Zvezda cavalry.


Battle of Domyoji - Osaka holding the 
Komatsuyama Heights
The battle being fought was one of the last of the Sengoku Wars - based on the Battle of Domyoji, 1615, between the Tokugawa Shogunate and the Toyotomi Clan. This was part of a long campaign collectively known as the siege of Osaka, as the Shogun, Tokugawa Ieyasu sought to remove the last threat to his overlordship of Japan.


I've based this very roughly on the Command and Colours boardgame scenario, but adapted to my board and the limits of the PW Sengoku game.
Brief Background:

On 5 June, Gotō Mototsugu, a samurai leader in the service of of the Toyotomi Hideori, was at Domyoji with his forces guarding a mountain pass through which the Shogun's forces were expected to come. The country thereabouts was a low-lying section north of Komatsu-yama ridge on the opposite side of the Ishikawa river, a tributary of the Yamato-gawa river. In order to take their positions on the ridge Mototsugu had to ford the Ishikawa river. During the passage of the river, scouts reported that Tokogawa Ieyasu's Eastern Army had debouched from the pass through the range and were moving up the southern slopes of Komatsu-yama.

Shortly after daybreak, Gotō Mototsugu and his samurai rushed forward to Komatsu-yama in order to push the Tokugawa forces back. Within an hour, however, a strong attack by the enemy was driving his troops back to the summit of the heights. All this time Gotō Mototsugu was awaiting the planned arrival of reinforcements which had been delayed by thick fog. At about mid-morning Goto Mototsugu was wounded and committed seppuku.  Command of his forces devolved upon Sanada Yukimara.

Tokugawa activation dice: Good roll!
Such, more or less, was the situation at the beginning of the action on my battle board.  The forces of Goto Mototsugu were represented by the green army; those of the Eastern Army were orange/yellow.  


Osaka Army (Green):
Commander: Sanada Yukimara (in Pavilion)
Susukida Kanusuke commanding samurai beside the pavilion
Yamamoto Kaimio commanding ashiguru yari on the heights
1 Pavilion (elite, static) = 4SP 
1 Mounted Samurai (average) = 3SP
3 Foot Samurai (elite) @4SP = 12SP
4 Ashigaru Yari (average) @3SP = 12SP
1 Ashigaru Tepo (average) = 2SP

Totals:
10 Units, 3 Generals; Initial activation (10/6 + 3) = 4D6/2 (Expectation = 7 units)
33SP, Exhaustion Point = -11SP; Rout Point = -17SP 

Eastern Army (Orange/Yellow)
Commander: Honda Tadamasa (Mounted Samurai)
Mizuno Katsushige Samurai right flank
Date Masamune Samurai left flank
1 Mounted Samurai (elite) =3SP
3 Foot Samurai (elite) @4SP = 12SP
4 Ashigaru Yari (average) @3SP = 12SP
3 Ashigaru Tepo (average) @ 2SP = 6SP

Totals:
11 Units, 3 Generals; Initial activation (11/6 + 3) = 4D6/2 (Expectation = 7 units)
33SP, Exhaustion Point = -11SP; Rout Point = -17SP 

The Battle:
Osaka activation dice: another fine roll!

As the attackers, the Eastern Army opened the ball, with strong attacks against the flanks of the Komatsu-yama heights.  They got the white dice; the Osaka Army the green.  As you can see from two pictures back, the Tokugawa's boys grabbed the initiative with a vengeance: a superb roll of 19 - divided by 2 - permitting the activation of 9 of the 11 units.  Concentrated attacks against the ends of the heights very early secured lodgements as the Osaka people were forced off and inwards. 

In response, the Osaka Army's activation roll was the equal of their adversaries'. At once the reserve samurai under Kanusuke surged towards and across the river, helped by 'winning' the initiative roll that followed the first game turn. The flanks barely holding, Kaimio's ashigaru spearmen thrust down the hill against the Eastern Army's rather exiguous centre.  However their second activation roll was far less effective than their first, the roll of 11 permitting the activation of just 5 units. The Osaka Army prioritised on getting the reserves across the river and into action; and pushing the early success of the counter attack in the centre.
When at last the Eastern Army's second turn came round, they repeated the dice score of the first: 19.  Nine units activated - and there was plenty for them to do.  
 Although Masamune was finding the going tough on the left flank, Katsushige on the right completely overran the heights and surged into the valley beyond to engage Kanusuke at the river fords.  Also gaining the heights, the arquebusiers shot up a unit of spearmen that had been driven off the feature.
On the left, Masamune was also beginning to make progress, driving a reduced Osaka band of samurai to the riverbank.  The relative failure to progress in the centre was leaving the Osaka cavalry and spearmen encased in a narrow salient, and in danger of attack from several directions.
This was might have been a strong augury of the Eastern Army's victory, but the Osaka Army 'won' the initiative again.  Rolling 14 (i.e. an average activation roll allowing 7 units to move), the Osaka Army was beginning to make a comeback.  Kanusuke's samurai forced Katsushige back from the riverside; the army was holding everywhere else. 


The onset of Kanusuke's attack carried on and retook the eastern end of the heights.  Only a depleted Ashigaru Tepo unit was maintaining a precarious hold, almost surrounded, upon the crest of the ridge.
But if the Osaka Army was enjoying a resurgence on their left, their line was receding on their right.  The foot samurai on the extreme wing were driven back to and over the river, almost as far as Sanada Yukimara's pavilion.  About a third of the heights at this end had been cleared of Osaka's forces.  Surrounded on three sides, Yamamoto Kaimio was for the time being, holding his own.

For a short time Kaimio even managed to thrust back the enemies surrounding him, but he could never quite find the time or occasion at which he could extricate himself and return to the heights.

Katsushige's wing almost driven away from the 
main Eastern Army
Just as matters were going badly enough for Osaka on the right wing, they seemed to be proceeding well enough on the left.  Kanusuke had driven Katsushige's command well back from the ridge, where they became rather detached from the rest of the army.  Honda Tademasa was once again directing concentric attacks upon Kaimio's almost isolated bodyguard unit.  To protect his flank uncovered by Katsushige's retreat, he established a line of arquebusiers.


Surrounded on three sides Yamamoto Kaimio
 is finally overcome.

It did not take long for that exiguous line to be driven in.  The isolated Tepo unit holed up on the heights were finally destroyed, and Kanusuke soon overran the other unit which retreated with rather unseemly haste (two 'retreat' outcomes) to rejoin Katsushige's wing.  But they were not in time to save Kaimio.  Beleaguered for hours, with no hope of rescue, his command, and he with it, succumbed to his numberless foes.


At about this point, the battle sputtered to a close, both sides exhausted. Both sides had lost 11 Strength Points, though the Eastern Army's losses of samurai were double those of the Osaka army.  Osaka had, just barely, held off the Eastern Army.  That was not to be the end of the matter. Tokugawa Ieyasu himself was somewhere in the offing, and would not be taking a minor setback for a defeat... 
The last stand of Yamamoto Kaimio.