Wednesday, October 9, 2019

New Toys

The two 5-vehicle military truck sets from China.
 These interesting items arrived from China onto my doorstep yesterday. I had seen them on an Army Men group on facebook, noticed the Katyusha, and thought to myself of the Katyushaless state of my own Red Army.  The thing comes as part of a set of 5 trucks, the others of which I thought might also be of interest.  As the price seemed not too exhorbitant, I ordered two sets. The Company indicated the package should arrive about 10 October; I received them a day early.
Katyusha mounts.  Not quite right, but near enough for mine.

Let us then examine the loot. Well... It turns out the Katyushas weren't ...quite ... the thing: seven rockets placed between the rails instead of on them, and none underneath (16 rockets in all).  Looking up their mounts, I find that apparently the Katyusha frames could be mounted on any platform, pretty much. Most of the examples seemed to have been on 6x6 or 6x4 drive trucks. I found but one image of a 4-wheeled portee: 
That will do! For the rest, if it looks like what it's meant to be, then that is what it is: BM13 Katyusha rocket platforms.


The two flat bed trucks were welcome logistics or transport vehicles - no comment needed there. By the way, though, these are quite frankly toys, not models. They are made with a kind of friction motor. Draw the vehicle backwards along a flat surface, floor recommended, let them go, and watch them whizz across it. 
AA vehicles in the set.  Technicals in the service of
Tchagai perhaps?

The other three comprise a Quad AA mount, a large gun mount and a large (SAM?) rocket mount.  What to do with these? The only Quad AA mount for the Red Army I could find was the quad Maksim arrangement, arranged in a single row. Apart from the bracing struts, this looked more like the German Quad 20mm AA piece. Did the Soviets ever stick any captured examples on the back of trucks? The thing seems plausible enough, but what evidence is there that they did any such thing?

The big gun does look like a heavy-ish AA on a portee mount, and as I have seen such images, e.g. 
we might, just barely, accept these into our Soviet inventory. This and the other two, I rather suspect, will fetch up in the inventory of the Army of Tchagai as technicals of one sort or the other. Unfortunately, the big gun is fixed in 'carriage' mode, though it can swivel, and can't be elevated to look as though it's ready to shoot anything out of the sky.

Heavy stuff!  SAMs?  The nabob of Tchagai might well
be happy to add these to his arsenal.
This big rocket mount looks so cool, but I can find no images on the internet cognate to such an arrangement - certainly not for World War Two!   
A battery of ... erm ... 'mortars'...
Finally a couple more pics of the four vehicles likely to see a deal of action as time goes on. I simply haven't been able to find 1/76:1/72 scale Katyusha kits anywhere else, and it seemed to me that they were just the thing to equip my Guards Mortar units. Not precisely 'models', they offer the impression of Katyusha launchers. That'll do me.
You can't have too many trucks...

Long Live the Revolution: The opening battle.

In the following narrative, I used Bob Cordery's Developing the Portable Wargame WW2 rule set. The only difference was my own 'dice method' of determining initiative and unit activation. However, as a result of this action, I think I'll be looking a little more closely at the 'pin' option, with a view possibly of moderating some of its more punitive aspects, or possibly of dropping it altogether.  Otherwise, this will not be a long narrative.

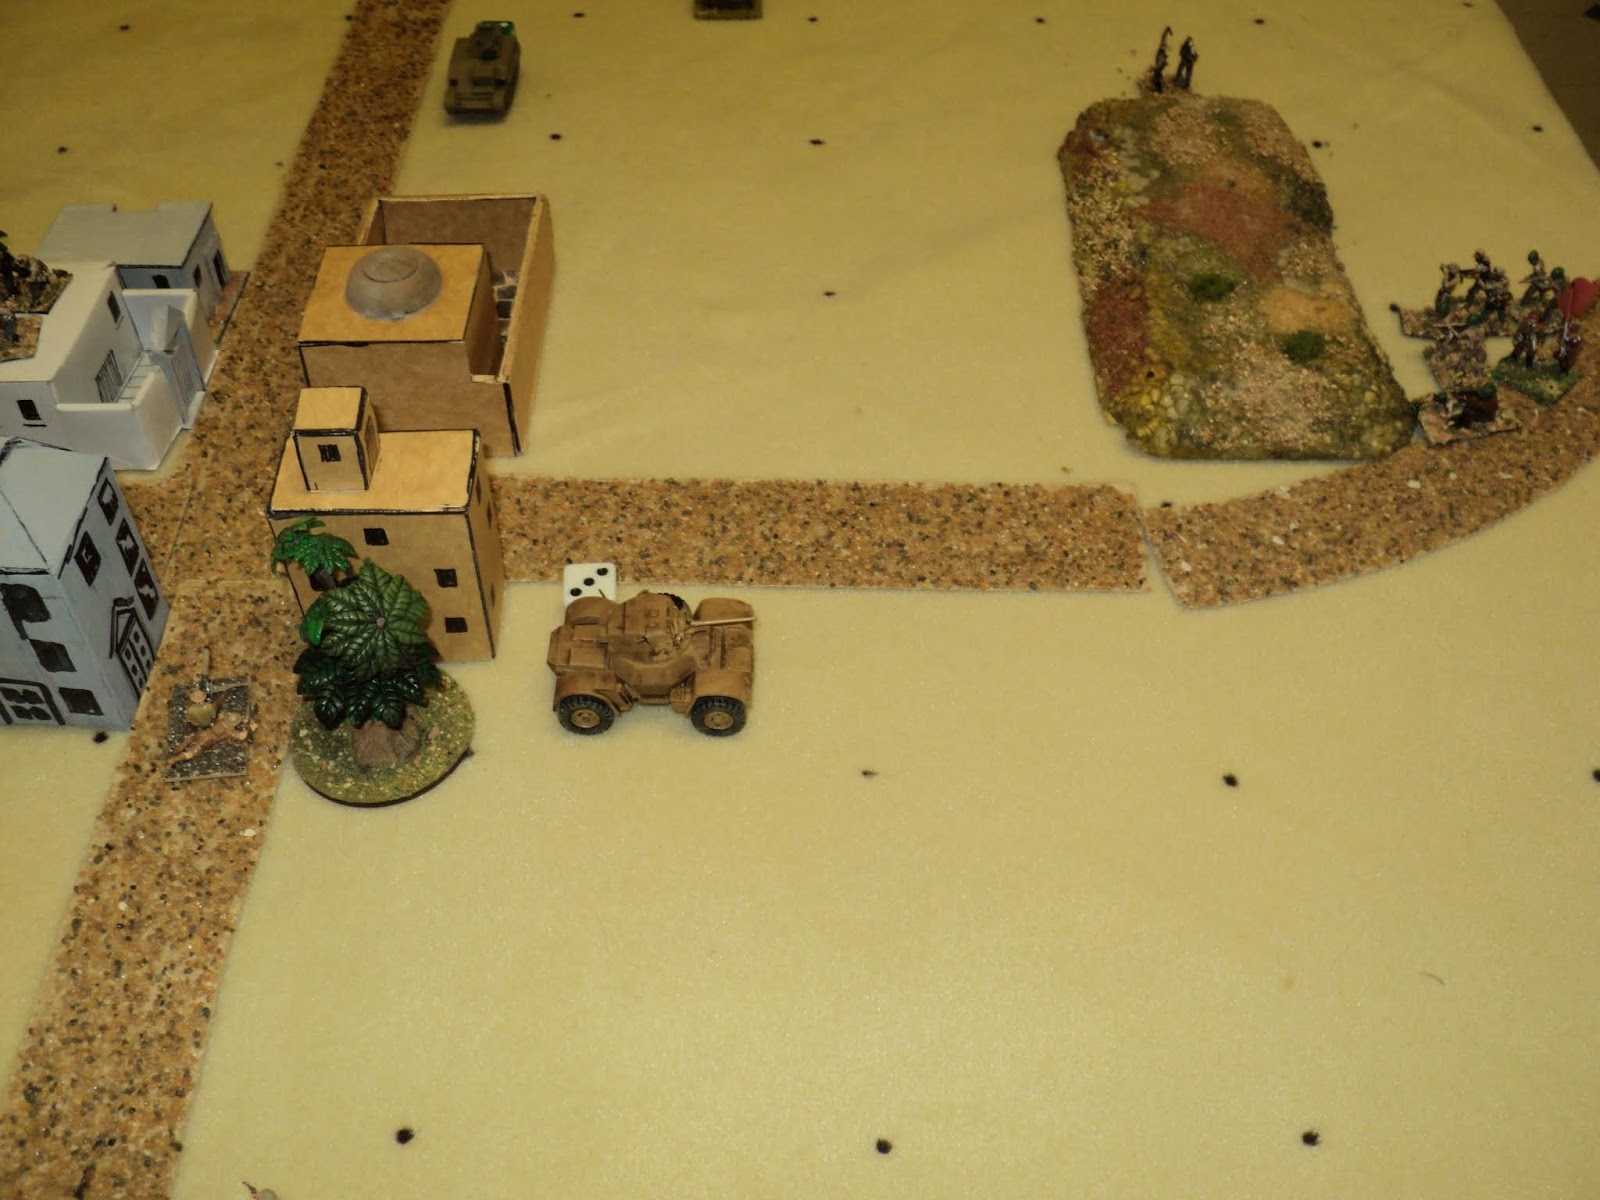
The rebel Baluchistan Armed Revolutionary Front (BARF) - for composition, see previous blog post - opened the ball with a battalion sized attack upon the high ground NE of Madasaiwannabi town, defended by 'C' Company, Imperial 22nd Punjanjoodi Battalion. Against possible retaliation from the town, the rebel machine gun and infantry gun detachments advanced to bring fire to bear on the place, and the mortars emplaced upon the northern outskirts of the town.
Although the early attacks on the ridge were handily repulsed - 1st and 2nd Coys, Ist Battalion took damaging hits, as did the defenders - because the attackers had had to fall back, they soon recovered their enthusiasm for the fight (the red 'pin' markers all came off). In the face of three times their strength, 'C' Company were fairly soon driven right off the feature, to the roadway. Whilst the mortar company, themselves under fire, held off the enemy 3rd Company, 'C' Company fell back behind them to the edge of the town.

Meanwhile, the fire supports against the town were producing a slow, yet steady trickle of casualties among the Imperial troops garrisoning the place. The MG platoon abandoned the NE quarter - and several smashed up MMGs - to establish a new line beside the southern highway exit from the town. By this time, the late-starting attack by the rebel left was getting fairly under way. Sixth Company had managed, with minimal loss, to get themselves athwart the right flank of 'A' Company, which experienced some difficulty maintaining themselves.  Soon, 5 and 4 Companies, also came within rifle range, whilst Colonel Peenut Buttahjars himself directed the supporting fire of the MMG detachment. The armoured cars of  'C' Squadron, Muddi River Horse, drove back the Light MkVI tanks that represented at the time the Rebel's sole armoured inventory, but with no loss to either side.


An aside, here, to foreshadow a comment at the end of this piece about AFVs and ARVs that carry machine guns. 


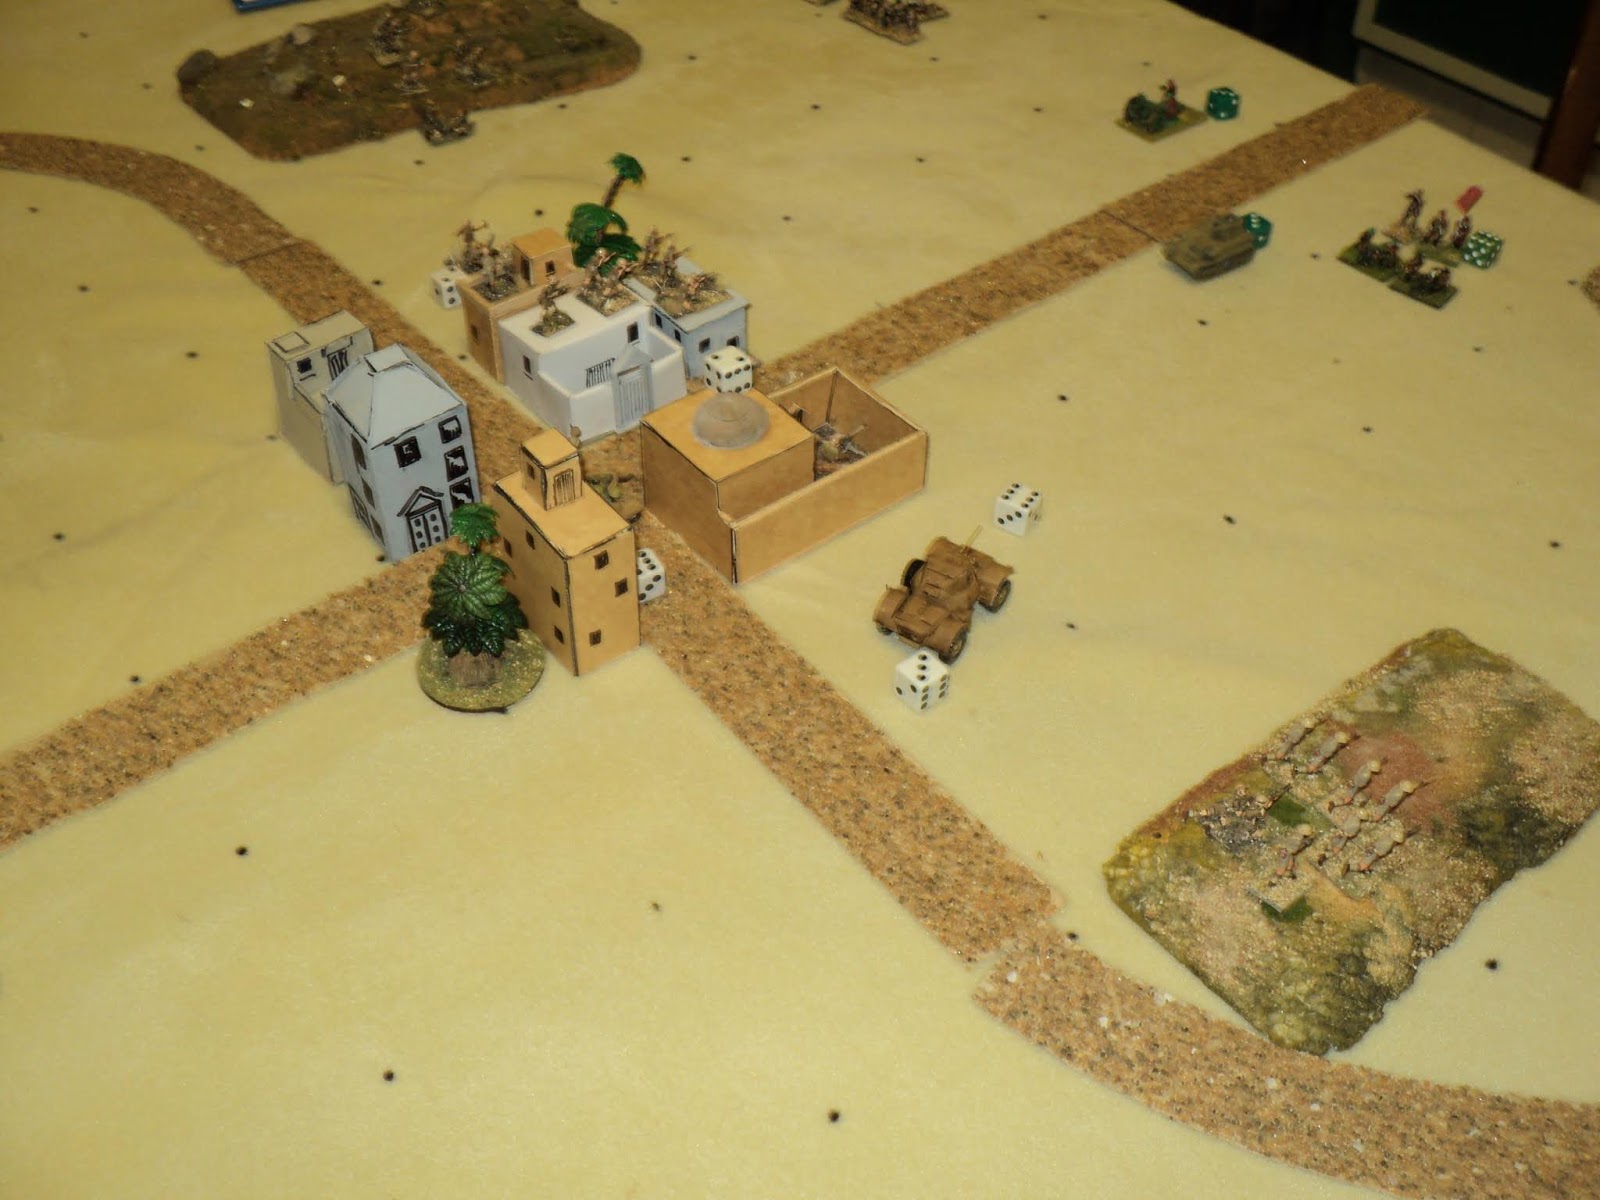
As the struggle south of Madasaiwannabi developed, at the other side of town, the Rebels overran the mortar battery, and drove 'C' Company quite within the precincts.  'B' Company's position suddenly became so exposed that for a short while were pinned down by fire coming in from front and flank.
The position of 'A' Compnay was also becoming difficult. Driven back to the western end of the ridge, where they became pinned down, they found themselves assailed front and flank by two enemy rifle companies. The armoured cars did their best, wiping out the Rebel MG company, and damaging their 4th Company as well.  


However, once pinned, and under close assault, unpinning became problematic, and 'A' Company's losses began to mount alarmingly. The relatively fresh 5th Company brought the Imperialists under close assault. Already repulsed at least once, 6th Company soon recovered themselves enough to join in the attack.  


Under increasing pressure from I Battalion and support troops, the town's garrison, too, began to melt away.   
Finally, the Rebel 3rd Company broke into the northwest quarter of the town. Having already abandoned the rest of the north side, what was left of 22nd Punjandjoodi Battalion was left clinging to the southside. 'A' Company was never to join them. Apart from scattered, disorganised survivors, 'A' Company died defending the last few rocks on the western end of its ridge.
By now, Lt-Cool Mugglethwaite realised that what was left of his command could never hold the town. Giving orders for the evacuation of the place, he drew his headquarters several hundred yards down road west. There he awaited the arrival of the MG and armour car units, and whoever else managed to extricate themselves from the stricken town.

The Revolution was off to a fine beginning. For a long time the issue had seemed to be in doubt. At one point, the SP losses read 6 for the Government, 9 for the Rebels. But once the action became general and the former troops became pinned down whilst under close assault, the situation reversed rapidly. The Government losses exceeded their exhaustion point (9SP) much sooner than did the Revolutionaries did.  At the action's end the latter were glad to see what was left of the Punjanjoodi Battalion disappearing in a cloud of dust beneath the setting sun. It was time to set about reorganising the town.

The Revolutionary forces had just reached their exhaustion point (13SP), by which time, the Government's had got to 15SP lost - all 3 rifle companies having lost all their SPs. There was no disguising the victory for the Revolutionaries in their first major action.

From this action a couple of points emerged that might affect the handling of future actions.


1.  Pinning (in this game, pinned units were marked by a red counter).  
Under the present system, when a unit takes a damaging hit, it becomes pinned. If it is in contact with an enemy it can fight, but otherwise not move or initiate a close combat. It can 'unpin' if not in contact with enemy, but neither move nor fire.  If the enemy remains in close combat - which becomes permanent if the enemy also becomes pinned - there is no way to 'unpin', and all hits become SP losses. That is how 'A' Company disappeared so quickly at the end of the action.

I am very tempted to drop the 'pin' feature altogether. This can permit the development of running fights or offensive drives. The pin feature also tends to discourage accepting SP losses in lieu of retreats in order to sustain an attack.  

An alternative might be to change at least one of the rules concerning pinning. 
- A pinned unit may fire or fight a close combat at reduced effect, but may not initiate a close combat.
- A unit that loses a SP and becomes pinned may in the same turn retreat one square provided that retreat takes it out of contact of any enemy.


2.  Machine-gun armed vehicles.
The Revolutionaries in this action had from somewhere acquired a Light Mark VI tank, light armour armed with machine guns only.  I used it as in effect a fast moving mobile machine gun.

Now, I hadn't really thought about it before, but other AFVs usually (though not invariably) also carry machine guns. Although the Daimler armoured car did engage it light tank with its 2pr AT gun, it did no more than scratch the armour. After that, I decided to use the car also as an MG platform in an effort to hold back the Rebel attacks on the right flank.

I have decided that in future all MG-carrying AFVs can act as MG carriers, but, in any given game turn, can fire its main gun OR its MGs, and not both.

To be continued:  The battle for the Provincial Capital.

Sunday, October 6, 2019

Long Live the Revolution: The War Against the Raj ...


Midmorning, opening action of the
Revolutionary campaign: 6 June 1945.
The War against Imperial Nippon had still to run its course as, from mild murmurings, the unrest in the Ruberian Empire of Rajistan grew in volume, violence and virulence.  In the western corner of Tchagai, the unrest grew into insurrection, insurrection into insurgency, insurgency into outright revolt.  Under the leadership of one Peenut Buttahjars, a former rissaldar in the Army of Rajistan, there developed a popular movement styling itself the Baluchistan Armed Revolutionary Front (BARF), notorious for acts of sabotage, theft and assassination.


Having rather similar notions of breaking away from the Empire, the regional magnate, the Nabob Maibiwih Khan, was inclined to be sympathetic to towards the BARF movement, but imagined himself to be its inspiration and head.  This upstart, Buttahjars - Colonel, forsooth! - was not one with whom the Nabob wished to be associated, for a good many political reasons.  Not least of which, he had remained Nabob on Ruberian sufferance, and was not desirous of compromising his position whilst there remained any prospect of the Imperium successfully crushing the revolt.

Aircraft view of the field looking towards the northwest
from behind Revolutionary lines.
On balance, the Nabob deemed it meet that he sat on his thumbs for the time being, quietly gathering his own strength, and let the Imperium deal with the immediate problem.

Matters grew to a head in the western region of Madasaiwannabi with the small town given over to riot that was not abated by the imposition of a curfew.  The local Imperial commander, Lieut-Colonel Ebeneser Mugglethwaite, decided to intervene in person.  Gathering together the 22nd Punjanjoodi Infantry Battalion and a squadron of armoured cars from 1st Muddi River Horse, the good Colonel set forth from the provincial capital.

Town Garrison: B Company with MMG platoon,
and the Lieutenant-Colonel's HQ.
Rumour of the Imperialist approach led Colonel Peenut Buttahjars at once to hasten the recruitment and training of his exiguous army, and set out from the northern hills into the Maimajikwand Valley, thence to march up to Madasaiwannabi town.   The Imperialists beat them to it.  Marching into the place, they quickly restored order with a series of shootings and arrests, and ordered, on pain of being shot on sight, the populace to remain indoors until further notice.  The markets and shops were closed, town administration suspended, and and inert silence descended over the place.

From a small tract of rising ground Colonel Buttahjars surveyed through a purloined pair of binoculars the town and the flanking hills, shimmering in the late morning sun.  His plan he quickly formed: to take the hills flanking the town, then a general assault upon the place from three sides.

The forces involved in the coming action were determined as follows:
Government: 18 + 3D6 SPs
Revolutionaries: 18 + 6D6 SPs
As it happened, both rolled low, leaving the Revolutionaries with a mere 37SPs, and the Government with an even more disappointing 25SPs only.  It seems that the former's recruitment and training had been proceeding more slowly than hoped, and that the urgency of the crisis had induced Mugglethwaite not to wait further for reinforcements of problematic provenance.
Opening moves.  The Revolutionary plan takes shape.

Rajistan Government:

C.O. Lt-Col E. Mugglethwaite
HQ: Carrier and small escort.  6SP
22nd Punjanjoodi Battalion
     -  3 Rifle Companies @ 4SP
     -  1 MMG (Vickers) Platoon @ 2SP
     -  1 Mortar Platoon (3-inch mortars) @ 2SP
C/1st Muddi River Horse
     -  1 Daimler MkII Armoured Car, light armour, light AT and co-ax MG.

Totals: 7 units, 25 SPs
Median activation: 4 units.
Exhaustion point: loss of 9SPs

Baluchistan (Brotherhood) Armed Revolutionary Front:

Commander, Colonel Peenut Buttahjars + escorts: 6SP
1st BARF Brigade:
     - 1st Rifle Battalion:
          - 3 Rifle Companies @ 4SP
     - 2nd Rifle Battalion:
          - 3 Rifle Companies @ 4SP
     - 1st MMG Company @ 2SP
     - 1st Infantry Gun Company @ 2SP
     - Attached Light Tank Company:
          - Light MkVI - light armour, MG only @ 3SP

Totals: 10 units, 37SPs
Median activation: 5 units.
Exhaustion point: loss of 13SPs.

All troops were classed as average.  I did toy with making the revolutionaries mainly 'poor', but decided that as the 22nd Battalion, though regular, was pretty much a second line unit, of possibly dubious loyalty anyhow, they weren't likely to be much better, come the crunch.


1st BARF Battalion's concentric attack upon C Company's
Ridge.  Already both sides have taken damage...

To be continued...