|
| Second hand Tiger I with new gun and mantlet. |
Once again my blog spot has been too long neglected. Maybe one day I'll be able to devote more time to it. It is not as if I haven't the available time. Motivation is far from abundant coin right now. Well, that is enough of whingeing.
 |
Where the mantlet came from. The inky bit was shaved down
that the gun barrel could fit over it so it could be glued firmly. |
Some weeks ago I expressed (commenting on someone else's blog) my admiration for the scratch building skills of the late John Sandars, of Sandskrieg fame. Someone suggested that I post something about my own scratch building efforts. I have done on occasion in the past, but I do have some recent efforts to show. Most of these are really fixes to models that had bits missing, rather than scratch builds per se.
The above Tiger II came into my possession minus gun and mantlet. The whole thing had to be constructed from something. An exhausted felt-tip pen provided just the thing, as you see, the gun barrel formed from plastic tube (cotton bud with the buds removed). The muzzle brake was carved from a larger bored plastic tube. Normally I have used ball pen reservoir for this, but though the plastic is softer, the harder plastic of the tube gives you better definition. It isn't perfect, but I'm happy enough with the way the muzzle brake turned out.
 |
| Add caption |
These pictures show my new method of fashioning tank tracks. I have been experimenting with strapping, recently. Though it has its points, I found it not quite satisfactory. Brian of
A Fist Full of Plastic has used this method, but added strips to the visible bits to add to the 'trackish' look to the tracks.
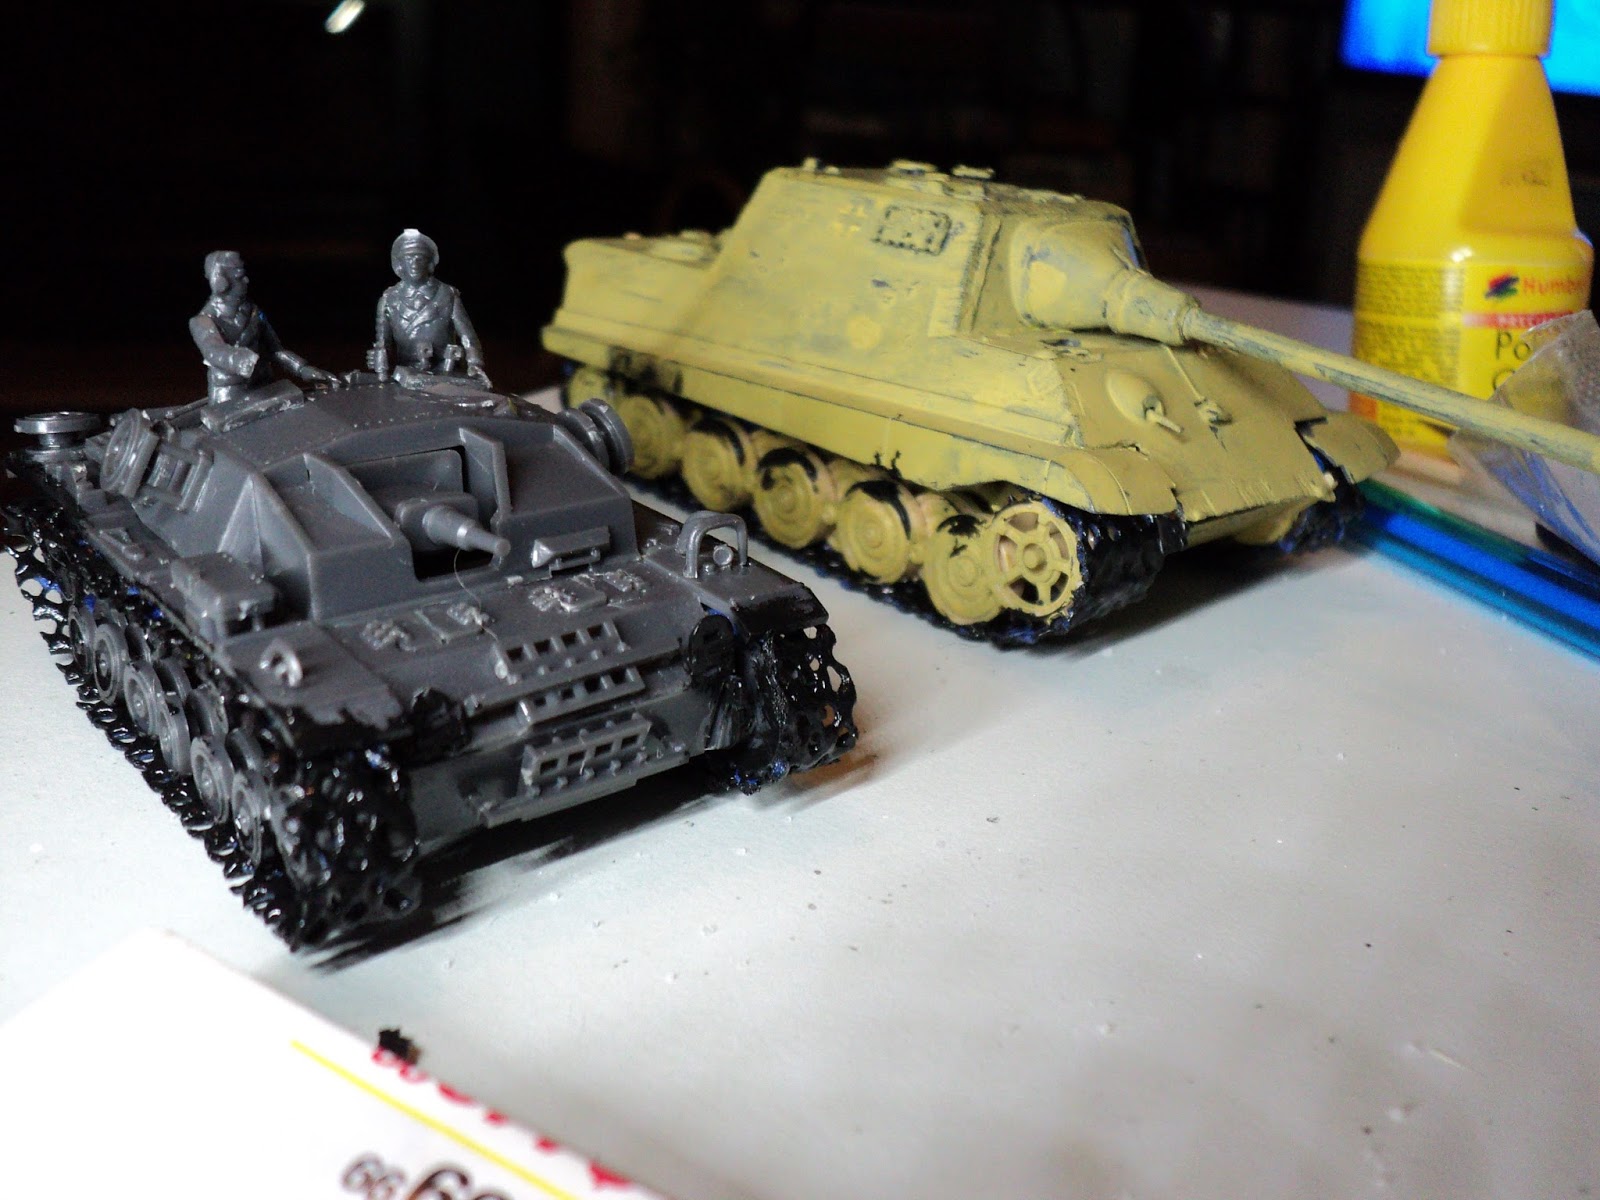
The Fujimi StuGIIID and ESCI JagdTiger in these pictures came without tracks. Not sure why in the former's case, as it was a mint kit still in its plastic wrapping when I bought it second hand. I'm not complaining very hard, though, as in the same box was a StuGIIIG, and that did have tracks. I have yet to build it.
 |
| Trackless models with their new tracks. |
I used the type of rubberised matting used in crockery cupboards to stop stuff from sliding about. I have used it for much the same purpose for my war games stuff, but have discovered a downside. it tends to stick to whatever is placed in it, with rather irritating consequences when you pick them up. But cut to a reasonable width, I find they make very good looking tank tracks.
 |
Showing off the matting tank tracks: blue matting cut to width
and length and draped around the running gear, painted black
and dry-brushed over with silver. I'll probably add a water
'rust colour' over all later on. |
You can get this stuff in black, but what I used, as you can see from the background of some of these pictures, the mat I used is blue. This stuff doesn't take paint all that well - you really have to slop it on thick. In my view that is no bad thing!
 |
The JagdTiger in rough 'factory finish' showing its paces...
|
To conclude this posting: a couple of genuine scratch builds. These are two portees from the Western Desert campaign, that I build maybe twenty-odd years ago. The 6pr portee was a direct copy of a John Sandars design, I think from his Airfix book on the Eighth Army. I just used whatever bits of cardboard, wire and balsa that came to hand. only the wheels are rubber wheels, very slightly over-scale, actually, but not by much. The overhead rack could use a tidy-up, and the covered wheel should have been centred, but at the time I made this, I couldn't work it out from the diagram, and had no other informative source to hand.
 |
| AT portees. The 6pr is Airfix. |
The 2pr portee was done from photographs. It turned out OK, I thought, but the gun not quite so satisfactorily. I was going to make the shield in one piece, but noticed that occasionally the hinged top was placed 'down'. Not the best option.
 |
I still have to stick a driver in the cab, and the gun crew is around
somewhere. It can fit under the trails of the gun for mounted
action. |
More on this topic to come...