Upon a July late afternoon, a small group of richly dressed mounted men might have been seen upon the side of the road leading southwest towards Lyndhurst. The drizzle that had dampened most of the day had passed, and the lowering sun glanced beneath the rim of the overcast to light up the vignette. There stood the young King, James, the Third of that name, and not long sat upon his uneasy throne; beside him his Prime Minister, Sir Edward Anders, Master of Lyndhurst, and already quietly being styled by friend and enemy alike, if not in his hearing: 'Kingmaker'. The pair stood a little apart from the rest of the officials, Ministers, councillors and court flunkeys who had also made the short journey to this spot.
'I had hoped, Sir Edward, for a larger contingent,' murmured the King, eyeing the five Lyndhurst battalions marching past, some 4000 men less quite a few straggling behind or making the march riding upon the small train of waggons and carts. Weary though they were after several days' march, dank, dishevelled, dusty and muddy besides, yet the men seemed in good spirits. Recognising their Master as they passed, and many the King as well from his time at Lyndhurst, they raised a wild cheer, waving in the air almost as many pikes and half-pikes as muskets. Upon learning that victuals and ale awaited them not much farther ahead, they raised another cheer.
'Long live the King!' The Master of Lyndhurst's call was echoed two thousand fold - or perhaps just a little less. A certain amount of cheerful banter passed between the marchers and the Master, as they continued on to their camps and billets, the familiarity of the former skirting close to, but never quite crossing, the bounds of over-familiarity or insolence. For Sir Edward (Sirreddard) Anders was a popular Master of Lyndhurst.
'Aye, Your Royal Highness,' replied Sir Edward, 'I fear that, far from a reinforcement, we have here, withal, barely a replacement for our recent losses.'
Sir Edward omitted to mention that, as it was, the manpower of Lyndhurst had been stripped to the bone to supply even this contingent. The fighting men remaining to his uncle back in Lyndhurst amounted to a few score, and then there were harvests to be got in a bare month away. Sir Edward didn't dare think about what might happen if that villain and false Duke, Romney, made a serious attack upon his lands.
He cast his mind to the late evening of two days back, when a dust laden traveller had been ushered into his Prime Ministerial office. A message from brother Leopold, forsooth! Sir Edward poured with his own hand a bumper of his favourite toddy of mulled wine. Offering it to the messenger in exchange for the rolled paper he held, he indicated a chair near the fire, then settled down to read.
There had been a battle all right. And the news, though not all bad, was certainly not all good. The French and Confederation Army had received a check, it seemed, but it had cost the Royalists dear. The march north to face Norfolk's Army was not going happen at once - and might not for several days. The combat must have been no mere skirmish...
At about mid-morning, the Chevalier and the Duke ordered forward their respective commands. As I mentioned earlier for the first turn, the anti-Royalists went first, the two contingents rolling separately for unit activation. Thereafter, the first-mover in each turn was determined by a dice roll. Strangely enough, the Royalists 'won' every initiative roll for the entire battle. For them, it was probably just as well.
 |
My apologies on the under-painted dragoons. But I wanted
to get this action done. |

Very quickly the Confederation Army developed two waves, with half the army advancing, whilst the other half waited. The Royalist position on this flank was a formidable one, three battalions and two artillery companies holding the village and enclosures, with the light infantry protecting the wooded inner flank, and the Dragoon Guards the open left. To force this position would be no light undertaking, as the Duke's men were to discover.
The French had rather different difficulties to overcome. The approach to their immediate objective, Benbow village, was flanked closely by woods, and barred by the Brewery River. This created something of a tangle as the dragoons found themselves leading an advance in country not really to their liking, the artillery waiting for their front to be cleared in order to fire at the enemy across the river, and infantry also looking for an open path to reach the river at all.
 |
| Royalist view of the dense French columns. |
It was not to be wondered at, then, that the Dragoons elected to charge in columns across the river (
as my LBC - 'Lonely Brain Cell' - rule set now stands, it makes no difference what formation horse and foot are in - it was really just the look of the thing. However, that may change!) , Harcourt taking the bridge, Dauphin splashing straight across the stream. That meant a reduction in their combat dice.
 |
| The first attacks! French dragoons versus British infantry, |
Seventh Fusiliers advanced from the village to meet the
Harcourt Dragoons at the bridge, where they inflicted 1SP hit and a 'retreat' hit; whilst taking a 'retreat' hit themselves. Both sides, deciding not (
7th Fusiliers), or simply unable (
Harcourt Dragoons), to retreat, took the extra SP hit. The fight between
Dauphin Dragoons and
115th Fusiliers was less bloody, the Dragoons taking a retreat hit only, and with room to do so, fell back. (
A point, here: retreating units can pass through friends, but only if the retreat takes them to an empty grid area. In this connexion, infantry may retreat two squares for one 'retreat hit' if - and only if - their normal 1-grid-cell retreat is blocked by friends, but there is an open grid-cell beyond.
More shall be said of this topic later in the narrative.)
 |
| Royalist hit-and-run counter-strike. |

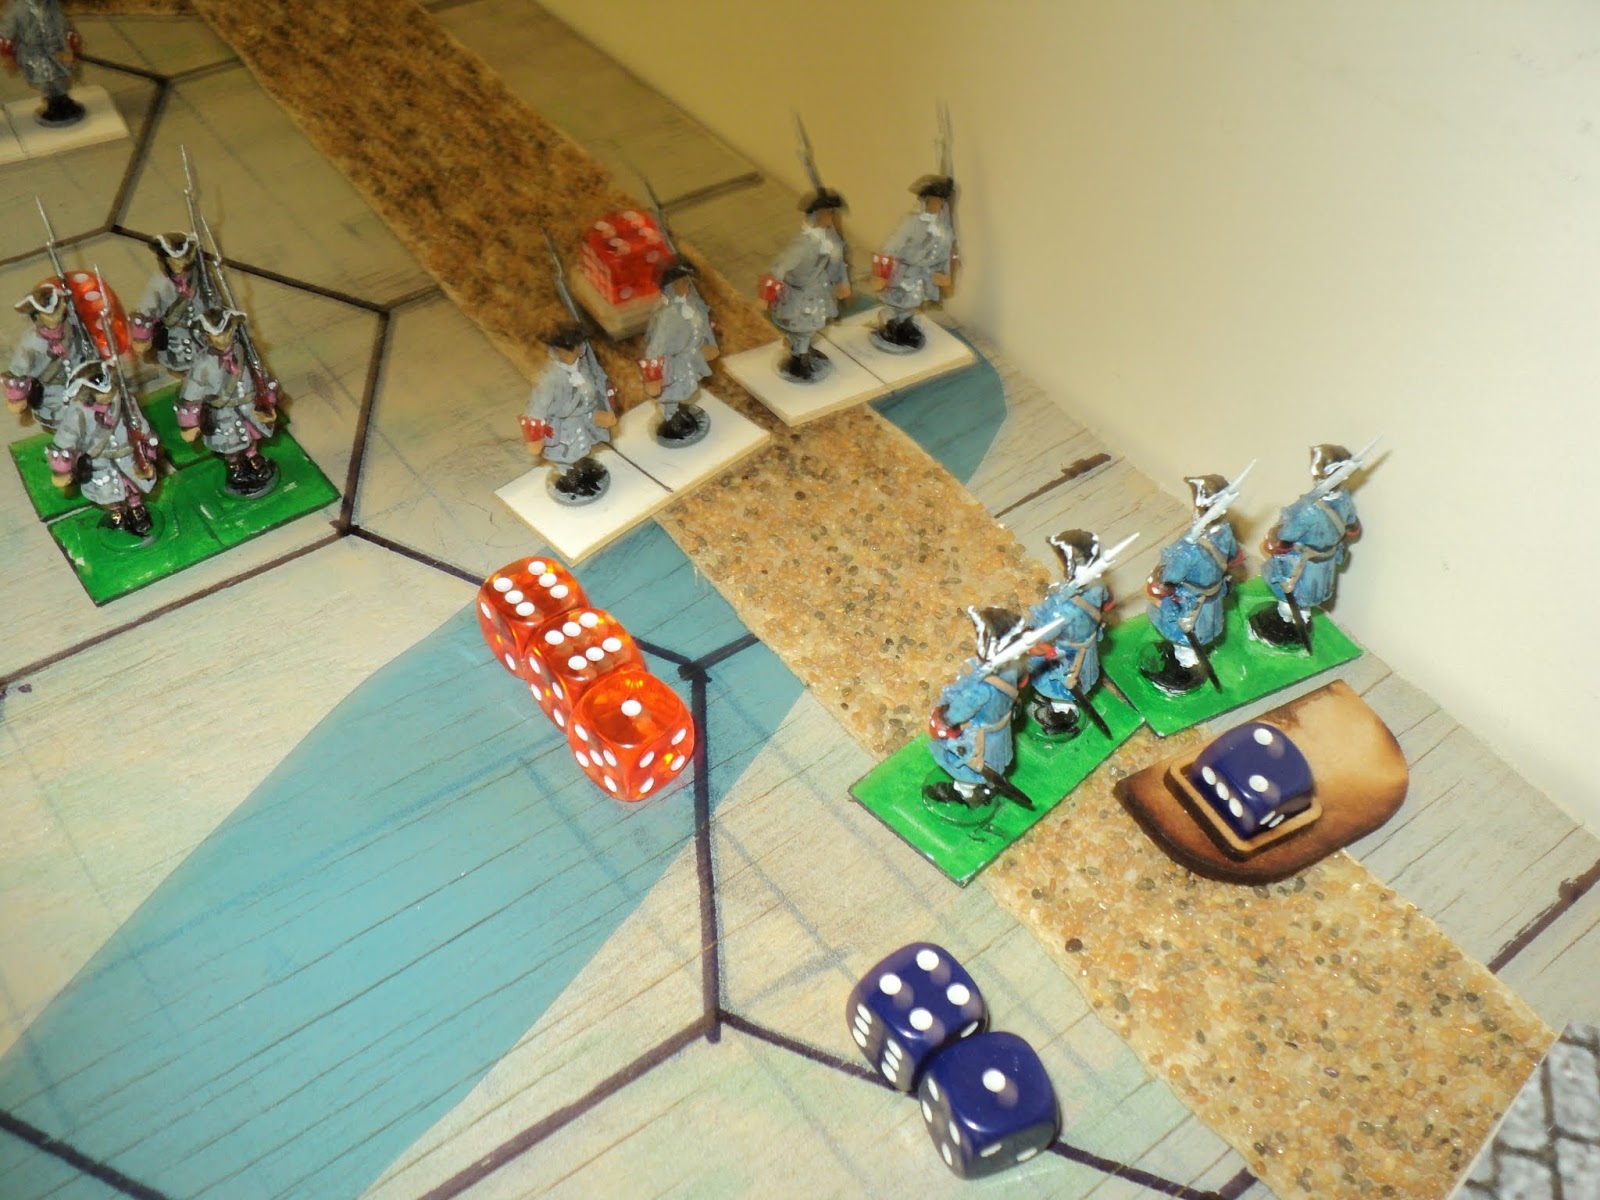
On the other wing, apart from effective Royalist gunnery that inflicted some hurt upon
114th Foot, the first close combats were joined as the
1st Light approached the Brook Forest, wherein lurked the light infantry of
6th and 96th Royalist Foot. Observing the somewhat careless approach of the greencoats, both Royalist battalions charged out and closed with the startled Confederates. The
96th's shooting proved woefully ineffective, the Confederation light infantry inflicting 1 SP and 2 'retreat' hits for no loss, and driving them back into the woods as far as the riverbank.
Sixth Light were tougher: dishing out 2 SP hits, before themselves retiring (1 'retreat hit'). On the whole, though, it had been a very effective 'hit and run' attack by the Royalist light infantry.
 |
Counter-blow by 2nd Dragoon Guards and the Royalist light
infantry. |
 |
The Confederation Horse get the better
of the opening exchanges... |
Meanwhile, the
2nd Dragoon Guards nerved themselves to charge the leading Confederation
Dragoon regiment. The combat did not begin well for the Guardsmen, taking an SP hit themselves for no loss to the enemy. Remaining in the battle (they could have chosen to retreat, having taken the hit), the Guardsmen overcame their earlier setback, and inflict 2SP hits on the enemy before pulling back (a 'retreat' hit)
 |
... but superior training and sheer bloody-mindedness
comes to the aid of the Dragoon Guards! |
These setbacks were more exasperating to the Duke's men than depressing. Even the crushing of 114th Foot by gunfire hardly slowed them down. Soon the leading foot battalions, 2nd and 1st Confederate reached the enclosures. It was the 2nd who struck the Royalist 9pr battery astride the road, where they managed to score a SP hit. But the damage to themselves was the greater - it being no small matter to charge guns frontally. (Another aside: I was in two minds about how to handle close combats involving cannon. For one thing, the beaten zone of canister or grape or similar 'shotgun' projectiles would be a dangerous place to be. On the other hand, though defending themselves with trailspikes and rammers, the gunners could scarcely be a match for regular line infantry who had got fairly in amongst the guns. Although I didn't use it at the time, I'm thinking that when the foot move into close combat, the cannon double their combat SP as per short ranged fire, but if the foot remain in contact the cannon SP is normal - or possibly even halved - for subsequent combat rounds).
 |
Infantry assault on the Royalist battery astride the road.
Not sure what those 4 green dice were doing there, unless they were
rolled for the gunners... |
 |
French attacks on the Royalist right forces the commitment of
5th Foot and 2nd Footguards to help the defence. |
The menacing French columns on the Royalist right persuaded Sir Leopold to reinforce that flank. He had already planned to push
5th Foot into the enclosures across the river to flank any advance by the French straight up the Casebrook Farm road or the Benbow road. It seemed to him appropriate, too, to commit part of his small reserve, the
2nd Footguards, to that flank as the pressure mounted.
 |
Both sides fell back after this clash, the Horse passing
right through the columns behind. |
Before the leading French foot battalions,
I Provence and both
Rousillon,
Harcourt Dragoons made one more bid to take the road bridge.
Seventh Fusiliers were driven back into the village, but forced the
Dragoons to break off the fight. (
A further aside to test your patience: For some reason I had the cavalry retreat two grid-cells whenever they received a 'retreat' hit. Maybe I was influenced by the situation on the map, but I had worked out what rules I would use before beginning the action. It just seemed right. As it transpired, the two 'retreat' hits inflicted by 7th Fusiliers implied a 4-grid-area retreat, which, fortuitously enough, was just sufficient to take the dragoons all the way beyond the congested field behind. I really do like this 'interpenetration' idea for this type of game).
 |
| The Confederation Infantry can not buy a hit upon the guns. |
At this time, the most of the fighting was still being sustained by the Duke. But his assaults upon the artillery were stalled. All day the Confederates simply could not buy a hit on the enemy artillery, whose return fires proved very damaging. In the first rounds of combat,
2nd Confederate took a SP hit, and
1st Confederate took two; all without inflicting the slightest hurt upon the artillery. That could not be sustained for very long.
 |
The Dragoon Guards smash a Confederation Horse unit
and are about to ride over the guns (just out of
the picture). |
As the Confederation infantry prepared to launch further assaults, the Dragoon Guards declined to remain idle. The 2nd Guards had already battered one enemy horse unit, the Duke of Kent's Own. Now the 3rd Guards resolved to measure their prowess against what remained of it. Fighting back manfully Kent's Own inflicted 'retreat' hit, but were themselves overwhelmed by 2 SP hits and a redundant 'retreat' hit. For their part, the 2nd Guards charged the sole Confederate battery, which was supporting the infantry assault. Electing to conserve their strength, the 3rd Guards promptly retired - a mistake as it transpired, for, just after riding over the Confederation's cannon, they found themselves assailed in flank by the remaining mounted unit under the Duke's command, Romney's Horse.
 |
| The guns about to be ridden over. |
The rude irruption at once reduced the
Guardsmen to just 25% of their strength, as a retreat would have had to traverse a grid area adjacent to the unit attacking them. (
Here we go again. I really, really was in two minds about this. In this action, I forbade such a retreat; the cavalry had to take the SP reduction. So effective was the Confederation Horse flank attack that that meant 3SP hits right off. Now, I am not sure why I decided upon matching combat dice with current SP, perhaps it has to do with my 'Memoir '44' style of combat system [see previous postings]. But I also like the idea of allowing retreats into grid-areas adjacent to an enemy, even one already adjacent and in combat with the subject unit, but with the compulsion to halt at once. Combat is resumed in the next side's turn. The concept is fixed on the notion of a unit fighting (or trying to fight) its way out of trouble. It seems to me worth play testing).
 |
2nd Dragoon Guards caught in flank, attempt to fight
their way out. |
At any rate, as you can see, in the following Royalist turn, the Guardsmen turned to face their attackers (
though it seems to me the option to break off the action could be explored). This was to be no glory ride: the two hits were more than enough to scatter the
Dragoon Guards. The
Duke's Own had been bloodily avenged.
 |
| Royalist right under heavy assault. |
On the Royalist right flank, the French Horse having been seen off, the defenders had to face the French infantry. Now I had decided that a unit in a river grid area fights at 1SP less, so it were better to defend a river crossing from an adjacent clear grid area. This was, of course, tough on the attackers, even though, after some rounds of fighting against horse foot and guns, all the defenders - even the artillery - had taken some loss - 5SP, and only
II Rousillon had so far taken any loss on the French infantry.
 |
A blood letting on the Casebrook stream! 5th Foot take 2 SP
hits; I Rousillon 1 SP hit and 2 'hit or retreat'. |
The battle between
I Rousillon and
5th Foot proved costly to both sides - and that seemed to become a feature of infantry versus infantry fights. In attempting to force a crossing, the
Rousillon inflicted two SP hits, but took one with a couple of 'retreat' hits, whereupon the battalion fell back to prepare a second attempt.
II Rousillon almost forced a passage when they drove
115th Foot away from the riverbank, but more was also beyond them, as Frenchmen here, too, fell back.
 |
| The demise of II Rousillon. |
Rather more success attended the assault by
I Provence that carried the bridge. Although receiving a 'retreat hit', the
Provencals wiped out
7th Fusiliers' remaining SPs, and surged over to the other bank. There awaited them, in the village,
8th Fusiliers, who had moved in behind the
7th against just this eventuality.
 |
| I Provence vs 7th Fusiliers. |
So matters stood on the Royalist right when the Confederation assaults finally petered on their left. Having rallied from their earlier fights, 3rd Dragoon Guards rode into the flank of 2nd Confederate infantry, which unit promptly disintegrated. The attacks upon the road had also melted away. Having lost 15 SPs out of 43, the Confederation Army had reached its exhaustion point. Very soon they put some distance between themselves and the Royalists, and invited the latter to try their luck crossing the gap. Under strict orders from Sir Leopold Anders himself, the Royalists declined the invitation and contented themselves with resting and counting the cost.
 |
| The Confederation Army draws back, it's offensive strength spent. |
To take up the slack, the French commander found himself committing his centre troops, the two
Bocard battalions against the Brook Forest; and
II Provence straight up the Clydesdale road. All morning the gun battery astride the road had been engaged in an ineffectual duel with the Royalist 9pr guns across the Brewery River.
 |
| French Boccard Infantry attacks Brook Forest |

In their haste to close with the light infantry in Brook Forest,
II Bocard forged rather ahead of their companion regimental battalion and struck the
96th Light unaided. Despite the woods being the natural home of the light infantry, the French regulars gave at least as good as they got in the ensuing firefights. Taking heavy losses themselves, they eventually scattered
6th Light, and, when
96th Light Infantry sought to intervene, had them driven back to the riverbank. All this before
I Bocard had come up. But the effort had worn down
II Bocard to the extent that further effort broke them down. The remnants scattered over the fields.
 |
| Royalist defences already showing signs of strain. |
It was becoming clear by this time that the outcome of the main French assault around Benbow would decide the battle, one way or the other.
Eighth Fusiliers found themselves driven into the village, and out the other side. A counter-attack regained the place, but by this time the resistance of
115th Fusiliers along the Brewery riverbank, and
5th Foot at the Casebrook Stream had been broken by determined French attacks. The
2nd Footguards marched to the aid of the
Benbow garrison, but not before they were evicted a second time. A concerted counter-blow by
8th Fusiliers and the
Footguards once more restored Benbow into Royalist possession, but the defences were becoming thin: just two battalions and a reduced heavy battery remaining.
 |
Royalist defences looking pretty thin. The village has changed
hands four times by now (in the excitement, neglected to take
pictures). |
Nor were prospects looking bright in the centre, as I Bocard Infantry took up the duel so well fought by their companion battalion. True, II Provence had been halted on the road by effective gunfire, but as 96th Light Infantry were bayoneted out of Brook Woods, 4th Foot had to be shifted to their left to contest the passage of the stream.
 |
| Brook Forest lost to the French. |
The crisis of the battle seemed to have been reached. Around Benbow the French had firmly established themselves upon the Royalist side of the river. Although, after changing hands four times, the village remained in Royalist hands,
2nd Footguards had been driven back, leaving the village and the
gun battery for the moment isolated. Against what remained of the
defenders, there still seemed inexhaustible numbers of
French infantry ready to press the advantages already gained. On the point of exhaustion (having lost 25SP out of 74SP), the
Royalists awaited the final assault that must surely come.
 |
The French high water mark, and the crisis for the Royalists -
just as the French assaults fade away. |
It didn't. The French attacks suddenly petered out and faded away, as the French infantry fell back across the river. The battle was over.
What happened?
I was most surprised when a Strength Point count of the French revealed they had taken 22SP loss out of 60SP. The sight of several reduced, but unbroken, battalions had deceived me into believing that, having plenty of SP still in hand, the French would gradually edge the Royalists out of Benbow, at which point I would probably have counted the action as a Franco-Confederation victory. West of the Clydesdale road, they had lost only the one battalion, most of the rest more or less damaged. The Royalists had lost three.
Of units actually destroyed, routed, scattered, not answering the call to the colours, the losses were:
Royalist: 3 Regular (
7th and
115th Fusiliers and
5th Foot), 2 Light battalions, 1 Dragoon Regiment;
Confederation: 1 Regular and 1 Light battalion, 1 Dragoon regiment, 1 battery;
French: 2 Regular battalions (
II Rousillon and
II Boccard).
The exhaustion of the Royalists and French having occurred in the same turn - the Confederates rather earlier - the action counted as a tactical draw. The Franco-Confederation march on London had been definitely checked. But the Royalists themselves had taken too much damage to contemplate an immediate march to relieve the Army of the North.
The crisis of London had not been averted; it was merely in abeyance.
Links to earlier
Vales of Lyndhurst postings:
Requiem
Vales of Lyndhurst continued
Combat at Clydesdale 1


 Very quickly the Confederation Army developed two waves, with half the army advancing, whilst the other half waited. The Royalist position on this flank was a formidable one, three battalions and two artillery companies holding the village and enclosures, with the light infantry protecting the wooded inner flank, and the Dragoon Guards the open left. To force this position would be no light undertaking, as the Duke's men were to discover.


 In their haste to close with the light infantry in Brook Forest, II Bocard forged rather ahead of their companion regimental battalion and struck the 96th Light unaided. Despite the woods being the natural home of the light infantry, the French regulars gave at least as good as they got in the ensuing firefights. Taking heavy losses themselves, they eventually scattered 6th Light, and, when 96th Light Infantry sought to intervene, had them driven back to the riverbank. All this before I Bocard had come up. But the effort had worn down II Bocard to the extent that further effort broke them down. The remnants scattered over the fields.


I quite like the look of this game, like a boardgame but like a miniatures game.
ReplyDelete... and very accessible! It was fun and exciting to play through, especially once the French attacks really started to bite.
DeleteYour tabletop looks very effective and has been well used since you constructed it a year ago.
ReplyDeleteCheers, Peter. Yes, my 6ft x 4ft table is pretty heavy and there really isn't enough room for it, so it never did get all that much use. This 4ft 4in x 4ft board is much light and takes up much less room. With a blanket over it, it becomes a 'free' (i.e. non-gridded) surface. But the hex system I find very handy, apart from having to develop terrain systems that fit!
DeleteOne caveat - it might be a tad on the small side for my 36-figure C18th units!
A hard-fought battle!
ReplyDeleteIndeed it was! Even after the action was over, the issue is in doubt!
Delete