 |
Concentric attack by infantry and armour against
a fortified machinegun post. |
The early successes and gains of the government forces against the BARFist revolutionaries holed up in Maimajikwand seemed to suggest an imminent collapse of defence, and even the Revolutionary movement as a whole. Half the infantry in the town - a whole company, withal - had dispersed under a concentrated barrage from the Government's field artillery, and the whole line was under intense, unrelenting assault.
 |
Beleaguered BARFist infantry at the south end of
of the trench line.
|
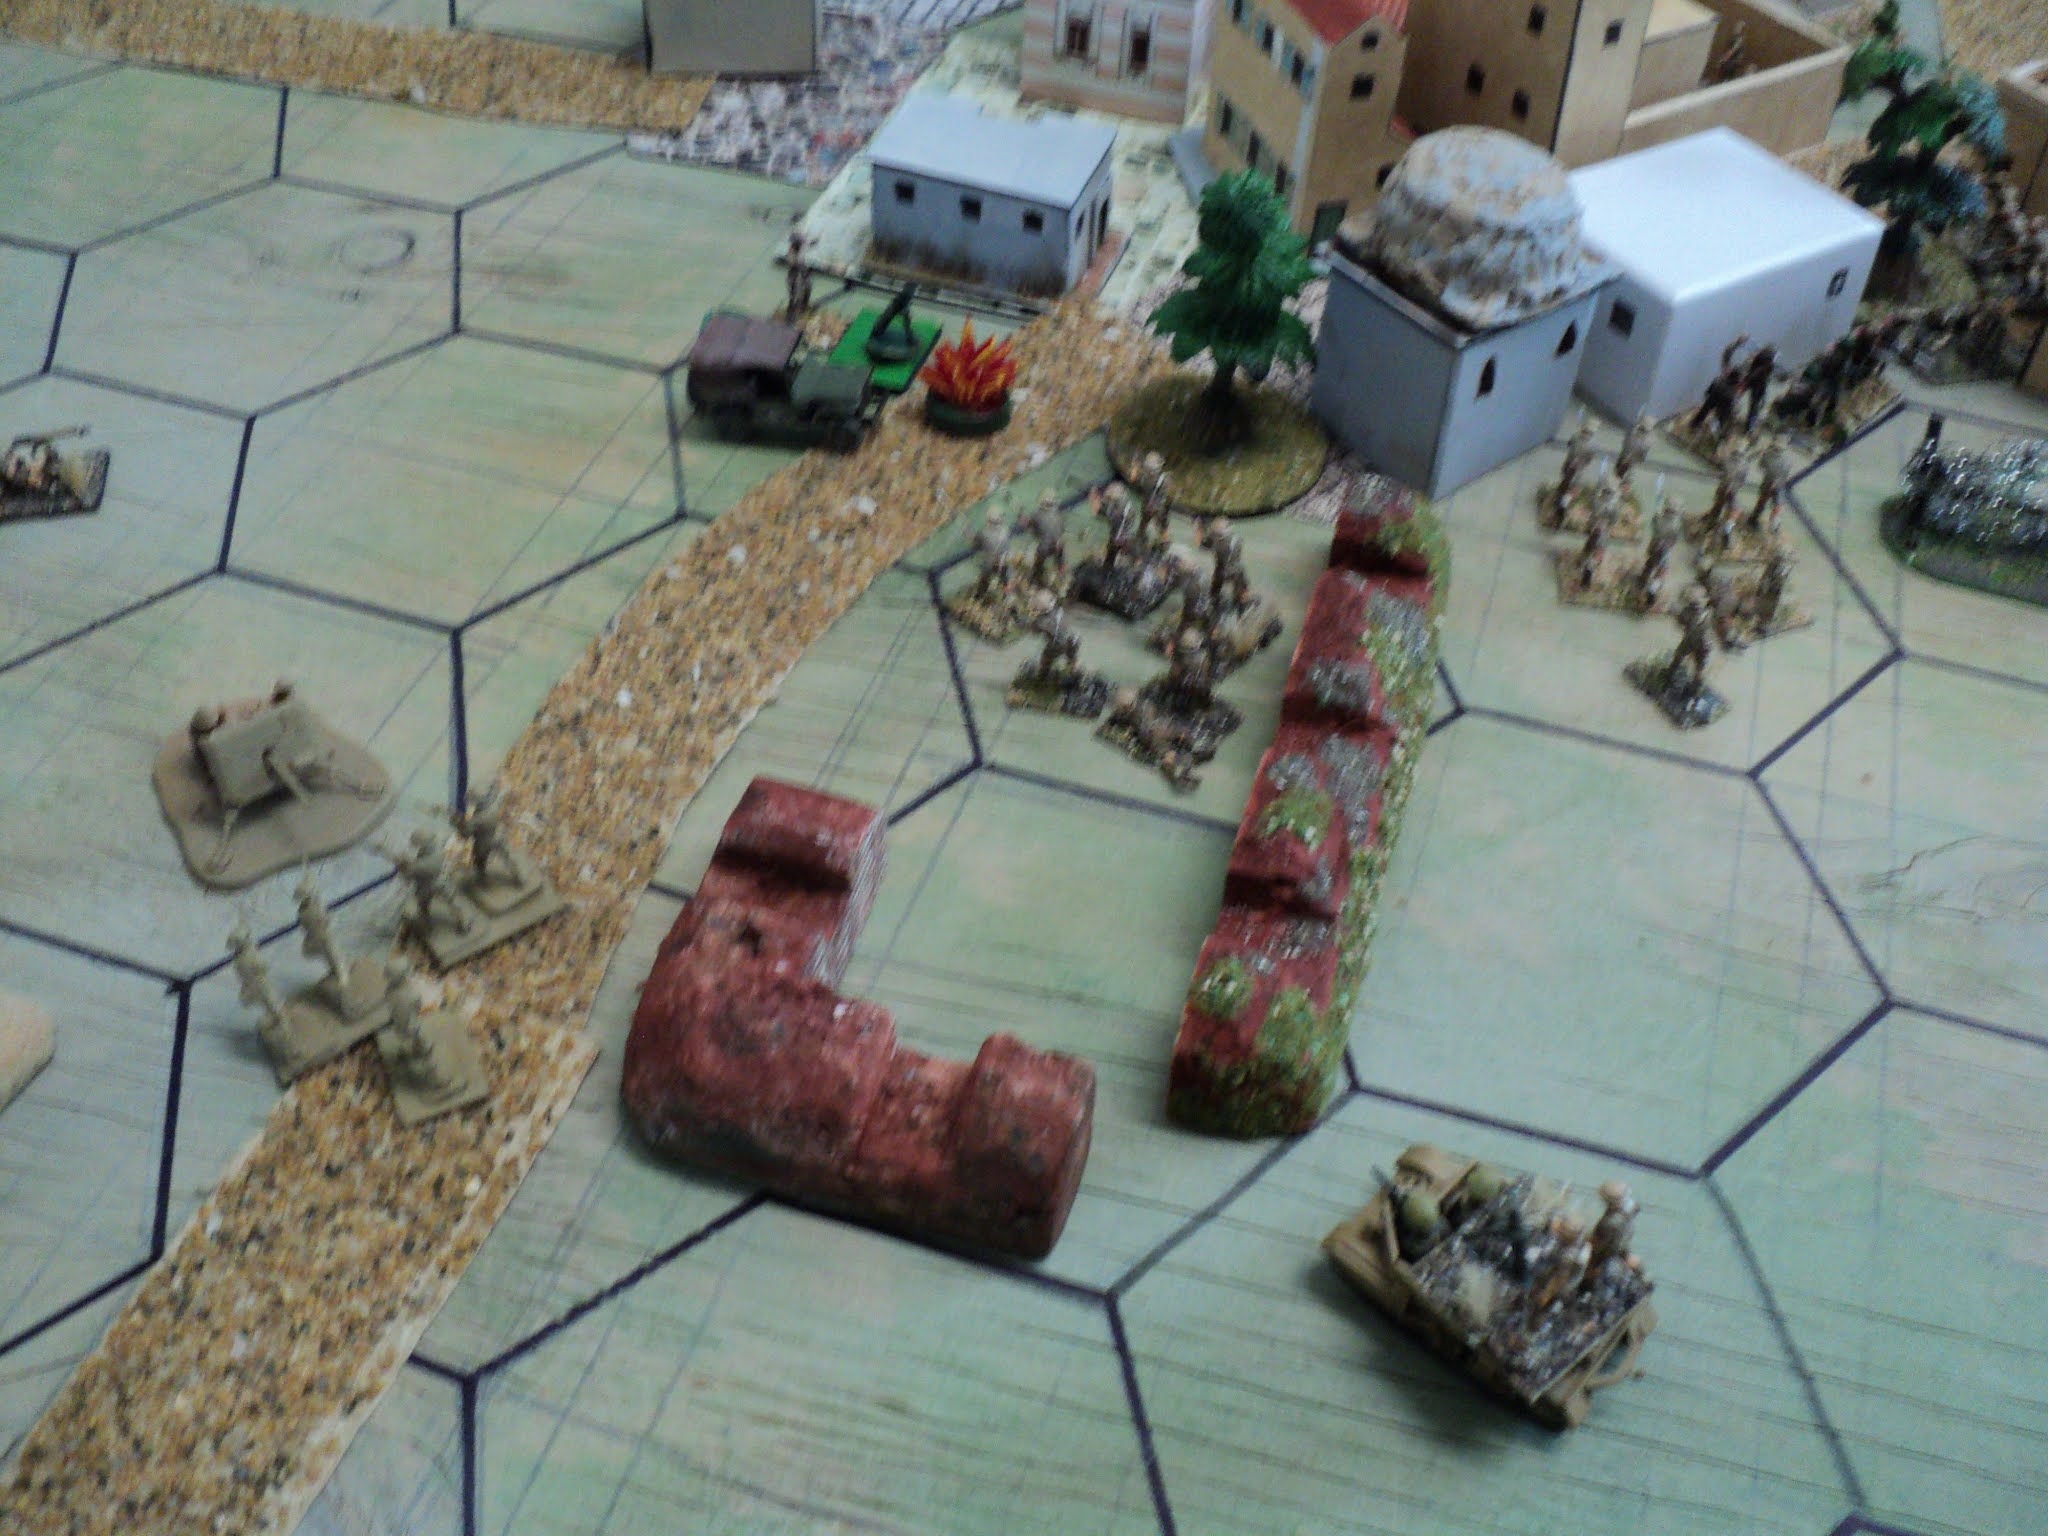
The cornerstone of the town's defence, the fortified machine gun nest, came under concentric attacks from two infantry companies, supported by a squadron of medium tanks (D/6th Armoured). The six-pounders destroyed and the Stuarts driven out, a whole line of entrenchments were left abandoned, 'D' company of the BARFist infantry left isolated at the end of the line. C/6th pushed into the fieldworks, then drove along the line to take this lone company in flank, just as 'A' and 'B' Squadrons continued their close assaults. The lighter rebel armour took the opportunity to take the Government tanks in flank. What with the infantry hand-held anti-tank weapons in the field works and the incoming gunfire from the right flank, very soon a good two-thirds of 'A' Squadron's strength lay abandoned and burning close by the minefield.
 |
18th Siliputti Battalion - still scarcely engaged
apart from 'D' Coy assault on the trenches. |
For their part, the Siliputti Battalion was having an easier time of it, only slowly and in piecemeal fashion coming into action. Only 'D' Company was in close action, 'B' Company engaging the remaining BARFists in the town with a long range small arms fire. In rear of this part of the line, the platoon of BARFist machineguns left the shelter of the oasis and pushed up towards the fieldworks to bring their fire to bear. At once the Silliputti commander, Major Inzamam Laghari, ordered up artillery support against the menace.
 |
The second time the government gunners
demonstrate their skill...! |
 |
| Dead on target... |
Once again, the gunners demonstrated their skilled practice. The shells rained down upon the machine gunners.... but with surprisingly few casualties, they simply scuttled a few hundred yards to their rear where they set up a new gun line. As this happened to be out of range of the 25 pounders, they were able safely to bring the immediate front of the whole trench line under fire from the rear position. This was to cost the
Silliputti Battalion dear.
 |
... and the machine gunners bug out to a new
position out of artillery range. |
At end of the line the remnants of the BARFist 'A' Company continued to hold out, even as C/18th (Siliputti) joined their companion 'D' company in the assault. As both sides' 'B' Companies fought it out in the town, 'A' Company pushed up through the gap. The BARFists in the town were coming under pressure now from three Government companies: 'A' and 'B' Siliputti Rifles, and 'D' Choklit Ghandhi. Surely the BARFist resistance must soon collapse?
 |
Siliputti Battalion closing in. 'D' and, especially 'C'
Coys have taken heavy losses... |
No such thing. The whole assault upon the BARFist defences had as it were hit a stone wall, though for the time being at least they were able to keep up the pressure.
 |
The Government assault seems to have stalled
on the south flank... |
Suddenly, the BARFist line gave - at little. The resistance from the machine gun nest collapsed, whereat C/17th
Choklit Ghandhi forced their way further into the town, into the left rear of the BARFist 'B' Company. 'D' Squadron ran through the earthworks into the rear of the BARFist 'D' Company, where they engaged the rebel armour in flank.
 |
The MG nest cleared, 'D' Squadron pushes
into the rear of the trench line. |
This was too late for 'A' Squadron, its tanks left smoking wreckage in the plain, and 'B' Squadron was also left depleted. Yet, for all their stout resistance, the BARFists on the south flank were now in parlous case, the infantry, reduced to 75% surrounded by enemy armour and soon to come under infantry attack.
At last overrunning the whole of the trench line north of the town, the Siliputti Rifles pushed on to bring the anti-tank gun platoon and the mortars under attack. The anti-tank gunners proved more than happy to accept a close quarter fight, where they were to give at least as good as they received. But the mortars, despite the encouraging presence of their Revolutionary leader, failed in the crisis. The crews cut down, Colonel Peenut Buttahjars barely escaped the Government clutches - speeding away in his jeep, neither waiting upon the order of his going, nor the kind invitations for him to remain. (As the command element was with the mortar unit destroyed by gunfire, then close assault, I rolled a die for his fate: 2xD6, 12 = KIA, 11 = WIA, 10 = MIA/POW. The roll was nowhere near indicating such a fate...).
 |
| Northern trenches overrun |
The demise or capture of the Colonel might have ended the Revolution then and there. The action was quite lost, the Revolutionary fighters exhausted, and the Government troops triumphant - but the fighting was not yet finished. From their rearward position, the machine gunners mowed down in windrows the onrushing companies of the
Siliputti Battalion. The surrounded BARFist 'B' Company refused to budge from the northwest sector of town it occupied, even when Government armour could distantly be heard in the eastern suburbs.
 |
| What happened to the Siliputti Battalion?! |
However, the southern defences had been quite overrun, and what was left of the BARFist 'D' Company - about platoon strength - after driving off the Government armour, was all that escaped to join the light tank squadron in the rear. The foreign press sympathetic to the Revolution were to laud the heroic lost-cause resistance of 'B' Company; the more hostile news outlets - notably the Daily Post of Londontown - deplored the fatalistic fanaticism of a people no better than anarchists...
 |
| Southern trenchline finally overrun. |
Only a pathetic remnant of his fine army accompanied Col Buttahjars's retreat to Madasaiwannabe, the little regional town at the head of the Maimajikwand valley: apart from a few stragglers, the squadron of light tanks (for a wonder having lost none), a single rifle platoon and a Vickers platoon. Lacking the means to shift them, the 2-pounder anti-tank guns remained on the field. Surrounded, with no hope of escape, 'B' Company was finally forced to surrender.
 |
Government armour enters the eastern suburbs
of Maimajikwand |
Though decisive, the Government's victory was not yet complete. It had been costly, too, especially to the
Siliputti Battalion late in the the action. Eighteen Strength Points was the Government's 'butcher's bill' - nearly two-thirds of them from the
Siliputti Battalion alone. But it was short of the exhaustion point. The BARFist battle losses were the same: 18SP, well beyond its exhaustion point. If I had a '50% Rule', perhaps it would have been enough to occasion a collapse or surrender. On top of the 18SP lost, a further 5SP were left as the remaining 12SP departed the field.
'We will fight on,' quoth Colonel Buttahjars to any news correspondents who were brave (or foolhardy) enough to venture into the fastnesses of the upper Maimajikwand valley.
I admit to being
very tempted to end the whole campaign here, with the collapse of the Revolutionary movement. Had the revolting Colonel been captured or killed, that certainly would have been the end. But no - there is still one more battle to fight. A last stand - or a resurgence? Who knows?
To be continued...


Ion. The revolting colonel lives on....!!!!!!
ReplyDeleteRegards
That he does, the slippery fellow, to trouble the Nawab's repose, and to perturb the Pax Sub-Continentalis.
DeleteArchduke Piccolo,
ReplyDeleteA great battle report,
This seems to have been a tough battle, and leaving the scene set for the revolution to flare up again is a great situation to be in as you can revisit it at some point in the future.
All the best,
Bob
Hi Bob -
DeleteThe Revolution is not yet crushed, bloody, beaten, but as yet unbowed. The good Colonel will retire to the cradle of his revolt, Madasaiwannabe, and there make his final stand if he must - or restore his fortunes if he can.
I must say, though, that after they were demonstrably beaten, the BARFists put up a heck of a show before going under.
Cheers,
Archduke Piccolo
A smashing game, I look forward to the return of the revolting Colonel.
ReplyDeleteRegards,
Paul.
Hi Paul -
DeleteI reckon he'll be back for at least one last episode, as the Government forces close in...
Cheers,
Archduke Piccolo
An excellent campaign! I have thoroughly enjoyed following it.
DeleteRegards, Chris.
An excellent campaign! I have thoroughly enjoyed following it.
DeleteRegards, Chris.
Cheers, Chris -
DeleteI think there might be JUST one more episode...
All the best
Archduke Piccolo
Fantastic looking game Archduke
ReplyDeleteCheers, Maudlin Jack - The way these forces have been organised, with multiple stands representing the Strength Points of Infantry units, has come to be my favourite for 'mechanised' warfare.
Delete