


The action purported to be fought somewhere in the Balkans: a large scale raid by Bulgars, or perhaps a Byzantine punitive expedition into Bulgaria. The armies comprised:
Byzantine:
Commanded by Emperor Dementius himself - single element 6SP
1 unit kataphraktoi - Cataphracts (mace/lance/bow), 4SP (elite)
1 units tagmatic kavallarioi - Heavy Cavalry (lance, bow), 4SP (elite)
2 units thematic kavallarioi - Heavy Cavalry (lance, bow), @4SP (average) = 8SP
Byzantine:
Commanded by Emperor Dementius himself - single element 6SP
1 unit kataphraktoi - Cataphracts (mace/lance/bow), 4SP (elite)
1 units tagmatic kavallarioi - Heavy Cavalry (lance, bow), 4SP (elite)
2 units thematic kavallarioi - Heavy Cavalry (lance, bow), @4SP (average) = 8SP
1 unit prokoursatores - Lance/Bow Light Horse (lance, bow), 4SP (average)
1 unit Varangian Guard - Close Order Spear, 4SP (elite)
2 units skoutatoi - Protected Bowmen (spear, bow), @4SP (average) = 8SP
1 unit peltastoi - Loose Order Spear (spear, javelin), 4SP (poor)
1 unit akontistai - Light Infantry (javelins), 4SP (average)
1 unit sphendonistai - Light Infantry (sling), 4SP (poor)
Totals:
12 units, median 6.
50SP: Exhaustion Point = minus 17; Rout Point = minus 25

Bulgar:
Commanded by Kavkhan Attaboi - single element 6SP
2 Heavy Cavalry (javelins, bow), @4SP (elite) = 8SP
5 Bow Light Horse (javelins, bow), @4SP (average) = 20SP
4 Close Order Spear, @4SP (average) = 16SP
1 Bowmen, 4SP (poor)
1 Bow Light Infantry, 4SP (average)
Totals:
14 units, median 7.
58SP: Exhaustion Point = minus 20; Rout Point = minus 29.
The slight difference in overall strength points in favour of the Bulgars is (supposedly) offset by the slight qualitative advantage that the Byzantines have, especially in the weight of their mounted arm.


An archery battle begins on the Bulgar left. The flanking spearmen take a loss, but the Byzantines early on take worse hurt. The Bulgar heavy horse archers cause losses to the tagmatic cavalry, and the javelinmen in the village halve the strength of the Varangian Guard - rather bad luck for elite troops.

This does no more than annoy the Byzantine cavalry, which engages enemy heavy horse led by the kavkhan himself. The impetuosity of the charge throws the Bulgars back (the Byzantine combat roll overcame the advantage to the Bulgars' presence of their commander).


As the Bulgar heavies reel back, in come the Byzantine cavalry, to strike a heavy blow. The Bulgar heavy horse archers lose a second SP.

Perhaps the Bulgars might yet retrieve the situation on their right, but for the pressure mounting in the centre. Both skoutatos units are entering the pass between village and the peltasts' ridge, led by the super-heavy cataphracts. The Bulgars have a couple of spear units close by, and a weakened light horse unit (having exchanged pleasantries with the slingers at the cost of a SP each) rides in to deliver volleys of arrows.

The Bulgar left, meanwhile, draws back a little, the solid line of spears linked to the hilltop village, to which the Bulgar javelinmen have withdrawn, by Attaboi's heavy horse. The front village having been abandoned by the Bulgar light infantry, their Byzantine counterparts occupy it.

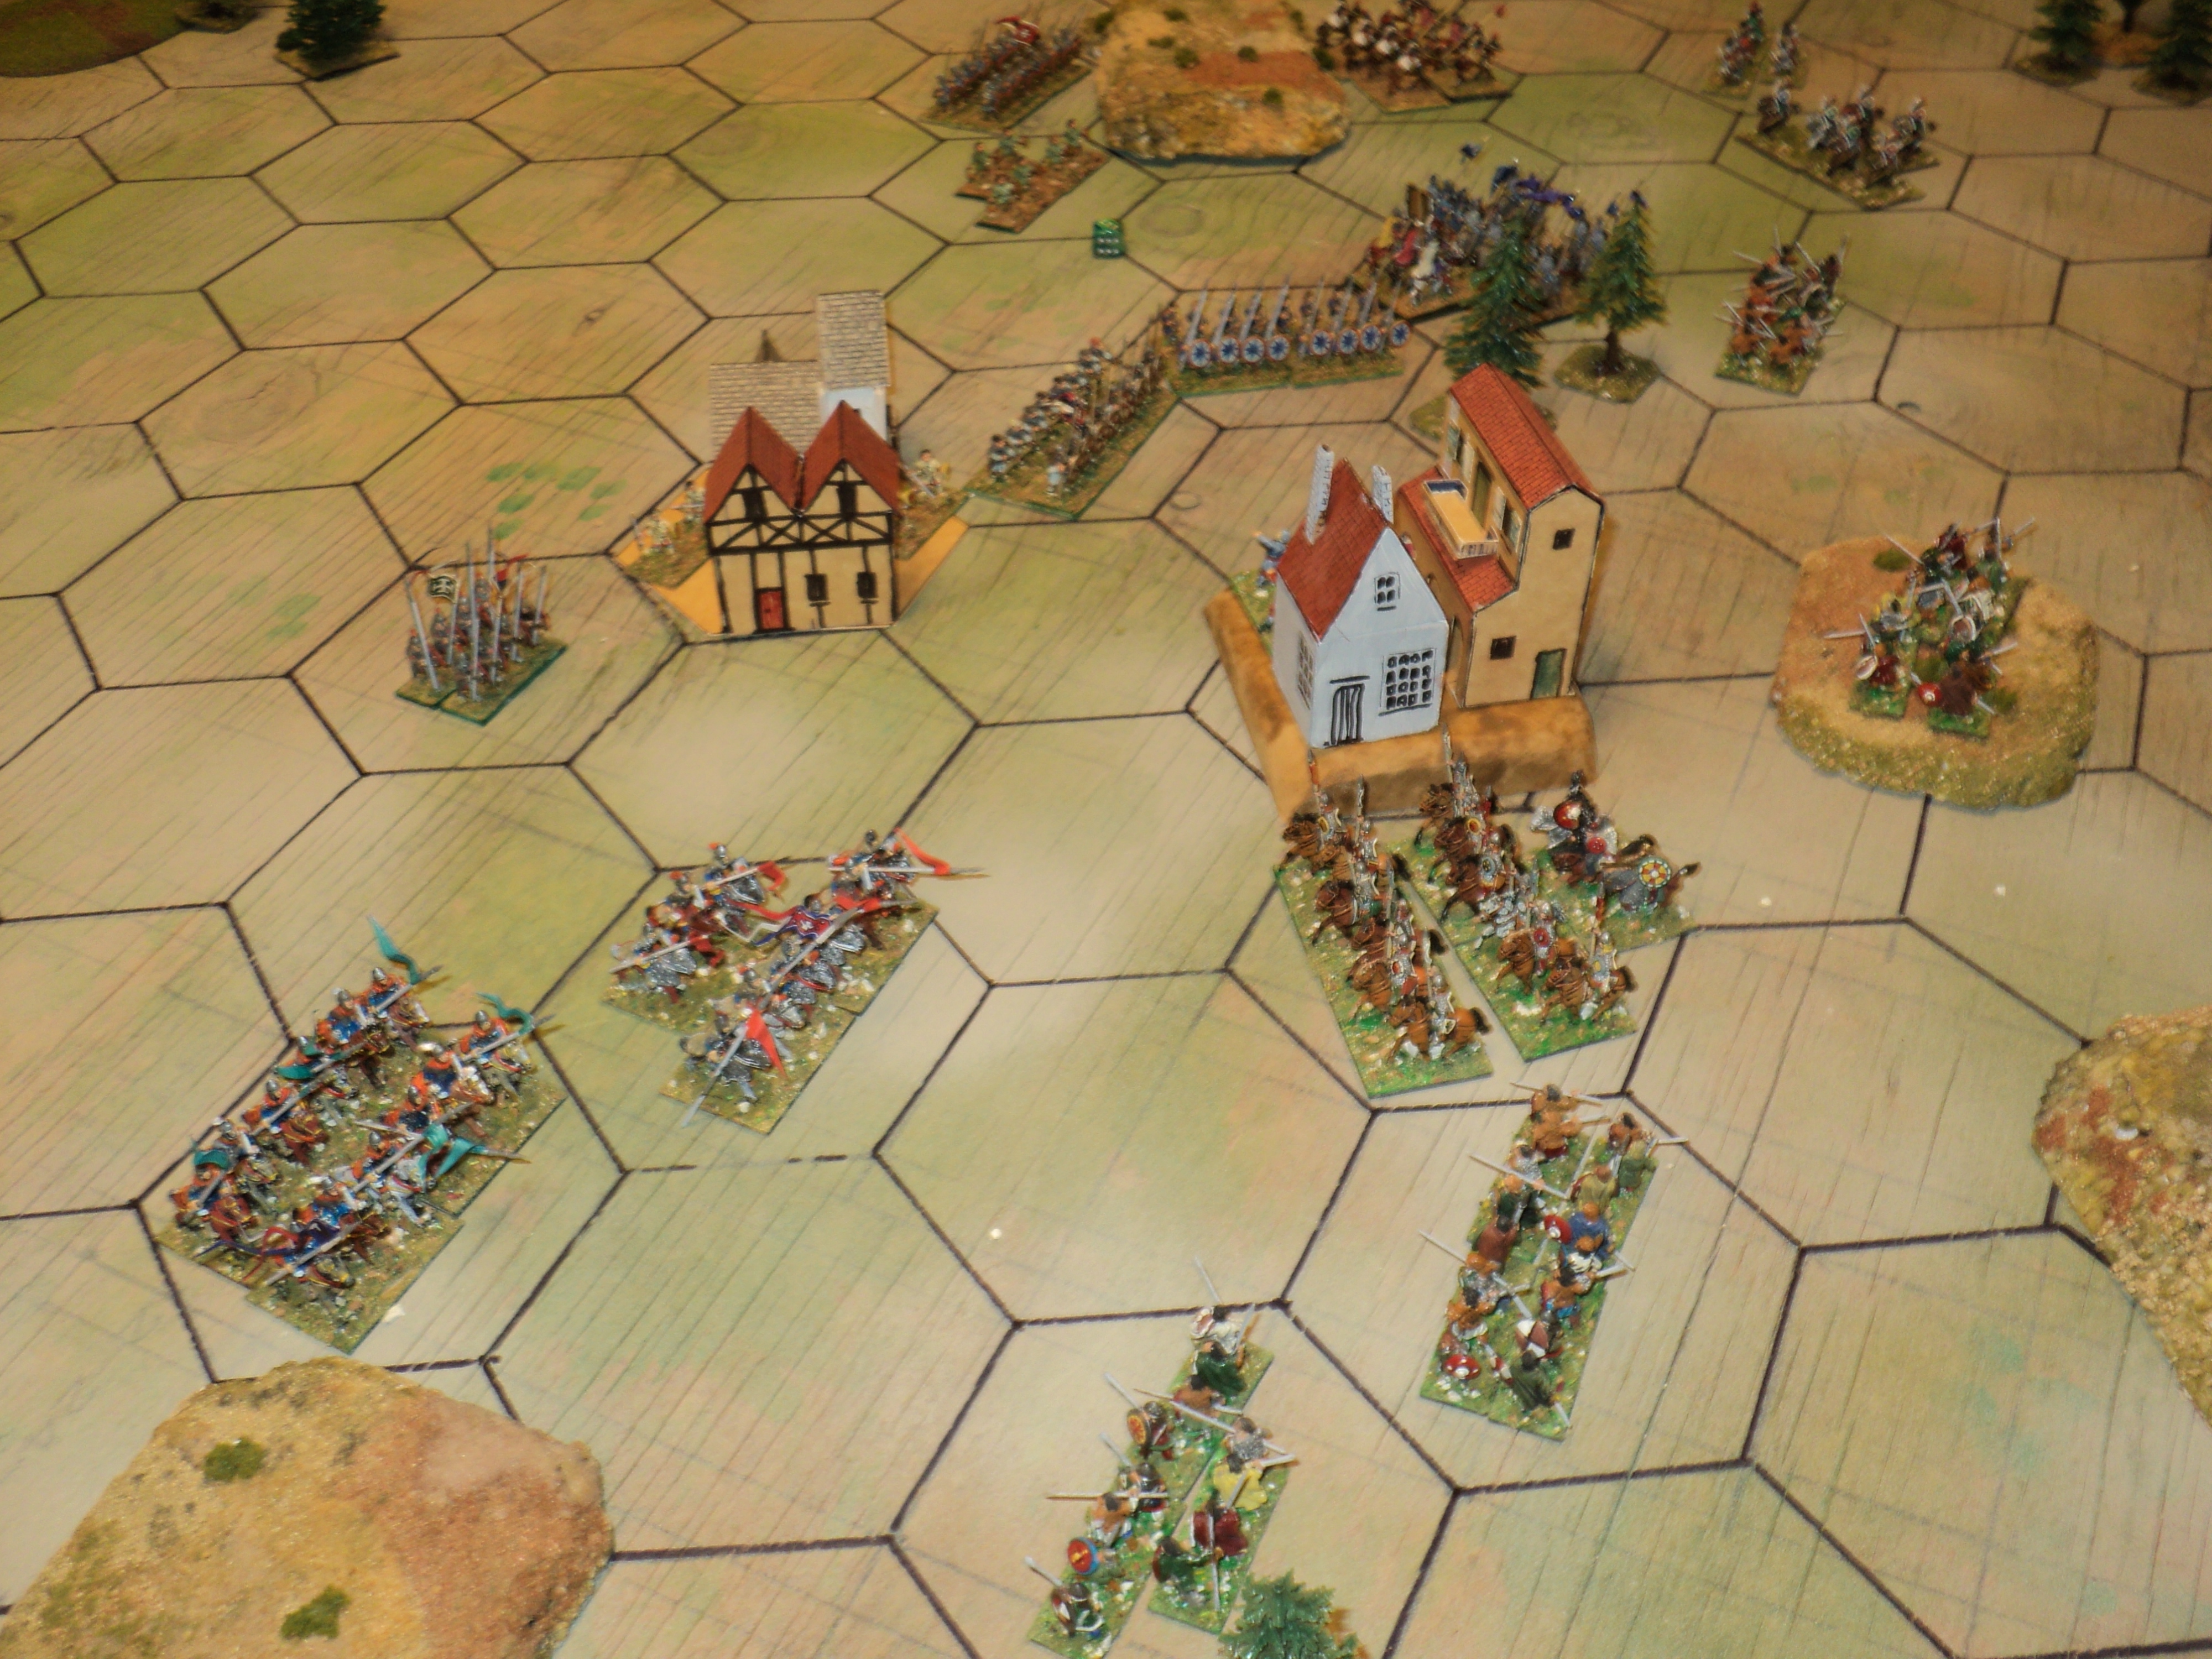
That there are three Bulgar mounted units to hand facing two Byzantine - the latter's slingers and medium foot some distance off - might make things a bit tricky for the kataphraktoi facing the spears, but all three have taken some damage already- 4 strength points among them, for the loss of one slinger stand.


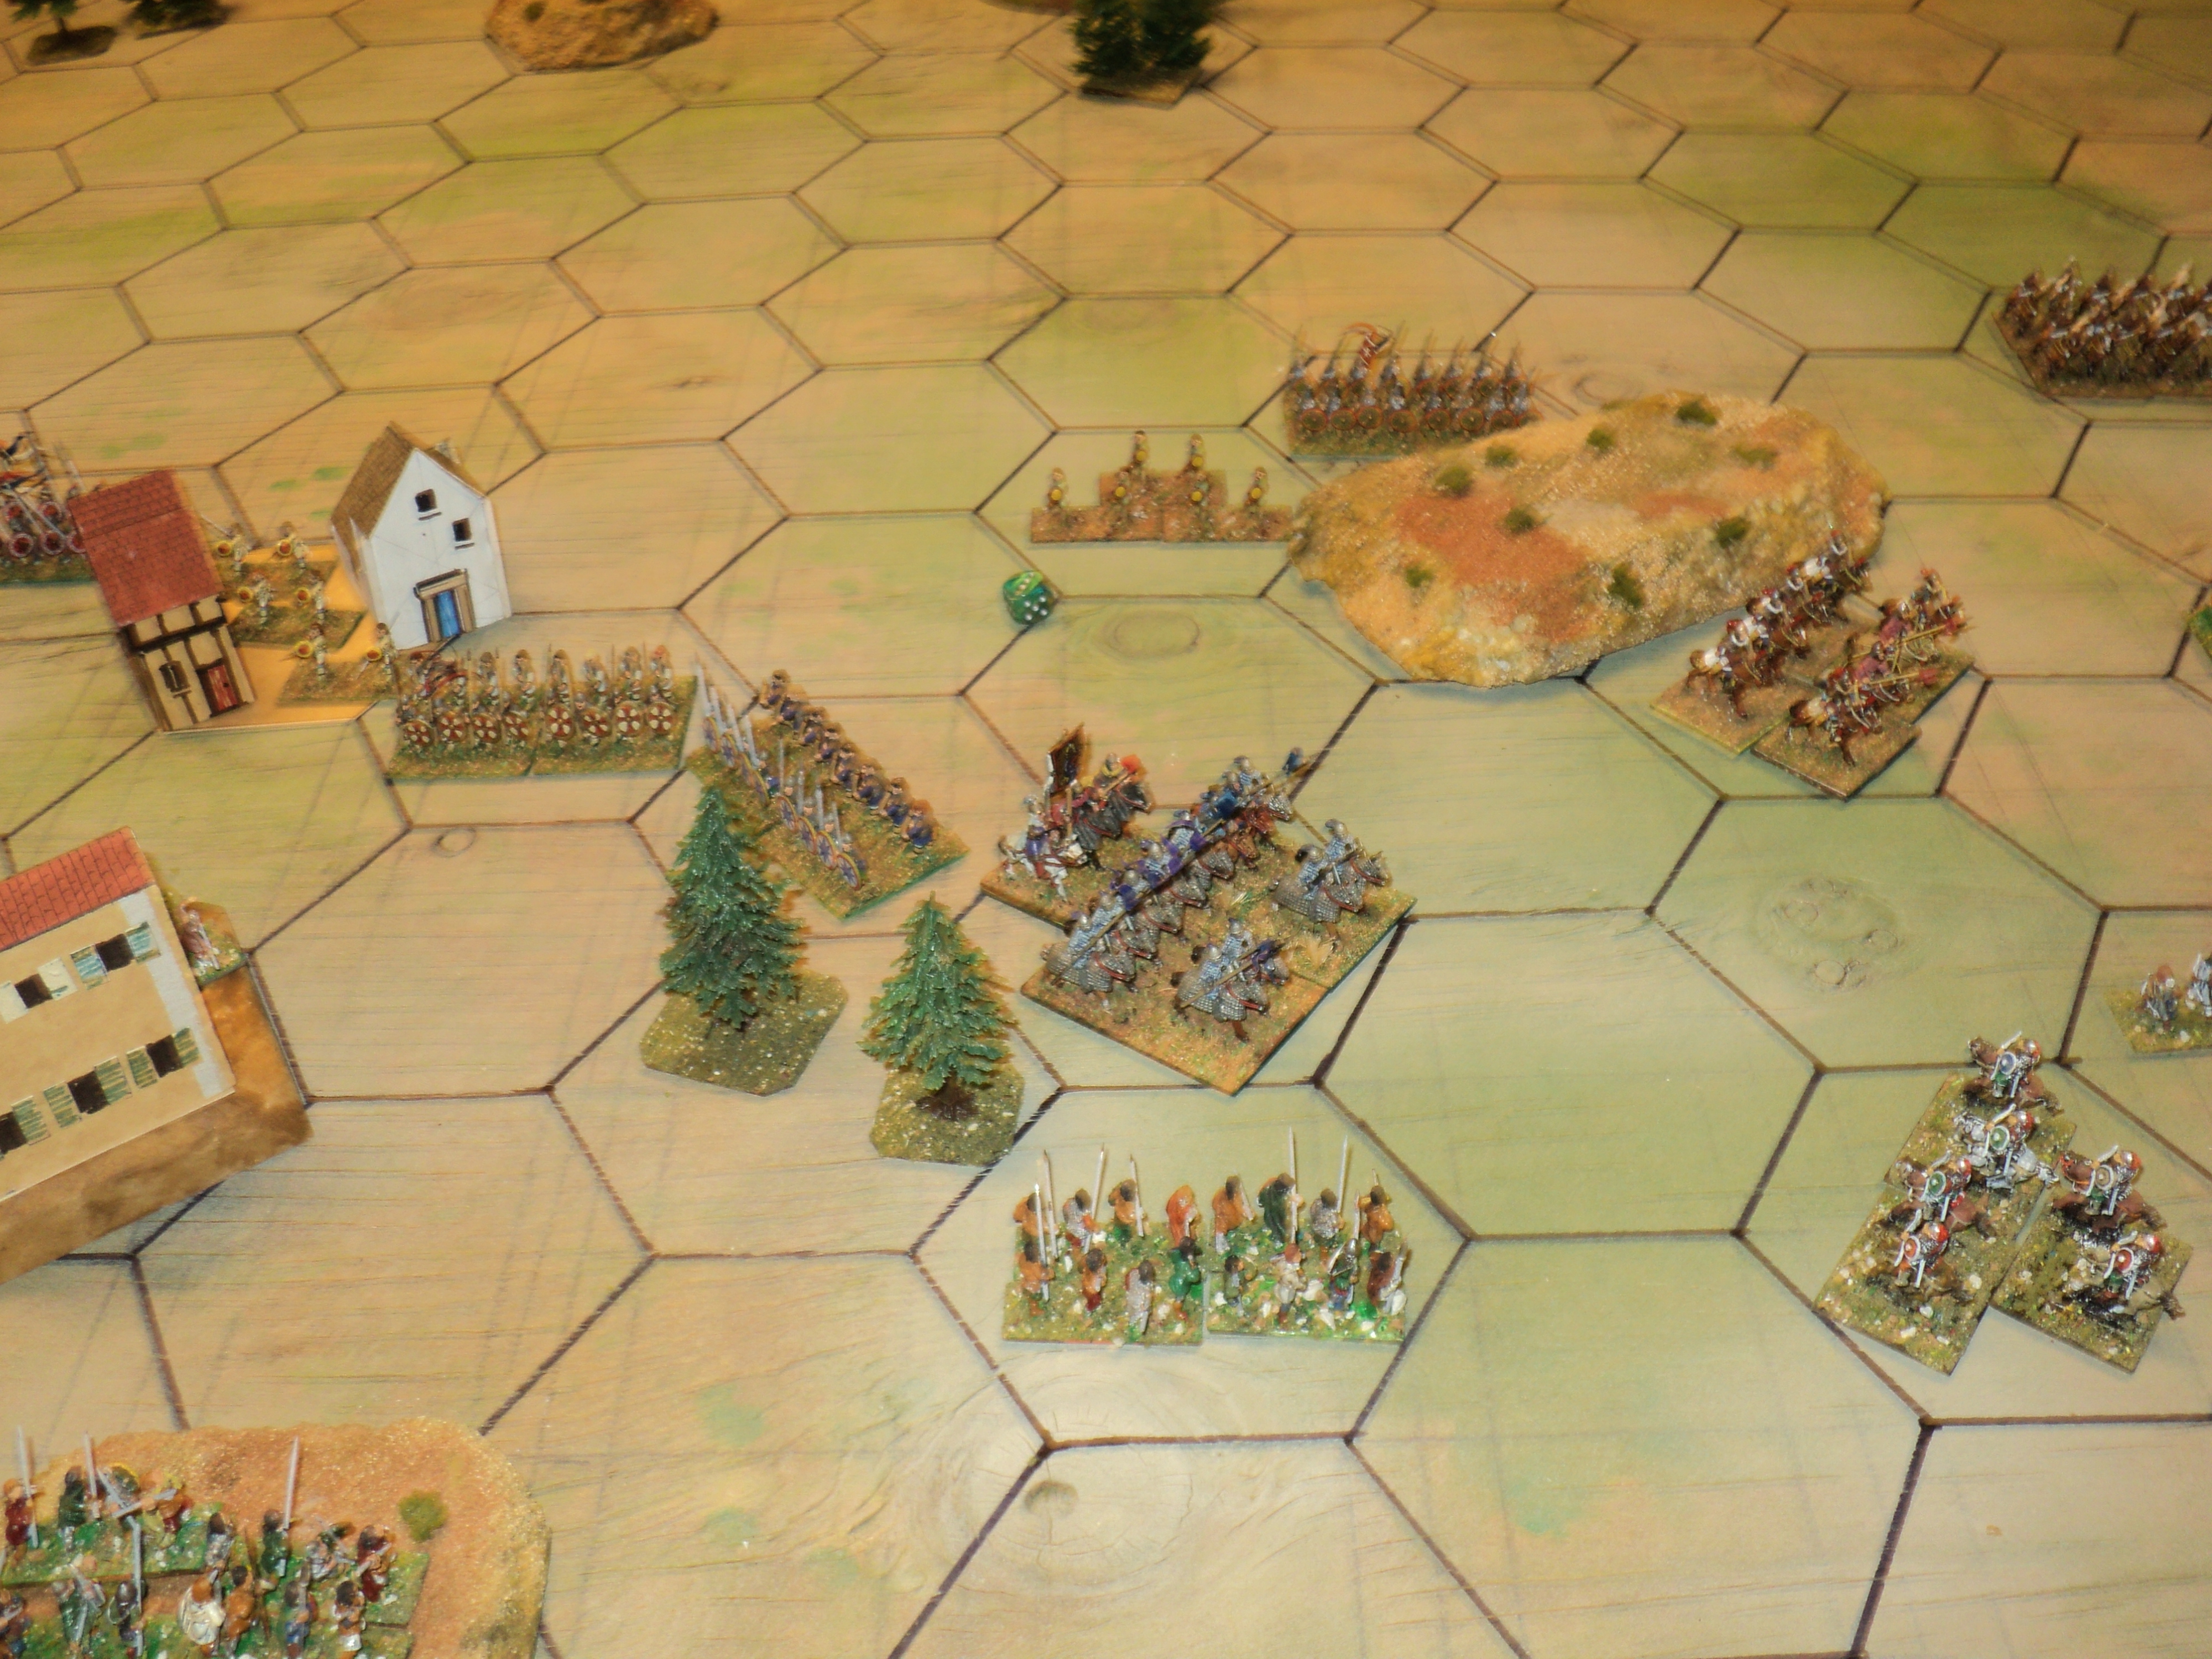
By now the Byzantines are well and truly in the ascendancy. Urged on by the Emperor, and the presence of 'Our Lady of Bachernae' the kataphraktoi charge into the spears before them, and destroy half the unit. On the far left, the white shield kavallarioi charge the depleted heavy horse, whilst between the two heavy horse units, slingers and light horse engage the enemy light horse and bowmen. Dare the Bulgar light horse attack the flank of the kataphraktoi?


The battle ends with the Bulgars exhausted and defeated, and their centre completely pushed in, only remnants of units still forming any kind of line. Reducing the Bulgars by 20 strength points, the Byzantine loss was maybe half that - an emphatic victory.

A comment on the battlefield and the troops.
As a pick-up game, I generated the terrain using Bob Cordery's method, modified for the size of my board. The Balkans being, I am supposing, pretty hilly in places where it is not mountainous, I based the generation upon that premise.
The kataphraktoi you might observe is formed of two double-stands with the figures forming a trapezoid 2+4 on each. Really they would be 'better' (for a given value of...) forming a quad-stand with the figures forming a trapezoid 6+8. It turns out that a few weeks ago I found a lonely and long-lost kataphraktos figure amongst a bunch of spare Byzantine figures I didn't know I still had. It ought to have been shipped off to Oz with some other such figures about 6-7 years back. So this last figure could fill the gap in the front rank. Maybe. Just as a loose figure you understand.
One of the stands is entirely lance armed - the original weapons carved away and replaced with something longer and more pointy - modelling wire and the head of a pin held together with tin-foil or paper pennons. Discovering a little more about these fellows, I arranged the next stand with
- front 2-figure rank armed with maces (plastic, cribbed from a Revell 100YW box);
- outside 2 rear-rank figures armed with lances;
- inside 2 rear-rank figures horse-archer figures armed with bows.
Each in their way are handsome looking units, I think.
A splendid game and armies. Good to see a return to the Byzantine Empire.
ReplyDeleteMark -
DeleteI admit that these armies get sadly neglected. You might see more of them in the coming 'Compendium III'...
Cheers,
Ion
Currently for sale on Amazon. 😁
DeleteWow! Already!
DeleteA fine looking battle Ion - no doubt you've already done this, but please could you explain your Rout Point rule? I want to use something for a future campaign.
ReplyDeleteI do much the same thing as the Archduke. Exhaustion point is when the army stops attacking, at Rout point, it runs away.
DeleteMaudlin Jack -
DeleteYeah, that's pretty much as Martin says. An army having reached its exhaustion point (having lost 1/3 of its strength) can fight, but is no longer in a position to mount attacks. Once having lost 1/2 its strength, it simply routs, and the enemy is the victor. A battle ends (a) if both have reached their exhaustion point or, (b) at least one of them has reached its rout point. Of course the thing derives from the Old School 50% Rule, quite arbitrary, but a useful limit to an army's endurance.
About the 'exhaustion point' thing, I am very tempted to modify it slightly, permitting a single unit under the direct command of a general (probably Army Commander only) being allowed to (counter)attack. Such a rule exists in the DBM rule set, though there is a minus for the command being 'broken'.
I have occasionally thought of attaching a close combat -1 modifier to 'exhausted' troops as well. Not sure about that one, and have never actually tried it.
On the matter of campaigns, post-battle a proportion of the losses are restored to the army. Usually it's one half, though in some of my rule sets the losing side gets 1/3 back. In my map games both sides get half back, pro rata by arm of service, with infantry rounded up, and the other arms rounded down.
Example: An army has just lost 5 infantry, 3 cavalry (figures or strength points is immaterial) and one gunner. Overnight half the losses are restored: 3 infantry (rounded up), 1 cavalry (rounded down), and you can kiss your gunner goodbye. Net loss, then, is 2 infantry, 2 cavalry and the gunner.
I find this method works pretty well for me!
Cheers,
Ion
Cheers
Ion/Martin
DeleteThanks very much for the information! Much appreciated.
Splendid looking battle. Good flow of the narrative made it easy to follow.
ReplyDeletepancerni -
DeleteThank you for your comment. I thought the pictures showed the progress of the battle pretty well, too.
Cheers,
Ion
Great stuff Ion ⚔️⚔️
ReplyDeleteThe battle report felt realistic and it was good to see the Byzantines achieve victory. The Kataphraktoi, in my mind, have a strong battlefield presence (surely no enemy unit wants to be facing them?) and it’s good to see your Varangians correctly armed with spears.
Hopefully we’ll all be able to read more battles and campaigns of the Byzantines in PW Compendium 3 👍
Cheers,
Geoff
Geoff -
DeleteI really do like my Byzantines. For well over a decade they were getting so little action, and was pretty much disillusioned with DBM (a good rule set, mark you, but poorly expressed at times, too broad a topic, so I the only time I got an historical opponent, it was another Byzantine, and I have never really understood why anyone wants to sauce a bland diet of pick-up games with 'competitions')... at any rate I was considering selling them off. But then I'd hoik them out - and didn't have the heart to abandon them.
In any case the history of the Eastern Mediterranean and the Levant has always been a major source of interest for me, which is why I built a Byzantine army in the first place. But I always intended to add at least one historical opponent. My Bulgars/ Georgians (depending on my mood) is only about half the size of my Byzantines, though.
Cheers,
Ion
Geoff -
DeleteThe Varangian figures were actually cast with axes, but my spies tell me that the 'axe-bearing guard' came more into prominence after 1066, when much of it comprised exiled Anglo-Saxons. Evolving from Rus mercenaries, the earlier VG favoured spears.
Cheers,
Ion
Indeed. I recognised the venerable Tin Soldier castings - a bit old-school, but they have plenty of charm 👍😉
DeleteI quite liked the Tin Soldier - at 18mm a little chunkier than your usual 15mm chappies (which make up most of my Barbarian types). I thought the Pechenegs particularly good, though there was just the one figure. I modified several to carry javelins and shields.
DeleteIncidentally, someone told be that the figure designer was a bit of a Hellenistic nut: his Greeks were superb. He must have been a fan of Aztecs, too: those I saw, and certainly admired. Not that I was tempted, mark you. I had determined long before to have just the one Ancients/ Mediaeval 'period'.
Cheers,
Ion