
 |
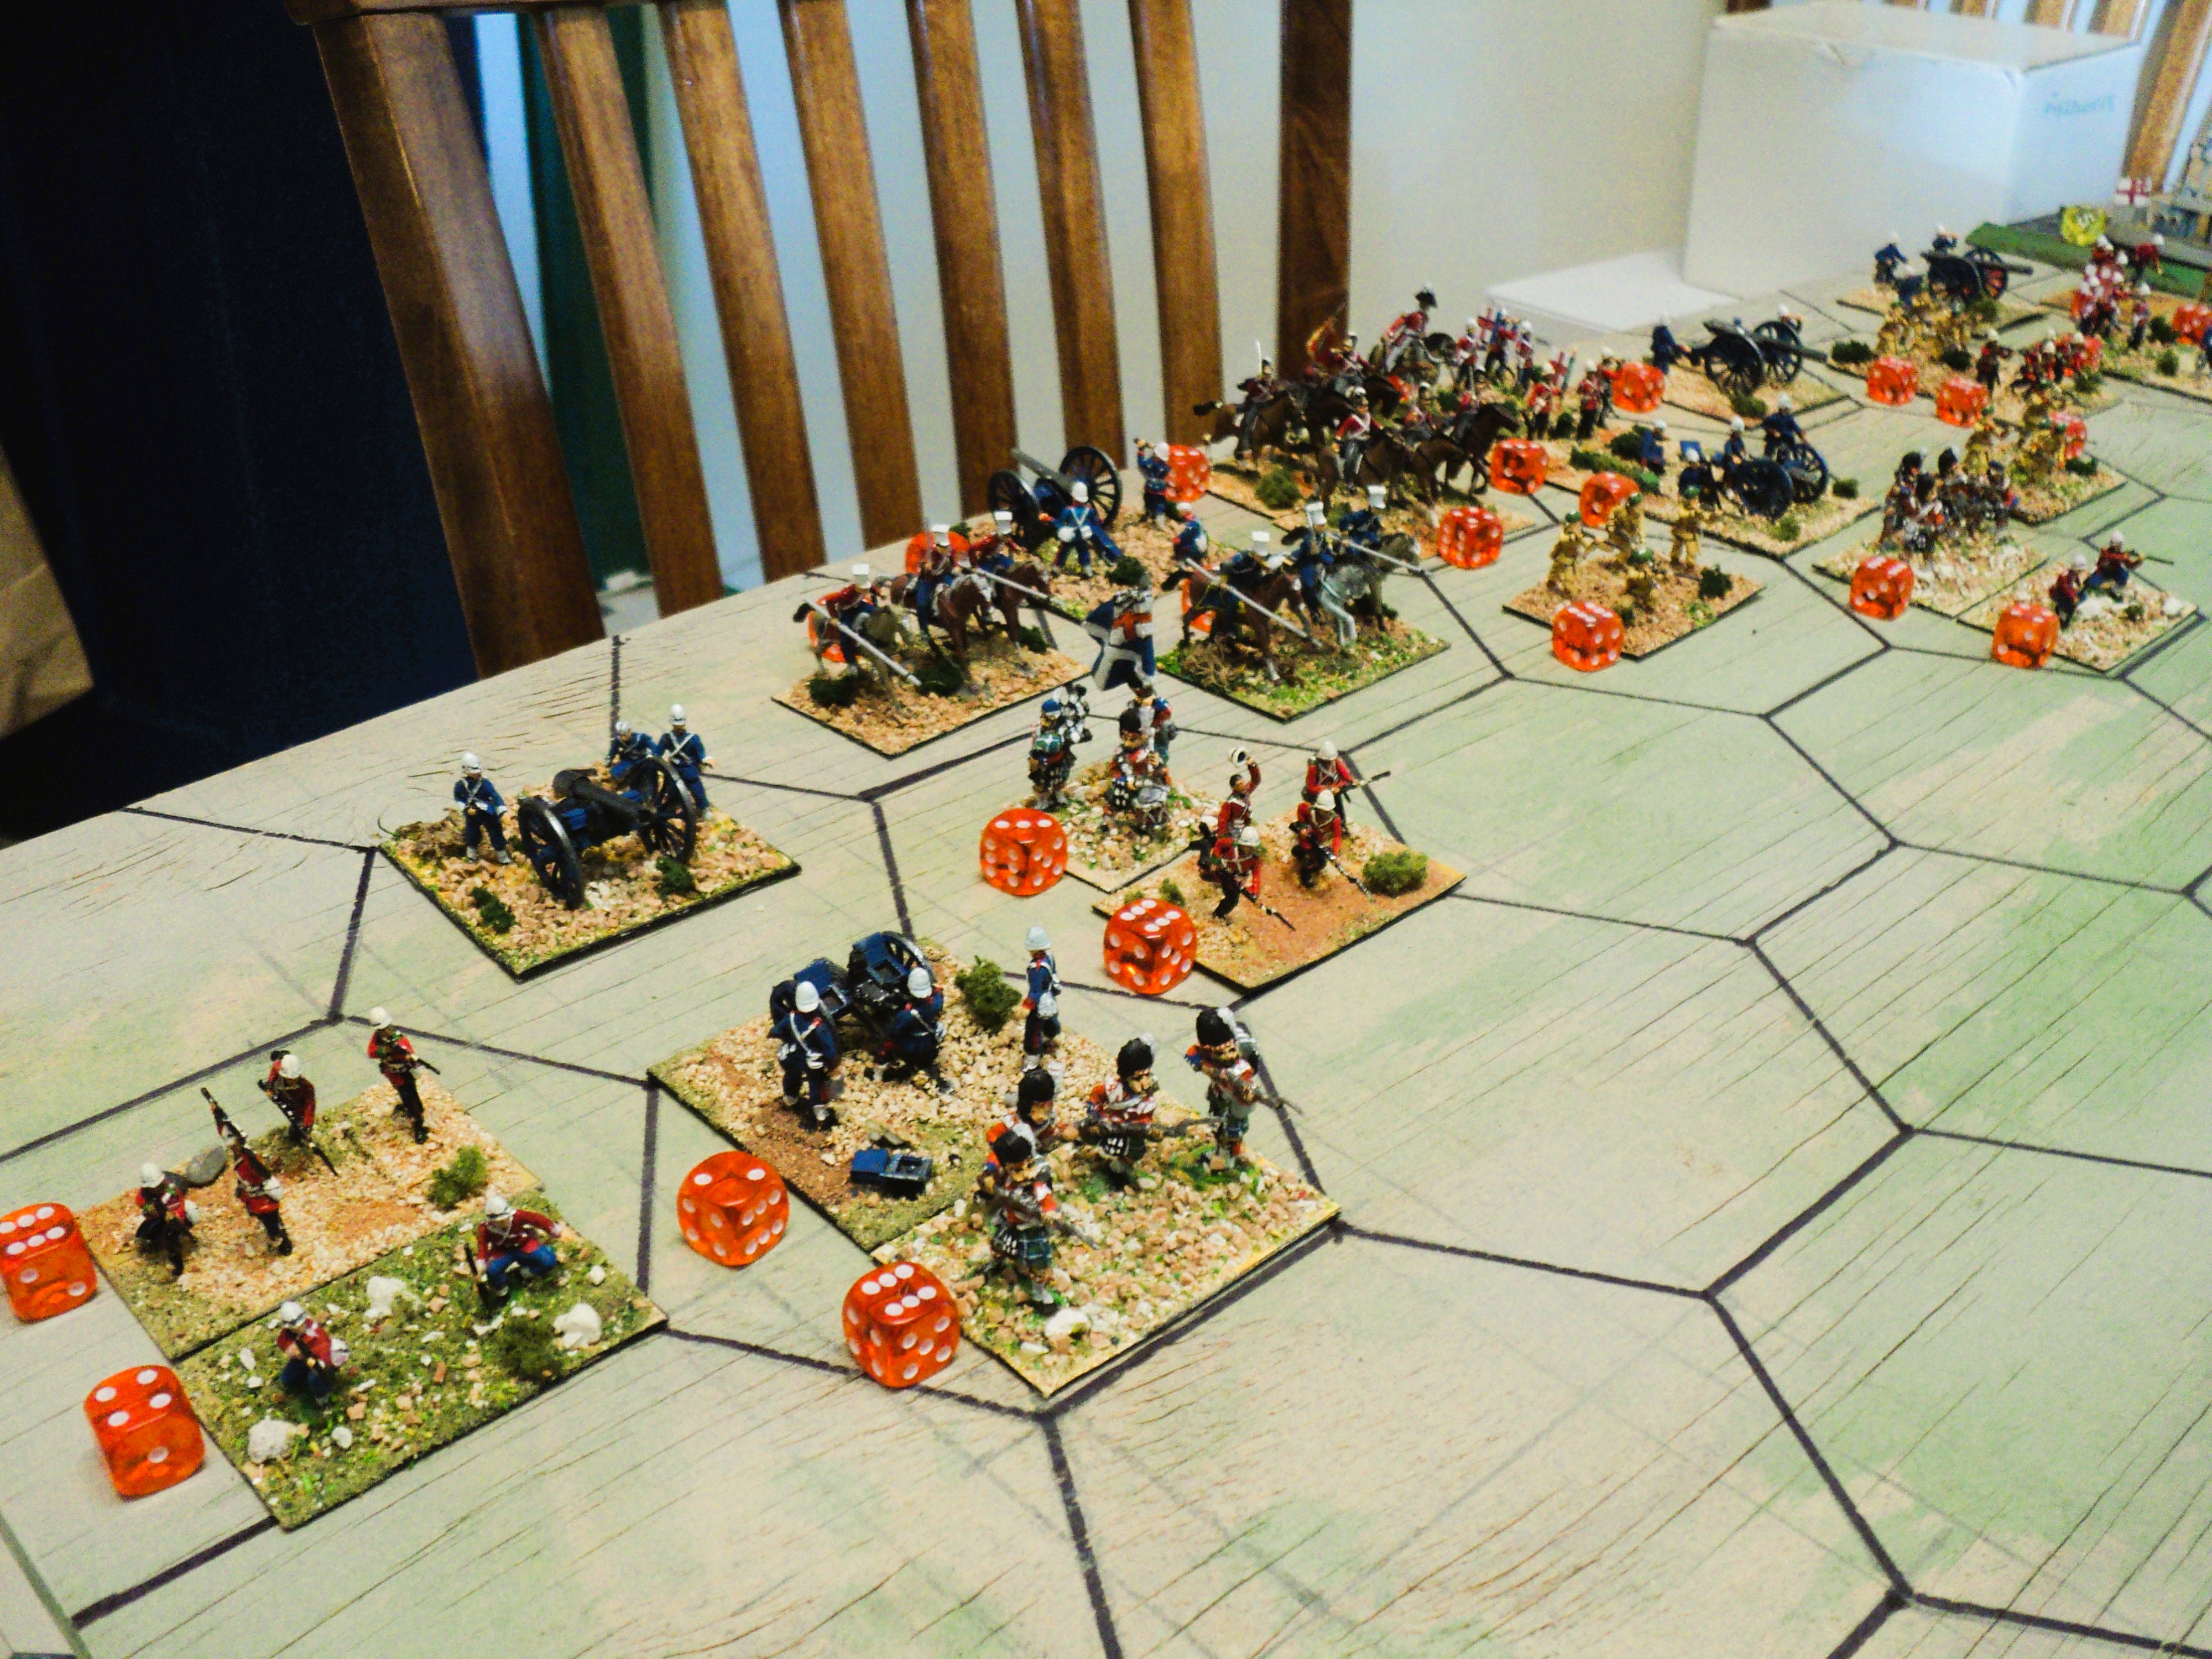
| The armies lined up for battle: 7th 'Meerut' Division on their start lines; 35th Turcowaz Division with cavalry support lined up in defence. |
After the failure of Lieutenant-General Sir Aylmer Reddington's relief attempt, Major-General Sir Grinmore Scarlett was forced for several weeks to wait out the siege at Hak al Kumara. A serendipitous discovery of a large hoard of grain had at least given his 6th Division - such as had so far survived the rigours of a failed offensive operation and the siege - the stamina to hang on for the two months before General Reddington could mount a second relief attempt. On 7 March 1876, two months and one day following the first attempt, 7th 'Meerut' Division launched its second assault upon the Turcowaz positions close by Shaikh Sa'ad village.
 |
| The Turcowaz right - west side of the Pardis River: 103rd Infantry, 3 cavalry units and half the army's artillery |
Army of Turcowaz:
Corps Command: Nasr ed-Din ... 6SP
35th Division: Duya ed-Din ... 3SP- 103rd Regiment, 3 Bns (stands) @6SP = 18SP
- 104th Regiment, 3 Bns @6SP = 18SP
- 105th Regiment, 2 Bns @6SP = 12SP
- Nordenfeld MG Company @2SP
- Artillery, 2 batteries @2SP = 4SP
Cavalry:
- 43rd, 44th Regular cavalry @4SP = 8SP
- 75th, 76th Irregular Sipahi @4SP (poor) = 8SP
- 61st, 62nd Tribal Light Horse @4SP (poor) = 8SP
Reinforcements (off table):
52nd Division: Abdullah Jemal ... 3SP
- 154th Regiment, 3 Bns @6SP = 18SP
- 155th Regiment, 3 Bns @6SP = 18SP
- 156th Regiment, 3 Bns @6SP = 18SP
- Nordenfeld MG Company @ 2SP
These reinforcements were scheduled to arrive on table once the first line of entrenchments had been breached.*
24 units, 146SP, E.P. -49SP
* For this action I made this change. The arrival of 52nd Division was triggered by Ruberian breaches of the first line of fortifications, but they had to be diced for. At the end of the turn in which an attacking unit forced its way across the trench line into the Turcowaz position, I rolled a single D6 die. If the score matched the number of attackers who had successfully done so, then the whole of 52nd Division arrived on the Turcowaz table edge to moved into the table next turn. As it transpired, it was something like 4 turns before 52nd Division arrived, by which time at least five and I think six units had forced the first line of defence.
 |
| Turcowaz centre: 104th Infantry supported by the other half of the artillery. Nasr ed-Din stands with the artillery; Duya ed-Din with III/104th Battalion |
 |
| Turcowaz left - protected by a vast salt marsh. The understrength 105th Regiment, beefed up by the 35th Division machine guns. In support, the other half of the cavalry: regular sipahis and tribal light horse. |
Army of Ruberia:
Seventh Meerut Division, Lt-Genl Sir Aylmer Reddington ... 6SP
19th Dehra Dun Brigade (Col Wm Dennys) ... 3SP
- I/ Seaforth Highlanders ...6SP (elite)
- 28th Punjinjab Infantry ...6SP
- 92nd Punjinjab Infantry ...6SP
- 125th Napier's Rifles (Skirmishers) ...4SP
- Gatling detachment ...3SP
28th Garwhal Brigade (Brig-Genl Geo. Kemball) ... 3SP
- II/ Leicestershire Infantry ...6SP
- 51st Hydansikh Infantry ...6SP
- 53rd Hydansikh Infantry ...6SP
- 56th Punjinjab Infantry ...6SP
- 62nd Punjinjab Infantry ...6SP
- Gatling Detachment ...3SP

28th Brigade on west bank of
Pardis River

35th Brigade (Brig-Genl G.B.H. Rice) ...3SP
- I/ 5th Buffingtonshire Infantry ...6SP
- 37th Dogra Infantry ...6SP
- 97th Deccan-Decca Infantry ...6SP
- 102nd King's Own Grenadiers ...6SP
- Gatling Detachment ...3SP

35th (nearer thr river) and 19th Brigades

21st Barrelly Brigade (Col G Ross) ...3SP
- II/ Black Watch ...6SP (Elite)
- 6th Jat Light Infantry (Skirmishers) ...4SP
- 41st Dogra Infantry ...6SP
- 9th Bhoped Infantry ...6SP
- Gatling Detachment ...3SP

21st Infantry and 6th Cavalry Brigades
6th (Indian) Cavalry Brigade: (Brig-Genl R. Thered) ...3SP
- 14th King's Hussars ...4SP (elite)
- 4th Cavalry ...4SP
- 7th Harian Lancers ...4SP
- 33rd Queen Adelaide's Own Light Cavalry ...4SP
- 'S' Battery, RHA (Horse artillery) ...2SP
Divisional Artillery:
- IV, IX, XIII Brigades, @2SP = 6SP

HRMS Shoofly gunboat. Captained by
Lt-Cdr James Rosemount, she played a far more
active role than in previous actions.

Gunboat:
- HRMS Shoofly, ...8SP
36 units, 163SP, Exhaustion Point -55SP.
 |
| Earliest moves by Ruberia's attacking formations. |
To be continued: the battle narrative...
Gosh, that really is a lot of stuff on the table. Looking forward to seeing the action unfold.
ReplyDeleteMartin -
DeleteI think all the battles in this particular series have been roughly this size. Possibly the addition of a fourth brigade has added to the density of the Ruberian attack. These forces, by the way are almost exactly similar to those for the previous battle on the same field
https://archdukepiccolo.blogspot.com/2020/08/a-return-to-chronicles-of-rajistan.html
The result of that one was so unsatisfactory as to indicate a further relief attempt.
Cheers,
Ion
Archduke Piccolo,
ReplyDeleteThis looks as if it is going to turn into another of your classic tabletop battles and reports. I look forward to seeing what happens with mildly supressed excitement!
All the best,
Bob
Bob - This one certainly had its moments of excitement!
DeleteCheers,
Ion
Looking good and it all promises to be another great battle for you to fight:).
ReplyDeleteHi Steve J.
DeleteIt was. But I have had some interruptions writing the thing up. I am still in the throes of selecting and captioning the pics on paper, before uploading and composing the narrative.
Cheers,
Ion
Fantastic looking game Archduke - the Earthworks are very impressive
ReplyDeleteMaudlin Jack:
DeleteThank you! The earthworks - standing in for trench lines of course - were made variously from expanded polystyrene mouldings, foam rubber, quarter-round wooden beading and whatever else suggested themselves. I probably ought to come up with something more persuasively to suggest 'trench' rather than mere earthwork...
Cheers,
Ion
Lots of lovely toys, ready for a scrap. ⚔️⚔️
ReplyDeleteCheers,
Geoff
Too right, Geoff! Y'know: these armies started out as very much a side-line, and they have changed a great deal from the 'Little Wars' style of thing I had planned for them. I had even come up with a refinement of Wells's combat system. Then they went through a 'Horse, Foot, Guns' stage, and finally settled into late 19thC Portable Wargames where they have found a home.
DeleteI've had to make some minor tweaks to the 'Widow at Windsor' to 'fit' my armies, but have come up with something to my satisfaction. More on that when I finally get around to writing up this battle. Going through the pic selection at the moment...
Cheers,
Ion