Sunday, November 20, 2011

The Kiivar Navy

Further work on the Navies of the belligent nations of the Raesharn-Kiivar conflict, has led to the near completion of the Raesharn surface fleet (two carriers still to be launched), and now the Kiivar Navy.

A while ago I posted some pictures of the Raesharn Fleet as it was then. Here, now, are pics of the Kiivar Fleet - such as it is...
Kiivar's sole surviving Carrier, KNS Condor. As it is slightly larger than the Raesharn carriers, I'm tempted to allow it more aircraft: 5 'flights' to 4.

A 'flight' of aircraft will comprise 1 playing piece, which at the moment looks as though it will be 3 miniature aircraft per stand.

Battleship KNS Eagle, Flagship of Admiral Yueh Tim Lee.

KNS Eagle leading Kiivar's other battleship, KNS Falcon. This ship design is the same as the Raesharn vessels that outnumber Kiivar's own by 4 to 1.

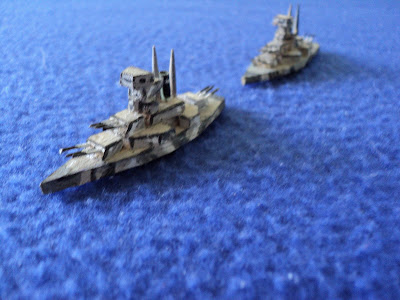
Dive bomber's view of Kiivar's naval might...

A dive-bomber's closer view of KNS Eagle...

Kiivar's cruiser squadron: KNSS Harrier, Peregrine, Goshawk.

A closer view of KNS Harrier.

Finally - a view of naval aircraft flights under construction. Most of these will be single-engine aircraft, though there will be a few twin-engine blokes kicking around - for the sake of variety, mainly. These are to be glued to clear plastic oval shapes in stands of three, and placed atop a cut-down length of semi-transparent cotton bud. The problem is what should form the base. Probably washers - the base needs to be fairly flat but weighty. At 4 flights per carrier, the Raesharn Navy can carry a formidable force of 16 flights - fighters, dive bombers and torpedo bombers.

The Raesharn aircraft are green, with red within white roundels. Kiivar's aircraft will be dark blue with light blue within yellow roundels...

Oh: nearly forgot. Some landing craft, each capable of landing one unit of land forces, armour, foot, or guns. I've built just 6 so far: need more than that for a credible invasion force!


To be continued...

Russians ... or soldiers of M'yasma?

Some time ago I picked up at a bring-n-buy a small 7YW corps of Russians - horse, foot and gun. Nicely painted and presented, reasonably priced, too hard to resist. This lot seemed to comprise:
1x12-figure grenadier battalion (3 stands)
3x12-figure musketeer battalion (e@ 3 stands)
1x6-figure Cavalry unit (2 stands)
1x6-figure Hussar unit (2 stands)
1x4-figure Hussar unit (2 stands)
1x8-figure Cossack unit (4 stands)
1x artillery piece.
Not the largest force you ever saw: 48 foot, 24 horse and a gun.
The Cavalry unit. Nice paint job - as received. I had nothing to do with it.

The Blue Hussars (I think this might be the Pavlograd Hussars. Again two stands. Looking at the makeup of this army led me to suspect it was intended for a rule set similar to Shako. Not my favoritest rule set, but it's playable enough.


But this was a puzzle. Why 3 per base? Was he intending to use them as heavies? These will probably be rebased...


Marshal-General Count Ignatius Yakovitch Smirnoff and the artillery. Readers with long memories who have visited this site before might recall his presence in the banner pic that I've recently replaced with something more of my own...


These cossacks have a certain presence about them, do they not? They look like a single unit, but might have been intended as two. The lances have been replaced by some spare flagpoles from the Wargames Factory WSS infantry. Plastic does not go well with lead - I broke one of the lances shortly after taking this picture, though have since repaired it. I'll eventually replace the lances with wire, but may use these spearpoints, fastening them on the end of the lances with paper pennons...


The infantry column on the march. The previous owner had attempted to hand draw the flags, but, unsurprisingly, didn't make much of it. I like doing my own, but the design is extremely complicated and difficult to render well. I found a source of flags on the internet, found a way of peeling back a mirror image and printed out several.


Were these to be Russians - or maybe another, vaguely Livonian/Ukrainian/Muskovite imagi-Nation such as the Grand Duchy of M'yasma?
Since this purchase, the army has grown a little: a further 2 battalions of musketeers, enough hussars to form a third unit and to give all three 3 2-figure stands apiece, and enough heavy horse to give the Cavalry a third stand. At that, there remain 4 rather orphaned musketeers in the 'advancing' pose (all the rest are 'March attack'). Not sure what to do with them.

Leaving them aside, the Army of the Grand Duchy now comprises 72 foot, 35 horse, and... 1 gun still...

Thursday, October 20, 2011

Jono has been busy...

Readers of the previous article may have noted the amount of equipment on the 'table' - actually a small musicians' stage (which I think accounts for the rather more vicious attack I had to undergo: hayfever). Almost all of it has been due to Jono's industry. I can take credit for the Kiivar foot troops - infantry and artillery crews - and two anti-tank guns in 'factory finish'. The rest is Jono's.

Here's what I mean...

First of all: one of at least 3 infantry guns. This one appears to have been captured by Kiivar forces from Raesharn or Omez enemies earlier in the campaign. That it to say, I borrowed it and one other for the 'Blacklands' battle.
Raesharn Cavalry. Adapted, Jono tells me, from Italeri Mamelukes. Neat eh?
The next three show Raesharn's medium and field artillery. In the Blacklands action, Jono had them all in a single battery. I've recommended that he subdivide them into two: a 3-gun field battery, and a 3-gun medium/heavy. Superb pieces of ordnance...


Raesharn armour. The symbols are Raesharn numerals. Jono allowed they were based upon what he remembered of Mayan numerals. As it transpires they aren't so very similar, but they look plausible and good, all the same. Jono has devoted quite a lot of time, and built up several folios, developing his Sideon IV world.
Here's what I've been doing, aside from building navies. The 'Blacklands' article shows a map of the campaigh theatre. This map has been enlarged with the hope of using it in the same manner as the old Avalon Hill/SPI boardgames - or the 'Civilization' computer game. Here is a section of the map - the Yian Peninsula in southern Kiivar...
The next action will be based closely on the Don Featherstone 'Tank and infantry action on the St James Road'...

Wednesday, October 19, 2011

The Blacklands of Kiivar ... A photo essay.

Last weekend was something of a trial run for a several items of equipment: artillery, anti-tanks guns and AFVs of various kinds. The premise was a powerful attempt by Raesharn forces to seize, take or carry a strategic crossroads, in the Blacklands near Kavi (see map - not far northeast of the headwaters of the Firth of Kiivar). The action unfolds in the following series of pictures.

A general view of the Raesharn forces on their startline. They comprised two infantry companies, a tank company (4 tanks) plus 3 other AFVs, a battery of 3 heavy and 3 field artillery pieces, an anti tank gun or two, a reconnaissance section of an armoured car and motorcycle combination, and a section of cavalry.
General view of the battlefield. The bridges were built for a smaller scale (that being used here something like 1:35 or thereabouts), and were a bit narrow for this. They were held to be negotiable by wheeled vehicles, but not tanks or assault guns. The stream itself was crossable, but took time, and vehicles risked bogging down. The stretched lengths of pot scourer served as barbed wire entanglements.
Another general view. The Kiivar defenders had just two AFVs but the infantry company was supported by a 2-gun mixed battery of artillery plus a couple of infantry guns, 4 'medium' antitank guns, a single twin-barrelled AA cannon, and a section of assault engineers, who garrisoned the Crossroads Tavern. Oh, yes: both sides could call upon air strikes...

The formidable array of Raesharn artillery.

Fortunately they were lacking in targets on account of the absence of a forward observer. But they could see the tavern, which was bad luck for the engineers therein. Of eleven men, four survivors evacuated the place after the enemy guns found the range...

Raesharn Cavalry, ready to sweep around the Kiivar southern flank...

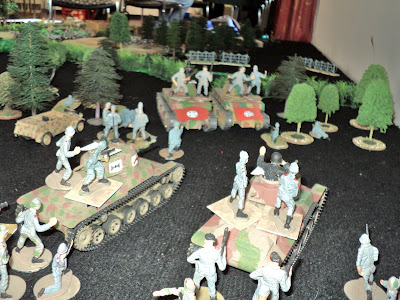
The Raesharn tank company, together with its riders, ready to go.
Kiivar left - garnished heavily with anti-tank guns...

Kiivar centre. The assault engineers would soon have to vacate the Tavern...

Kiivar right. Nr 1 Platoon in the woods, supported by an infantry gun overlooking the river bridge.
Raesharn tanks advance on the northern flank...

General view from behind Kiivar lines...

First strike! Raesharn aircraft takes out Kiivar's only tank. Their remaining AFV is an assault gun, off to the left. The AA cannon fails hit the aircraft as it flashes by...

Retaliation! A Kiivar fighter-bomber shoots up the Raesharn artillery. Although Raesharn loses half a dozen gunners, the guns themselves remain intact. This proved something of a distraction for the Raesharn commander, who detailed several infantrymen to man the guns. A rule emendment might have to be looked at here...

Second Raesharn strike destroys the entire Kiivar artillery battery, leaving just two gunners surviving. Bad news for Kiivar...

The armoured thrust reaches the stream and begins to cross. This proved a considerable obstacle that slowed the Raesharn advance. The lead tank bogged down when almost across. Though slowed, the Raesharn were not altogether stopped, however.

In the centre, the assault gun heads for the hill. An antitank rifleman lies in wait...

An assault gun tentatively probes the Kiivar right flank. Where are the cavalry?

Kiivar's second airstrike does immense damage: two tanks knocked out, and 6 infantry bite the dust. Methinks wiping out 2 tanks was a bit punitive. Another rule change in order there, possibly. Mind you, exactly the same odds [taking 1 for 6 and 2 for 5 etc] would have left both tanks intact, and just two infantry casualties...

The Raesharn AFV mounts the hill to take a hull-down position, and comes under the concentric fire of two AT guns and an AT rifle. In the ensuing exchange of fire, the vehicle was hit twice, but managed to take out half the crew of an AT gun before it succumbed. The AT gun on the extreme left of the picture - still in its factory finish (i.e. unpainted) - did the deed.

The AT rifleman takes care of the Raesharn AFV on the right, taking two shots to do so.

General view. Things aren't looking so good for the Raesharn offensive. They have lost 4 AFVs out of 7, and the armoured can was knocked out by an AT gun whilst standing near the bridge.

Raesharn forces push across the stream on the Kiivar northern flank. Kiivar infantry wait anxiously in and behind the woods...

Here come the cavalry...

There go the cavalry... Charging into the woods was always going to be a chancy proposition...

Touched up view of the north flank action. Raesharn tank comes under heavy fire but the Kiivar assault gun delivers the coup-de-flamade...

Another touched up pic of the final moments before the Raesharn commander calls of the action. Raesharn losses amounted to 5 AFVs, and armoured car, 7 cavalrymen, and perhaps a dozen other personnel. Kiivar lost a tank, two artillery pieces, and about 15 men (assault emgineers and gun crew). A fairly comfortable defensive victory, but it was against an inexperienced opponent. The next action - a Kiivar counter-offensive - might tell a different story...