Saturday, April 24, 2021

Return to 'Long Live the Revolution'>

Readers may recall this series that were suspended after December 2019.  I never actually abandoned the thing, but I realised the Second Battle of Khandibar would take some setting up.  Serves me right for adding that complication to Bob Cordery's original concept.  

Here is a link to that last action: 'Return to the Station'

Following the successful recapture of the vital rail nexus at Maibad Station, something of a lull descended over the country, as both sides in the civil war (as it had become) felt the need to draw breath after such a whirlwind campaign so far. The government forces had just barely saved the Nawabate of Tchagai from the Revolution; following a tide of unbroken success, the Baluchistan Armed Revolutionary Front (BARF) were finding the ebb hard to arrest. Much hope they placed upon the arrival in the sea port of Khandibar of a consignment of weaponry from the Confederated Community of Cooperative Peoples (CCCP - KKKH in Cyrillic capitals), the arrival of which was not expected, after the Battle of Maibad Station, for several weeks yet.


18th Siliputti Rifles advancing to battle. In the distance,
22nd Punjanajoodi Infantry. Figures mostly Airfix
with some Matchbox.


As word of this anticipated weapons import gradually trickled through to the Nabob's intelligence network, it became clear that the Revolutionaries simply had to be deprived of the sole sea port in their possession. Major-General Lord Redmond at once led a powerful column south, entrusting the railway station's safety into the hands of the hitherto unfortunate Lt-Col Ebenezer Mugglethwaite, with the newly reconstituted 17th Choklit-Ghandi Battalion, two armoured squadrons and assorted support and LOC troops. Lord Redmond took with him (42 + 6D6 = 68SP):

Government Forces:
  • Lord redmond's staff, with Dingo scout car vehicles = 6SP
  • 18th Siliputti Rifles
    • 3 rifle companies @ 4SP
    • 1 machine gin platoon @ 2SP
    • 1 medium mortar platoon @ 2SP = 16SP
  • 22nd Punjanjoodi Infantry = 16SP
  • 31st Kashinkari Rifles = 16SP
  • 5th Aagravaa Dragoons
    • 2 squadrons, A and C, M4 Shermans @ 3SP = 6SP
  • Bty/ 1st Tchagai Artillery
    • 2 troops, 25pr field guns with Quad prime movers = 8SP
Totals:
20 Units, median = 10 (Average commander) 
68 Strength Points (good dice roll!), exhaustion point = -23SP


Meanwhile, a certain Major Sher Liwih Khann had been placed by the Revolutionary leadership in command of the BARFist garrison at Khandibar, with strict instructions to hold the place at all costs.  He was to await the arrival of the vital arms convoy already on its way from Archangelsk. This convoy was still days way, if not weeks, somewhere in the Mesogesean Sea, approaching Port Did, and the Sezu (or Taofik) Canal. He had to hand (30+3D6 = 43SP):


Revolutionary forces: 
  • Sher Liwik Khann, staff, hangers on, camp followers, assorted bandits and badmashes as well as genuine patriots, jeeps = 6SP
  • 6th BARFist Volunteers 
    • 3 Rifle Companies @ 4SP
    • 1 Mortar Platoon @2SP = 14SP
  • 7th Khandibar Volunteers 
    • 3 Rifle Companies @4SP
    • 1 Mortar Platoon @2SP = 14SP
  • A Sqn/ 2nd 'Tulwar of the Revolution' Armoured Regiment 
    • 1 M3 Stuart light tank =2SP
  • D Sqn/ 2nd 'Tulwar of the Revolution' Armoured
    • 1 M3 Grant Medium Tank (poor) =3SP
  • 2 fixed anti-tank posts with 6pr AT guns @2SP = 4SP 
Totals:
13 Units, median = 7 (Average commander)
43 Strength Points (another pretty good dice roll), exhaustion point = -15SP

The difference in SP being 25, the Revolutionaries received 13SP in augmentations to their defence, in the form of 2 minefields (@2SP), 3 barbed wire emplacements (@1SP), 4 field works (@1SP) and a fortification (2SP).


Now, before beginning the brief narrative - and in partial explanation why it is so brief - I should mention that, owing to a glitch in my note taking in preparation for this battle owing to an egregious staff error, the armour, detached eastwards along the coast for some reason, was not present on the battlefield as the Government attack began. By the time  I realised my mistake  the armour arrived, it was far too late to affect the outcome of the action. I could, of course, have let it go as though the Revolutionaries had rolled '8' on their 3 dice, instead of 13 - the probability of having done so, coincidentally enough, being precisely the same.

25pr field artillery in action...
The action opened with the rapid advance on foot of the 18th Siliputti and 22nd Punjanjoodi battalions sweeping forward, both with A and C Companies leading, supported by B Company and the mortars and machineguns of HQ Company.  The main immediate objective being the Central massif, C Coy Siliputti came in on the right of  Punjanjoodi, all supported by the 25-pounder gun battery, where Lord Redford had also parked his Brigade HQ, and the Punjanjoodi mortars and machine guns.  

... and on target!  A Coy, 7th Khandibar Volunteers
taking some stick...
The support from the machine guns didn't last long.  The Rebel mortars quickly found their range, and wiped them out in short order, but the attack carried on unabated.  
... and receiving the close attention of C Coy, 18th
Rifles and A Coy, 22nd Infantry...
The two company attack overran the fieldworks on the Massif, and drove the defenders quite off the feature and into plain in front of the town.
Central Massif overrun, Government troops attack 
Revolutionary positions beyond.

Meanwhile, to the west of the central Massif, two companies of Siliputti Infantry stormed the ridge on the other side of the pass.  The pass itself being mined and barbed wired, the approach was somewhat constricted (1 hex only), forcing the attack on a single company frontage.  The first attack was easily repulsed, but when it could be supported by the battalion's mortars, and machine guns from beyond the wire to the left flank, A Coy finally carried the high ground..  B Coy soon joined them there to consolidate the position, before pressing on into the coastal plain. 
The early attack on the western ridge repulsed, A 
and B Coys of 18th Rifles at last capture the heights...

Already the western half of the Revolutionary 
forward defences have been overrun or driven in.
The general picture was now the Rebels having lost the position upon the high ground along the entire left half of their front. So far they had had few opportunities of bringing up supports or to mount a counter-attack. For their part, the 31st Kashinkari Rifles hadn't passed beyond the wadi - then in spate from an overnight deluge. However, the two Sherman squadrons coming up the Maimajikwand road, though hardly engaged, tended to discourage 6th BARFist Volunteers on the right from offering much aid to their colleagues under close assault on the other flank.
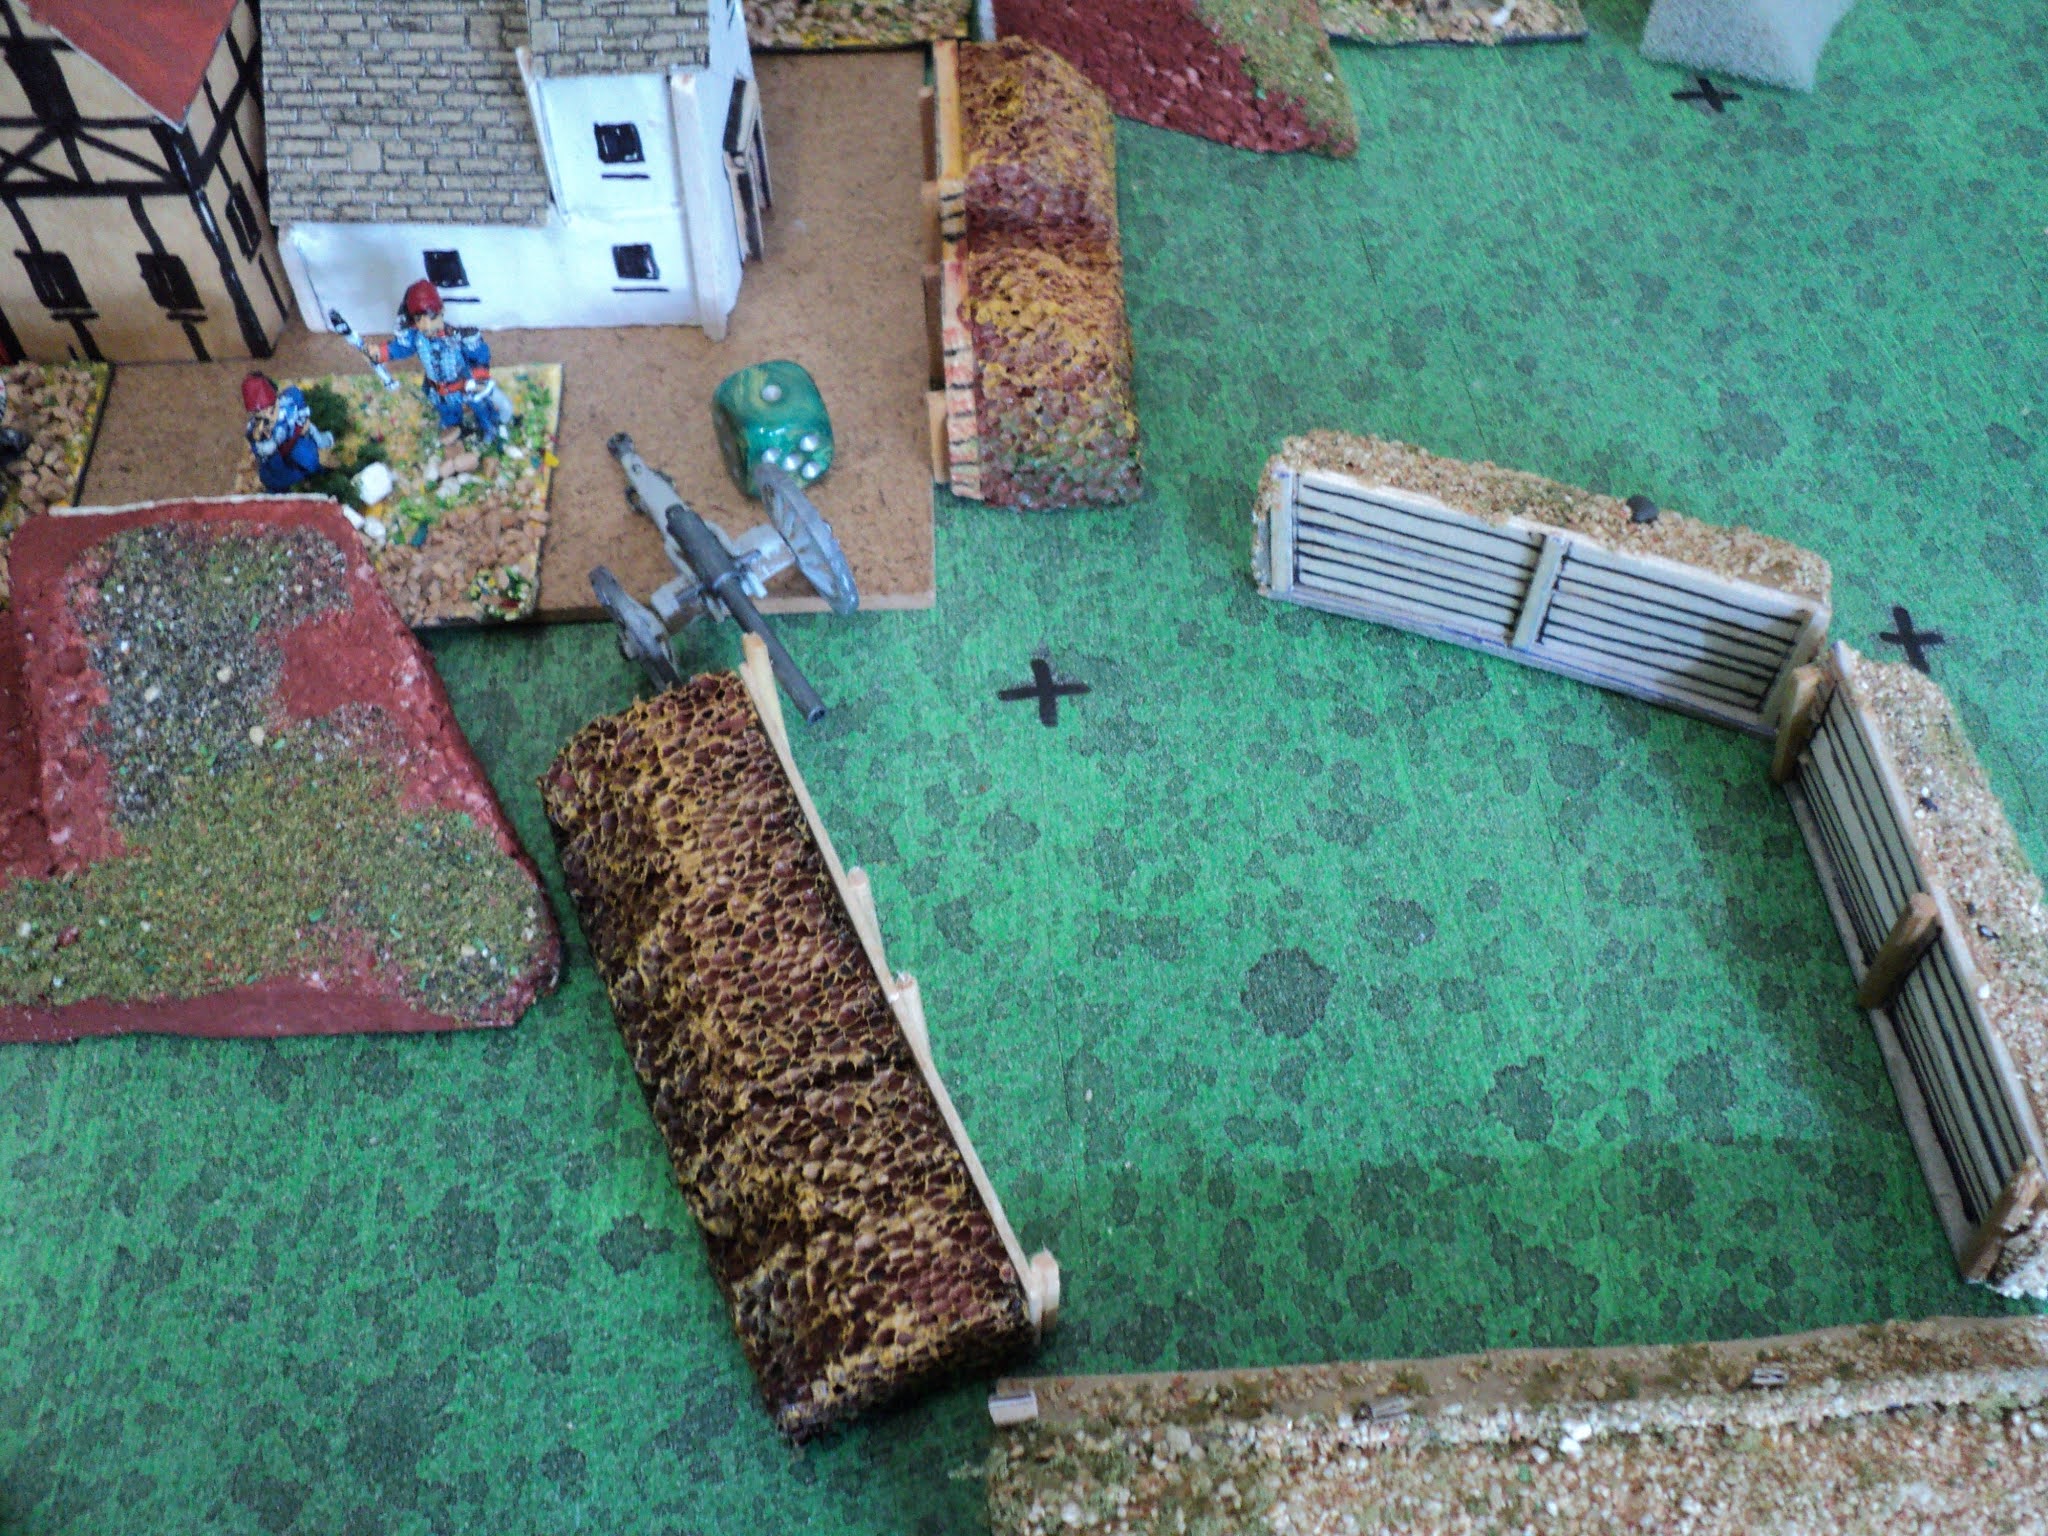
The fortification that was home to a 6pr troop
has new occupiers...
A company of Government infantry forced the evacuation of the fortification covering the Maimajikwand pass from close by the town. The Rebels managed to extricate the guns, but then came under fire from the lost redoubt.  The reserve company from BARFist volunteers counter-attacked from the town, but were unable to make progress. Instead, they themselves were driven back into the place.
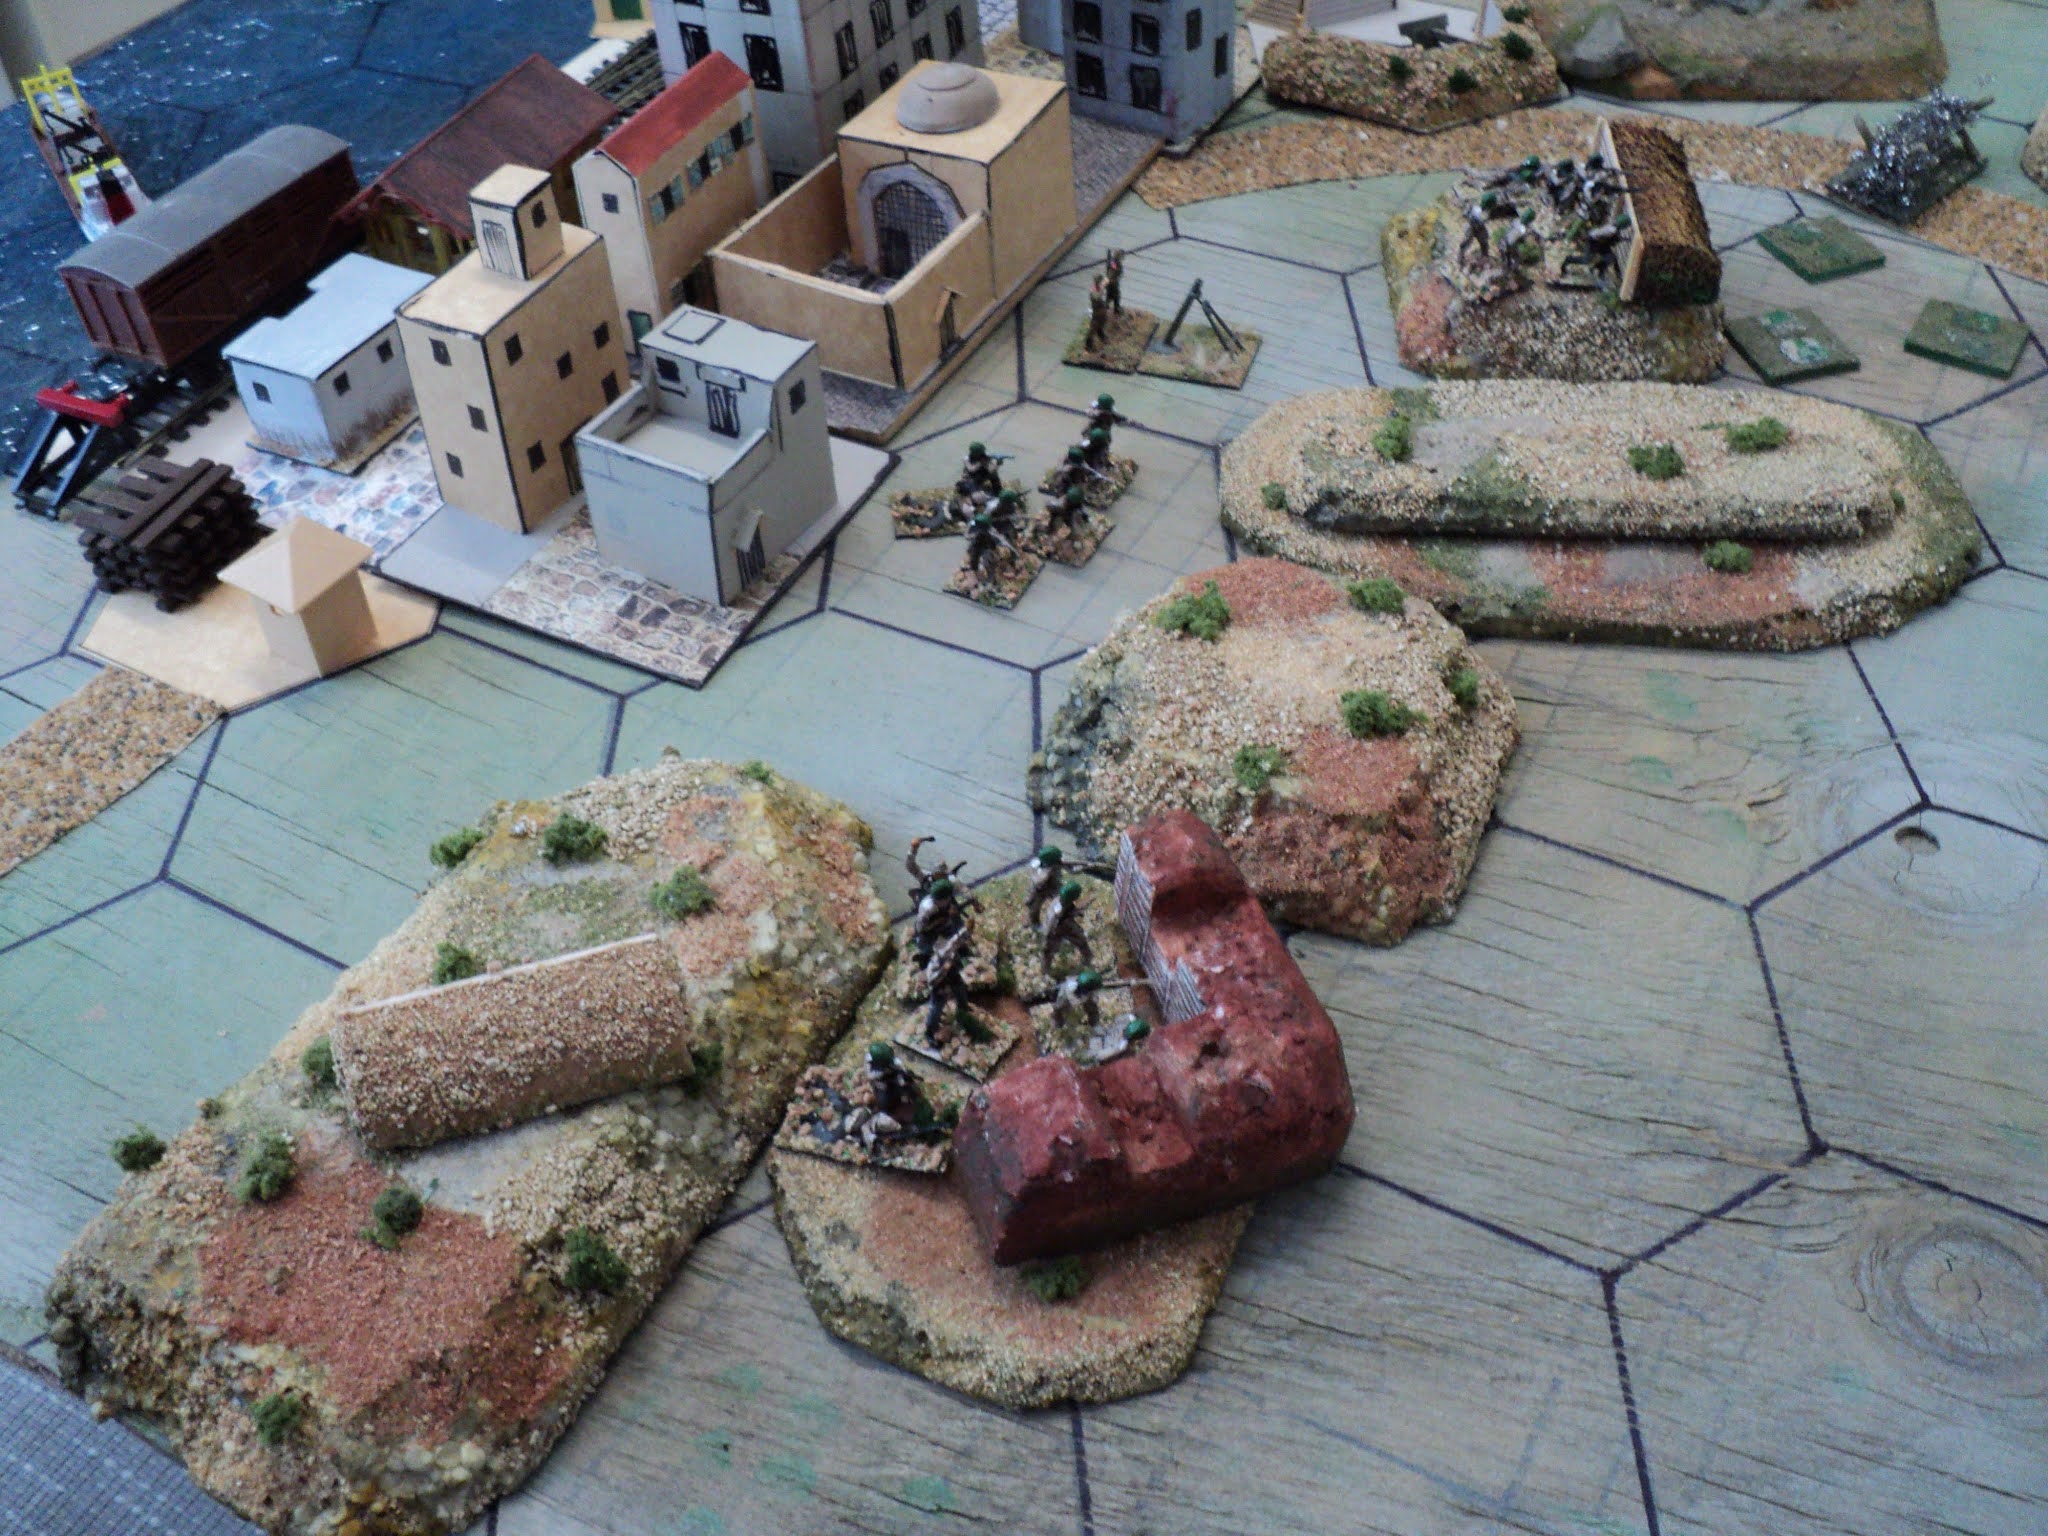
The belated arrival of Revolutionary armour 
is too late to retrieve their fortunes.
Already it was plain that the sea port could not be saved for the Revolution. Although somewhat depleted, the Siliputti Rifles overran the fieldworks that were home to a fixed troop of 6-pounder anti-tank guns, and pressing into the built up precincts along the coast. To the east, the revolutionary armour arrived too late, and too distant from the decisive sectors to change the course of the battle. A brief exchange as the Government Shermans nosed their way over the less steep slopes and crests of the coastal range led to the loss of a few tanks on both sides.
Revolutionary forces driven right back into the town.
Though facing sturdy and steady resistance, the victorious Government infantry began forcing their way into the town, clearing the railway station and  pushing on to the wharfs along the waterfront. Having reached that point, of a sudden, Revolutionary resistance slackened appreciably, as the local commander ordered the remnants of the garrison to pull out along the east coast road.  
Government attacks continue unabated.  The Rebels
fought gamely until the Government forces reached the 
waterfront docks, whereat the defenders melted 
away into the desert eastwards.  

The sea port captured, Lord Redmond lost no time in installing a garrison organised around 22nd Punjanjoodi Battalion, and set off with the rest of the Brigade, post haste, to rejoin the troops about Maibad Station, thence to resume the advance to Maimajikwand, the capital of the province - the vipers' nest as far as Lord Redmond was concerned - in which the Revolution began.

Sunday, April 18, 2021

New boats...

Gradually Paul 'Jacko' Jackson and I have been developing an 'East African' campaign modeled very loosely upon the Eric Knowles Madasahatta campaign of yore.  A simple map has been drawn up on a hex field, with the idea of using the campaign mechanics outlined in Bob Cordery's Portable Colonial Wargame.  At the moment the powers involved seem to be:

  • Azeitona - a Europeian colonial power (vaguely Portuguese), with a small foothold upon the coast of Aithiops at the mouth of the Greatgreygreengreasylimpopo River, alongside the peaceable indigeous delta dwellers, the D'inka.
  • M'Butu - a militant indigenous people who like having the Azeitonian colony around, but are inclined to stand up for their own sovereignty, and are possibly inclined to claim some suzerainty over the D'inka.
  • 'The Forgotten of God' (P.C. Wren) - a vaguely Touareg, Bedouin, desert dwelling people, pugnacious and armed to the teeth, and whose whole idea of the give and take of  'trade' often amounts to 'you give; we take'.
  • Zanzingabar and Dar Es Oualdo, piratical city states and slave traders bearing a minimum acknowledgment of the fealty and homage they owe to the Turcowaz Sultan.

It seemed to me that the last of these might have some sort of naval presence, hence these vessels I made over the weekend.  The photography that accompanies this posting is from my phone.  Vaguely dhow/ felucca/ polacre/ settee type vessels.  The tiny breechloading cannon is freestanding, if ever they need an armed  vessel.  Eventually at least one more vessel will be added to the Zanzingabar fleet.  According to the PCW system, these vessels will have a carrying capacity of 8 army strength points each (length 10cm, beam 4cm), unless one is a war boat carrying the cannon, which will reduce its carrying capacity to 4SPs. 


Saturday, April 17, 2021

Catching Up ...

A couple of weeks back, I tried out a scenario based on the Battle of Mimasetogu, 1569, between the forces of the famous Shingen Takeda and those of the Clan Hojo.   Rather than do a full account of this battle, I'll just post some pictures with captions.


Set-up: Clan Takeda (Red) attempting to force the defile between 
wooded mountainous foothill.  Clan Hojo (Blue) wait in ambush.

Early combats don't all go Takeda's way...


...Not even when a general leads a mounted charge
into the flank of a band of ashigaru.


As Clan Hojo's samurai come to the rescue, 
the ashigaru seem to be holding their own


Losses so far, even: 4SP each...

Could Clan Takeda be on the verge of breaking
through on the right...?

Perhaps not, as Hojo Clansmen stream into the fray


Heavy losses - especially among the 'quality'. 
It looks even, here, but Clan Takeda has taken 2 
more ashigaru SPs, from a 3 figure stand with
long spears.

Clan Takeda no nearer a breakthrough 
than at the beginning - not helped by half the army
idly looking on.

Battle ends with a stand-off.  Clan Takeda lost 13SP, 
Clan Hojo 11.  But a victory for Hojo, as they held 
the pass.


Wednesday, March 31, 2021

Command Decision - Battle of the Bulge action.


The lead German battalion columns: 2nd Panzergrenadier
leading 3rd Panzer

Last Sunday (28 March) Paul ('Jacko') and I played a Command Decision World War Two game - the first either of us have played since early in the 2000s.  Probably its the first CD game we've played together for nigh-on thirty years (where do they all go?!). We both just wanted a blow out with something a little different from what we have been doing recently on the war games front.

The table map taken from the Bastogne 
campaign booklet (GDW)


The scenario comes from the Bastogne campaign module booklet that I bought even before I got the CD rule set. This one, #9 Noville, takes place on December 19, 1944 - the fourth day of the Ardennes Offensive - Hitler's 'last gamble', or one of them. It pits elements of CCB/ 10th US Armoured Division - Team Desobry - against the better part of the whole 2nd Panzer Division. This would be an entirely one-sided battle, were it not for the ground conditions (heavy mud) and weather (beginning at 0500 - night - and a day of intermittent fog). For this I prepared some cards that, move by move, displayed the weather, and hence visibility.

Weather conditions cards for use with this
action.  

To quote the booklet:

Situation: Team Desobry of CCB/ 10th Armoured Division, is to hold the road junction at Noville, guarding the northern flank of the Bastogne perimeter. 2nd Panzer Division must break through as quickly as possible, securing the town to protect its supply lines, and press on to the west.

The battle starts at 0500 hours.

Off-Board Support, US: 420th Armoured Field Artillery Battalion (3 M7 SP howitzers)
Off-Board Support, German: None.
Weather: Intermittent Fog.
Ground Condition: Heavy Mud


US positions, early morning darkness, 19 December.

The Americans begin the action with a small battlegroup - Team Desobry - comprising tank and infantry companies from Combat Command B, 10th Armoured Division, together with an assortment of platoon-strength supports, and stragglers from 110th Infantry Regiment (26th infantry Division) and 52nd Armoured Infantry from CCR, 9th Armoured Division, in and around the village of Noville. They could expect a trickle of reinforcements later in the day, a platoon of Hellcats at midmorning with another in the late afternoon, and  in the early afternoon a whole battalion of Parachute infantry from the 506th Airborne Regiment.
View looking east.  Of course, it's being night,
this pic ought to be all-over black.
The German strength - the best part of the whole 2nd Panzer Division - was to build up throughout the morning and early afternoon, beginning with I Bn/ 2nd Panzergrenadier Regiment (motorised) and I Bn (Panthers)/ 3rd Panzer Regiment, minus two of its four companies.  To these, were added:

0700: HQ and IIBn (PzIV) 3rd Panzer Regiment 
Actually, this unit had 2 companies each of PzIV and JgPzIV, one of the former pair being engaged elsewhere.
0900: HQ, Infantry gun and Engineer Coys, plus IIBn/ 2nd Panzergrenadiers (on bicycles)
1100: HQ, 2nd Panzer Division, 38th Panzerjager Abt with 2 StuGIII and 1 PaK40 coys.
1400: HQ, IG and Engr coys plus IBn/ 304th Panzergrenadiers (gepanzert) and a third Panther Coy from I Bn/ 3rd Panzer Regiment.
Even though the panzer and armoured infantry companies were under strength, this was certainly a formidable force that the scratch assortment of Yankees were expected to face!  

I won't go into a lengthy narrative here, mainly as we got only as far as late morning and the imminent arrival of the StuGs and PaK40s.  During the late hours of darkness, the whole column, led by the panzergrenadiers in trucks moved up the road from Bourcy, via Hardigny and Rachamps.  Dismounting just beyond the last village, 1st Company carried on, followed by the 3rd, whilst 2nd Company took the road northwest to approach Vaux village over the wooded hills.  


The Panzer recon platoon accompanied the 1st PzGr Coy up to the crossroads, reaching that point just as dawn broke to a heavy mist or light fog. A M18 Hellcat platoon (C Coy/ 609th Tank Destroyer Bn) close by Noville village facing up the road towards the crossroads, caught the recon panthers in flank at less than 1000 yards, reducing then at once into wreckage. Spotting the Shermans on the hill, the following panthers, with some fine shooting, knocked out two platoons' worth just before the fog thickened and, reducing the visibility to 100 yards, obscured the enemy from view.

An attempt by 1st PzGr Coy to carry the hill was met by a hot fire from beyond that caused heavy casualties. My Command Decision set being the First Edition and lacking the casualty tokens, I have added a set of coloured counters to the mix, green, yellow, red, in turn signifying the number of hits received.  Red places a stand at hazard of elimination at the next hit. So from the picture above, you can see that the three-stand company (1st) has been badly knocked about, whilst 3rd Company to their right has taken by light casualties so far.  Almost out of the picture, 2nd Company has also taken slight losses as they approach the undefended Vaux village.  (Actually, I started with yellow, but, as they were veteran ought to have with green.  The Yanks were mostly veteran also, but the CCR/ 9th Armoured stragglers ought to have been classed as 'green'.  Never mind - it made little odds.)

Upon arrival, rather embarrassingly ahead of the IInd PzGr Battalion, the IInd Panzer Battalion came up the Bourcy-Noville road, pausing before the wooded hill to deploy into the muddy fields beside the road.  In the heavy mud, they were at some risk on bogging, just as the panthers had been earlier (part of 1st Panther Company had indeed stuck fast and the crews were frantically trying to unstick themselves).  However they were reluctant to to press further forward until the IInd PzGr Bn had come up.  At that, one jagdpanzer platoon did bog down, shortly before it came under heavy artillery fire whenever the fog momentarily cleared.


With Vaux in their hands, the Americans forced off the centre hill, and a route westward almost secured, 2nd Panther Company drove onto the hill preparing to engage the enemy beyond.  The lead platoon strayed into bazooka range of the Noville garrison, which at once, with some astonishing shooting put paid to the panthers in moments.  On a D10: 5s required to hit, 3 hits; damage 1D10 against side armout defence of 4: 10, 10, 7 = +6, +6, +3.  Goodbye panther platoon.  Overkill.  
The final act of the day was a brisk tank battle east of Noville. Poking their noses out from beyond the village, the last of the Sherman company took out the second half of the 2nd Panther Company. But retribution was swift. Remobilised from the clinging mud, the 1st Panther Coy had edged closer to Noville. High velocity 7.5cm shells slammed into the American tanks. Now the only really effective anti-tank weapons they had available were on a Hellcat platoon lurking in Cobry, southwest of Noville.

We had to call the action at this point. For the first time in a good while this was played at the club,  and the set-up, action (some 12 turns) and a humungous lunch took us from 11am to a little after 4, when it was time to pack up and go home. This was probably too ambitious a project for the time available (and an 8ft by 6ft table would have been preferable to the 8ft by 4ft we had to make do with), but this was not possible to play at home.

The kit was mine (German) and 'Jacko's' (American); the terrain mostly mine, and thanks to the Woolston Club for the fine 'heavy mud' table mat!

Could the Germans have cleared Noville, and  possibly Cobry, before the 506th Parachute battalion arrived to spoil the party?  I think so.  IInd PzGr Bn and the Panzer battalion was just about set to sweep the wooded hill along the Bourcy road; I PzGr Bn was still a force to be reckoned with in the north, and half the Panther battalion remained a presence in the centre.  Some useful support weapons and combat engineers were also arriving.  Having said that, though, the loss of three panther platoons was not to be sneezed at...


Thursday, March 18, 2021

The First Blacklands War - Table of links

The First Blacklands War having reached a conclusion, here is a 'Table of Contents' series of links to the thirty-four (!) postings that made up the campaign narrative.  My thanks go to Bob Cordery whose idea this was. 

The first week of the war


Fleet action


First battle


Each successive line is a separate link, the list following the chronological order of their posting.  Just 'left-click' on a line to link to the blog article.

Tuesday, March 16, 2021

The First Blacklands War - The End


The Storm of Scutari

The besiegers have infiltrated the town,
aided by anti-Imperialist townsmen


General situation in the Blacklands
after five weeks of war.


Having apparently inserted themselves into besieged Scutari through obscure postern gates left open in the southwest quarter of the fortifications, the infiltrating Black Mountaineers thought to have effected a surprise as they advanced along the line of the west wall. In this I allowed the attackers a kind of 'free hit', attacking the defenders in flank, the close proximity of the south wall defenders to be ignored for one turn. All it required was for them to score a '4' upon a D6 to effect a hit, and possibly to eliminate the defender altogether.  
 
Attacks against the north face of the town

The signal to attack was given by a salvo from the Black Mountains' sole artillery - their mountain guns, proper siege weapons not to be had. It was owing to this lack that the siege, already of two weeks' duration, had been unlikely to end by breaching the walls. Upon the signal the infiltrators began their charge, whilst at the same time, the whole of the remainder of the army, concentrating in the north and east of the town began their storm.

Attacks against the east face.

The first, most easily reached, objectives were the demi-lunes before the walls. The east demi-lune threw back the first attack with loss, but were unable to sustain the second that quickly followed. The northern demilune, subjected to as much gunfire as the Mountaineers could fling at it, also succumbed early on.
Failing to achieve surprise, the infiltrators face a
counterattack by twice their numbers.


Had events within the town fallen out as favourably, no doubt the place would have been overrun and the garrison surrendered in due course. It appears that the hoped for surprise was incomplete - if the whole emprise had not been betrayed, withal - for the infiltrators were met by a surprisingly resolute resistance (they failed to roll the necessary '4'). Unable to push on, they were themselves assailed in flank, and pushed into the unoccupied southwest bastion. There they were to remain bottled up for the duration of the battle.
Infiltrators driven into an unoccupied bastion.

The capture of the demi-lunes had neither of them been achieved without heavy loss, but the attacks continued to be pressed with determination, against both northern bastions.

The East demi-lune is the first to fall, but not 
without cost to the Mountaineers.

..then falls the north demi-lune.

In the face of stiff resistance the Mountaineers pushed their way into the northeast bastion, the defending artillery out, and into the main town.  
The northeast bastion now falls...

Following up, they inflicted some loss upon the gunners and their guns, but were themselves driven in rout from the bastion (the attackers lost their second and remaining SP; the artillery, lacking a retreat, also lost one).
... but the attackers driven out.

The first wave having receded from the contested bastion, the second wave surged in before the guns could be brought in to reoccupy it.  Once again the fighting was fierce and bloody.  The combat dice were the duplicates of the previous (a 5 and a 6 rolled). Both side lost SPs, enough to eliminate the Garrison's artillery, and to halve the attackers' strength. 

The second wave of attackers overrun the bastion 
before the garrison can reoccupy.

As they overran the guns and surged into the town, prospects seemed to be looking bright for the besiegers. The northwest bastion had also fallen, albeit with heavy loss. But along the main north wall itself, the attackers remained held up in the ditch behind the demi-lune. General Bogotan was soon to insert himself into the action there, in the hope that his presence might tip the balance.


The battle for the Northeast sector of the town.  
Meanwhile the Northwest bastion has also fallen.

Nothing loth, the Garrison Commander also thought his august presence might be the thing to sustain a desperate defence. For the moment at least, the Mountaineers seemed on the brink of victory, if they could but press further into the town. The garrison's resistance seemed to be weakening. It had reached its exhaustion point - 6SP lost - but the attackers, with no great superiority in numbers to begin with, were themselves beginning to flag. They had also lost 6SP; just one more, and that would be the end of the attack, unless the garrison surrendered betimes. Three bastions and two demi-lunes having fallen, that seemed by no means improbable.

The commanders join the fight for the north wall.

There was to be no surrender. Exhausted though they were, the garrison brought the close quarter fighting at the southwest bastion to a successful conclusion...

... which is reoccupied by the garrison.


The infiltrators driven out from the southwest bastion...

... just as, aided by the protection of the walls, the on-going close combats to right and left drawing off threats to either flank, and encouraged by their commander, the defenders of the north face of the town threw off their assailants. Lucky to survive, General Bogotan was caught up and carried along in the rout, back to his own lines.  
The defeat of the north wall attack - the '4' is
enough at least to force back the attackers...

The storm has failed. Just barely, but the failure was as complete as it was dire. The Allied plenipotentiaries in Genevra were to be left with nothing more than a tenuous hold upon Vardar province to bring to the council.
... but the 'hit resolution' destroys the attacking unit.
General Bogotan is forced to flee.

The End of the War

In their capitals, Kings and Princes were aghast, the negotiators in Genevra left without any worthwhile leverage, the whole six-week war having achieved nothing towards the territorial aggrandisement of even one of the Allies.  In Ionople, of course, the Sultan would have been cock-a-hoop, had cock-a-hoop-ness been in the style of Sultanry, and the grins of his representatives in Genevra reduced their opposites to incoherent, spluttering rage.  

Much blame was to be heaped upon the General who failed at Scutari.  Despite the insistence of the other potentates, the Black Mountains Prince was rather disinclined even to admonish, let alone cashier or execute his army commander, who might be difficult to replace with one with equal ability.  He knew as none other, that his peremptory order handed his commander a near-impossible task.

Ship carrying Turcowaz plenipotentiaries up the 
Illyrian Sea on the way to Genevra 
(detail from old Diplomacy map)

For his part, the Sultan was inclined to forbearance in the peace negotiations that were to follow. Insisting upon the acceptance of the status quo ante bellum, he permitted himself to be overborne upon the subject of reparations, accepting the barest minimum that, in his view at least, accorded with his honour and dignity as ruler of the Settee Empire. The instructions he had relayed to his Genevra embassy were to demand treble that minimum, but to allow themselves, of course with 'extreme reluctance' to be beaten down to his 'line in the sand.' The World in general agreed that His Imperial Magnificence might justly have stood out for settling upon more than he did.

Even so leniently treated, in the following months the Allies rather chafed under their financial treaty obligations. Persuading themselves they had been harshly and unreasonably treated, they once more began to harbour against the Settee Empire resentments that seemed to justify their casting covetous eyes upon the Imperial provinces. The murmur towards a second attempt against the Settee Empire were not long in being heard once more in the Blacklands' capitals...

To be continued?  Maybe.