

To conclude - for the time being - this series of articles on the Byzantine and Bulgars, I thought I would try a proper battle, but with a certain extra something. From the Grant and Asquith Scenarios For All Ages (a.k.a. The Red Book {of Scenarios}), I thought Number 4, from which the title of this posting has been taken. The lead picture sets up the situation.
 |
| The pursuing Byzantine force. |
"Splitting his raiding force in three, he took the main body on the raiding expedition, leaving the other two forces - with promises of a share of the loot - flanking the return road at a distance, ready to entrap the pursuing Imperialists. Overconfident and heedless, Manikos caught up with the raiders not far from the frontier..." Michael Psellophanes The Dementiad.
The game was played out on the 13x7 Memoir '44 hex board - none too roomy, as it happened, for the forces I chose. The troops were laid out as in the leading picture. The forces were as follows:
Byzantine:
- Strategos, Dmitrios Manikos @ 6 SP = 6SP
- 3 Kavallarioi Units, heavy cavalry, lance/bow, sword, shield @ 3 SP = 9SP (Note: Manikos remained with one of these units, which was classed as ELITE)
- 1 Procoursatores Light Horse, lance/bow, sword, shield @ 2 SP = 2SP
- 2 Skoutatoi Heavy Infantry, spear/bow, sword, shield @ 4 SP = 8SP
- 1 Peltastoi Heavy Infanrty, spear, javelin, sword, shield @ 4 SP = 4SP
- 1 Akonstai Light infantry, javelins, shield @ 2 SP = 2SP
- 1 Sphendonistai Light Infantry, sling, @ 2 SP = 2SP
Bulgar:
Main Raiding Force ('Force Two' in the original scenario):
 |
| Bulgar raiding force. |
- Kavkhan Attishu @ 6 SP = 6SP
- 2 Bulgar Noble units, Heavy Cavalry, javelins, bow, shield (One of these was led by Attishu himself and is classed as ELITE) @ 3 SP = 6SP
- 2 Horse Archer units, Light Cavalry, javelins, bow, shield @ 2 SP = 4SP
- 2 Slav Spearman units, Heavy Infantry, Spear, shield @ 4 SP = 8SP
Total 6 units, 24 SP. All except one heavy cavalry are rated AVERAGE. Possibly to balance the scenario more, the spearment could have been rated poor, but it seemed to me only the more reliable troops would have been taken on such an expedition - quite apart from the motivation in respect of whatever loot they might have been carrying.
 |
| 'Force One' - the flanking Bulgar force. |
Flanking force (Force One in the original):
- 1 Heavy Cavalry unit @3 SP
- 1 Horse Archer unit @ 2SP
- 2 Slav Spearmen units @ 4SP
Total: 4 units, 13SP, all classed as AVERAGE
 |
| 'Force Three' - ready to slam the door shut behind the Byzantines. |
- 1 Heavy Cavalry unit @ 3SP
- 2 Horse Archer unit @ 2 SP = 4SP
- 2 Slav Spearmen units @ 4SP = 8SP
- 2 Slav Archer ubnits @ 2SP = 4SP
Total: 7 units, 19SP, all classed as AVERAGE.
Now, there was but one Bulgar commander in an overall force of 17 units, 56 Strength points. Something I overlooked, but would certainly consider a second time, would have been to apply the Exhaustion Points to each of the three Bulgarian forces separately. That would have given the separate forces Exhaustion points of 8 (Attishu's), 5 (Force One) and 7 (Force Three) respectively.
 |
| First move won by the Byzantines ( a die roll) - they drew a 6. |
The original scenario forces being translated to the Mediaeval period, it remained to transpose the map onto my Memoir '44 board. The tiles came in handy, here, and worked quite well, but addition of the trees gave it a more '3D' look.
Now, for the card activation system. This time I wanted to test the separate Black and Red decks idea. The Bulgar unit total of 17 indicated a 'median' of 8, so they got the red 8, 9, 10s from 2 packs. The 9 Byzantine units indicated a 'median' of 5, so they got the black 4, 5, 6s. The roll for first draw (a die roll seems good enough) gave the nod to the Byzantines' first move. They drew their top card: a six. It seemed to me that carrying on with the pursuit would be no worse that many another action!
 |
| Bulgar's first draw: a ten! Auspicious for them! |
They got close enough to send a few arrows chasing after their quarry, but without much effect. Then the Bulgars drew - a ten. Bad news for the Byzantines! Attishu promptly turned some of his men around to face the pursuers; Force One (bottom left in the picture ) sent one spear unit into the farm near the large wood whilst the remainder skirted the other side of the wood to flank the Byzantine infantry. The advance of Force Three was limited to the light troops only. Even so, there were already indications that must have been worrying for Dmitri Manikos.
 |
| Byzantine foot turn to face 'Force One'. |
Still, a good draw, and Manikos detailed his infantry to deal with the flanking move by Force One, which had already put a dent in the slingers. The archery from one of the skoutatoi units removed several Bulgar nobles from their saddles.
 |
| Under pressure from in front by the horse of 'Force One' the Byzantine infantry find the light troops of 'Force Three' closing on their rear. |
 |
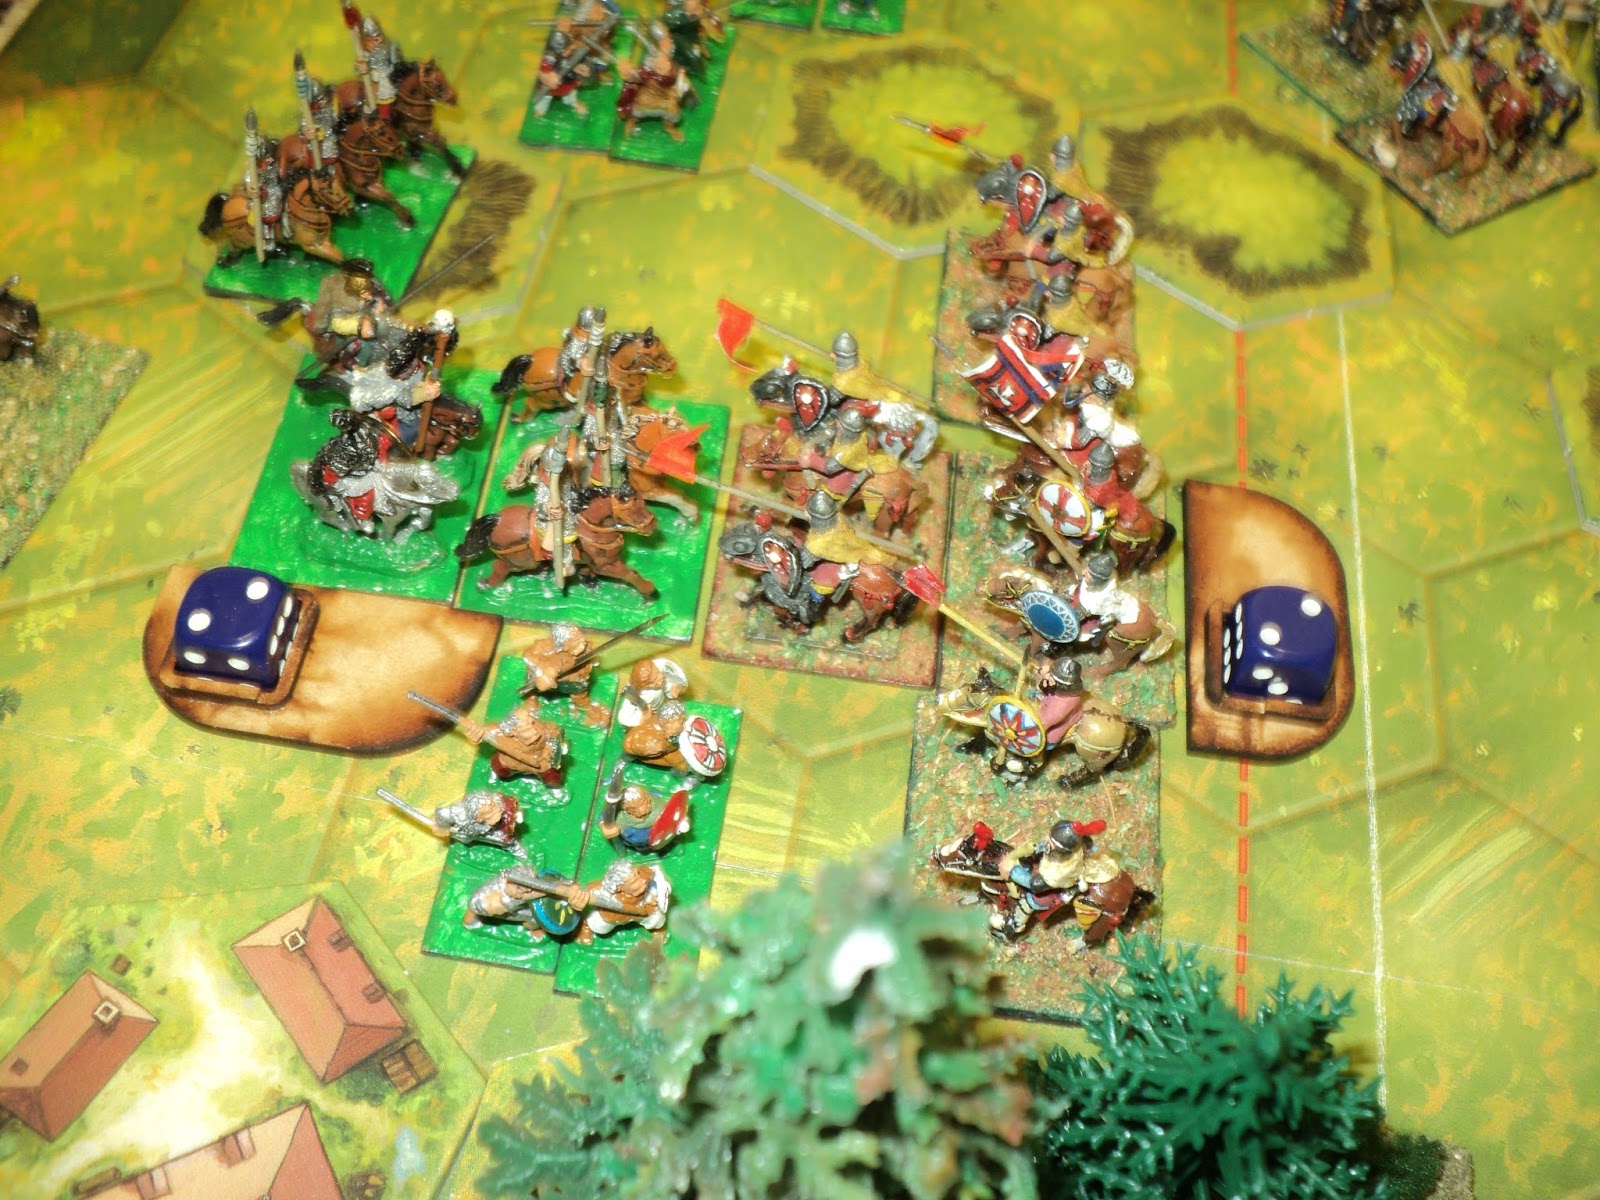
| Things look dire for Manikos's bodyguard, too. |
The following sequence of pictures depict the developing battle, as the Bulgars contain Byzantine attempts to break out of the encirclement, and tighten the squeeze. Considering the odds on the dice, it has been a feature of these that the shooting and close combat has tended to be fairly ineffectual. So it proved in this action. The bonus for lances moving into contact availed the Byzantines nothing, and thereafter, all three kavallarioi units remained locked in close combat with the Bulgar light and heavy horse.
 |
| The light archers covering their rear having been dispersed, the peltastoi turn to face the approaching enemy light troops with javelins. |
 |
| Desperate fighting as Manikos and his horse try to break out. |


 |
| Having driven off the Bulgar archers for the moment, the peltastoi return to try to sweep aside 'Force One'.... |
 |
| Four units shooting - two with arrows, two with javelins - with just one 'kill'. And that was only because the Bulgar heavies has no retreat! |
 |
| The leaders facing off against each other. Both their bodyguards have taken losses. |
 |
| The Byzantines are practically surrounded now! |
 |
| One of the Byzantine heavy horse units looks to be in serious trouble... |
In view of the foregoing picture, I should make some comment about unit facing using the hex grid system. My preference is to call the direct front, and right and left flank front of a unit, all three, as frontal. An attack from any or all three hexes, I regard as a frontal attack. The flank-rear hex grid areas are outflanking areas. An attack from either or both these areas constitute a flank attack. Finally, an attack only from the area directly to the rear counts as a rear attack.

In these two diagrams, you will see to Manikos's right a unit of cavalry taking on two spear units: one directly in front, the other to the left flank front. But a short distance to the left is the real danger: a unit of Bulgar heavy horse about to charge into their left flank rear - a flank attack.
 |
| The danger of missile attacks from front and rear. Having no retreats possible, the Byzantine foot start losing heavily. |
 |
| Desperation: All four command points go to trying to sweep 'Force One' aside! The Bulgar spears are struck front and flank |


 |
| Success! - at least a partial one. the 'Force One' heavy horse are destroyed, but despite their parlous situation, the spears hold out. |
 |
| The failure to destroy the spears is a a disaster for the Byzantine foot as the Bulgar lights fall upon their rear... |

 |
| ... and losses mount alarmingly. |
 |
| There is simply no shaking off the determined Bulgar assaults. |
 |
| The Byzantine infantry line crumbles. |
 |
| It is all up with the Byzantine army. Manikos escapes the destruction of his body guard ('effect on commander' die roll: a one); and the infantry is dying on its feet. |
By this time, the Byzantine force had long since sunk past its 'exhaustion point'. Their chances of escape, then, had dwindled to almost nil. With the loss of his bodyguard, with most of his remaining units standing on just one SP remaining, nothing but scattered remnants could possibly escape the disaster. It would be noticed from the above picture that 'Force One' (bottom right), having lost the heavy cavalry (3 SP) and one from the spears (1 SP) had reached the 'exhaustion point' of 4 SP lost. Although I did not consciously apply these individually, 'Force One' had been committed pretty much to a holding action from early on. Attishu's command had also lost 4 SP, not enough to tip it over the edge.

The loss of 8 SP was little enough in the light of the Byzantine loss of 20 when the battle finally ended.
Very interesting and a ton of work to get that report out, thanks.
ReplyDeleteThanks, Norm. I might revisit the Byzantines and Bulgars again some time. I hope by then I will have tidied up both armies!
DeleteCertainly an attractive game and it sounded very engaging.
ReplyDeleteWell, the Bulgars got their revenge for recent defeats! I'm thinking of making a rather larger hex-board for bigger scale actions. I have the figures for them!
DeleteBut it's now high time to get onto other projects. Ancients/Mediaeval is very much a sideline however much I enjoy classical and mediaeval history.