The Soviet push to take Apresski began at dawn, with a general advance by
4th Guards Cavalry Corps, 316th Rifle Division and
5th Mechanised Corps. At once the
5th Mech Corps artillery began its bombardment of the German line, which stretched between heights 605 and 609. On the right covering the defile between Hill 605 and a stretch of woodland stood
189th Infantry Regiment.
Thirty-second StuG Abteilung covered the heights themselves. Between the hills, the towed PaK40s of
181st Panzerjager supported the
35th Infantry Regiment. Height 609 was crowned by the
Marders of
239th Panzerjager and
125th Infantry. Close by the Div HQ,
181st Artillery Regiment were dug in their battery positions.
As the opening salvos of the heavy Russian guns thundered through the dawn, 17th Panzer Division lurched into motion, passing through and to the west of Apresski town on their way to the front.
 |
| 17th Panzer Division moving up |
There was nothing sophisticated about the Soviet assault: a broad frontal attack straight up the Apresski railway line. A reconnaissance the night before had indicated that both flanks of the German line were open, or at least occupied by nothing more than patrols. On the left flank, 139th Tank Brigade (T34) was to execute a left hook around the forest onto the German flank. On the right, 6th Guards Cavalry Brigade were to carry out the other wing of the planned double envelopment.
 |
The frontal attack begins early. At considerable cost.
140th Tank Brigade punches through 35th Regiment:
141st (Heavy) Tank Brigade tries to widen the breach. |
Before these flanking movements could have been fully developed, the main attacks struck the German line. Helped by the supporting heavy artillery,
140th (Medium) Tank Brigade pierced the defences of
35th Infantry Regiment, and drove them back. But in following up this success, the tanks came under deadly flanking fire from the Marders and towed AT guns.
 |
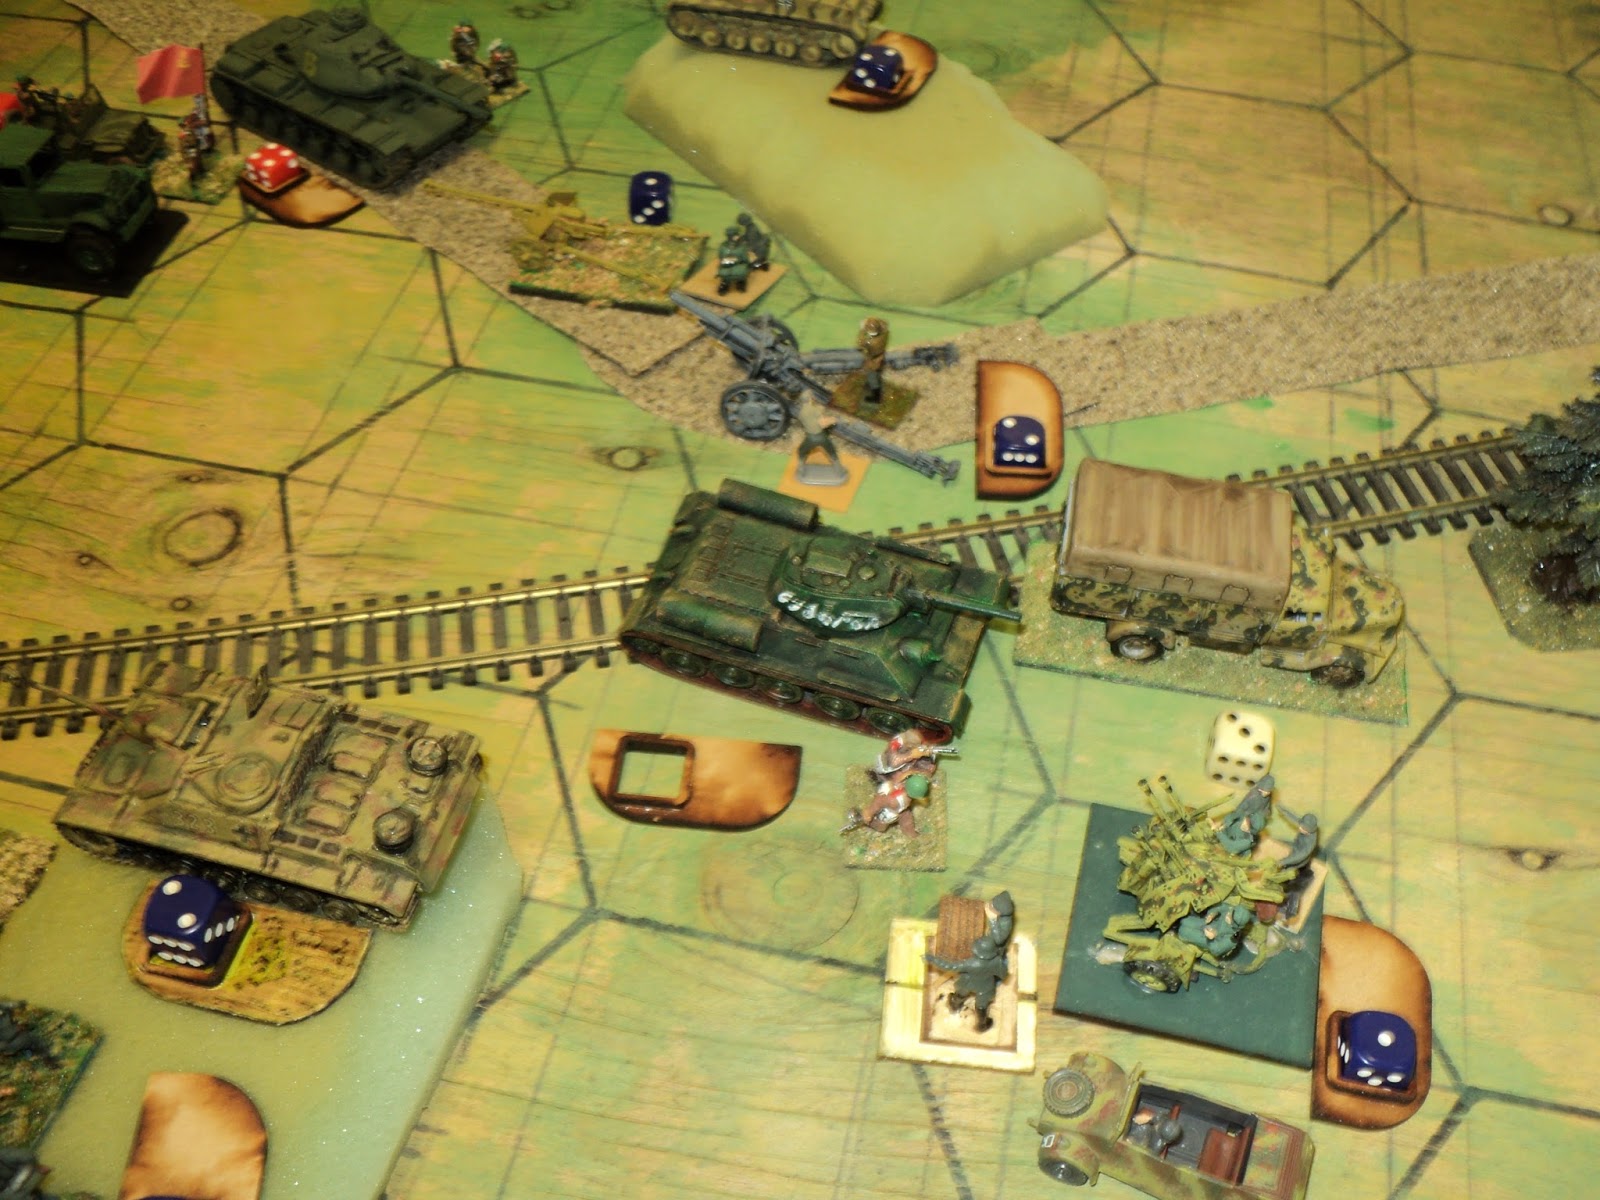
'All in the Valley of Death rode the T34s...' The Quad AA
is there just to make the German Div HQ look more ...erm ...
HQ-ish. I have ideas about that, though... |

Unable to escape the deadly flanking Anti-tank and artillery fire,
140th Tank was reduced to a pile of smoking scrap metal. The heavy tanks of
141st Tank broke themselves trying to overrun the dug-in PaK40s of
181st Panzerjager Abt, The German line remained, more or less, intact.
 |
The Russian Heavy Tank Brigade, reduced to remnants,
(SP=0), pulls out of the line. |
A point here on the narrative. At times I will refer to flanking fire, or flank attacks, but they have no significance on the combat mechanics. I've chosen to assume defenders have an all-round defence posture. Where flank attacks do become significant is in the possibility of a formation's flanking units being caught by multiple attacks. So 125th and 189th German infantry Regiments were particularly vulnerable.
 |
The CavCorps light Tank Brigade has also lost most of its
armour, and pulled back. |
The attacks on Hill 609 were also stalled. The light tanks of the
Cavalry Corps were soon depleted, leaving
7th Guards Cavalry Brigade sustaining an unequal battle until
316th Infantry Division should come into action, and
6th Guards Cavalry developed their flank attack.
 |
139th Tank Brigade attacks 189th Infantry Regiment from the
west, 17th Panzer are still distant. |
The lack of mobility of their infantry rather hampered the coordination of the Soviet attacks, for which the Tank Brigades suffered severely. Even
139th Tank's attack began before the
5th Mechanised Corps' 47th Rifle Division could come up.
 |
| 125th Infantry under attack front and left rear. |
Once fully engaged the battle flared up anew, with heavy losses on both sides. Beset on front, right flank and left rear,
222nd Division anxiously awaited the intervention of
17th Panzer Division.
 |
| The pressure mounts against the German right.... |
 |
| Soviet 316 Rifle Division throws their weight against Hill 609. |
 |
47th Rifle division taking heavy casualties; 189th Infantry Rgt
hangs on grimly. |

Even at their best speed, the panzers intervention was already too late for the infantry. Both flanks were already crumbling by the time
17th Panzer got close enough to make a difference. However their intervention was timely enough to permit the remnants of
189th Regiment to pull clear.
A second narrative aside, here. Under the HEXBLITZ system a unit or formation reduced to 0 SP is not automatically destroyed. If it can retreat, it must do so at once one grid area, its 'mode' being changed to 'S' if previously 'D'; 'M' if previously 'S'. If it can not retreat it remains in situ, but if engaged again does get destroyed. So far, 35th and 155th German Regiments has suffered that fate, though in the case of the former, it was the following up T34s that sealed their doom. Vengeance against the 140th Tank Brigade was swift and equally thorough. On the other hand, the light and heavy Tank Brigades, both also reduced to 0 SP, were able to break off their attacks and pull back.
...
At this point it might have been as well to check up upon the wellbeing of the several formations. I was using the Portable Wargames convention in which once the overall SP of one or other side had been reduced to 50% or less of the original army total, then that side was exhausted and incapable of further offensive action. By this time, 222nd Division had been crushed, pretty much, though the anti-tank units were still in action. But 5th Mechanised had been equally decimated.
Upon reflection, I think this simple approach is best, as a problem will arise if testing formation by formation when we consider the 1-hex formations. Unless, of course the test is reserved for multi-hex formations...?
The acutely observant reader will notice the sudden appearance on the table of numbered and lettered cards. Until now, the passive posture of 222nd Division and distance of 17th Panzer indicated that a good deal of time could be saved in this solo game simply by playing it IGoUGo. The intervention of 17th Panzer forced the assumption of the numbered priority system. This turned out rather well for the Germans I/39 Pz Bn drawing a '5' and II/39 Pz drawing the '1', whilst 139th Tank Bde drew a '19'. The '10' drawn by 40th Panzergrenadiers would have been useful but for the '25' drawn by the remnants of 189th Regiment. That meant the latter could not in time clear the former's front.
 |
| 139th Tank Brigade might be in trouble... |
Although the panzers did not quite succeed in destroying
139th Tank, their attacks allowed
189th Infantry to escape.
 |
| Hill 609 cleared, the cavalry follow up... |
 |
| The Russians carry Height 605. |
On the other flank,
4th Guards Cav Corps had at last cleared Height 609, and swept on to catch up with the retreating Marders. Caught up in a traffic jam of rear echelon and Headquarters troops only tardily lurching into rearward motion (very careless, this!) the Marders succumbed to the rampaging Soviet horsemen.
By now both sides had taken such losses that I bethought myself it were high time to check the remaining strength of both sides. Out of 33 SP, the Germans had lost 17 - 15 from
222nd Infantry, 2 from
17th Panzer. The Russians had lost 20 SP. That ought to have meant both sides would abandon further attacks or aggressive moves; effectively bringing the action to a close. Having miscounted the latter's overall strength at 41 SP (instead of 39) permitted the latter to carry on with their assault.
The panzers broke off their counter-attack and immediately put some distance between themselves and the enemy. The HQ and transports of
222nd Division weren't so fortunate, the Soviet cavalry catching up with them and destroying the transports and the supplies they carried, and overrunning the HQ as well. In fighting back, the German HQ units did enough damage to their assailants that the latter also broke off. Meanwhile, the retiring German artillery, finding the road congested with the towed panzerjager elements had to take to the railway line to continue their retreat (
one of the interesting effects of the priority card system!). Fortunately for them the Soviets had nothing in hand to mount an effective pursuit.
 |
| The Germans break off the counterattack and pull back. |
By this time the day was done (
I didn't actually count the moves, but I think there were 6, possibly 7 played, close to the full period of daylight for an early autumn day). The Soviets had carried the
222nd Division's defence line all across the front, but at a very high cost.
222nd Division was destroyed, pretty much, as a military formation (
in a campaign context, there wouldn't have been enough left to reconstitute much more than a brigade - if so much). There wasn't much left of
5th Mechanised Corps, either, the whole formation taking a terrible battering. Nor had the Cavalry Corps come off lightly. But
316th Infantry, the decisive reserve that had helped finally to clear Height 609, had hardly any loss to deplore (finishing the day with the SP they began with).
 |
Close of the action. The Soviet front line has been pushed some
12 - 16 kilometres northward. The Germans still hold the town. |
For all that, the result was satisfactory to neither side. The Soviets were still well short - 6 or 8 kilometres - of the town that had been their objective. The Germans had lost their main defence line. Still, the former still had three unengaged Rifle Divisions and the 8th Tank Corps available for a second attempt. 17th Panzer Division hadn't taken too much damage, and 544th Infantry Division moved up overnight to take up positions in and around Apresski. Neither side was done yet.


 Unable to escape the deadly flanking Anti-tank and artillery fire, 140th Tank was reduced to a pile of smoking scrap metal. The heavy tanks of 141st Tank broke themselves trying to overrun the dug-in PaK40s of 181st Panzerjager Abt, The German line remained, more or less, intact.


 Even at their best speed, the panzers intervention was already too late for the infantry. Both flanks were already crumbling by the time 17th Panzer got close enough to make a difference. However their intervention was timely enough to permit the remnants of 189th Regiment to pull clear.


Stunning! Great to see all those different figures and models in use. Gives me hope for my 20mm collection.
ReplyDeleteThanks! One of the reasons this project has caught my interest so thoroughly is the accessibility of play. My WW2 stuff has been woefully underemployed in recent years.
DeleteThe game described here was set up on my game board laid upon my kitchen table (with a blanket in between, of course!) The set up and play took maybe two hours - not much more, certainly.
But I do need to find a use for my few armoured cars...
Nice looking game, love the railroads...
ReplyDeleteCheers, Phil!
DeleteYears ago there used to be a model railway display in Christchurch around this time of the year. I went there specifically to collect odd items for war games scenery - rail lines, trees, rolling stock, small buildings, and assorted rail yard clutter.
I like the colours of the game board, but those bally pencil lines Bother Me.
Great game report- enjoyed following it. I've played a single game of the original Megablitz and am slowly working on some forces for my own games.
ReplyDeleteCheers,
Pete.
Thanks Pete -
DeleteI'd be interested in seeing your own battles, and others' too.
All the best,
Ion
A great battle report, very inspiring!
ReplyDeleteThank you, Martin. It is often my practice to see where 'my' kibitzers are coming from. Expect to find another follower of your blogspot.
DeleteVery nice report! Was this a historical battle?
ReplyDeleteMichael
Hi, Michael. This was not an historical battle, though the setting - Operation Bagration - was. The forces aren't quite historical either, but are based on historical precedents..
DeleteLooks to be a nicely balanced game.
ReplyDeleteRegards, Chris.