
 |
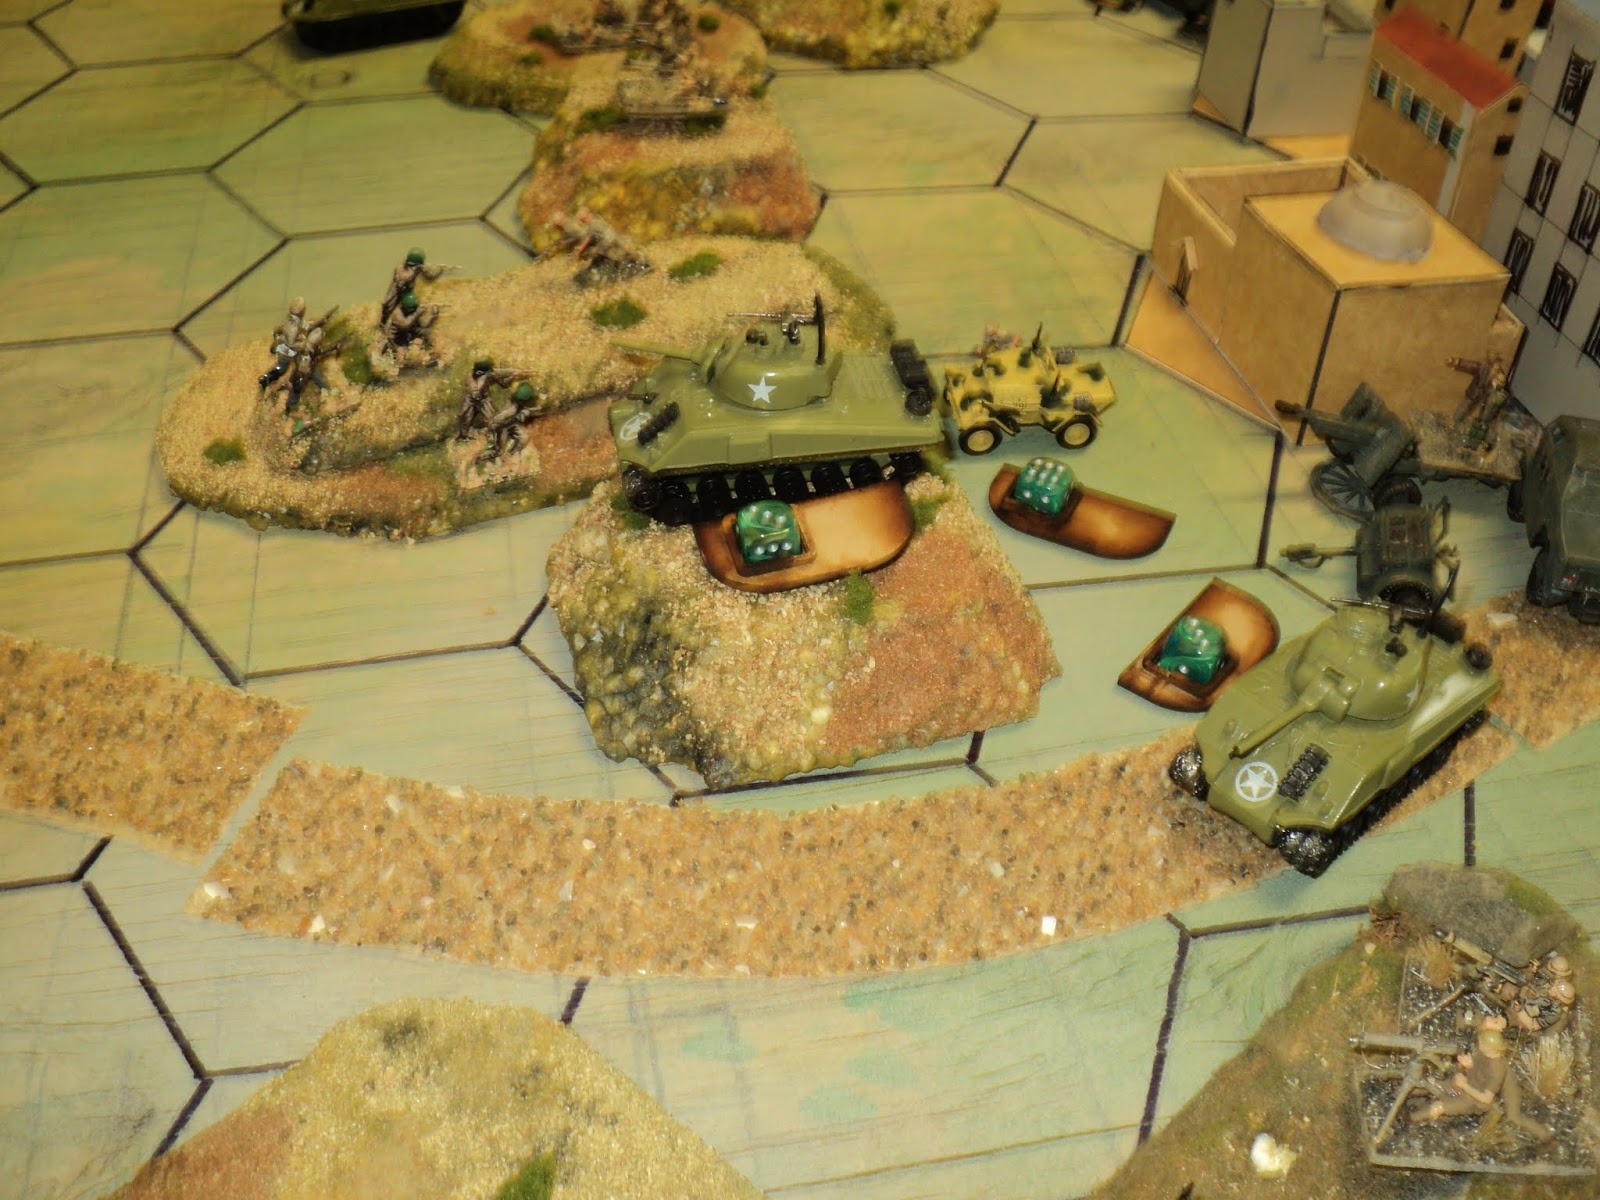
| Opening BARF moves, with the 'Revolutionary Rifles' and the light tanks leading off. |
The Battle of Khandibar is the only one so far in which I have taken one side, and a friend (Paul - 'Jacko' - of 'Painting Little Soldiers') the other. He was given choice of sides, and chose the defending Government army. This ought to have been a straight-forward 'IGoUGo' game, but through sheer force of habit, I continued with my adaptation of the Portable Wargames activation system using dice and the median number of units on either side. It is not clear how - or even whether - this affected the result. My attacks were more piecemeal than I liked, but the defence had similar problems in choosing units to move and/or fire. Suffice to say, I didn't notice at the time any real detriment to the way the action played out, and I don't think Paul did, either.
 |
| Battle of Khandibar: the Sea Port. |
 |
| Government right (east) flank |
Of course, the relatively open west flank, where the railway and Maibad road - call it the Maibad Pass - pierced the coastal range, drew the immediate attention of Col. Peenut Buttahjars. That is where BARF would be making its greatest effort. In setting up, Paul and I simply laid out our troops simultaneously, without paying too much attention to what the other was doing. It would probably have been realistic enough for the defenders to lay out first, and then the attackers to make his arrangements in response. We didn't do that.
 |
| Government centre and the Maimajikwand Road pass. |
So I was rather surprised to see that the Government left flank was left open: 'D' Squadron of the 5th Aagravaa Armoured covering Maibad Pass, and a rifle company and Vickers platoon holding the central massif overlooking it. The 'middle pass' through which the Maimajikwand road led - call it the Maimajikwand Pass - was strongly covered by 'B' and 'C'/5th Armoured squadrons, flanked by another rifle company, and backed by a gun and a mortar battery. 'A' Squadron covered the eastern flank, also covered by the other 25-pounder battery.
 |
| Government left flank. The Maibad Road pass has been cleared and Brigadier Damwright goes in danger of capture... |
A determined leader of men, Colonel Peenut Buttahjars accompanied the whole 1st 'Scimitars of Revolution' Armoured Regiment light tanks, pushing for the Maibad Pass. Lacking organic transport, 3rd Revolutionary Rifles accompanied the armour on foot.
A couple or so of asides here;
1. I have added 1 hex to the PW movement allowance of armour, right across the board. I felt that, even cross country, heavy armour (1+1 grid area) could at least keep up with infantry on foot (2 grid areas). So the Sherman medium armour moved 3 hexes; the Stuart light tanks moved 4.
2. I'm staying with the 'tanks as machine-gun carriages' thing. Tough on the PBI, but it seems to work overall, in keeping with the notion that tanks are intended to fight infantry, not other tanks. This explains why the Revolutionary armour survived this action with almost no loss.
3. It is interesting to follow the progress in this action of the 3rd Revolutionary Rifles (in their distinctive red-brown uniforms) as they sweep forward, their ranks thinning all the while.
Somewhat surprisingly, 'D' Squadron was shot to pieces in the Maibad Pass without inflicting the slightest hurt upon the light tanks. True, the Shermans were outnumbered 3 to 1, and 3rd BARF Squadron had their leader there to encourage them, but as the latter were classed as 'poor' (to reflect the lighter weight of armour) I might have expected some loss to the latter. As 1st and 3rd Squadrons stood off in a gunnery duel, 2nd Squadron raced forward to deliver the coup de grace. In a trice, the valley floor was littered with burning and abandoned Shermans, and 2nd Squadron held the Maibad Pass. Third Rifle battalion surged forward to bring the central massif under fire, as the Stuarts funnelled through the pass to bring their MGs to bear on the reverse slopes..
 |
| General view, as 'A' Squadron counter-attacks in the plain In the middle distance a gunnery duel develops between Government tanks and Rebel portee anti-tank guns. |
By this time, at least parts of 2nd (BARF) Battalion had also begun their advance, accompanied by the two anti-tank gun batteries, their aim being the Maimajikwand Pass. Covered as it was by two Sherman squadrons, with artillery support, this was to prove a tougher nut to crack, as 2nd Battalion were to discover. One, and then the other, of the anti-tank gun batteries took hits as it was deploying, which leads me to another aside.
4. Since early on in this series I have departed very slightly from the PW system as it involves multiple targets in one grid area, in particular as it involves heavy weapons and their tows, tractors and transports. The PW system allows one shot by a single unit against such a target, with a hit counting against both (or all) elements, and the outcome of that hit also applying to both. For this game, I rolled for the grid area for 'hit-or-miss', then each unit separately for the outcome. This could lead to a loss for one and a 'retreat' for the other.
I quite like this. For a portee mounted AT gun, say, the results could be:
a- Gun -1SP; Portee (or tow) -1SP
b- Gun -1SP; Portee retreat (with or without the surviving gun)
c- Gun - retreat; Portee -1SP (see below)
d- Gun - retreat; Portee - retreat (gun under tow, or mounted on portee, as appropriate).
Now, a, b and d are fairly straightforward; but what about c? Suppose we rule that a transport SP has to equal (or exceed) the carried weapon SP, then, in Case 'c' the gun takes a 'hit' AND retreats with the portee, now able to carry but 1 SP. Alternatively it might dismount (taking the hit because it is not retreating) and the portee leaves it behind. It seemed to me that it involved no real complication to treat such weapons in this way. As it happened in this action, portee and gun both took the hit.
 |
| Central Massif under assault from 3rd Barf Battalion - Revolutionary Rifles. In the centre, 'C' Sqn has been driven off the isolated hill. |
Owing to the commitment on the Revolutionary right and centre, 1st battalion was taking a considerable time to get forward, its mortars badly missed on the east flank. But progress was rapid on the right. The Light Armoured rattled though the Maibad Pass into the right rear of 'A' Company, 18th Siliputti Rifles and the accompanying machine-gun platoon holding the massif. 1st Coy, 3rd Revolutionary Rifles followed the tanks through the pass, as, supported by the Battalion's mortars, 2nd and 3rd Coys began their assault upon the massif. (Note: The Government Armour was arranged 'A' to 'D' Squadrons from the right [east] flank; the infantry companies 'A' to 'D' from the left).
 |
| The Revolutionary armoured right hook. |
Two companies of 2nd 'Volunteers of Tchagai' (2nd and 3rd, the 1st having been driven back with heavy loss well short of the heights) seized a foothold upon a spur extending from the coastal range into the plain north, and engaged 'C' Company and 'B' Squadron in a close quarter fight among the rocks and light brush. With great effort, they scattered the Government infantry company, but at a very high cost to themselves. Second Company exhausted all its strength in the fight, and 3rd Company has also taken heavy losses. Unable to maintain that foothold against the Government supporting MG fire from their left flank, the 'Volunteers' soon retreated down into the plain.
 |
| 2nd 'Volunteers of Tchagai' take a foothold upon a spur of the ridge north of the town |
The Revolutionary Rifles were enjoying far more success in overcoming the Massif defenders. Forcing 'C' Company onto the reverse slopes, where they came under MG fire from the Rebel tanks, the 'Rifles' brought the Government MG platoon under close assault. The defenders were becoming overstretched, the Government tanks discouraged from coming to the defence of the left flank on account of the pressure from in front. Although reducing both portee anti-tank gun batteries, 'B' squadron was driven off the high ground. Had the 2nd 'Volunteers' Battalion not been so knocked about, they might have seized the abandoned heights then and there.
 |
| The position of 'A' Company and the supporting MGs has become untenable, with Rebel armour in their left rear. |
But the momentary foothold had had to be relinquished, and 2nd Battalion were in no fit state to make good on the opportunity. Meanwhile, however, 1st 'Sons of Revolution' Battalion was at last lurching into motion. A company took some hurt from a 25-pounder stonk that landed on the bridge over the dry watercourse, just as they were traversing it. As the rest of the battalion emerged from the brushwood lining the dry riverbanks, 'A' Squadron, 5th Armoured descended into the plain to bring them under MG fire well short of the heights. Supported by 'A' Battery of 25-pounder artillery, the tanks' high hopes of throwing back this attack were to be disappointed. Though inflicting some loss, they found the enemy infantry closing the range. Before they could be brought under close assault, the tanks hastily drew back to the ridge line.
 |
| 1st 'Sons of Revolution' emerging from the dry river bed. |
All this served to keep the defenders occupied in the centre and on the east flank. Although giving as good as they were getting, the beleaguered 'A' Company and MGs could hardly survive long under assault from a full battalion of infantry, a regiment of tanks, all supported by the battalion's mortar fire.
 |
| Government centre. In the distance, the Central Massif looks about to be overrun. |
When at last the massif's defenders were overwhelmed and overrun, the 3rd 'Volunteers' were able to advance upon the town. But Brigadier Damwright managed to arrange a defence line in the north western outskirts, abandoning as lost the railway station and the western suburbs, and along the line of the Maimajikwand road.
 |
| The Central Massif cleared, the Revolutionaries push on to the town. |
For all their success so far, the Revolutionary Army - apart from the armour - was beginning to show signs of wear and tear. Although pressing on all fronts, they were finding Government resistance becoming a whole deal tougher.
 |
| 1st and 2nd BARF Battalions press on in the face of heavy MG fire from the support platoons and the tanks. |
Eventually the Revolutionary troops developed a powerful attack against the powerful knot of artillery-supported armour overlooking the Maimajikwand road just as 2nd company of 3rd Battalion broke into the town, and captured a small mosque alongside the highway. The exchange of fire between the light Revolutionary tanks and 'C' Squadron cost the latter a few tanks, but was otherwise inconclusive. When 'B' Squadron, on the heights overlooking the road, came under infantry assault from elements of 2nd and 3rd BARF Battalions, they managed to hold their ground only at the cost of several tanks as well. However, the effort was enough to exhaust the Revolutionary Army's further resolve, and the action petered out.
As the battle sputtered to a close, the Revolutionaries had cleared the western ridges, including the 'Central Massif', and had secured a lodgement further along the heights, between the points held by 'A' and 'B' Squadrons. Second Company of 3rd BARF Battalion had also entered the town, though held only a small section of the outskirts.
The last few pictures show the final stages of the action.
 |
| The ranks of 3rd battalion are a lot thinner than they were not long ago! |
Afterword:
This was an undoubted victory for the Revolution - the Government reached its exhaustion point at least two turns before the Revolutionaries did - and yet I felt that it wasn't quite decisive. Although the Revolutionaries controlled, if they did not occupy, the railway station and the coast road west, they had not quite reached the waterfront, and the Government still held the commercial sectors of the town and the dockside marshalling yards. One feels that a second day of battle might have been in order. Let us come back to that.
 |
| Heavy losses among the Rebel infantry! |
Government:
Command:18th Siliputti Rifles:
A Coy: -4SP
B Coy: -
C Coy: -4SP
D Coy: -
1st MMG Platoon: -1SP
2nd MMG Platoon: -2SP
Mortar and carrier: -2SP
5th Aagravaa Armoured Regiment:
A Sqn: -
B Sqn: -1SP
C Sqn: -1SP
D Sqn: -3SP
1st Tchagai Artillery:
A Battery and Quad:
B Battery and Quad: -2SP
Total loss: -20SP (C.f. exhaustion point, -17)

Revolutionary:
Command:1st 'Sons of Revolution' Battalion
1st Coy:
2nd Coy: -2SP
3rd Coy: -1SP
1st Mortar Battery:
2nd 'Volunteers of the Revolution' Battalion
1st Coy: -2SP
2nd Coy: -4SP
3rd Coy: -2SP
2nd Mortar Battery:
3rd 'Revolutionary Rifles' Battalion
1st Coy: -3SP
2nd Coy: -2SP
3rd Coy: -3SP
Mortar Battery: -1SP
1st 'Scimitars of the Revolution' Armoured Regiment
No loss!
1st AT Battery: -2SP (-1 each from gun and portee)
2nd AT Battery: -2SP (-1 each from gun and portee)
Total loss: -24SP (exhaustion point, -24)

 |
| The Heights under attack from elements of all three BARF battalions |
- Resolve any ongoing close combats to a conclusion. This would represent some of the close order fighting continuing after dark, as one reads in so many battle accounts.
- Tot up the SPs lost, and returning half to each side.
- SPs replaced on a pro rata basis, with rounding priority going to rifle elements first and infantry support weapons second.
On that basis, the Government troops would have regained 10SP, 4 going to 'A' and 'C' Coys, 2 going to the Armour (recovery and repair), 2 to the MMG platoons, and 2 to the mortar and carrier.
The Revolution would have got back 10SP of rifle infantry, and 1 each for AT gun and carrier, for 12 total. The fight would have continued next day with a 59SP Revolutionary force, against a 40SP government one. It would probably have been a street fight, the outcome, anyone's guess.
 |
| Close of the action. The Revolutionaries have established a lodgment in the town, but have not quite reached the waterfront. |
 |
| Rough positions of BARF Revolutionaries at the close of the action. |
To be continued: the Battle for the Capital City: Nawabisbad.
Looks good and sounds like an engaging game.
ReplyDeleteI find the PW type of game quite involving. My war games table has seen more action in the last three years than it had seen in the previous thirteen.
DeleteI thought this 'Sea Port' scenario would be quite an interesting one. I might have provided added 'atmosphere' as, say, certain wealthy magnates and high officials, fearing for the lives and their families, crowd the waterfront, hoping to be taken off by ship. All the while the vengeful Rebels rampage ever closer on the other side of the screening coastal range.
But I didn't.
Cheers,
Ion
Nice report and lovely game, I enjoyed this diversified and beautiful terrain and these great maps!
ReplyDeleteThanks, Phil. It would never win any prizes, but the table always looks interesting to me at least!
DeleteInteresting game. I think this actually might present a rather interesting scenario. With the revolutionaries facing so far a string of complete victories this inconclusive engagement may be a source of concern. With the potential for Government forces to attack the Maimajikwand garrison at any moment there may be concern about having been too ambitious.
ReplyDeleteIndeed perhaps that is a potential scenario. Have a government attack begin while the forces are split between the two locations. Will Col. Peenut Buttahjars retreat from Khandibar? Remain and rely on the garrison to hold out? Perhaps he will split some elements off to reinforce the garrison?
Of course you have already be well ahead in the timeline so these questions are irrelevant. Enjoying the campaign, I do like how this one is a bit more inconclusive, makes me excited to see how this will be resolved.
That rather presupposes a strategic component to the campaign design. But as it is really a programme of battles, the strategic aspects take very much a back seat. But you are right, the addition of the Sea Port Scenario off to one side at least gives a strategic background to some of the scenarios, such as the BARF, after the Railway Station, being unable to advance upon the National Capital without neutralising a threat flanking their advance.
DeleteThis was the method General John Bell Hood CSA hoped to stymie Tecumseh Sherman's advance past Atlanta. It worked too... for a short while...
Enjoyed reading the game report and really like the maps.
ReplyDeleteCheers, Peter.
DeleteI'm sort of developing a hex-grid cartographic style that I find attractive, and I hope helps orient the reader when looking at the photos. With a few little tweaks I reckon Microsoft Paint would be a very useful function. It's pretty good now!
Great battle for the port Archduke
ReplyDeleteI think this scenario does add something to the campaign. I did consider adding an airfield, but figured they would tend to be associated with large centres anyhow. In any case, although I have considered adding air power to the government forces, so far I have 'resisted' the 'temptation'.
DeleteExcellent battle and report sir.
ReplyDeleteAre you still using a variant of Bob's Portable Wargame Rules?
Have seriously considered using his Hexblitz, or a portable wargame variant, the an entire Market Garden game (with Arnhem filling one hex).
Hi, Duc -
DeleteYes, still using PW (developed version). I have made a few minor tweaks, one being to add one grid area to the moves of armour (1 for heavy armour being too slow to my mind); and am moving towards multiple units in a target hex being diced for severally, rather than a single roll determining hit/miss and another for effect on all. Using tanks as machine-gun carriages shooting a infantry is not explicitly stated in the rule set; I have made that explicit. In this particular action, the Government tanks did a fair bit of execution amongst the Rebel infantry!
I do like your Market Garden concept - I'd be keen to see that (or even to try it myself)! I've been thinking a lot about Hexblitz, and am starting to settle upon something that lies somewhere in the middle of Hexblitz, Tom Gow's Megablitz, and Chris Kemp's NQM. But I would be very interested to see what you come up with. Overall, I'm very much taken with the concept.
Just by the way, it is my belief that Portable Wargame could also be used for operations level games. In some respects I have the scaling wrong with my Tchagai rebellion, insofar as what I have been calling companies really ought to have been battalions, and the battalions, brigades. But so it began, and so is continues.
Cheers,
Ion