Wednesday, February 15, 2017

Grid wargames play test.

Hauptmann Harlequin von Chrome's sketch map from
Chapter 9: 'Double Delaying Action' of his
memoir.
 Still waiting for my copy of Portable Wargames to turn up - problem with the delivery company, apparently - I thought I'd try out a gridded game adapting the simple One-Hour Wargames WW2 rule set.  Opening the book more or less at random yielded this: Scenario 9: Double Delaying Action.
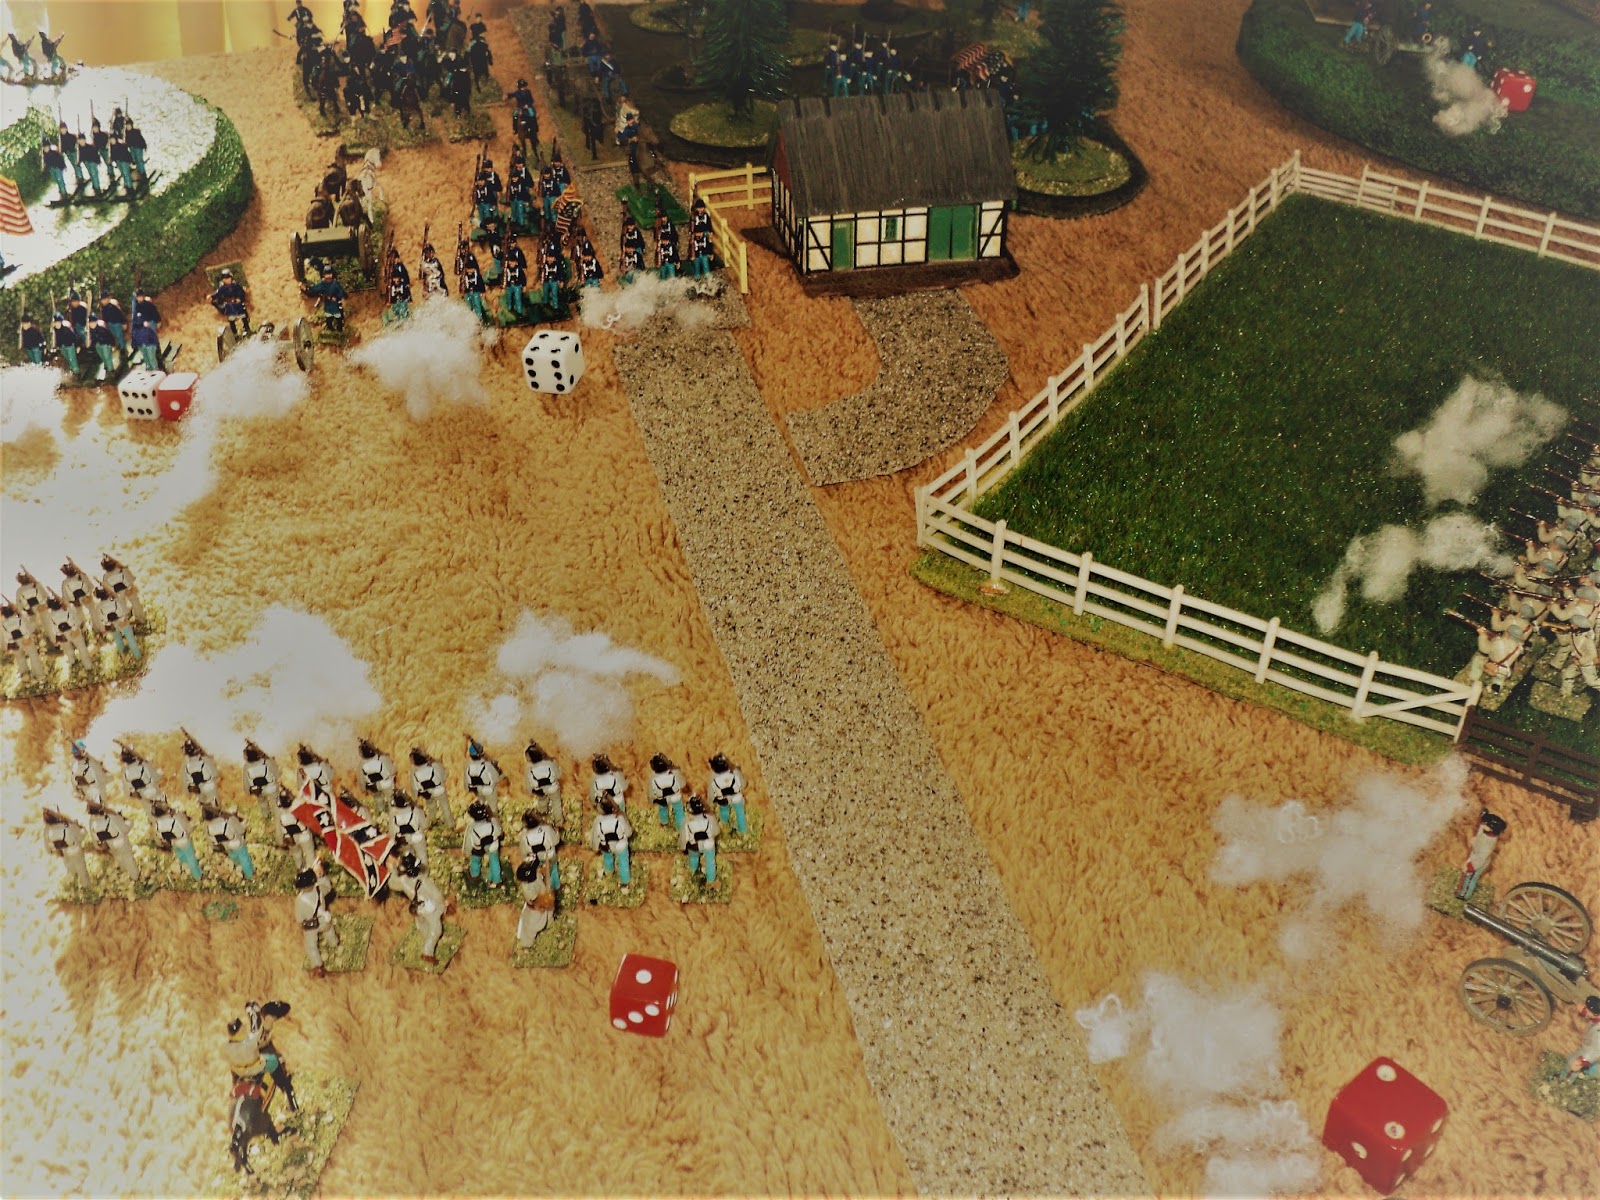
The battlefield.  the trio of trees by the river mark the location
of a ford.

The table set out yielded an interesting enough terrain.  The yellow hedgehoggy thing in the picture was by way of a weight to keep the polystyrene hill in place.  New Zealand is a damned windy country, let me tell you, especially in summer. The air is rarely still. Fortunately for me the wind today was a mere zephyr,  For the firefighters battling the bushfires south of where I live - the enormous smoke clouds dominating the southern sky wafting off to the east - conditions would have been very unpleasant, with a scorching nor'wester forecast for later in the day.  The power outages later in the day were due to these fires.  They have been going for a couple of days, now. But... to proceed.


Ten units from which the BLUE army was selected
Here are the troops from which the forces were to be selected:

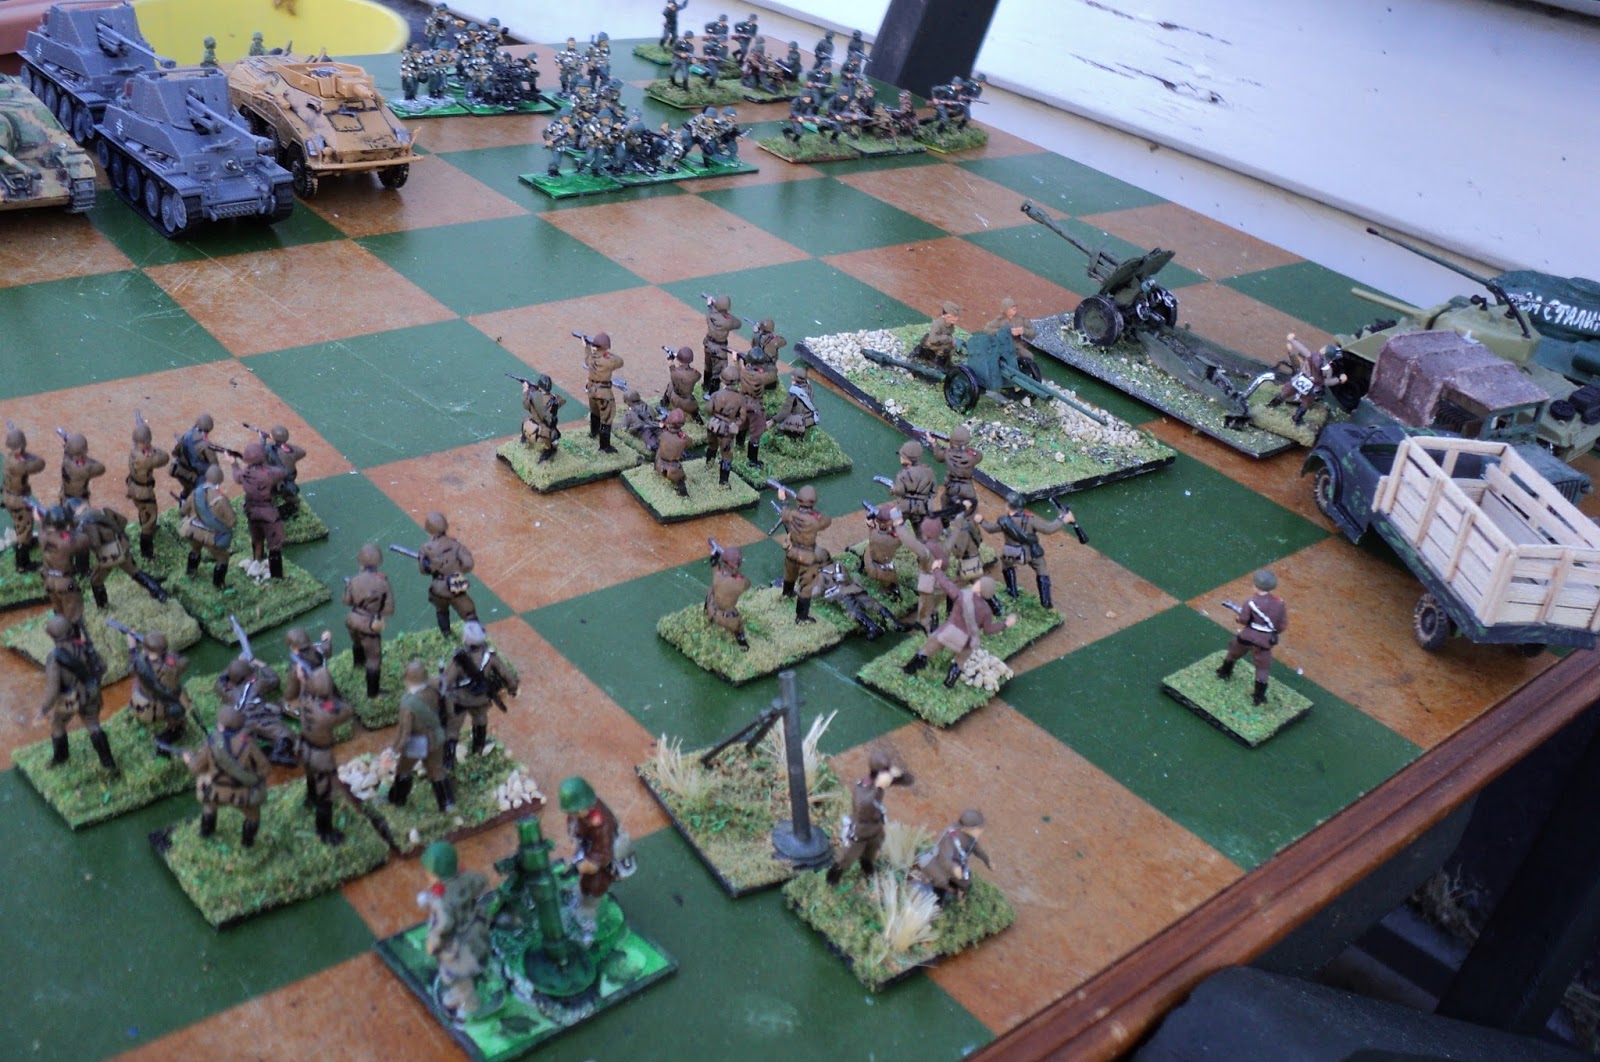
Ten units from which the RED Army was selected.
Blue Army (German):
- 4 Infantry units (each 4 stands, 8 figures);
- 2 Tank units - Jagdpanzer IV/70s classed as 'tanks' (because they were to hand);
- 2 Anti-tank gun units - Marder 38(t).  These I treated 'per spec' in the rules - the same as towed AT guns;
- 2 Mortars - one infantry support 7.5cm gun mounted in an 8-rad armoured car, and one 12cm mortar.  Both were to be treated the same.

Red Army (Russian):
- 4 Infantry units.  They ought to have had 4 stands, not 5, not that it mattered at all:
- 2 Tank units: 1xT34/85, 1xM4 Sherman;
- 2 x120mm mortars
- 2 Anti-tank units, 1x76.2mm and 1x45L66 anti-tank guns.


BLUE (German) army's main thrust: over the ford.
The jagdpanzers are Matchbox, the Marder a recently
bought second-hand Marder 38(t); the Sherman a
'made in China' diecast of indeterminate origin.
This scenario postulated that five miles north of this area, a decisive battle is being fought.  Both commanders here have been ordered to reinforce the main battle, whilst at the same time delay if they can not prevent the enemy reinforcement.  RED (Russia, defending) must break off at least 3 units by move 12 (one each fourth turn), provided that BLUE (German, attacking) fails to gain control of the town (for a future supply base) AND fails to exit at least two units from the north edge of the map.
A single company about to attack the town.  The white dice
(German) and the red (Russian) are strength point markers.

I have an idea that the author, Neil Thomas, mentions somewhere what each unit represents, but I tend to think of them as companies - or company-sized - though they could conceivably represent battalions.   Each and all units have 15 strength points.  I used dice in holders to mark this, with the idea for the infantry units of removing a stand for each 5 strength points lost.  Then I promptly forgot I was going to do this because I was concentrating on remembering the current SP strengths of the vehicle and gun units.  I now think for those that once the first five SPs are lost, of placing two dice down showing 5 and 5 and reduce the SPs from them.

Each side comprised 6 selected from the 10 available units, selected by a die roll.  The Russians rolled a '1' which gave them:
- 3 infantry (Rifle) companies
- 2 mortar companies
- 1 tank company - Shermans
Of these, 1st Rifle Company deployed in the woods, 2nd Rifle Company formed a reserve in rear of the town, which was occupied by 3rd Rifle Company.  The tank company stood midway between wood and town, but somewhat drawn back close by the hill.  The powerful mortar support stood upon the hill itself. The whole formed a line with the flanks thrown a little forward to occupy the wood and town features.

The German main attack
 The Germans rolled a '3' for force selection, which gave them:
- 3 infantry companies
- 2 tank companies (the Jagdpanzer IVs
- 1 Anti-tank company (the Marder)
The General Officer Commanding - General-major Klaus von Klutz - decided that the town was likely to prove too much of an obstacle, and massed the bulk of his force for a major drive over the ford and the Russian right flank.  Just a single infantry company (Nr 1 Coy) would make an attempt upon the town.
Rather an optimistic attempt on the town...

Progress on the western flank...
The Russian chose not to contest the ford crossings, preferring to wait for the Germans to advance onto their guns,  After briefly favouring the forest defenders with machine-gun attention (spiritedly returned with support from the mortars), the heavy assault guns swung off to the northeast to take on the Shermans. By this time the lead German armour had already taken serious losses. The company finally succumbed, having barely advanced beyond the riverbank. By this time, however, it was time for the Russians to draw off one of its units.  One of the mortar companies was the most conveniently placed; it retired without more ado.
The Soviets reinforce the town garrison.
The German company is already badly depleted.
Meanwhile the contest for the town drew quickly to a close.  After the initial exchanges of fire, the Russian commander, possibly unnecessarily, pressed 2nd Rifle company into the town alongside the 3rd.  The unequal firefight - two to one, with the Russians enjoying the cover of the buildings, could end but one way.  First Infantry Company was out of the battle.

The armoured battle...

That still meant that in the sector of their main effort, discounting the mortar supprt, the Germans outnumbered the defenders two to one.  By the time First Assault Gun Company was destroyed, it had inflicted considerable loss upon the Russian armour.  Second Assault Gun Company had already joined the quarrel, and barely two more turns had passed when it reduced last of the Russian tanks to a smoking wreck.
Both sides have lost a tank company.
The 1st Rifle company was equally unable to hold off the German infantry attacks.  Second Infantry Company plunged into the woods on their flank, and levered the Russian back
Russian infantry under
heavy attack in the woods. The green die must have been
knocked: it ought to have been showing a '2' signifying that
the Russian unit was down to 7SPs.

The problem of playing outdoors.  The sunlight in Canterbury
New Zealand is very strong (which is why I always
wear a hat outdoors).
Time was pressing for the Russians, who perforce drew off the remaining mortar company. Having won the battle for the town, Colonel Vladimir Vladimirovitch Vladimirski ordered 3 Company to counterattack to the west, whilst 2 Company took to the road north.  There was plenty of time to draw off the latter, but he would have been better to have kept 3 Company in the town.  It helps to remember what  the victory conditions what your orders are and what needs to be done to carry them out.


All the same, 2 Rifle Company saw off a tentative approach by the Marders, before turning off to retreat northward.  Badly depleted though it was, 3rd Rifle Company were gone by the 12th game turn, fulfilling half of the Russian victory conditions.  It was at this point that I called the game, for it was clear enough that the Germans would exit two units in that time.

The Germans have conquered the west flank, but the
job is but half done.
About to call it a German victory I suddenly realised that the Germans had to have control of the town by the end of move 15 as well.  In the circumstances, that too was achievable, as the Russians had long since abandoned the place.  On the other hand, the last remaining rifle company (the 1st was finally destroyed at Turn 11) was still within a couple of moves' distance from the town also.  As that implied a fight for the place with the Russians having a slight edge, I was forced to award the laurels to the Russians after all.
Second Rifle Company ought to have carried straight on
northwards, instead of diverting onto the hill; and 3rd
Rifle Company should have stayed in the town.  
Outcome:
German:
- One tank and one infantry company destroyed;
- One tank and one infantry company carried on northwards off the map;
- Town contested; therefore not in exclusive German hands.
Russian:
- One tank and one infantry company destroyed;
- Two mortar and one infantry company drawn off to the north;
- Town still denied German control.
Result: Russian victory, albeit a very tight one.

Move thirteen completed.
 Two moves would not be enough for the Germans to bring off two units off the
northern edge and to take and hold the town.   
The action went by very quickly, with no real hitches.  It is no disparagement to describe the Neil Thomas rule set as being of the 'One Brain Cell' type.  There are good reasons to adopt this approach. For one thing, simplicity makes the game accessible, and is less unrealistic in many of its effects than is too often alleged.

But as designed here, they are very easy to tailor - and I suspect have been designed with that possibility (inter alia) in mind.  It would not take much to build in rules differentiating among the disparate armour and armament of armoured and unarmoured fighting vehicles; of loading infantry on trucks or half-tracks, of bringing in reconnaissance elements etc, and still have a fairly simple game.  Less simple, sure, but by no means complicated.


Next time:  Stonewall in the Valley continues:

Sunday, February 12, 2017

"Attentive to our duty" - a naval interlude.

Raesharn convoy: Destroyer flotilla (T61-64) leading
and to the flanks, the protected cruiser trailing.  Far off,
almost due west...


In a recent posting in his blog spot, Bob Cordery mentioned the possibility publishing a further volume on Developing the Portable Wargame (working title).  The subject of naval war games was to be included in this volume.

,,, two Kiivar armoured cruisers approach.


This sounded intriguing enough for me to inquire further into this.  In response, Bob kindly sent me a copy of his naval war game rule set as they presently stand.  Well, we had a few goes last night as I gradually sussed how the game worked.  For some reason I thought the gunfire was adjudicated 'per gun', which had two interesting, if amusing, effects.  One: the actions were extremely short.  Two, imagine a nine-gun battleship firing 72 dice at point blank.  Yeah.  Right.

Clearly I needed to reread the rules, but I quite like the 'per gun' notion, if it could be made to work.
Convoy.
The COW report that accompanied the rules mentioned a scenario in which a couple of armoured cruisers attacked a convoy escorted by a protected cruiser and a flotilla of torpedo-boat destroyers. My first pass in fact had two protected cruisers attacking an armoured cruiser and two destroyers protecting a couple of merchant vessels.  Some superb gunnery put the armoured cruiser under, but one of the attacking ships went with it.
Early - possibly too precipitate - reaction by the escort
destroyers.
 After the first passes, I had another at the original scenario.  The opening arrangement was unclear, so I imagined the attackers approaching from the same direction as, but on a converging course with, the convoy.

Battle of Tobacco Roads


Royal Kiivar Navy:  Task Force Admiral Yueh
Armoured Cruiser KNS Termagant (Main Armament 8"; Secondary 4.7")
Armoured Cruiser KNS Virago (Ditto)

Imperial Raesharn Navy: Convoy Captain Suzumaha
Protected Cruiser IRS Mastodon (Main Armament 6"; Secondary 4.7")
Destroyer Flotilla: T61 - Leader, Commander Yamazuki
                              T62, T43, T64 (In this world of Sideon IV, destroyer flotillas comprise 4 vessels)
                              All destroyers armed with 4" guns, and 4 torpedo launchers.
Merchant ships: Allswell, Ben Betterhof, Cudbewuss, Dammital. The first and last of these were small tramp steamers, the other two more sizeable.
Any tricks to get these ancient card stock sheets to lie flat?!
As dawn broke over the gentle swell of the Great Southern Ocean, lookouts upon the Torpedo Boat Destroyer T64 descried off to the west the dark smudge of an approaching pair of ships.  Armoured cruisers, devil a doubt, armed with modern eight-inch guns - heavy metal for the Raesharn escort to take on.  Apprised of the situation, Captain Suzumaha sipped his early morning apple tea, and ordered the escort to intercept the enemy.

A very noticeable swell this morning!
The Raesharn response was probably too precipitate, as a sudden change in course by the Kiivar ships caught the Mastodon isolated from the destroyers, and under fire from both.  Considering the superior range and weight of metal of each of the Kiivar vessels over the single Raesharn cruiser, the latter could have come off much worse that it did.  Taking six hits herself, Mastodon inflicted four on Virago.


IRS Mastodon caught isolated by the two heavier enemy ships.
 Even so, this could not last.  It would be some time before the destroyer flotilla could intervene, in circumstances that might - but for events - have led to Commander Yamazuki's court marshal.  (First move being diced for, Raesharn moved first in the game, but the moment the toss went the other way, that would be the cue for the Kiivar vessels, with two moves in a row, to slip in behind the escort and isolate the solitary big Raesharn ship.  The destroyers were caught too far away and heading in the wrong direction.)


Mastodon flings herself between the raiders and the convoy.
This kind of heroism ends but one way...
Heroically covering the rear of the slowly fleeing merchant ships, once more the overmatched Mastodon came under heavy fire. She scored a few damaging hits upon Termagant but succumbing to a welter of 8-inch shells, went under in a matter of minutes.


Seven hits, on top of the six earlier, and Mastodon goes down.

After this disaster, it seemed that the convoy lay at the mercy of the Kiiver squadron.  But racing back came the destroyers, T62 far ahead of its companions.  
The Raesharn destroyers determine to do or die...
The gunfire from the Raesharn ships was not enough to stop T62 from closing to torpedo range. Three hits into the larboard side were enough to put Virago in a sinking condition.  Down she went. But its success did not save T62.  Reduced to a complete wreck in moments, that destroyer also slipped beneath the waves.
For the moment Termagant can concentrate its gunfire on
the lead M/S.  It was not very effective.


Battle rejoined: the Flotilla leader, T61, thumps two torpedoes
 into Termagant's larboard side - just before several 8-inch shell
hits puts paid to T61.

The demise of T62 was followed quickly after by that of T63, with hardly any further scratched to the paintwork of Termagant. That fast-moving cruiser managed momentarily to keep out of torpedo range of the remaining Raesharn destroyers, but in going after the merchants, allowed the escort vessels to close again. Concentrating the main guns on T61, Termagant trained the secondaries on Allswell. The destroyer also disappeared among several explosions, but the merchant suffered only minor damage (2 hits).   Then two torpedoes slammed beneath the port-side belt armour of Termagant - the vengeance of T61.  There would be no court marshal for Cdr Suzumaha. 


Termagant continued to circle the merchant ships, like a wolf after sheep.  The wheeling ships and the determination of the sole remaining escort, T64, prevented the cruiser concentrating its fire upon any one steamer.  Ben Betterhof was reduced to a wreck, but remained afloat and under power; and a few fires were started aboard Dammital as well.  But the main armament had to be reserved to fend off T64.  That vessel soon joined its companions in Davy Jones's locker, but a final torpedo hit persuaded Termagant to break off the action.
The last destroyer, T64 finally drives off the raider, but not before
taking several fatal hits.
The escort had saved the convoy, but barely, and that at the cost of all five warships.  But the attackers had lost a valuable warship of their own.  It chances were problematical of anyone making the journey to safe harbour.


That was a pretty even and hard fought action, with heavy loss on both sides, but an indeterminate result.  Now, although my navies are more cognate to early WW2, but with fewer 'types' - or different - ships I played this action 'per spec'.  There are some comments I would make at this point.  Bear in mind these are off the top of my head after just one proper 'play test'.
 End of the action.

1.  It is tempting to suggest making the results of torpedo attacks more chancy, but perhaps more lethal when they do strike.  A possibility: 3 dice as now if fired from abeam of the target, 6's to hit, 1D6 damage per hit.  If fired from ahead or astern, 2 dice only with the same probability of hits and damage.  As now, 4 torpedo attacks maximum per destroyer or other torpedo carrying vessel.
2.  What are the practicalities of adding a little more detail in terms of critical hits affecting guns, command, motive power and steering?  It is true that such detail makes for a deal more complicated bookkeeping, but would they add anything to the game?  Would they add anything to the narrative? Something for me to think about.
3.  The concept leads to a very playable game judging by my very brief acquaintance. Can they be modified by a supplement adding aircraft, carriers and submarines?  Or are we looking at a series of separate, or maybe modular, rule sets?
4.  I still like the 'per gun', which seems possibly more appropriate to the 'post-Dreadnaught' era.


Friday, February 10, 2017

Stonewall in the Valley 10: Battle of Passage Creek concluded/

Situation on the southern wing - the Confederate right.
Kust visible on the extreme right can be seen dismounted elements
of Col Munford's cavalry

The arrival of the three Confederates Brigades of Taliaferro, Trimble and Taylor on the left and centre of the field tended rather to shunt Winder's 'Stonewall' Brigade off to the right, facing Barnett's barn and the nearby woods and hill.  Fortunately, Munford's 2nd Virginia Cavalry, accompanied by Captain Chew's 'flying' artillery joined them there (this determined by dice rolls).  Whilst Chew's rifled guns engaged the Union horse and artillery on the hill, 27th Virginia Infantry rallied and rejoined the rest of the Brigade, and Munford's cavalry dismounted, formed a skirmish line, and plunged into the woods behind Turvey's place (just visible in the above picture).  Although Ashby's cavalry had arrived in the centre, Jackson directed them to support General Winder.
...
33rd Virginia and 21st North Carolina in action.


Heavy blows delivered and received.

Meanwhile, on the rest of the embattled front, events seemed to be turning in favour of the Union.  Both sides seemed to be wilting under the deadly fire, to the extent that on both, the morale and endurance of five regiments came into question.  For all ten units, a dice roll would determine how they would respond to events. The Union rolls, north to south went: 3,3,4,5,2. The last was a failure, but only enough to stop that unit advancing as it had been doing.


The Confederate rolls were much less fortunate.  Again north to south, they went 4, 1, 1, 2, 1 - disaster!  In the woods on the extreme left, 23rd Virginia stood up to the strain well enough, but 37th Virginia, and almost the whole of Trimble's Brigade, were driven back.  The advance of 21st North Carolina was halted, but 21st Georgia fell back, and 15th Alabama, whose enthusiasm in closely engaging the enemy more than made up for their early morning failure, once more suddenly broke apart and fled in confusion.
Musketry and gunnery duels in the centre.
'Stonewall' Brigade in action.  Reinforcement appearing
in the picture.

Having shaken themselves out into a semblance of order, the Stonewall Brigade resumed its advance, 27th Virginia into Barnett's field, whilst 5th Virginia engaged the Union battery on the hill to the right. Coming under return gunfire, 5th Virginia were taking heavy losses - in fact little more than 50% of the men remained with the colours at the close of the action.  Yet that gallant regiment stood its ground and returned a musketry so effective as eventually to silence the battery altogether.  

The Union horse alongside the battery never really got the chance to redress matters.  A popping fire of carbines from the woods to the left front revealed the presence of dismounted rebel cavalrymen; 33rd Virginia, alongside Chew's battery, supported the 5th from its right rear, and a large body of horsemen, distant as yet, were rapidly approaching from the right front.  In the face of such a variety of threats, a kind of paralysis seized the Union cavalry.


In fact at about this time, I considered calling the battle, as it was already clear to me that the decisive action was going to happen on the Confederate right.  But Union successes so far mitigated against such a decision.  I felt that General Shields would see the battle going pretty well, and would stay with it.


It would be a costly decision.  Though their first attacks had been checked, if not altogether repulsed, the Confederates had plenty of reserves.  The 6th and 7th Louisiana of Taylor's Brigade soon took up the cudgels dropped by Trimble's Brigade.  Having recovered its aplomb, 10th Virginia also rejoined the 23rd in the railroad woods, where their combined firepower gradually overcame that of 5th Ohio.


In the midst of the roar of battle, as he stood on horseback closely observing the action, General Shields was struck by a Minie ball that flung him out of the saddle.  The wound was mortal (determined by die roll, ranging from '1' - slight, requiring dressing but able to remain in command - to '6' - immediately fatal; I rolled a '5').  As Shields was carried from the field, Brigadier Kimball took over direction of the battle.

(In my combat system, dice rolls for firing determine the number of 'hits' on the target, which are then resolved into 'casualties' (dead, wounded, missing, straggled, skedaddled, and carrying wounded to the rear, and what have you).  In resolving hits into casualties, if double-6s appear, regimental officers are laid low, which can affect the unit's cohesion in subsequent 'reaction' tests.  But triple-6s affect any General officer who happens to be standing within 5cm of the target unit.  So it happened here.)

It was not long before 23rd Virginia felt itself sufficiently emboldened to emerge from the woods to engage 5th Ohio more closely.  The 10th had rejoined the firefight, and the 5th Ohio, in front of them was feeling the heat.
Taliaferro's Brigade pressing back the Union right.

General Shields takes a hit.

In the centre the firefight continued - a real battle of attrition, though for neither commander was this a desirable proceeding. General Jackson in particular had to be acutely aware that somewhere less than a week's march distant, General Fremont's Mountain Department Army was at large and unchecked. It would not do to be forced out of the Shenandoah valley because the last couple of days had so weakened his army it could not face Fremont's column.


Cavalry battle on the ridge.

Developments on the southern wing were more to the liking of 'Old Blue Light' Jackson.  As the Stonewall Brigade began pressing, Ashby's cavalry (7th Virginia) nerved themselves to charge the 1st Rhode Island on the hill.  Under cover of the charge, Col. Munford's dismounted troopers emerged from the woods and began to climb the slopes flanking the Union horse. 
Collapse of the thinly held Union left.

Although the Federals had the slope of the Confederates, the latter had the numbers.  As it happened, the latter exacted a full revenge for its misfortunes earlier in the day and routed the Rhode Islanders right off the hill.  Sorely depleted, the survivors of Battery L, 1st Ohio Artillery also made off.  
7th West Virginia comes until heavy pressure.

This left a vacuum on the Union right flank, guarded only by the woods back of Barnett's barn, where 7th West Virginia was conducting a lone fight against 5th and 27th Virginia.  Within the cover of the woods, the West Virginians were able for over an hour to hold their own despite the slight numerical superiority of their opponents.  The hill once cleared brought in 33rd Virginia and the dismounted troopers of 2nd Virginia Cavalry over and around the heights onto the West Virginians' left flank.

As General Trimble rallies a broken unit, the Union centre
 breaks of the action under cover of a cavalry charge.
The writing on the wall must have been abundantly clear to General Kimball by now.  The early successes on his right and centre were beginning to become undone, as rebel reserves joined in the fight, and their fire began to be felt.  True, the Union had reserves also, but as holes began to appear in their turn in the Union lines, they were soon used up.  
Taylor's Brigade (6th and 7th La) about to storm the Union
defended hill.  Sixth La is looking very depleted, but
morale remained strong.
It did not help the Union cause that Brigadier Trimble had reorganised his Brigade fairly quickly after his earlier reverses.  To be sure, the North Carolinians and Georgians had never lost their good order despite being driven back.  For their part, 15th Alabama pulled itself together a deal more rapidly than it had earlier in the day.  In sum, therefore, Trimble's Brigade was ready one more to try conclusions.
Rallied CSA regiments ready to try a second round...


Charge of 1st Maine Cavalry

The crumbling Union line no longer had that luxury.  As losses mounted, cohesion became more difficult to maintain.  Tyler's, and then Kimball's, Brigades began to be edged back as the Confederates stepped up the pressure. Suddenly the 5th Ohio infantry broke and scattered, signalling an imminent collapse of the Union right.  In desperation 1st Maine Cavalry - part of Col Knipe's column that had remained on this wing to support Tyler - flung themselves upon the Confederate line.  

Although with pistol and sabre they lowered a few rebel infantry, the latter had emptied too many saddles during the charge itself, for the Union horsemen to hope to impose more than a brief delay.  The survivors joined the growing exodus from the field.


The fatal charge of 1st W. Va. Cavalry
That general retreat spread to the centre as General Kimball acknowledged that the game was up, and it was time to preserve what he could of his command.  Hoping to catch the Confederates on the hop, he flung in the West Virginia cavalry against the line of Confederate artillery astride the ride near Barnett's field.  Had the Napoleon battery not had taken earlier losses the execution by the CSA guns would have been catastrophic (the horse would have taken eleven hits) but as the battery was down to 3 crew figures, the 'Die Range' was only 5, to the roll of '6' was a 'miss'.  The '5' rolled by the companion battery was within the  'Die Range' for rifled guns firing canister at point blank range. That was bad enough for the cavalry, who didn't even close, but made off hurriedly down the road.
Respective losses to 1st Me Cav and
23rd Va.
The afternoon was now far advanced, perhaps two hours of daylight remained as Shields's - now Kimball's - command quit the field.  Losses had been heavy on both sides, but, as the battle progressed, the fortunes though favourable to the Union to begin with, had swung decisively and irreversibly in favour of the Confederacy. 
Crumbling Union defence line...

There was no pursuit.  The Army of the Shenandoah had had a hard twenty-four hours, and in the process had thrown back two of the Union columns sent to drive them from the Valley.  It was enough that the rebels could reach the southern turnoff and restore their lines of communication.  For their part, the Federals would not reach Front Royal until the following morning.  Nor would they stop there.  Desiring to return to his parent Division, Col Knipe drew his command back to Cedarville.  For his part, perhaps shaken by the day's events, and the loss of General Shields, on the morrow Kimball took his Division back to the Blue Ridge Mountains, though the Manassas Gap and stopped only upon reaching Piedmont town late in the afternoon.

Of the movements of the Army of the Shenandoah, we'll have to wait for the next instalment of Stonewall in the Valley.

To be continued...