Monday, August 31, 2020

A New Project That ... Isn't...

 It was whilst browsing through some old back-issues of Wargames Illustrated that I ran across Bob Cordery's article 'Balkan Wars' Matrix games (Issue 66).  They made interesting and intriguing reading, once again.  

Bob Cordery's 'First Balkan War'
 Matrix Game Map as it appeared in WI66


In a subsequent article (WI78) Bob had created a set of rules and army lists for playing out the battles that might have arisen from the overall game.  The DBx ancestry of this rule set is clear, and bears some similarity to the Horse, Foot, Guns rule set developed I think by WRG some years later.  However, I thought they might go very well with the Portable Wargame systems.

Well, this was thought-provoking beyond my powers of resistance.  There was never any prospect of my running a matrix game as such, but how could one pass by such resources and not try to make something of them, even as a solo campaign?  

This was never going to be a whole new project.  The armies I have already: my late 19th Century 'Colour' armies.  Of course, the role of Turkey/ the Ottoman Empire/ the Porte would be taken by Turcowaz/ the Settee Empire/ the Door.  That was easy.  How were the armies to be distributed?  

BULGARIA becomes Chervenia
GREECE becomes Hellenia
MONTENEGRO becomes the Black Mountains Principality
SERBIA becomes Bijela
TURKEY becomes Turcowaz

In WI78, Bob outlined army lists for the belligerents, from which I developed the armies.  Here they are:

Chervenia - Head of State, Tsar Ferdinand

I Army: 
    1 x General (Vasil Kutinchev; 'Good') = 6SP (Strength Points)
    6 x Infantry stand (2 Veteran, 4 Trained) @ 4SP = 24SP
    1 x Machinegun stand (Trained) = 2SP
    2 x Cavalry stand (1 Veteran, 1 Green/ Militia) @ 3SP = 6SP
    2 x Field Artillery (1 Veteran, 1 Trained) @ 2SP = 4SP
    1 x Medium Artillery (Trained, siege arty) = 2SP
    2 x Transport (wagons, pack) @1SP = 2SP
Totals: 15 Units (includes general, Median = 8+1 = 9); 46SP (exhaustion at 16SP lost)

II Army:
    1 x General (Nikola Ivanov, 'Average') = 6SP
    9 x Infantry stand (5 Trained; 4 Green/ Militia) @4SP = 36SP
    1 x Machinegun stand (Trained) = 2SP
    2 x Cavalry stand (1 Trained, 1 Green/ Militia/ Irregular) @3SP = 6SP
    2 x Field Artillery (2 Trained) @2SP = 4SP
    1 x Heavy Artillery (Trained) = 2SP
    2 x Transport @1SP = 2SP
Totals: 18 Units (Median = 9); 58SP (exhaustion at 20SP lost)

Chervenia II Army, the largest of the three.  Unclear as to function 
of transports, I thought to use them as limbers.  I reckon the 
guns will get limbers, and the 'transports' will be logistic elements. 


III Army:
    1 x General (Radko Dimitriev, 'Poor') = 6SP
    6 x Infantry stand (1 Veteran, 3 Trained, 2 Green/ Militia) @4SP = 24SP
    1 x Machinegun stand (Trained) = 2SP
    1 x Cavalry stand (Trained) = 3SP
    1 x Field Artillery (Trained) = 2SP
    1 x Transport (stand of 2 pack animals) = 1SP
Totals: 11 Units (Median = 6-1 = 5); 38SP (exhaustion at 13SP lost).


Hellenica - Head of State, King George I

Army of Thessaly
    1 x General (Crown Prince Constantine/ Lt-Genl Panagiotis Danglis, 'Average') = 6SP
    6 x Infantry stand (1 Veteran, 3 Trained, 2 Green/ Militia) @ 4SP = 24SP
    1 x Machinegun stand (Trained) = 2SP
    1 x Cavalry stand (Trained) = 3SP
    1 x Mountain artillery (Trained) = 2SP
    1 x Field Artillery (Trained) = 2SP
    2 x Transport @ 1SP = 2SP
Totals: 13 Units (Median 7); 41SP (exhaustion on 14SP lost)

The Hellenic Army.  The near piece is a 'mitrailleuse'.


Black Mountains Principality - Head of State, Prince Nikola I

Army:
    1 x General (? 'Average') = 6SP
    4 x Infantry stand (1 Veteran, 1 Trained, 2 Green/ Militia) @4SP = 16SP
    1 Mountain Artillery = 2SP
    1 Transport (2 pack animals) = 1SP
Totals: 7 Units (Median 4); 25SP (exhaustion on 9SP lost)

The Army of the Black Mountains Principality.  Not the most powerful
presence in the theatres of war... (H'mmm... What is that weapon
the horse holder has slung over his shoulder...?)


Bijela Kingdom - Head of State, King Peter Karadordevic

I Army:
    1 x General (Petar Bojovic, 'Good') = 6SP
    5 x Infantry stand (1 Veteran, 2 Trained, 2 Green/ Militia) @ 4SP = 20SP
    1 x Machinegun (Trained) = 2SP
    1 x Cavalry stand (Trained) = 3SP
    2 x Field artillery (2 Trained) @ 2SP = 4SP
    1 x Heavy artillery (Trained) = 2 SP
    2 x Transport @1SP = 2SP
Totals: 13 Units (Median 7+1 = 8); 39SP (exhaustion on 13SP lost)
Both Bejelan Armies, the near being the Ist.  The blue uniformed fellows are
the Militia ('Poor') units.


II Army:
    1 x General (Stepan Stepanovic, 'Poor') = 6SP
    4 x Infantry stand (3 Trained, 1 Green/ Militia) @4SP = 16SP
    1 x Mountain artillery = 2SP
    1 x Transport = 1SP
 Totals: 7 units (Median 4-1 = 3); 25SP (exhaustion on 9SP lost).
The lesser of the Bejela armies, the same size as that of the 
Black Mountains.


Turcowaz - Head of State, Sultan Mehmed V

I Army:
    1 x General (Nazim Pasha, 'Poor') = 6SP
    8 x Infantry stand (2 Veteran, 4 Trained, 2 Green) @ 4SP = 32SP
    2 x Cavalry stand (1 Trained, 1 Green/ Militia/ Irregular) @3SP = 6SP
    1 x Field artillery (Trained)  = 2SP
    1 x Medium artillery (siege, trained) = 2SP
    2 x Transport @1 = 2SP
Total: 15 Units (Median 8-1 = 7); 50SP (exhaustion on 17SP lost).


II Army
    1 x General (Ali Riza Pasha, 'Poor') = 6SP
    10 x Infantry stand (2 Veteran, 4 Trained, 4 Green/ Militia) @4SP = 40SP
    2 x Cavalry stand (1 Trained, 1 Green) @3SP = 6SP
    2 x Field artillery (Trained) @2SP = 4SP
    1 x Heavy Artillery (siege, trained) = 2SP
    2 x Transport @1SP = 2SP
Totals: 18 Units (Median 9-1 = 8); 60SP (exhaustion on 20SP lost)


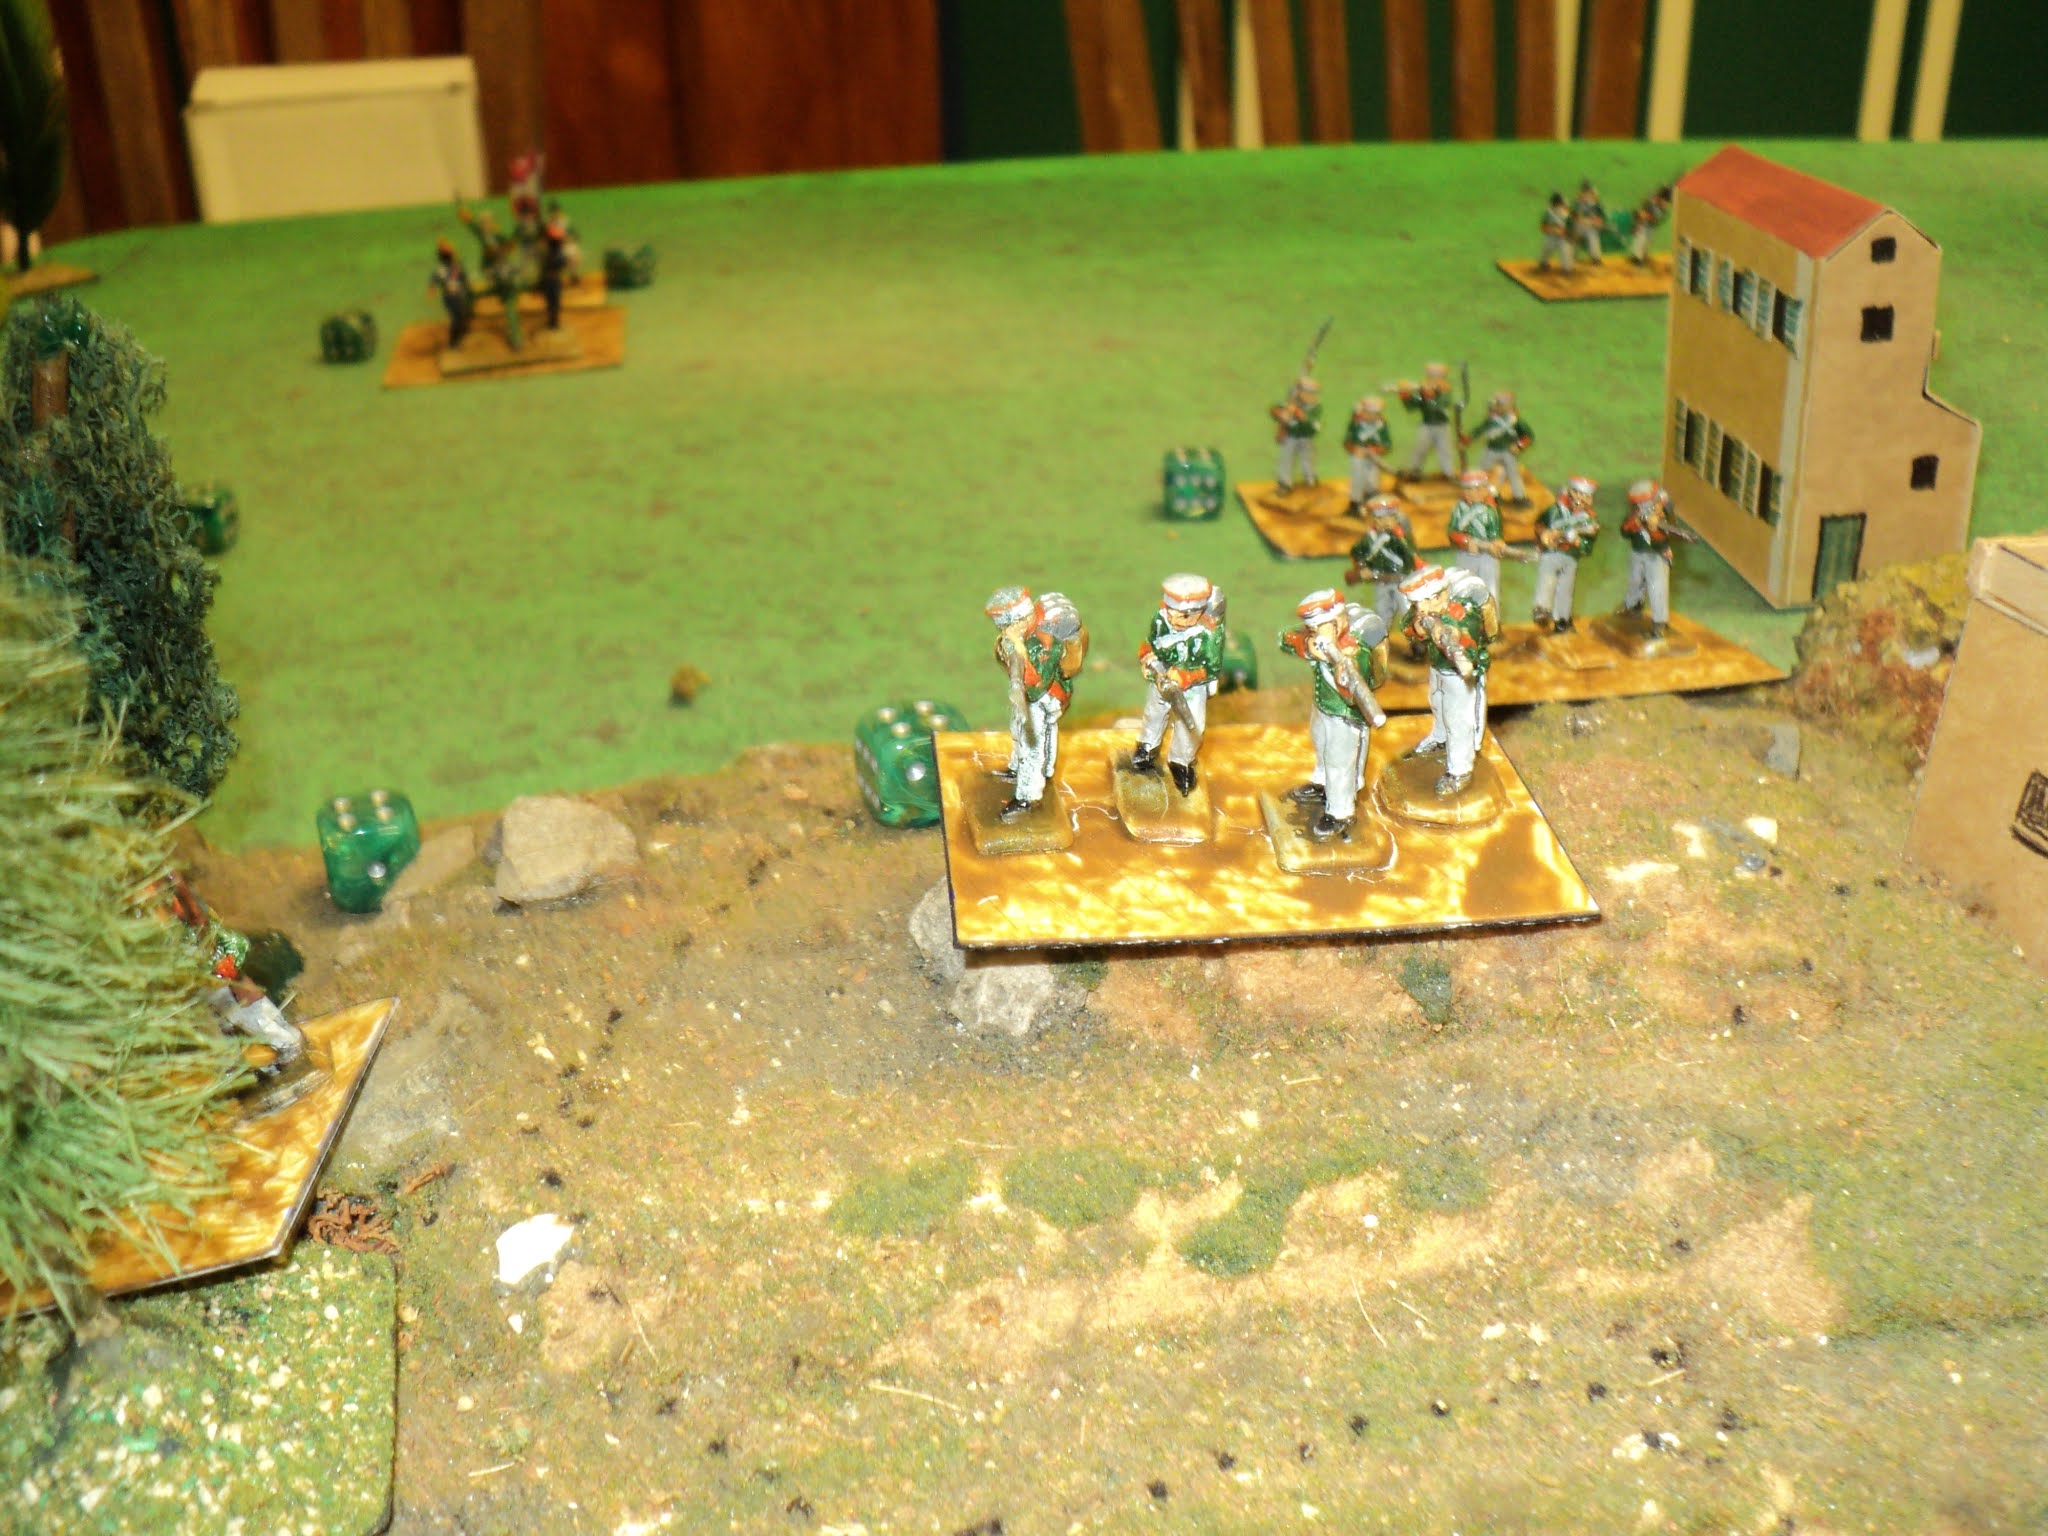
The powerful II Army of Turcowaz.  As you see them,
the infantry are divided left to right as veteran, trained, and 'militia'.


III Army:
    1 x General (Abdullah Pasha, 'Average') = 6SP
    10 x Infantry stand (1 Veteran, 3 Trained, 6 Green/ Militia) @4SP = 40SP


    1 x Cavalry stand (1 Green/ Militia/ Irregular) = 3SP
    1 x Field artillery = 2SP
    1 x Medium artillery (siege, trained) = 2SP
    2 x Transport @1SP = 2SP
Totals: 16 Units (Median 8); 55SP (exhaustion on 19SP lost)


IV Army:
    1 x General (Halepli Zeki Pasha, 'Good') = 6SP
    6 x Infantry stand (1 Veteran, 5 Trained) @4SP = 24SP
    1 x Cavalry stand (Green/ Militia/ Irregular) = 3SP
    2 x Mountain artillery (2 Trained) @2SP = 4SP
    1 x Transport = 1SP
Totals: 11 Units (Median 6+1 = 7); 38SP (exhaustion on 13SP lost.

Now, having sorted the armies, and decided upon a tactical rule set, how do we run the campaign? At the moment, I'm looking simply at 'area movement' according to the original map. The spaces upon which armies may stand are the outlined regions and provinces AND the fortified cities. However, only one army may occupy a fortified city. An army in a fortified city may move out only into the provincial area within which the fortified place stands. An army wishing to enter a fortified city, may do so only from within the city's provincial region.

My reading of the history of the First Balkan War indicates that the four nations opposing the Turkish Empire could in only very polite circles be called 'Allied'. For a start it's not clear why Montenegro was in it at all, apart from territorial ambition, as that little principality had lately enjoyed good relations with the Porte. Yet Montenegro was, by half a week, the first to declare war.

The others seemed to have made cooperative noises before declaring war against Turkey, but almost all such notions were set aside once it all began. Only Montenegro seems to have been willing to enter into 'joint ventures'. By contrast, the historical army of Stepan Stepanovic, a combined Serbian-Bulgarian formation, split into its constituent contingents (under Bulgar orders) from almost the moment the war got under way.

So I am inclined to disallow all cooperation between the 'Allied nations', even armies within nations, with the exception of Montenegro. Without that exception, I reckon the tiny Montenegrin army would be in for a toughish time of it.


The starting points have been shown on the map. The locations of the four Turcowaz armies was somewhat dictated by the opening situation of the Matrix, that left limited choice. Those of the 'Allied' armies had been left open, but I decided they would all begin in separate regions, one of the armies in 'South Chervenia' actually being located in the capital, Sofia.

I was wondering if somehow I could make some kind of use of the 'matrix card' deck. One feels something ought to be possible - and it would help the 'narrative' along, too. But so far, the flash of brilliance is eluding me that would show me how it might be done.

Appearance of the armies: I am making no pretence to be reproducing the armies and uniforms of the historical counterparts. The Bulgar Chervenian army infantry will be resplendent in very British-looking red coats, just by way of an example.

For a while I thought of using the transport elements as the limbers or pack animals for carting artillery around.  And so the pictures would seem to indicate except that there are in many armies more guns than transport elements.  I have decided that if I'm going to include gun transports they:
(a) will be additional to the logistics elements in the army lists; and therefore
(b) will be integral to the artillery elements and strength points thereof.

Battles:
At the moment, the thought is that battles will be fought between individual armies, using The Portable Wargame. If two armies of the same nation enter a region occupied by a single enemy army, each will fight the defending army separately if they arrived from separate provincial areas (or cities); but may attack together if they arrived from the same provincial area. However, both armies will be subject to their own unit activation, and their own exhaustion point.

The objective is to conquer the whole Turcowaz Imperium west of Constantinople Ionople, with the Chervenians showing a considerable interest in taking that capital, as well. Each of the Allies have their territorial ambitions, perhaps more collectively than can be satisfied once the spoils are to be divided...


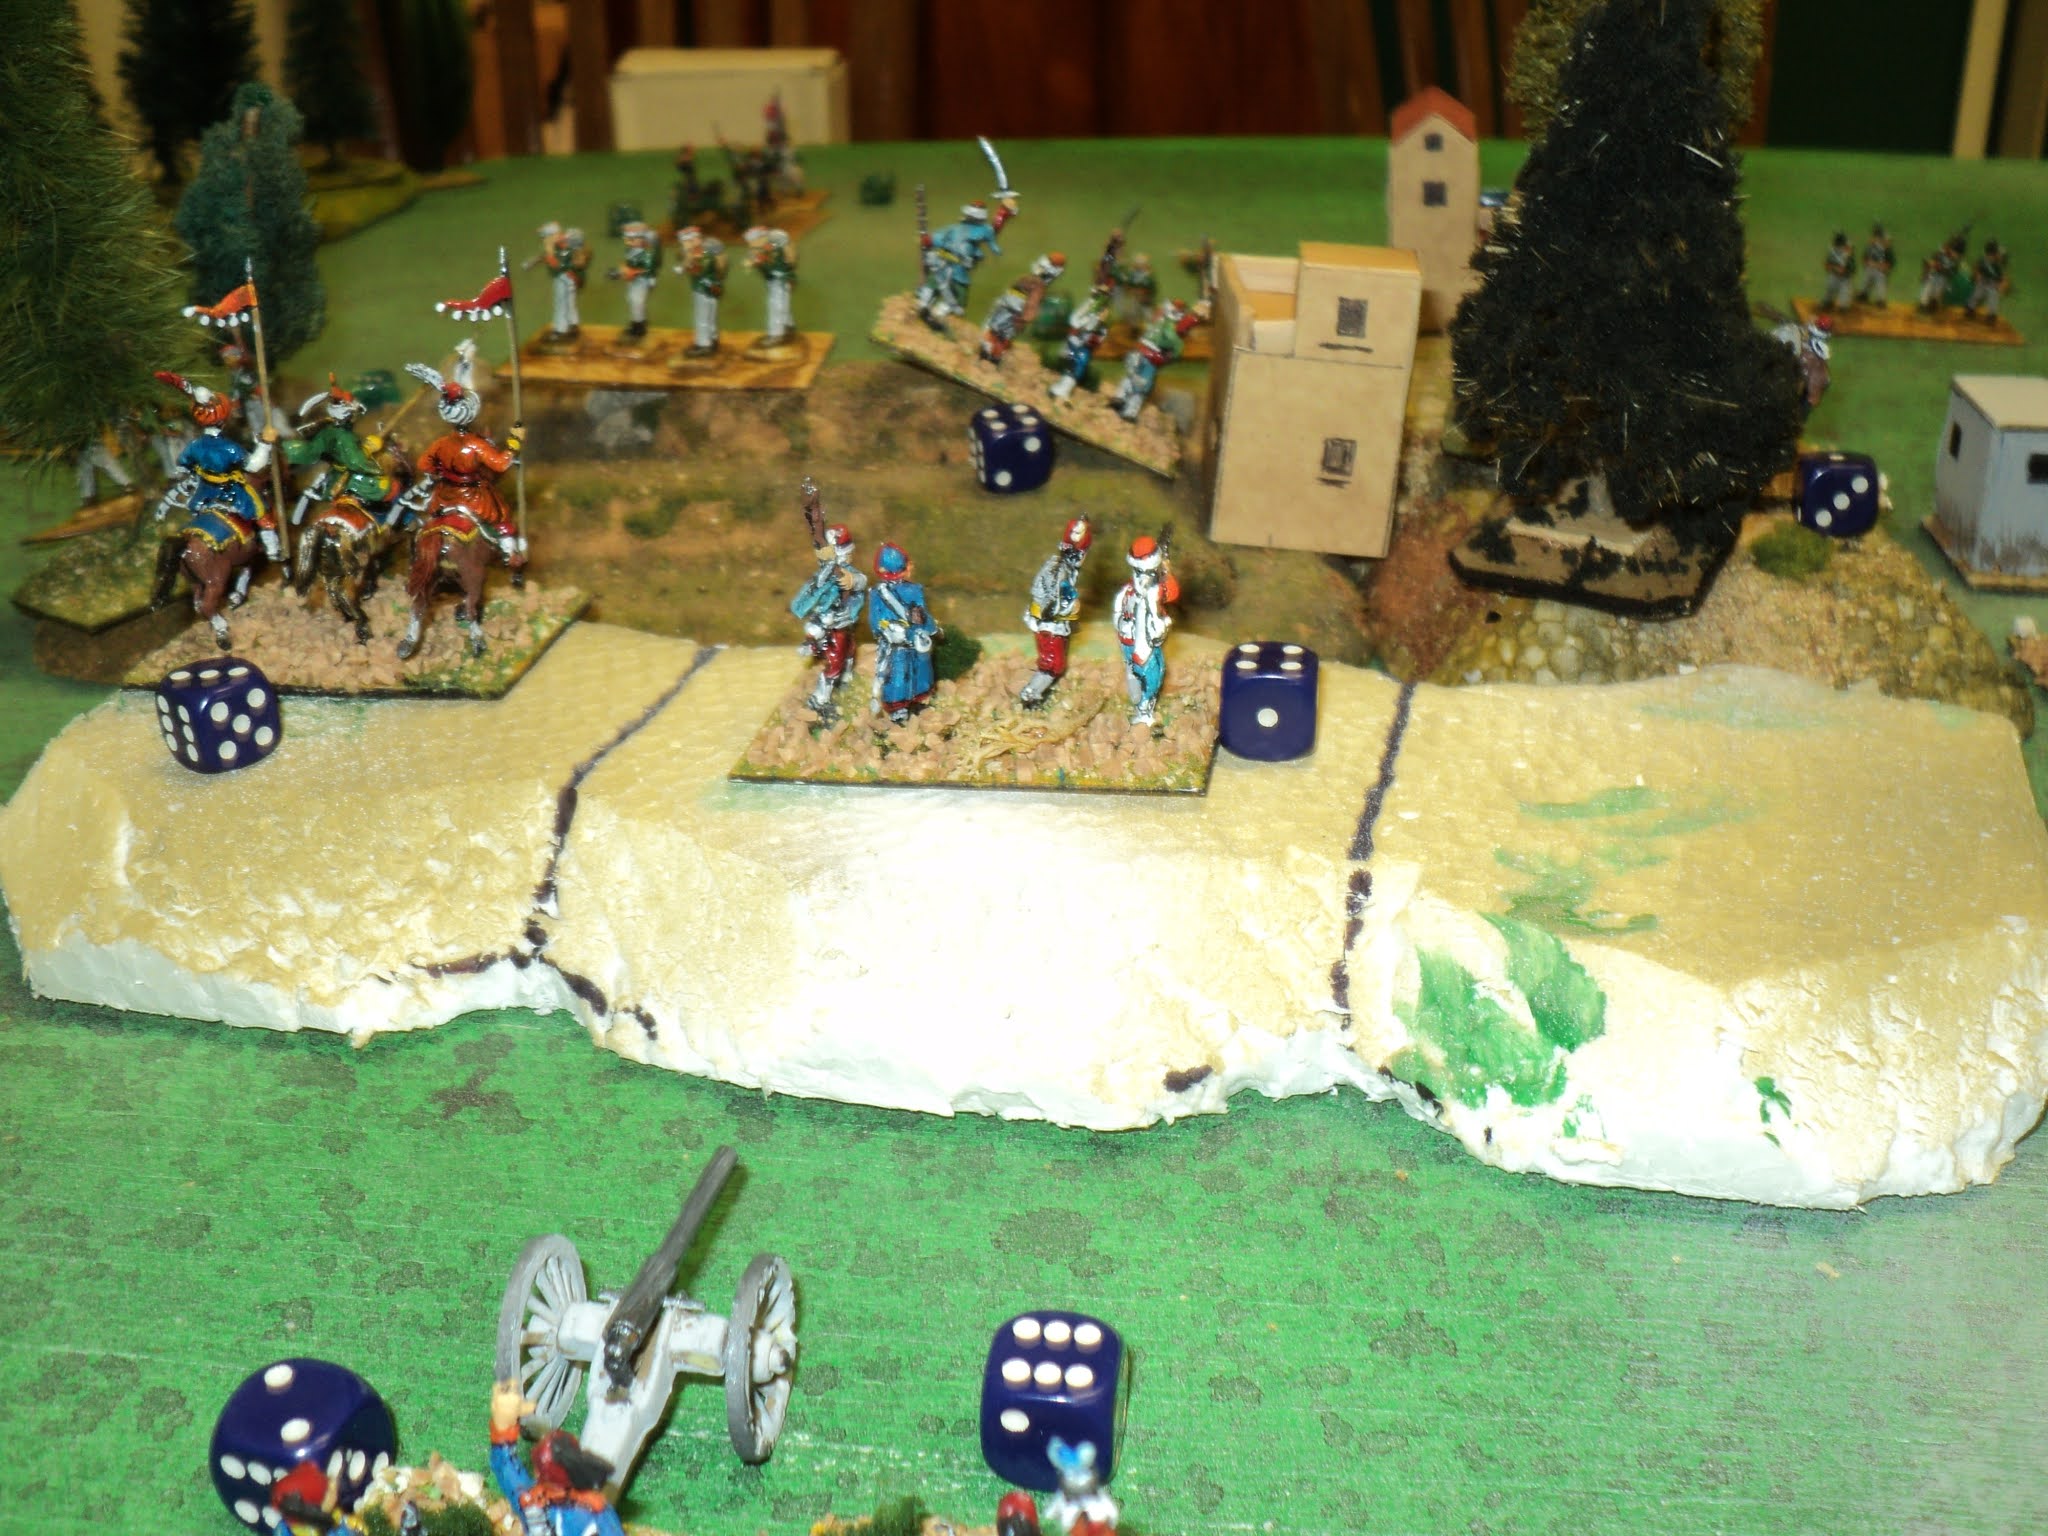
Another view of the Turcowaz II Army.  Just because.


Sunday, August 16, 2020

Hidden project - Revisiting Harad

Several years ago a friend started up an 'imagi-nations' project built around the crumbling empire of Harad - modelled upon Iran, c.1980, imagined as a vast Middle Eastern imperium stretching from Pakistan to the Mediterranean coast. This friend, whom I tend to think of as 'Evil Uncle Brian' (from his former email address, I think), is the sometime author of 'A Fistful of Plastic' blog spot, and originator of the Harad group on Facebook. Neither gets much traffic these days.  Pity. 

Third Motorised (Mixed) Battalion (Regiment).  Three rifle truck-mounted
companies, and a squadron of Centurion MBTs. The Hummer command vehicle
 is a little anachronistic: too bad.

His invitation to join in I resisted for a considerable time, being finally persuaded by the look of some of his battles. We did play out one interesting scenario, back in 2012, I think (entirely his gear), but otherwise not a lot happened except that I received a fair bit of kit - quite a lot, actually - that I'd like to think was surplus to Brian's requirements. The unfortunate part was that Brian got a dream job up north, he left town, and so the project went for some time into limbo. But not before I drew up a map of the Middle East (Baluchistan, Medifluvia and the Mesogesian coast), and created my own country the Nawabate of Tchagai.  The Nabob (Nawab) as Head of State was Brian's idea.  I called him Yeswih Khan, son of Maibiwih Khan.  Thank you, President Barack Obama!

Harad Empire c.1980.


I still poked around with it from time to time, and went into a little 'back-history' with the Developing the Portable Wargame campaign 'Long Live the Revolution', which series of postings I began late last year.  

Third Motorised Regiment.  Behind it is a Army/ Division/ Brigade command 
vehicle created by finding some running gear for the trackless hull.  The 
logistics element is a container on a flat-bed lorry.

But it was Tim Gow's Little Cold Wars that gave me a certain impetus to develop the Nawab's army.  The organisation lists therein suited me better than the Command Decision type lists, which called for a heck of a lot more vehicles. However, I went for the 'CD' 'look' for the organisations overall. So here are 5 rifle battalions - mechanised, motorised and 'leg' - and a reconnaissance battalion, still a work in progress, but gradually getting somewhere.
Second Mechanised Infantry Regiment, in their distinctive flecked uniform:
4 Rifle companies, a mortar platoon, and some sort of missile-launching APC in the rear.
 'D' Company is mounted on an old Alvis 'Stalwart' vehicle.  I have no idea what the other things are.

Another view of 2nd Mechanised Infantry.

As you can see, this unit is still WIP.

This is the elite 1st (Mixed) Mechanised Regiment, the 'Blue Berets': 3 Rifle coys with 3 platoons and a RPG team,and 1 rifle coy with 4 platoons; plus a powerful squadron of Leopard I MBTs,
and an HQ element of  mortar and 2 sniper teams.  I have no idea what the APCs are.


It seems that one of the Leopards has night vision gear.

Here is 51st Reconnaissance Battalion: 3 Recon rifle coys mounted in Saracen APCs, and a 
mixed armoured car squadron of Saladin and some 8-rad German thing.  The battalion command 
vehicle I suspect is another anachronistic toy.


Two 'leg' regiments, 4th and 5th Infantry, each comprising 4 rifle companies.  They could probably 
use at least 1 LAW, TOW or Sagger AT team, and 1 mortar platoon as well.  


Now, all I need is to develop an enemy - possibly from among the Nimruz hill tribes, if not Harad itself.  Maybe that is what will become of the 6th, 7th and 8th battalions (not pictured), a cadre of soldiery for an enemy supported by the CCCP (Collective Cooperative Confederation of Peoples).

Monday, August 10, 2020

In Darkest Aithiops...

View of the settlement looking west. Hordes of m'Butu storm out of the jungle from the northwest.

The growing colony of New Azeitona - a provisional name for a nascent settlement - had extended in a few months to a small scattered township some ten miles (sixteen kilometres) south of the main town of Vertiginous.  There was rich farmlands upon the coastal strip between ocean and jungle, and a fine little harbour. But the settlement here infringed rather upon the conditions set by the Great Chief Barra Kuta in the wake of the Limpopo River Trail battle that stopped the Azeitonian expedition into the continental interior. These conditions permitted a ten mile colonial expansion, sure enough, but the sprawling settlement of Oportonovo considerably overstretched that limit.


Standing upon his rights as sovereign over these lands, the Great Chief issued an ultimatum that the Azeitonian Governor, Tenente-Coronel Joao Pablo Relaxado, chose to ignore. It was not long before the Great Chief of the m'Butu had gathered together a war band with which to enforce his will upon these troublesome interlopers.
Of course, the Colonel did not ignore the likelihood of such a move, and hastened to build up some king of defence for the place - not easy for such a spread of houses and buildings. A couple of blockhouses had been constructed towards the south end of the township, and a stockage remained in use near the beach from the earliest settlement of the place. The only buildings of substance and size were the church and the administrative block along the main street. For the rest, houses were scattered about over a considerable distance.


The Azeitonian garrison comprised:

Command: Capitao Ferdinand da Gama 6SP
6 Regular rifle-armed infantry @4SP = 24SP (1 stand aboard the gunboat)
4 Civilian bands, musket armed @3SP = 12SP
1 Rifled mountain gun @2SP
1 Horse drawn limber @1SP (Poor)
1 Gunboat (ANV Lafayette) counting as smoothbore heavy artillery 2SP
1 Barge (may carry one infantry stand) @1SP (Poor)
2 fortified blockhouses (1 grid area each)
1 fortified stockade (2 grid areas)

Total: 48SPs, exhaustion point -16SP.  All troops 'average' except where stated.

The garrison begins the action scattered about the settlement, including 1 rifle unit aboard Lafayette, with the barge alongside.

As usual, the m'Butu army disdained sophistication, and relied on their celerity of movement and hitting power up close and personal. 

The m'Butu army comprised:

Command: Great Chief Barra Kuta (always keen for a fight) 6SP
13 Infantry with spears @ 4SP = 52SP
2 Infantry with muskets @4SP = 8SP

Total: 66SP, exhaustion point -22SP.

Of the buildings in the town, only the vaguely ecclesiastical edifice and the brownstone admin block could count as strong points. The remaining buildings represented scattered houses, afforded no cover or concealment in themselves, but did block line of sight (not that it affected the spear armed natives in any way!).

Once again this was played of a Tuesday evening 4 weeks ago, with Paul 'Jacko' Jackson having choice of sides.  In the previous encounter between these forces, he chose the Azeitonians. This time he chose the m'Butu. He could bring his forces onto the table anywhere along the jungle side of the table, and/or up to half way down the right hand end as seen from the pictures. He chose to concentrate his whole force in that corner.

The tale is soon told.  Hordes of m'Butu came surging into the north west end of the town, to be met only by scattered units from the garrison and some civilian bands. Ungarrisoned to begin with, the stockade was to remain worryingly empty whilst the gun battery and a single company stood off the attack from four war bands. The admin block and church grounds were barely occupied betimes before the spear-armed m'Butu were surging up to their walls and battering at the doors.   
Hastily, the company of infantry was called up from the gunboat (itself lacking targets for the moment), as were several civilian bands. The companies manning the blockhouses at the south end of the township soon abandoned their positions to counter attack the flank of the assailants at the church. This was the flank upon which the great Chief had placed his musket men, who were to give a very fair account of themselves in the ensuing firefight with the Azeitonian regulars.
Tending to bunch up into irregular columns to begin with, the m'Butu took some heavy early losses, but this was offset by the piecemeal entry into the fight of the colonial forces. The mountain guns were soon overrun and the supporting companies forced back to the houses close by the beach. Fortunately a band of armed settlers had entered the stockade and were lining the earthworks at the north end.  

The attackers also broke into the administration block and put the garrison to the spear. But the settlers defending the church were hanging on still against the native hordes, helped by the regulars counter-attacking from the southern flank. Having overrun the colonist line close by the stockade, several war bands surged on towards the houses near the beach, to which the surviving riflemen and their commander, had fallen back.  
They did not remain there long, and nor did the settlers in the stockade. Taking heavy losses the settlers abandoned their earthworks and scattered. The remainder of the garrison could count themselves lucky the m'Butu declined to enter the place. The assailants soon evicted the defenders from the beach houses as well.
Just when it seemed that the m'Butu attackers would overrun the entire settlement, the impetus of the attack suddenly faded away. Having reached their exhaustion point, only ongoing close combats about the church - still grimly holding on against huge odds - remained to be fought out, along with the popping firefight on the south flank.  Although the natives reached their exhaustion point first, they were quickly followed by the colonists. The battle was over. 


There was no question but that the Azeitonian colonists had received a bad scare. Before fading back into the jungle, the m'Butu had overrun almost half the settlement, and who knew what might have been the outcome had they succeeded in breaking into the church? However, the survivors were rather inclined to view the result as victory, however high the actual cost. For his part, the Great Chief figured he had made his point, and was inclined there to let the matter rest. Whether he was right to do so remained to be seen...

This whole scenario was based very loosely upon the attack upon Kororareka, New Zealand, 11 March 1845, in which local Maori, taking issue with certain colonial developments they misliked, chased the settlers and the small garrison out of town. The historical engagement was rather smaller scale than that implied by the Oportonovo action.  Methought it would make a fine 'disguised' scenario.

A contemporary sketch of the attack on Kororareka (Russell), March, 1845.


Sunday, August 9, 2020

A Return to the Chronicles of Rajistan


Ruberian relief force about to assail the thin Turcowaz lines.
Having found himself and his army immured in the desert market town of Hak al Kumara, Major-General Sir Grinmore Scarlett settled down to await rescue. His faith in the attempted rescue was not misplaced, but perhaps due consideration to the means available to his would-be rescuers ought to have given him pause. 

The relief column had really but one route to reach Hak-al-Kumara , one easy to predict, and therefore easy to anticipate. Whilst retaining his besieging forces, General Nasr ed-Din Pasha ordered 35th Division (Duya ed-Din, reorganised since its battles several weeks before) to set up an entrenched blocking position at the point of the river that reverted to its southern course. Keeping the bulk of his Division on the more likely east bank of the Pardis River, he detailed one of his regiments to dig in on the right (west) bank, just south of the Sheikh Sa'ad hamlet, supported by cavalry and camelry, whilst his main body occupied a double line of entrenchments on the east bank. Behind this main position stood a redoubt between the equally impassible obstacles of the river and a salt marsh some distance to the east. Not only had the relief force to get by the defence works, but also the bottleneck partially stoppered by the redoubt;  and behind this bottleneck, the local commander, Bashir ed-Din could call upon the regiments of 52nd Division.
View from behind Ruberian lines.
This is a continuation of the campaign begun in the middle of last year, as related in the following postings.
Chronicles of Rajistan 
Chronicles of Rajistan 2
Battle of Hak-al-Kumara
The Campaign Continues
Battle of Cpistupon
On this occasion I roped in Paul 'Jacko' Jackson, who took over the side of the Ruberian (RED) relief column, as Major-General Sir Aylmer Reddington, whilst I, in the guise of General Bashir ed-Din, commanded the covering force. The rule set we used was from the Colonial Portable Wargame (Bob Cordery), specifically, the 'Widow at Windsor' rule set.  More on this later.
The 5 Turcowaz battalions look pretty thin!
The Turcowaz corps comprised:

Corps Command: Bashir ed-Din ... 6SP

35th Division: Duya ed-Din ... 3SP
  • 103rd Regiment, 3 Bns (stands) @6SP = 18SP
  • 104th Regiment, 3 Bns @6SP = 18SP
  • 105th Regiment, 2 Bns @6SP = 12SP
  • Mitrailleuse Company @2SP
  • Artillery, 2 batteries @2SP = 4SP
Cavalry:
  • 43rd, 44th Regular cavalry @4SP = 8SP
  • 75th, 76th Irregular Sipahi @4SP (poor) = 8SP
  • 1st, 2nd Irregular Camelry @4SP (poor) = 8SP
Reinforcements (off table):

52nd Division: Abdullah Jemal ... 3SP
  • 154th Regiment, 3 Bns @6SP = 18SP
  • 155th Regiment, 3 Bns @6SP = 18SP
  • 156th Regiment, 3 Bns @6SP = 18SP
  • Mitrailleuse Company @ 2SP
These reinforcements were scheduled to arrive on table once the first line of entrenchments had been breached.

24 units, 146SP, E.P. -49SP

Ruberian columns attacking on a narrow front...
The Relief Army comprised:

Seventh Meerut Division, Lt-Genl Sir Aylmer Reddington ... 6SP

19th Dehra Dun Brigade (Col Wm Dennys) ... 3SP
  • I/ Seaforth Highlanders ...6SP (elite)
  • 28th Punjinjab Infantry ...6SP
  • 92nd Punjinjab Infantry ...6SP
  • 125th Napier's Rifles (Skirmishers) ...4SP
  • Gatling detachment ...3SP
28th Garwhal Brigade (Brig-Genl Geo. Kemball) ... 3SP
  • II/ Leicestershire Infantry ...6SP 
  • 51st Hydansikh Infantry ...6SP
  • 53rd Hydansikh Infantry ...6SP
  • 56th Punjinjab Infantry ...6SP
  • 62nd Punjinjab Infantry ...6SP
  • Gatling Detachment ...3SP
35th Brigade (Brig-Genl G.B.H. Rice) ...3SP
  • I/ 5th Buffingtonshire Infantry ...6SP
  • 37th Dogra Infantry ...6SP
  • 97th Deccan-Decca Infantry ...6SP
  • 102nd King's Own Grenadiers ...6SP
  • Gatling Detachment ...3SP
21st Barrelly Brigade (Col G Ross) ...3SP
  • II/ Black Watch ...6SP (Elite)
  • 6th Jat Light Infantry ...6SP
  • 41st Dogra Infantry ...6SP
  • 9th Bhoped Infantry ...6SP
  • Gatling Detachment ...3SP
6th (Indian) Cavalry Brigade: (Brig-Genl R. Thered) ...3SP
  • 14th King's Hussars ...4SP (elite)
  • 4th Cavalry ...4SP
  • 7th Harian Lancers ...4SP
  • 33rd Queen Adelaide's Own Light Cavalry ...4SP
  • 'S' Battery, RHA (Horse artillery) ...2SP
Divisional Artillery:
  • IV, IX, XIII Brigades, @2SP = 6SP 
Gunboat:
  • HRMS Shoofly, ...8SP

      
36 units, 165SP, Exhaustion Point -55SP.
Paul 'Jacko' Jackson - Sir Aylmer Reddington - surveying the action.
As there was very little difference quantitatively and qualitatively between the two sides (the Ruberians having more artillery and machine guns), I figured that the balance would be derived from the absence of the Turcowaz 52nd Division until signalled to arrive by the Ruberians' carrying the first line of entrenchments at some point. The troops defending the east bank of the river looked woefully thin.  'Jacko' got the choice of sides, and plumped for the Ruberians.  Game on... 

Turcowaz cavalry waiting to counter-attack.
Supported by the massed batteries in the centre, the Ruberians advanced in dense columns, 19th and 21st Brigades towards the desert end of the Turcowaz line, 35th Brigade up the east bank of the river, and 28th Brigade up the west bank. Right from the outset the defenders did fearful execution among the attackers - a combination of formidable dice-rolling and the Ruberians' determination to close. For their part, the Ruberian artillery proved surprisingly ineffectual, not helped by the equally woeful gunnery from HRMS Shoofly.


The Ruberians' first success came upon the river bank, where a skirmishing light infantry force broke into the thinly manned part of the trench line, and forced back a battalion of 104th Infantry. That breach of the line signalled the arrival of 52nd Division, 154th Regiment on the west bank, pushing towards the Shiekh Sa'ad settlememt, the main body pouring onto the field on the east bank.


Meanwhile, the main Ruberian assault gradually weakened Turcowaz resistance. The mitrailleuse company wiped out, the two battalions of 105th Regiment were being gradually edged out of their trench lines. But General Sir Aylmer Reddington seemed reluctant to follow up, in the face of the vast numbers of Turcowaz reinforcements pouring onto the field. With no success to show on the west bank, and Turcowaz infantry reoccupying the part of the line abandoned briefly in front of 35th Brigade, the Ruberian commander acknowledged defeat and called off the attack.


Overall I was very surprised at the result. The Ruberians had taken fearful losses, many times greater than those of the Turcowaz defenders. They might well have held even without the reinforcements.  
Clearly I had got the balance wrong, though for the 'purposes of history', a certain bias in favour of the Turcowaz was reasonable. The action was based upon the first attempted relief of General Townshend's Division at Kut Al Amara in 1916. There, the attack successfully carried the forward defence line, but foundered upon the blockade of the defile between the river and the marsh.  
I also think I chose the wrong rule set from Bob Cordery's The Portable Colonial Wargame book. I am forced to conclude that my RED-BLUE armies are simply not set up for 'The Widow at Windsor' rule set - mainly on account of there being no good method of indicating single units (stands) in line or column - and the action would have been much better under the simpler 'The Gatling's Jammed'. This battle was supposed to have been the final in the Medifluvian Campaign series, but I think there will be just one more attempt to relieve General Scarlett's army at Hak al Kumara.

Monday, August 3, 2020

Tsar versus Sultan - A border incident.

Hookah Farm - seen from the south
Hookah Chitlik (Farm) seen from the south, behind 
Turcowaz forces.

Far to the north of Medifluvia, far beyond Sakhdad, Tenveh, Lake Fordor-Sedan - even beyond Trebizond and almost as far as Alania - was sketched, in the year 1875, the nebulous northern fringes of the Settee Empire of Turcowaz. A troublesome region, this Hyperborean territory lies far distant not only from Bosphoran Ionople, but equally so from Moscovgorod, and even farther from the Tsar's favorite residence in Sankt Peterburg. Making this trouble, across this border, the local Zelenian governor, Count Nicholai Pavlovitch Ignatiev, far from idling his hours and his command in the usual sybarite debaucheries associated with distant, ill-supervised, and semi-forgotten garrisons, entertained himself by frequent cross-border forays, clashes with the local Turcowaz forces, and raids upon the unfortunate subjects of the Sultan.
Hookah Farm, seen from the north, behind Zelenian forces.


The Sultan, ordinarily somnolent to the point of comatosity, could, now and then, be aroused to choleric outbursts and, therefrom, effective decisions. In the wake of one particularly destructive (and profitable) raid by the Zelenians, the Sultan recalled a certain turbulent subject, sneering, bellicose and violent, Abdul Ameer, disgraced for assorted breaches of the peace in the capital, who might after all contribute more to the well being of the Empire the farther he was from its capital. So Abdul Ameer found himself some months later, in the fortified frontier town of Alkalkalaki, listening to a gabbled and garbled report from some peasant or other complaining of the burning down of the pile of sticks he called a home by the loathed and feared Tsarist raiders.  

The following action is taken from the classic scenario from H.G. Wells's Magnum Opus, Little Wars: the Battle of Hook's Farm. The action between the border forces of Turcowaz (TURQUOISE) and Izumrud-Zelenia (EMERALD-GREEN) took place at an equally bucolic location, Hookah Ciftlik. In the diagram, substitute Taverna for 'Cottage', Ylerif Mosque for the Church, and Hassan the Hermit's Hovel, for 'Hovel'.


This scenario was adapted for a gridded table, as suggested in Bob Cordery's book, Developing the Portable Wargame, except that I adapted for my own 10x10 board, and included the re-entrant in the ridgeline near Hassan's hovel. As it transpired, the forces engaged were exactly similar, as follows:

1 Commander (Abdul Ameer and Count N.P. Ignatiev respectively) @ 6SP
6 Infantry units, rifle-armed, @4SP = 24SP
3 Cavalry units @ 3SP = 9SP (I've just discovered a typo in my book!)
2 Artillery units @ 2SP = 4SP
Totalling: 11 units and 1 commander; 43SPs

Turcowaz on their start line.

I used my dice system for determining initiative and activation. To determine initiative for each pair of moves, one blue (Turcowaz) and one green (Izumrud-Zelenia) were rolled, the high score going first. Whose turn it was then rolled a die to determine how many units were activated. The 'median' of the number of units as 6, a roll of 1,2 allowed 5 units to act; 3,6 allowed 6; and 5,6 allowed 7. 
In the event, the Turcowaz seized the early initiative ('won' the initiative roll), though, owing to a low activation roll ( a '2') advanced in a rather piecemeal fashion.  
The battle narrative is rather quickly told. The Turcowaz moving up slowly, the Zelenians themselves wrested the initiative and occupied the ridgeline about Hookah Chiftlik. A protracted firefight developed there, as Zelenians penetrated the woods on the western end of the ridge, and elements of Turcowaz infantry pushed through the scrub near the hovel.

Despite heavy losses, the Turcowaz got rather the better of the firefight and pushed back the Zelenians right off the feature, to a line alongside the Taverna. Elements reached the hovel and even the walls of the  Ylerif Mosque. Only a single unit remained cling onto its position at the wooded west end of the ridge. Meanwhile, a Zelenian cavalry unit attempting a wide flanking sweep east of the mosque, was met, and seen off, by waiting Turcowaz horse.

This appeared to be the turning point of the action. The Zelenian expeditionary force mounted a strong, coordinated attack all along the line, that gradually swept the Turcowaz infantry out of Hookah Farm, off the ridgeline, and into the plain beyond. For a space a couple of units clung on to their patch of scrubland, but a flanking attack forced at least one of them out. With the Zelenians advancing just about all along the line, the Turcowaz fell below their 'exhaustion point'.  

Counterattacks out of the the question, the Turcowaz clung on, its left-flank cavalry unit even dealing shrewd blows against Zelenian light horse that sought to drive them off and open a flank. The Turcowaz cavalry seemed to have a slight ascendancy over the Zelenian in this battle!

That was enough to discourage further Zelenian advances. They, too, had reached their exhaustion point, just one or two turns after the Turcowaz army. The battle was over.

Both sides claimed the victory, of course, but both had some reason for satisfaction. From a tactical point of view, the Zelenians has driven the Turcowaz quite back to their start line - even beyond in places. But there was no doubt that the Turcowaz had set a term on Zelenian raiding expeditions for this year. 


The Turcowaz uncoordinated early moves...


Turcowaz reach the Hookah Farm and the hovel...


...but Zelenian infantry seize the ridge west of the farm.

Firefights develop all along the ridge line.


Who holds Hookah Farm?


Turcowaz establish an ascendancy, and carries the farm.

Turcowaz elements reach the Ylerif mosque.

Waiting Turcowaz horse sees off a sweeping flank move by Zelenian light horse..

General view.  Turcowaz 'owns' the Hookah farm line ... for now.


Zelenian infantry gather for a counter-blow.

Zelenian counter-attack under way.  Already Hookah Farm has been abandoned.

Zelenian advances sweep the Turcowaz from the ridge line.

A rather depleted Zelenian foot unit strikes a Turcowaz unit in flank - enough to drive it out.


Turcowaz remaining hold on the ridge line, the two units in the thin cover, both threatened from a flank.


There's no recovering the lost high ground now!


Though the Turcowaz by now have exhausted their strength, a cavalry clash on the their left goes in their favour...

End of the action.  The Zelenian offensive has also tun out of steam. Both sides laid claim to victory.

It has been quite a while since my last posting. I had played a few games, and the armies in this battle had just recently been painted, but motivation for posting seemed to be wanting. And then I caught a chill that developed into a chest cold and morphed into pneumonia. I haven't fully recovered yet, though feel perkier today than I have done for a goodish while. So I still have a couple of battles to report and possibly another article on WW2 OOBs.