Showing posts with label Hundred Days. Show all posts

Wednesday, April 1, 2026

Waterloo Campaign 2.0 - Heads Up

 A fair while back I tried a Map Game version of the Waterloo Campaign. I called it the 'Hundred Minutes' - stupid name, but the thing itself went with a swing. But I was always conscious of the numbers being a little bit wrong, especially for the Allies. So, I'm revisiting, as I promised myself I would do. This time I want to formalise the rule set a bit more clearly, so this is as much a play test as anything.

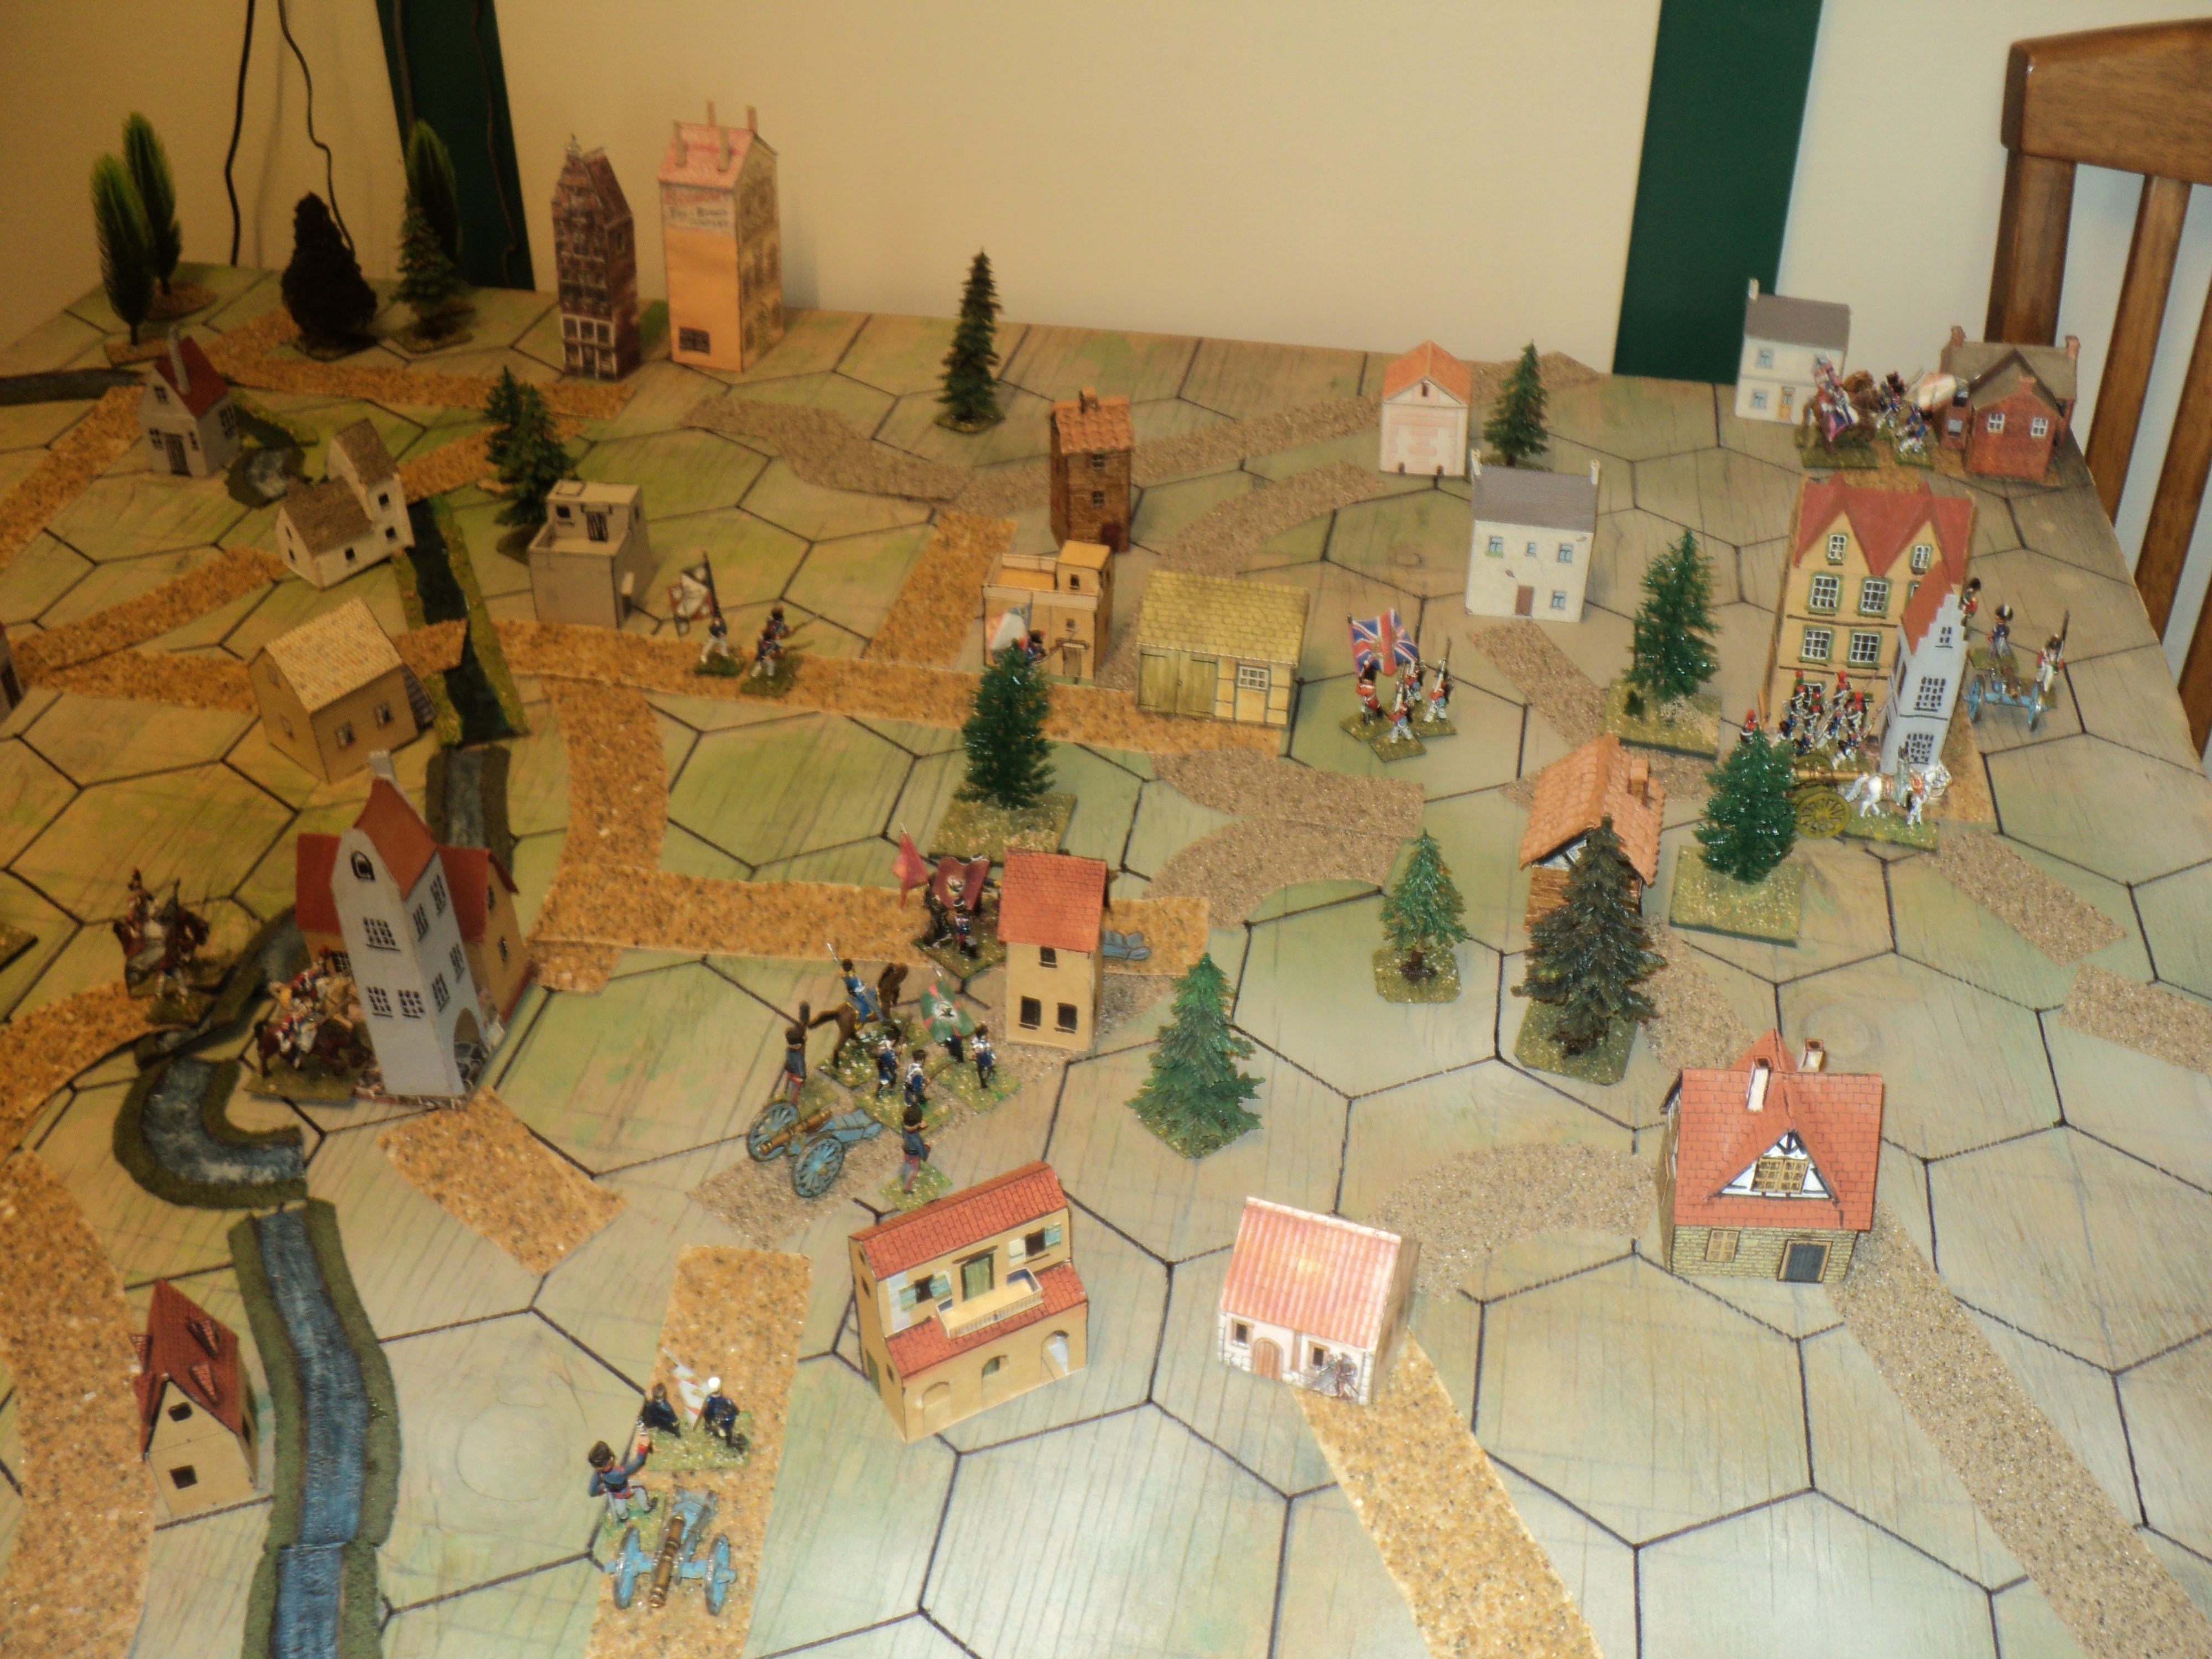
Early morning 15 June 1815, the sun breaking over the 
Ardennes forest as we look northwest towards
Charleroi.


The French set the ball rolling on Day 1, with the Anglo-Dutch and Prussians following on. For each of the subsequent days all three armies roll for initiative, with each army making its moves and fighting its battles in descending order of die roll. Otherwise, it's IGoUGo.


Marschal-General Prinz von Blucher surveys 
the Prussian II Corps at Namur


I also added two commanders on the French side, Marshals Ney (commanding the 'Left Wing') and Grouchy  (commanding the 'Right'). They, along with Napoleon himself, Wellington and Blucher, add their figure to the combat count.


Allied Cavalry Corps setting off from Alons
 across the Dendre River.


I'll discuss the mechanics more at large another time. For the moment, we're still in Day 2 (17 June 1815), with the Prussians still to make their moves. The Anglo-Dutch, then the French, have already made theirs.


The Duke of Wellington waves forward
from Brussels his Corps of Reserves 


Plenty of excitement already: three battles fought, Prussian I Corps badly knocked about, and the news from Quatre Bras isn't looking too good for the Allies, either. To add to the Allies' problems, a sinister development around Namur may have placed Blucher in something of a quandary.


The Imperial Guard takes up a lot of road!
Ahead of them are II and III Corps. The Emperor himself
oversees the march.


Situation morning 15 June

Marshal Grouchy had barely arrived at Charleroi with IV Corps when they were assailed by the Prussian I Corps. Not all the Prussian Corps could participate in the action, as 3 elements, a gunner, infantryman and cavalry figure, being back along the road, although they could join the main body, could not participate in the battle. This was due to a move restriction which counts an attack as a hex move. 

Battle of Charleroi, 15 June: Prussian I Corps against
French IV Corps. Marshal Grouchy lends his countenance to the 
French side. But, in the foreground, where are II and III Cavalry Corps going...?

So these 'reserves' awaited in Fleurus(Ligny) the outcome of the action. The two sides were fairly evenly matched, the Marshal making the difference:

Prussian I Corps:
4 Infantry, 2 cavalry, 1 gunner, all three arms present = 4+2+1+3 = 10 dice
French IV Corps:
Marshal Grouchy, 4 infantry, 1 cavalry, 2 gunners, all three arms present = 1+4+1+2+3 = 11 dice.

However, the battle outcome didn't match the evenness of the strengths!
Prussia lost 4 infantry and 1 cavalry figure;
France lost 1 cavalry (having just the one to lose instead of 5!)

This was a heavy defeat for I Corps. They fell back upon Fleurus, gathering in their reserves as they did so. Overnight, some of the stragglers were rallied in. At the end of each day, each side gathers in half their losses by each arm, rounded up for infantry, and down for other arms. As Prussia lost 4 infantry in the battle, they get 2 back. They lost 1 cavalry, but half rounded down is zero. The French also lose their  cavalry outright - rather a blow for them, as theirs was the sole representative of the mounted arm!

In the past I used a different convention: each side lost the lesser of each side's losses per arm. That would have meant both sides get their lost cavalry back, but what of the infantry? The Prussians lost 4, the French none. Do the Prussians get all four back, or none? I think the more usual 'half returns' might be fairer. 

On 16 June, the Anglo-Dutch made the first moves, I Corps to Soignes, Cavalry Corps through Waterloo towards Nivelle, and the Reserve Corps to Quatre Bras. The French moving next, IV Corps followed up their victory at Charleroi to engage I Prussian Corps again at Fleurus (Ligny); II Corps pushed up the Brussels road to engage the Anglo-Dutch at Quatre Bras, and I Corps marched through Mons towards Soignes. Leading the Imperial Guard, III Corps swung left upon reaching Seneffe, also heading towards Soignes where lay the Anglo-Dutch I Corps.  The Imperial Guard, meanwhile, was pushing directly up the road towards Nivelle, which  the enemy cavalry corps had not quite reached.

That left the four Division-sized French Cavalry Corps, and Count Lobau's VI Corps. Word having reached the General's ears indicating enemy troop movements nearing the Meuse around Dinant, he directed his small Army Corps east from Beaumont to Philippeville, with the view to marching upon Gives or Laneffe depending upon events. II and III Cavalry Corps themselves crossed the Meuse, the latter entering Yvoir. That separated the Prussian III Corps from the IInd, but II Cav Corps rather cheekily recrossed the Meuse at Namur, entering the town from which Blucher and the Prussian II Corps had departed the day before.

The French brought the Allies to battle at Ligny and Quatre Bras both...

I'll suspend the abbreviated narrative there for the time being. The two battles have been fought, with some interesting consequences for both sides.  I have some vague notion that this, or possibly the Echmuhl campaign revisited, might form a chapter in a future Compendium. If that is a goer, I want what gets printed there to be fresh, if not altogether new, at least containing more than what appears in this blog or elsewhere.  

One of the features of this revisit is my attempt to reflect the strengths of the various corps a little more closely. This means the Prussians in particular are a deal stronger this time around. But the slightly enlarged corps generally take up more space along a road, and I doubt that the French Imperial Guard will fit into a single hex. This could have some interesting effects. At any rate, the details might be left for another time.

The Little Great War -
This one I am placing on hold for the time being. I have two battle reports to ... erm ... report, and some campaign moves, so the thing hasn't fallen over completely. In fact looking at the pics has restirred the blood at least a little. But I have this itch to scratch first.

To be continued...


Tuesday, November 7, 2023

Portable Napoleonic Wargames: La Souffel (2)

The Allied forces arriving over the first four turns of the battle, the action developed slowly. The first to arrive, along the Lampertheim road, Palombini's Division was soonest in organising an assault upon the 16th Division river defences. Voyrol stood off the first attacks at Lampertheim itself, but a second drove his brigade back across the stream.  A counterattack recovered the village, which the Division's light infantry garrisoned.  Meanwhile, the garrison at Mundolsheim startled the light horse approaching the town's river bridge by a quick attack across it. The chevauleger scuttling back were replaced by half of Koch's infantry (Hohenlohe and Misany's brigades).  Beurmann retired across the river into Mundolsheim.

Allies close up to the Souffel river line

By this time, Prince Adam's cavalry had pushed down rapidly towards Souffelweyersheim, where von Moltke's dragoons tried to bounce the French skirmishers back from the opposite riverbank. In this they were successful, but at prohibitive cost. The depleted dragoons fell back to the north side of the stream. Passing through Reichstett village, the Division's horse artillery deployed into battery along the southern edge of the place, whence they began a bombardment of Montagnier's brigade standing between Souffelweyersheim and the woods a short distance east of the place. Montagnier shuffled his troops into shelter behind the village. 

Prinz Emile coming up to add weight to 
Palombini's assault

So far, matters seemed to be going well enough for the Allies, though Palombini was not strong enough, it seemed, to be sure of forcing the river line. He was encouraged by the arrival of Prince Emile's elite brigade and light troops, including its skirmishing companies.

(Note: I really have no idea, now, where I got the idea that Prince Emile's command included light troops, nor how I overlooked - I even wrote it down - that Hugel's brigade were all of light infantry. Be that as it may, we carry on. I gave Prince Emile a brigade of grenadiers, represented the 'light' brigade by grenzer, and the skirmishers by a pair of jager. It looked a fine little Division, advancing down the Lampertheim road...)

Prince Emile's Division

Not before time. Czollich's brigade attempted several assaults upon the 15th Division artillery position.  Aided by the flanking skirmishers, the artillery threw back several charges, and maintain a devastating fire upon the hapless Hungarians. Suddenly, Palombini's prospects looked much less rosy.
The Hungarians destroyed by gunfire and musketry
from the French skirmishers


They were not improved when Beurmann's aforementioned transpontine counterattack threw back Palombini's light horse brigade.
Beurmann's brigade sees off the Allied light horse


Such early successes were encouraging for the defenders, but the Allies had hardly begun any serious assault upon their lines.
Beurmann's brigade facing odds of at least three to one

The defenders had not much longer to wait. Splitting Koch's Division in two, Prince Eugene ordered Koch himself to lead two brigades to attack the French still on the north side of the Mundolsheim river bridge, whilst the other two brigades were to cross the river west of Souffelweyersheim, thence to attack that village supported by horse and guns.

(Note: Really, this was questionable - violating the 'unit integrity' rule that ought equally at this level to apply to formations. The whole Division ought to have gone one way or the other.  I didn't even notice until after the action.) 


Facing Koch's resolute advance, Beurmann quickly fell back into Mundolsheim, there to face a direct assault by more than three times their numbers. What remained to attack Souffelweyersheim seemed sufficient although Merlin's cavalry were to be quickly on the scene, and Grandjean's column could at last be seen trudging up the Strasbourg road.

The arrival of Grandjean's 17th Division

Supported by the depleted brigade of dragoons, Lalance's brigade splashed through the river to assault the western face of the village. They were stopped cold. On the other hand, the Allies scored a measure of success, their counter-battery finally silencing Rottembourg's guns.  


In an effort to keep Merlin's cavalry off his attacking infantry, Prince Eugene ordered forward the depleted chevauleger from Palombini's Division, Kinski's brigade (formation integrity be damned), backed up by the fresh light horse of Jett's Brigade (the uhlans in the picture).  Very quickly braving the flanking fore from Allied artillery, Merlin's cavalry, four times the strength Jett had remaining, attacked.  
Attack and counterattack around Souffelweyersheim

Under cover of the cavalry battle nearby, Hugel's brigade was fed through Lalance's depleted formation to renew yet another assault upon the town. By now, however, the lead elements of Grandjean's Division were already deployed east of Souffelweyersheim, and pushing forward. The signs of anxiety were already beginning to etch themselves across the Prince Royal's visage.


He might have been reassured by events upon his right flank. Following up the French withdrawal across the river into Mundolsheim, Koch's command scattered the garrison's hasty defence, passed through the village, and began an assault upon the rear of Albert's gun line. Just then, Emile's light troops were engaging the guns from across the river.  
The fall of Mundolsheim, and the beginning of the 
end of 16th Division

At this time, French skirmishers were still grimly clinging on to Lampertheim - the Allies couldn't buy a six! - whilst Voyrol waited on the opposite river bank.

Before Voyrol could lend his assistance, the Allied light infantry overran the guns.  In an effort to recover something from the battle, Albert led Voyrol's brigade into a counterattack. Outnumbered eight to one, it was always going to be a forlorn hope, and what remained of 16th Division collapsed. The Allies had taken the whole of 16th Division's defence line, barring the skirmishers holed up in Lampertheim.

Matters were not going so well at Souffelweyersheim. It was gradually becoming apparent that the Allies simply lacked the strength to take the place. Even were the town to fall, the strength General Rapp could call upon was rather greater than the attacking Allies could muster. At about this time, Prince Eugene called off the attack.


At the time, I calculated that the Allies had reached their exhaustion point, but looking at the pictures now, it seems that the Allied total losses amount to 18 SP lost - 9 from both wings of attack. For their part, if you could write off the entire Albert Division except its commander - 8SP, Rottembourg lost just 3SP;  Eleven - 14 if you added in Albert himself.  Fourteen was still (just) short of V Corps exhaustion point.  Eighteen would have left 3 more before the Allied corps reached the same condition.  

How do we assess the result, then?  Until I wrote this up, I was certain this was a French victory - unexpected given the disparity of overall strengths. On reflection it seems to have been something of a tactical draw - the Allied undoubtedly carrying the French left, but taking heavy losses for scant reward at Souffelsheim. 

Situation at day's end.
But really, I made a mess of this action, in many respects. In adapting the polyglot Allied III Corps to my own Austrian collection, I made a couple of bad mistakes, although not, at least, in the matter of respective strengths. I also forgot, twice, the issue of formation integrity. Having said that, even if Koch's Division had remained en bloc to take Mundolsheim, Grandjean's Division would have been on hand to counter any attempt to roll up the French river line. So I'm not going to beat myself up too hard about my slip-ups.

For anyone minded to try out this battle in this format I suggest you take a look first at these sites:

https://napoleonicscenarios.weebly.com/uploads/2/3/7/7/2377799/la_souffel_1815.pdf

https://img1.wsimg.com/blobby/go/2b00d6c2-086d-458a-bc05-fc390be0c5a3/downloads/1c0tsdvf3_17723.pdf

I used the former of these two, but I think the latter, which I discovered only today, the more informative perhaps. The Strength Points I calculated by dividing the Age of Eagles SPs by 3. 

In my next posting I'll see what the respective armies would have looked like, adapted from the second AofE scenario.  Otherwise, apart from a 'List of Postings' or 'Table of contents' posting, that will be the end of this occasional series under the overall title 'Hundred Days'. 

Sunday, November 5, 2023

Portable Napoleonic Wargames: La Souffel

The longtime reader of this blog might recall several articles over time depicting battles of the so-called 'Hundred Days' campaign.  The occasional series began in early 2019 with a 'might-have-been' series of battles between a Prussian 'North German Federal Army Corps' under Graf Kleist von Nollendorf, and the 'Army of the Meuse', commanded by General Henri Count Beaujolais. The one force was based on a real army corps being gathered by the German count; the latter entirely fictitious, a rumour historically made actual.  In June 1815, there was no 'Army of the Meuse'.

The series then continued with the battles of Quatre Bras, Ligny, Wavre and Waterloo, but not in that chronological order.  I began with Wavre (2019) and ended with Ligny (2022).  They began as a play test to see if, on a larger board, Bob Cordery's Portable Napoleonic Wargame could be extended to army level actions. With a few minor tweaks, they certainly could!

Battle of la Souffel, 28 June 1815

There remains, however, one last action, something of an epilogue to the return of Emperor Napoleon's attempted comeback from exile.  This was a smaller action fought in the east of France, some ten days after Waterloo.  Commanding the 20,000-strong French V Army Corps, General Rapp - a very able commander - faced rather superior numbers, some 200,000 Austrians and Allies of the Upper Rhine Army.  So outmatched, Rapp fell back westwards. Rapidly following up, Eugene, the Prince Royal of Wurttemberg, led his 35-40,000 III Corps in hot pursuit.  Upon reaching the line of the Souffel River with the enemy close behind, Rapp halted, took a stand, and offered battle.


Map of the table

As laid out, this scenario s owes a great deal to an Age of Eagles treatment of this action.  Probably a more direct research would have been preferable, but this was at least convenient. It is pretty much a defensive action by the French, the Allies - all of which were represented by my Austrian figures - being tasked with forcing the line of the river.  

Diagram of early developments.  See text infra.

The respective forces were as follow:

French 'Army of the Rhine ' V Corps,

General Jean Rapp ('Good' commander) 6SP

15th Division, General Rottembourg (3SP) 
  •     Gudin Brigade, (Conscript = Poor), 3SP
  •     Monagnier Brigade, (conscript), 3SP
  •     Skirmishers*, Average, 1SP 
  •     Artillery, Avg, 1SP

16th Division, General Albert  (3SP)
  •     Beurmann Brigade, (Regular = Average), 3SP
  •     Voyrol Brigade, (Conscript), 3SP
  •     Skirmishers, Avg, 1SP
  •     Artillery, Avg, 1SP

17th Division, General Grandjean (3SP)
  •     Fririon Brigade, (Conscript), 3SP
  •     Dandlau Brigade, (Regular), 3SP
  •     Skirmishers, Avg, 1SP
  •     Artillery, Avg, 1SP
Merlin's Cavalry  -   
  •      Grouvel Light Horse, Avg, 2SP (Chasseurs)
  •     Favier Dragoons HC, Avg, 2SP

Totals: 
18 units (including command), 43 Strength points
Exhaustion point -15SP; Rout Point -22SP 

View from behind 15th Division at 
Souffelweyersheim


Austrian Army of the Upper Rhine, III Corps

Prince Eugene of Wurttemberg ('Average' commander), 6SP

Division, Palombini, 3SP
  •      Count Kinski Brigade, Regular Light Cavalry, 3SP
  •      Luxembourg Brigade, Regular, 4SP
  •      Czollich Brigade, Regular, 4SP
  •      Light Foot Artillery, Avg, 2SP

Division, Prince Adam, 3SP

  •      Jett Brigade, Mounted Jager, Avg LC, 3SP
  •      Moltke Brigade, Dragoons, Avg HC, 3SP
  •      Horse Artillery, Avg, 2SP

Division, Koch, 3SP
  •      Hohenlohe Brigade, Regular, 4SP
  •      Misany Brigade, Regular, 3SP
  •      Lalance Brigade, Regular, 3SP
  •      Hugel Brigade, Regular, 4SP
  •      Foot Light Artillery (6pr), Avg, 2SP

Division Prince Emile, 3SP
  •      Folhenius Brigade, Grenadiers = Elite, 3SP
  •      Gall Brigade, Grenze, Avg, 3SP
  •      Skirmishers, Jager, Avg, 1SP

Totals:
20 Units (including command), 62SP
Exhaustion Point -21SP, Rout Point -31SP    

Note that this army was not all Austrian - but as my Napoleonic collection has little in the way of minor allies, this action featured my Austrians exclusively.

Turn 4: arrival of Koch's large Division
Before continuing, a word on skirmishers.
Now, Bob Cordery's Portable Napoleonic Wargame calls for skirmishers only for Brigade Level action.  Rule sets of the Age of Eagles variety abstract skirmishers as 'below the grain' of the figure:man scales.
Personally, I see no reason not to have them represented in some way. What I have done is to allow each French foot Division, and Prince Emile's of the Austrians, a 2-figure 'cloud' of skirmishers.

When I played this action out, I hadn't fully realised any special rules for them, they were simply a small 'unit' - probably brigaded light companies - with a single SP.  In effect they were expendables whose purpose was to weaken the enemy if they could.
Allied dragoons attempt to force a crossing 
defended by 15th Division's skirmishers

It did occur to me, though, that rules could be made more elaborate.  What I propose is the following:
1.  Any 'skirmish capable' formation may deploy one stand of/or 2 figures in an immediately adjacent grid area as skirmishing light infantry
2.  This stand of skirmishers is counted as zero strength points (0SP)  They are classed as 'Average', or, in rare cases, 'Elite' (e.g. British 60th and 95th Rifles, on account of their rifled muskets).
3.  The skirmisher stand 'fights' like any other infantry stand.
4.  Artillery firing at skirmishers reduce their D6 die roll score by 1 - other modifiers still applying.
5.  If attacked by enemy horsed troops, skirmishers reduce their own D6 die roll score by 1; other modifiers still apply.
6.  If attacking skirmishers, horsed troops increase their D6 die roll score by 1; other modifiers still apply.
7.  If the skirmisher stand takes a 'hit' - whether a 'kill' or a 'forced retreat', it is removed from the board as the screen having been driven in.  Note that, having no SP value, this comes at no cost to the skirmishers' army morale.
8. If the skirmisher screen has been driven in, an enemy attacking it may advance into the vacated grid area. 

OK, I have yet to play test this scheme, but the actual game, with the skirmishers being treated as just another fighting stand, seemed to work.  The pictures coming before and after this section comes from very early in the La Souffel action.  Austrian dragoons try to force a river crossing defended by the brigaded light companies of 15th Division.  The skirmishers were driven in (i.e. eliminated) but the cavalry failed to secure a lodgment and were driven back across the river. 
The skirmishers driven in but the cavalry take 
too much damage to follow up.

The initial set-up for the French had: 

15th Division in or east of Souffelweyersheim
16th Division in and about Lumpertheim and Mundolsheim
17th Division off table south of Bischheim on the Strasbourg road
Merle's Cavalry between Mundolsheim and Souffelweyersheim.

The arrival of 17th Division would be signalled when an Austrian unit crossed the river anywhere.
Action on 15th Division front.  Genl Rottembourg 
is shifting his artillery from the right flank


The Allied (Austrian) approach to this action begins with the gradual arrival of the four Divisions, according to the following schedule:

Turn 1, Point A (see map)
Palombini Division

Turn 2, Point B or C OR  Turn 4, Point D
Prince Adam Division

Turn 4, Point B or C
Koch Division

Turn 6, Point A 
Prince Emile Division

Allied Divisions of Palombini, Koch and Prince 
Adam closing in along the river line.

Looking at the respective armies, one might be forgiven for supposing this ought to be a walkover for the Austrians: superior in numbers and quality both. The piecemeal arrival of the Allies may be balanced by the absence of the French 17th Division until the Allies have secured a measure of success already.  The extra couple of stands of skirmishers the French have - my own addition - one must recall have just the one strength point.  Surely that won't make much difference?

For the outcome of this action, we'll have to wait until the next posting...

To be continued...

Monday, April 17, 2023

The Hundred Minutes' Campaign - Narrative.

Day One: 15 June 1815
At dawn 15 June 1815, the French Armee du Nord grinds into motion. Scanning towards the Meuse River, III Cavalry Corps enters Gives, whilst to the north, II Cavalry Corps crosses the river at Yvoir. Meanwhile, scouts from III Prussian Corps, pushing westwards from Gives to Dinant, observe the French dragoons have entered Yvoir, cutting the lateral link with II Corps in Namur. III Corps turns to clear the road.
Hundred Minutes' Campaign - opening positions.


The result of the action at Yvoir is that the II Cav Corps is removed from the Armee du Nord order of battle, but III Corps loses 2 infantry in the process. The French roll three fives - 3 infantry hit - only one of which is cancelled by the Prussians' roll. Possibly the French succeeded in catching the Prussians on the march, before being overwhelmed by superior numbers.  

The Prussians win their first victory, however Pyrrhic. (Aside: this was a very low probability result, the statistical expectation being that the cavalry would hit one infantry, with a very fair chance of it's being cancelled, and about a 50-50 chance of the II Cav Corps remaining a force in being. One supposes that somehow the French cavalry sprang some sort of surprise upon the approaching Prussians, and put up a very stout fight.)


Major developments are shaping around Charleroi and Mons. Having entered the place, the French IV Army Corps find themselves under attack from the Prussian I Corps. However, the combat between evenly matched adversaries is inconclusive. The French hold old out all day at Charleroi. Close behind the leading Prussians at Charleroi, the II Corps, together with Marschall-General Graf Blucher, the Commander in Chief of the Prussian Army, have entered Fleurus.


Day Two: 16th June 1815
The French I Corps, passing through Mons, encounters the Anglo-Dutch I Corps on the road north.  I Cavalry Corps, marching through Soire sur Sambre to reach Mons, swings out to the right to envelop the Allied flank. Meanwhile between those two towns, the French main body, II Corps leading, crosses the Sambre River at Binche. Passing though Soigne, the Allied Cavalry Corps races to intercept them.  For his part, the Duke of Wellington has brought the Allied Reserve Corps couth to Quatre Bras. 

Fighting begins in earnest at Charleroi and Mons. The Prussian IV Corps arrives in the theatre at Huy; ... 
...whilst far to the west, the Allied II Corps, marching from Ghent, has reached Alost. 


The inconclusive battle between the French and Anglo-Dutch I Corps results in heavy loss to both sides.  The enveloping attack by the light horse of I Cavalry Corps decides the battle, rolling up the Allied line and sending the remnant of the enemy reeling back. 

(If the result at Yvoir redounded to the credit of the French dragoons, this one had to be one of those thousand-to-one propositions that, Granny Weatherwax assures us, crops up nine times out of ten.  The cavalry rolled three fives - again! - and not one cavalry was hit.  But, I made a very bad mistake, here, as two of those hits ought to have been cancelled.  Still a round defeat for the Allies, but not so costly.  I think I was so impressed by the Allied failure to knock over any cavalry that I simply overlooked the two fives the Allies rolled.  Damn!  That could well have made a difference to the overall result.)


The clash at Seneffe also goes the way of the French. Encountering the powerful Allied Cavalry Corps, III Corps - II Corps having swung off towards Charleroi to join the battle there - destroys one cavalry unit and the artillery, at the cost of one of its own cavalry units.  The infantry hits - four and five - are cancelled by the Corps own four and five rolls. 


The fighting around Charleroi might have gone badly for the Prussians but for the arrival of Wellington at Quatre Bras.  Apprehending an attack by this new force, II Corps at once swings north to engage. (This I think was a mistake, and the II and IV ought to have handed I Prussian Corps a smacking, and let Wellington do what he might afterwards).
The clash at Quatre Bras is a disaster for both sides. The entire French Corps is smashed, apart from the artillery. Reserve Corps loses its artillery ... and the Iron Duke himself (those sixes!).  His two wounds, though slight, are enough to incapacitate him for the remainder of the campaign.
The distraction that leads to II Corps's defeat leaves IV Corps to fight the Prussians alone. Although Blucher and the Prussian II Corps are close behind, they not yet up to join the action. They would have to enter the open space to the right of I Corps, and, as that constitutes a whole 'cross-country' move, it's attack would have had to wait until the following day - the following move.  One on one, I Corps loses the whole of its foot; the French their horse and guns.  Having already lost their horse in earlier fighting, the Prussian I Corps is reduced to the same state as the French II Corps - artillery only remaining. The French IV Corps continues to hold out.


As this is something of a French defensive victory, the Prussians have to retreat, but this merely makes way for Marschall-General Blucher to lead II Corps into the battle.

Day 3: 17 June 1815
Meanwhile, events are not yet at an end along the Meuse river road. Before III Corps can resume its march after defeating the French II Cavalry Corps, the rear of its column is attacked by III Cavalry Corps. Actually the French horse can not quite catch up to bring on a battle before the Prussians are

able to turn and engage. In the drawn combat that follows, both sides lose a cavalry unit - the Prussian roll of two (cavalry hit) does not cancel, nor is cancelled by, the French roll of three (also cavalry).  All those infantry hits count for nothing as the French have none in this fight, but the Prussians fortunately cancel the French 'one' roll to preserve their artillery.  


Though undefeated, the French cavalry fall back to Dinant.  By this time, the fighting at Charleroi is over, as the Prussian IV Corps approaches Namur

The second battle of Charleroi, following immediately on the first, is a much tougher proposition for the defending IV Corps.  II Corps destroys most of the already depleted Charleroi garrison. Prussian casualties are light, but they have to mourn the demise of the Marschall-General himself - wounded twice, and expiring from his injuries. What little remained of IV Corps falls back across the river, first to Laneffe and then all the way back to Philippeville.


By this time, the roads north from Mons and Binche are clear, or, at least are impeded only by the remnants of the Allied I and Cavalry Corps.  In this game system I permit depleted formations to merge into a single corps.  Upon reflection it seems to me appropriate that the tiny French cavalry corps ought to be able to merge even with an undepleted army corps, although the only real mergers were I Cavalry and III Army Corps, and III Cavalry and IV Cavalry corps merging with the single infantry figure remaining of IV Corps

As III Army Corps swings west from the north road towards Soignes, the Emperor Napoleon leads his Imperial Guard directly towards Brussels up the Nivelles and Waterloo road.
After their victory at Quatre Bras, and observing their flank being turned along a road that converges with their own at Waterloo, the Allied Reserve Corps falls back to that place to await the French push. Two days march distant, II Corps approaches Brussels.

Day 4: 18 June 1815
Following up the defeated Allied cavalry, III Corps pushes past Soignes to engage the combined remains of the Allied I and Cavalry Corps along the Enghien road. The allies contrive to destroy the French artillery but lose their remaining infantry and two cavalry units as well. Only a single cavalry unit remains of two Allied Corps. They fall back to Ninove, III Corps in pursuit.


Now that the Prussian have occupied Charleroi, to be something of a threat to the French line of communications through Binche, Count Lobau's VI Army Corps swings off the north road to engage the Prussians in the town.

There the Prussians summarily repulse the VI Corps, knocking out their horse and guns, upon which the French fall back to Binche, and subsequently to Thuin.  


Meanwhile, the remnants of IV Corps having rallied at Philippeville, III and IV Cavalry Corps are converging upon that place to form a provisional formation under command of IV Corps' HQ.


Events are developing more decisively farther to the north. As the III Corps chivvies the Allied Cavalry Corps through Enghien, Napoleon runs to earth the Allied Reserve Corps near Waterloo


In the battle that follows, the Imperial Guard cavalry break themselves upon the Allied squares, but the columns and guns of the Guard infantry smash the squares, overrun the enemy gun line, and send the Allies reeling. Instead of falling back upon Brussels - currently occupied by II Corps - the Reserve Corps sidles off to Hal, as Napoleon occupies the ground he has taken (as the Allied lose 3 units, the French 2 only, this is a French victory).


Day 5: 19 June, 1815:

Whilst III Corps and the Imperial Guard are driving the Anglo-Dutch Army northward, sinister development are suggesting themselves to the south and east. After celebrating their victory at Charleroi, the Prussian II Corps begins  to move north, in the trail of the long departed Allied Reserve Corps. Daybreak of 19th June still finds then short of Quatre Bras. Hard marching has brought the Prussian IV Corps as far as Fleurus, a short distance eastward.
In the wake of the Imperial Guard, the French I Corps has swung across from the Mons-Enghien axis onto the Binche-Waterloo road, where they fetch up between Nivelles and Quatre Bras.  If the Prussians are to menace the lines of communication of the forward French formations, they will have to get by I Corps. 

There seems to be nothing to be done about the French menace to the Anglo-Dutch lines of communications through Alost and Ghent to the Channel Ports. Just a single Cavalry Division lies before the powerful French Column advancing inexorably northwards. Possibly a Wellington might have brought II Corps across to keep open that line, and let the fate of Brussels lie in the lap of the gods. But Wellington is no longer commanding. (Fact is, I decided that as a victory over Napoleon before Brussels would probably win the campaign for the Allies, I took a chance in behalf of the Allies. See Day 6. A 50-50 judgment call.)

Nor are the Prussian Corps safe. The Provisional IV Corps is once more on the march, towards Charleroi, now evacuated by the Prussians. VI Corps is also still capable of operations.


Day 6: 20 June 1815:


Great events along the Charleroi-Brussels highway. The Allied II Corps meets Napoleon upon his newly won field of Waterloo. It's an even fight (9 dice each), and an Allied victory here will almost at once decide the campaign in their favour. The Fates decree otherwise. The Anglo-Dutch are brusquely rebuffed, losing an infantry formation against no loss to Napoleon. Back goes II Corps to Brussels.


A short distance to the south the French I Corps, slightly outnumbered, clashes with the Prussian IInd.


The battle to decide whether the road south is closed or remains open is inconclusive, both sides losing an element.  


During the course of the day, what is left of the Allied Cavalry Corps takes a stand at Ninoves. That fight can have but one outcome. Swept aside, nothing remains to halt the French advance upon Alost. 


As a result of the defeat at Waterloo, II Corps retreats through Brussels and onto the westward road to Ghent. They are too late. It will be another day at least before ever they can fight their way through the enemy already in residence at Alost. Behind them Napoleon's Imperial Guard spends the night of the 21st in the forests just south of the city.


Though it remains possible for the Prussians, together with the Allied I Corps to sever at least the most direct road links to France, there remain elements of I, VI and IV Provisional Corps at least to cause the enemy some trouble keeping the road closed. Meanwhile there is nothing at hand to sever the Mons-Alost line.


Napoleon's entry into Brussels, together with the fall of Alost, decides the campaign. Napoleon has won the first round of the War of the Seventh Coalition. 


Next time, perhaps a debrief...?