Showing posts with label Lutzen 1642. Show all posts

Saturday, May 4, 2024

It seemed to work... Thoughts on Portable Lutzen

My recent Battle of Lutzen (1632) project threw up several thinking points, mostly occasioned by the way my armies have been designed and based. Having switched from a design of my own to the DBR game system (huge mistake, but not due, apart from a want of 'finish', to any real problem with that system)  I found myself unable to make the reverse decision. Perhaps that was a bullet I ought to have bitten, after all.

What this has led to is having to create units with multiple stands. Now, that's OK, but I have a feeling that the Antoine Bourguilleau designed Portable Pike & Shot Wargame calls for single-based units - even unto Swedish brigades and Spanish tercios. A tercio comprising 9 figures of pikemen forming a square, with 3 musketeers/arquebusiers capping each of the four corners, with each figure occupying a 15mm (front) and 20mm (depth) base would fit easily within my square grid cells, and not too badly within my hex grid cells. The latter would overlap the cell boundaries only a trifling amount.

Well, not to be: too bad. Let's work with what we have. 

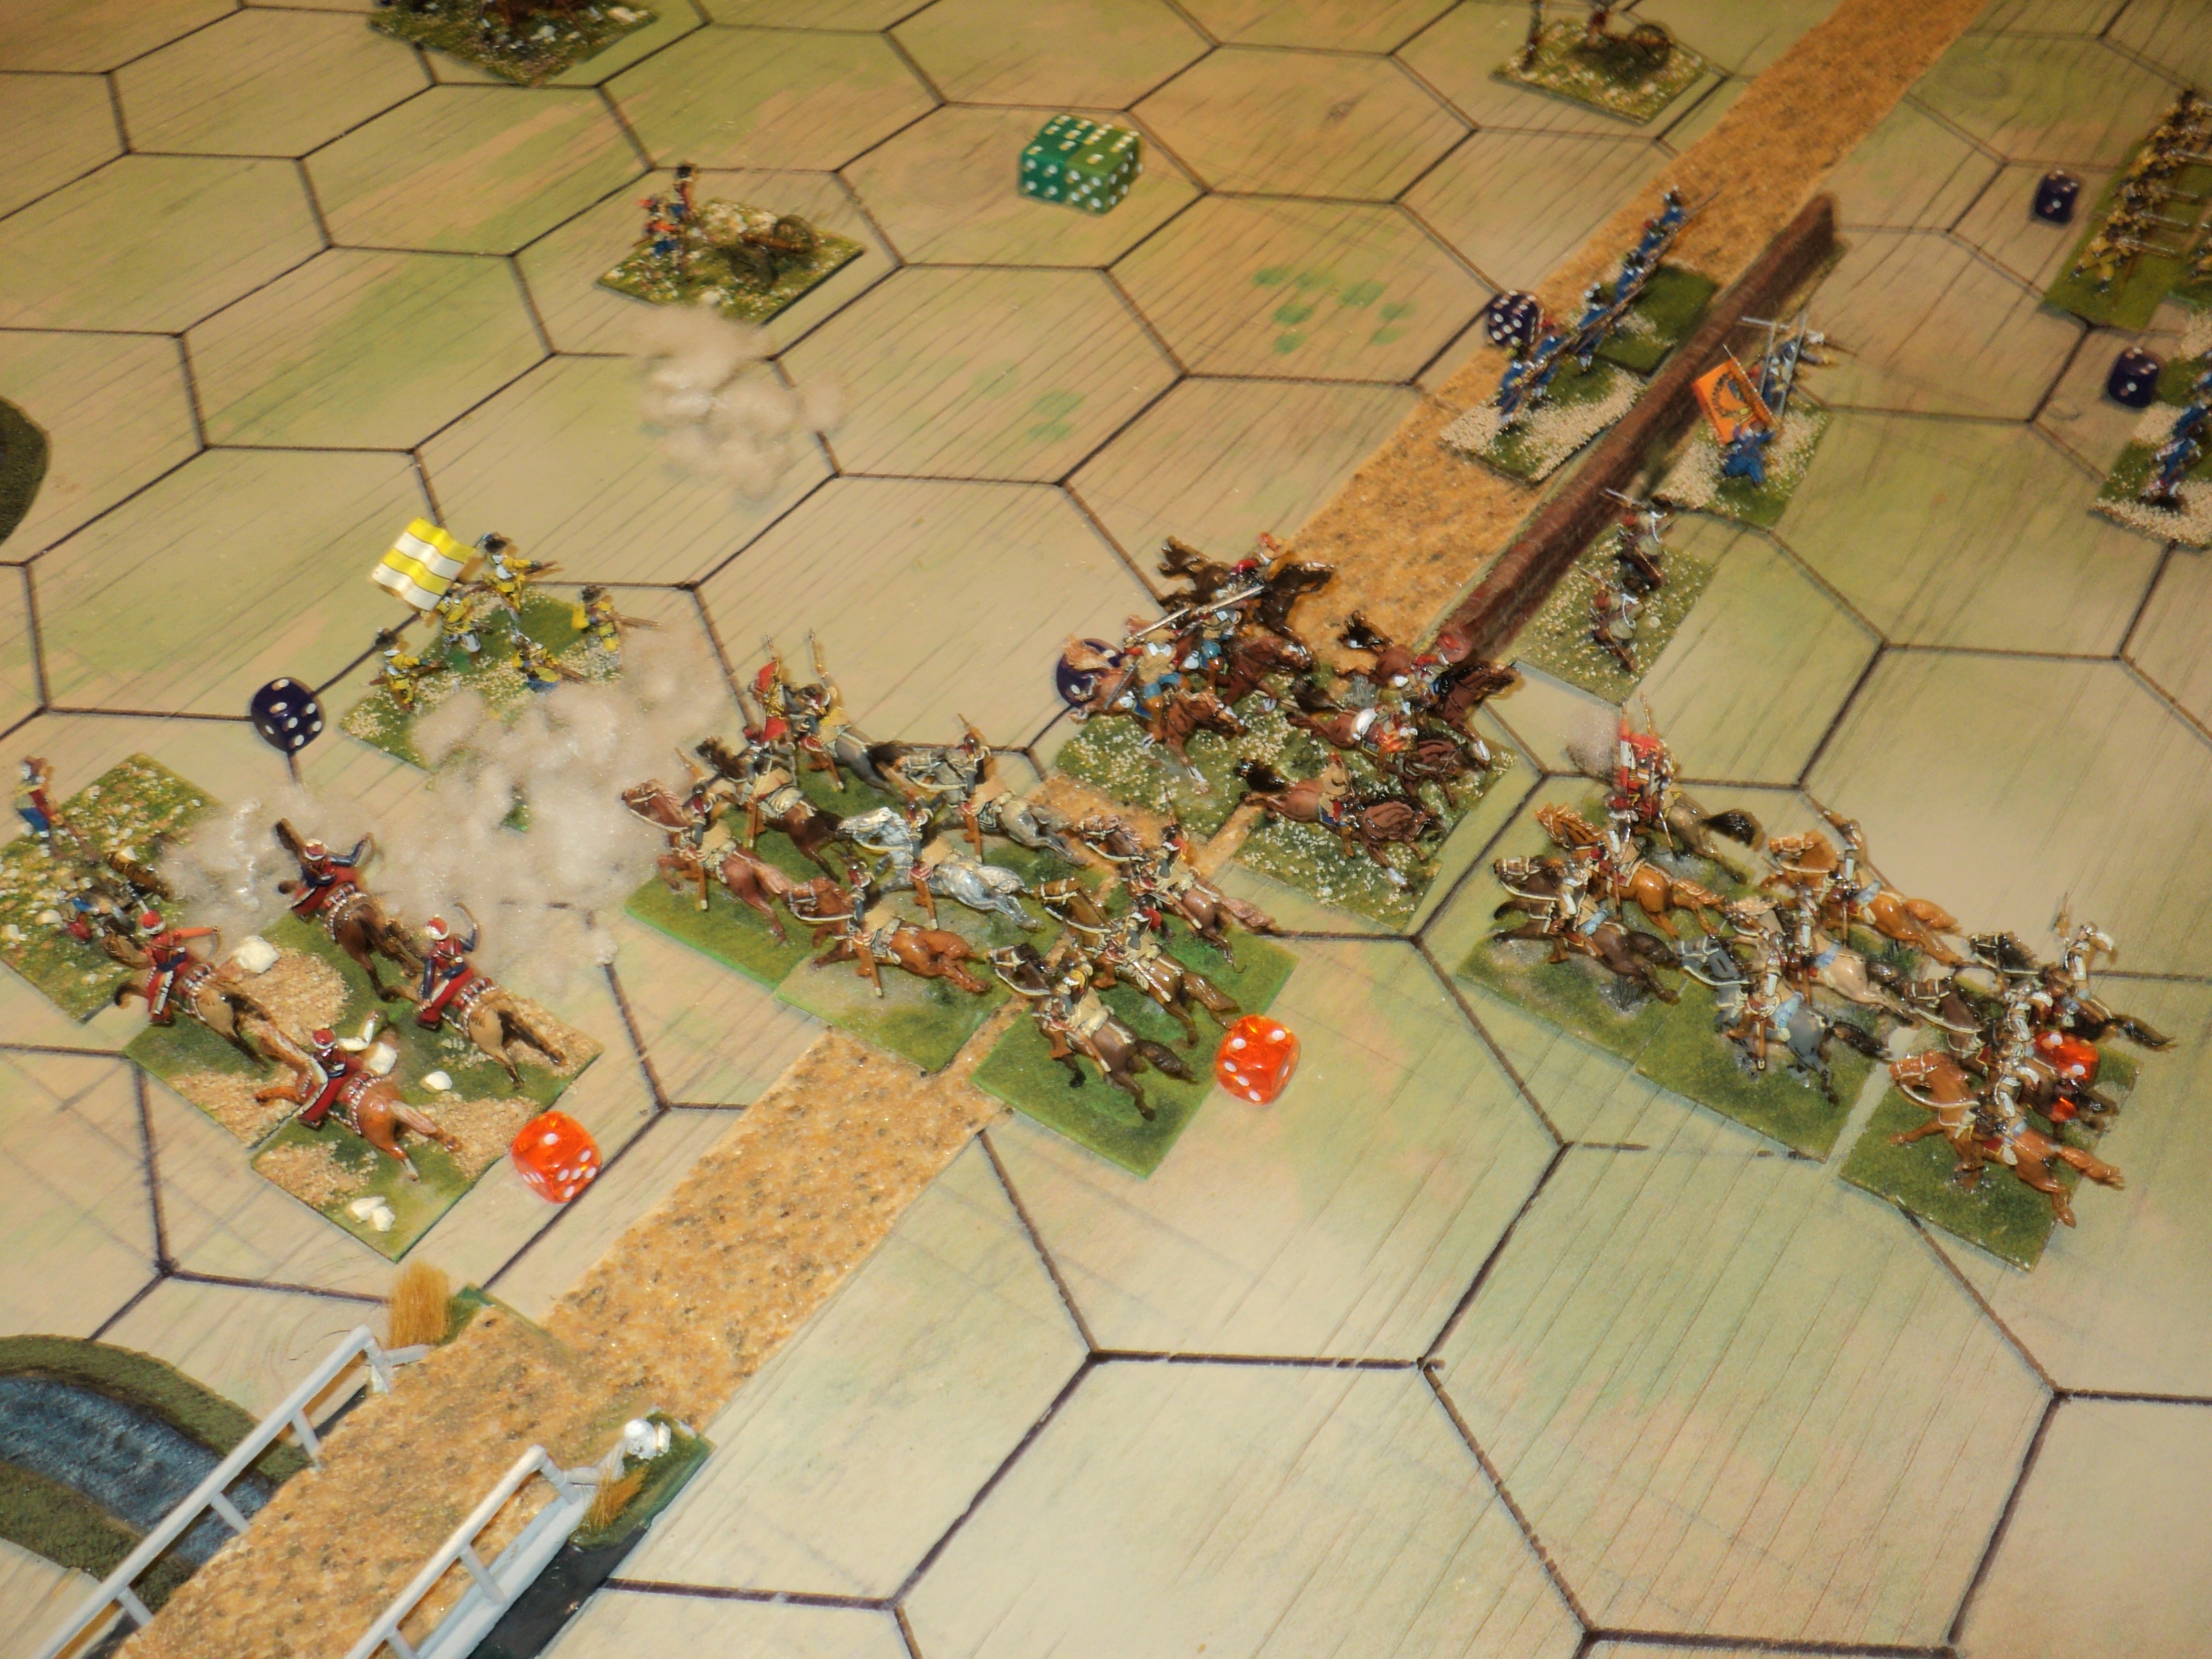
What I had in mind was that the infantry units would default to a 6-stand battalion, comprising a centre of 2 x 4-figure pike stands, and wings of 4 x 3-figure shot. Like these fellows on the right of the picture: 

On the right, four Swedish battalia, each of 20 figures.
The Imperialist foot facing them comprise 8 extra pikemen
This is roughly how a DBR game would look (this pic is dated May 2008 in my archives). Of course, the stands being 6cm wide, that gives us a unit with a frontage of 18cm - requiring two grid squares to accommodate. It was this, and thinking about tercios that gave rise to multi-grid-cell units. The tercios featured in my recent 30YW battles.

The concept seemed to work, although it did lead to a staggered 'line' drown up 4 tercios abreast at the outset of the Lutzen battle. Shaken out into a lozenge formation, the four tercios looked the part.

Before continuing with the topic of unit sizes, and their implications, I want first to outline where I intend to adapt the original concept to my own set up. I intend to try out several changes to the system

1.Artillery:

1.1 Artillery is divided into 'field' and 'battalion' guns
1.2 Field artillery can not move, except to change facing, unless there is a horse team available to move it. Once hitched (taking one move) the artillery may move two hexes per turn.
1.3 Battalion guns can be manhandled 1 hex per turn
1.4 Artillery present no obstacle to the movement of other units, apart from preventing their landing on the same grid area. A foot or horsed unit may simply 'pass through' friendly artillery. Enemy artillery overrun may simply be removed from play 
(I am very tempted to permit the 'capture' of artillery with the idea they they may be turned upon their former owners. Wouldn't that be fun?)
1.5 For the purposes of the game, I increased the range of my 'field' artillery to 6 grid areas - hexes or squares.  I'm very tempted to make it 8. At a 6-hex maximum, short range is 2 grid areas. 
1.6 The firing range of battalion guns is the same as for artillery in the Portable set: 1 grid area at short range; 3 at long. 
1.7 Rather than limiting shooting to along a single line of hexes or squares, I propose this:
When firing through a a square or hex side, the 'firing arc' is the grid area immediately in front, and one grid area either side of the centre line thereafter. 

Firing arcs;
Field battery: Red (short) and pink (long)
Battalion guns: Orange (short) and yellow (long) 

1.8 I am considering the option to shoot though a hex corner (not square corners if using a square grid). The reason for this has to do with the size and shape of my foot units. If so, the 'arc' of fire will be 1 hex either side of the center line - a firing arc 2-3 hexes wide.


2. Horse.

2.1 There is but one real adaptation I want to make, here, and that is to the 'Dutch' cavalry - harquebusiers - as defined under the PP&SW game system. These fellows tend not to go in for the up close and in your face stuff, but prefer to stand off and shoot. They also, it seems, favoured rather deep columns, which, shooting by introduction in a species of caracole, kept up a considerable rate of short-ranged fire whilst slowly moving forward (at least, that is how I figure it). 

This is quite in contrast to the 'Swedish' school of thought, which was to get tore in with the sword. The question is, how does one make it worthwhile to depict the deep columns of 'Dutch' harquebusiers? I propose that such a unit -

(a) adds 1 to its shooting dice if it has a third rank, 

or alternatively

(b) counts 1SP per rank, up to a maximum of 3. 

2.2 Light Horse.
The Imperialists often fielded Croats, Cossacks and Hussar light horse. I have added them to the mix: Move 4 hexes, 2SP each, counting as 'poor' or 'average'. 

3. Foot

3.1 Forlorn hope:
These for single stand units, rather like a skirmish line, with 1SP only. They may be classed as 'poor' or 'average'. Actually, these fellows were often brave men who volunteered for some reward or perhaps commutation of punishment. The chances of survival were pretty slender! However, brief experience, especially as defenders of a protected position, have shown them hard to shift, so they don't count as elite.

3.2. Battalia/ Brigades:
The three-stand battalia or 'brigades' I used for the Lutzen battle I reckon ought to be 3SP instead of 4. They each have the same firepower as the tercio, but eight of them still double the firepower of the 4 tercios. 

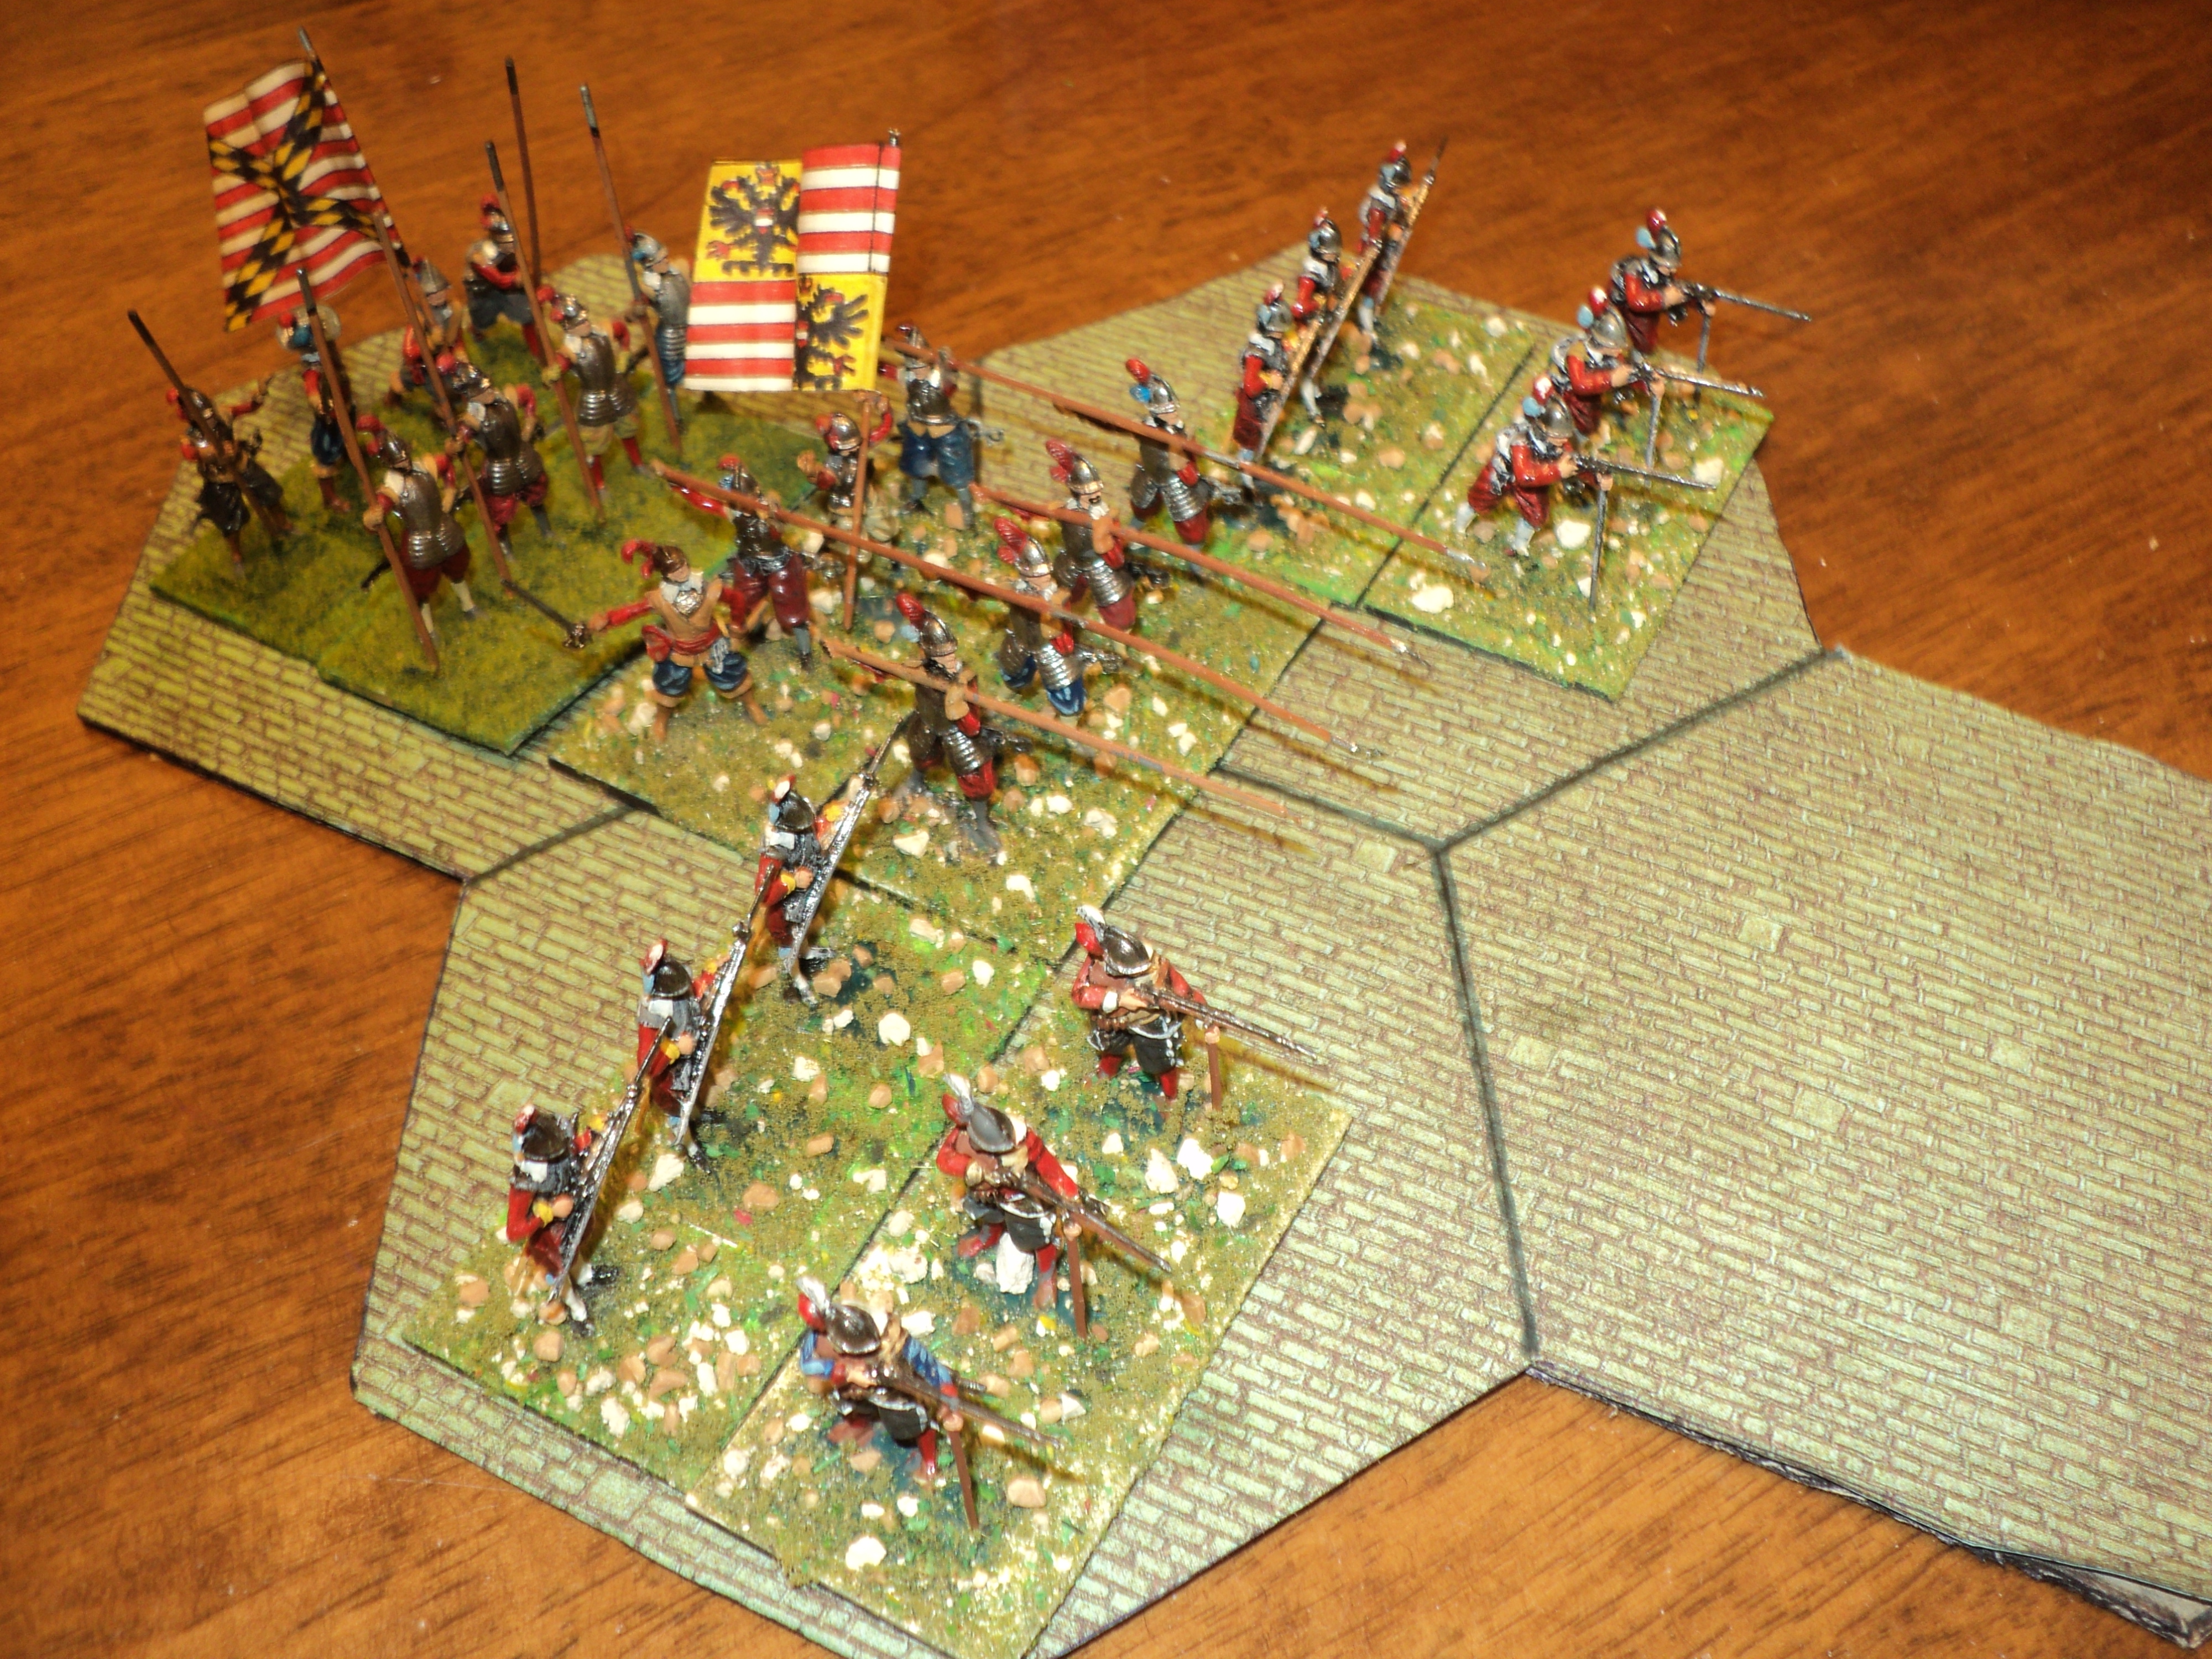
However, I also have in mind fielding 6-stand 'battalia'. Now, these of course, span 2 grid areas wide - reasonably convenient on a square grid battlefield; less so with a hex grid. On the latter, the unit would 'naturally' face the hex corners, as shown here:

With such a formation, one feels that it might engage two shooting targets in a given turn, or both wings concentrate upon the hex in front of the pike block. An enemy standing there would of course engage the battalion as a whole. A species of tercio might also be depicted with this orientation:

This whole idea seems to present rather a different game, with movement, fire and close combat through the hex corners, in effect, rather than the hex sides. If I were to test this idea, I'd be inclined to add 2 to the standard SP values for both: 6SP for the battalia; 8SP for the tercio.


4. Combat results.

For the size of the game, I seems more convenient - certainly speedier - that all hits result in a SP loss. Whether a unit taking that loss gets also pushed back one grid area might depend upon its quality (poor, average, elite). For the most part I applied the hit=SP loss during the Lutzen battle, and the thing went quite briskly considering the size of the game.

All these ideas will require play testing some time. Meanwhile, I am doing some prep work for the Battle of White Mountain (1620). My Swedish army will be co-opted to represent the Protestant  Bohemian Army.


To be continued...
Battle map for White Mountain 

Tuesday, April 30, 2024

This Will Never Work - 30YW Action continued

Imperialist left driving back Gustavus's wing.


We left the Lutzen action last time with matters not going at all well for the Swedish Army. The Imperialist harquebusiers were putting up a huge fight along the banks of the Flossgraben stream, destroying one, then two, of the Swedish cavalry units there. King Gustavus Adolphus himself went in danger of his life, as his bodyguard unit was scattered. Alone with his immediate entourage, he made his way to a fresh unit coming up, and with it took up the fight once again. It did not go well. Although the Imperialist horse was barely holding, a pistol shot lowered the King himself.  


What has happened to the Swedish king?!


Their successes, and the disaster to the Swedes from losing their beloved monarch (one fewer dice for the activation roll), were not coming to the Imperialists without cost. Although two-thirds of the forlorn hope were still in action, little more than half their left wing cavalry were carrying on the battle - just 6 Strength Points (SP) remaining of the 11SP with which they began.
Colloredo's Imperialists standing like a stone wall.

On the other wing, the Swedes were in an even worse case. Battering away at the enemy gun line, the Swedish horse suffered an emphatic repulse - a costly one that left the Imperialists barely scratched. It seemed hardly likely that the reserves to hand could alter the result, but it had to be tried.
Swedish brigades approaching...


So far the foot in the centre had been hardly engaged. Having cleared the ditch of the part of the forlorn they had encountered, the right flank 'brigade' began to bring a telling musketry fire upon the lead tercio. By this time it had already lost a SP. So had the brigade.
A harquebus unit vanishes in rout. The turning of the 
tide, perhaps?

The two brigades to their left joining the first, they swept on to close with the lead tercio, whilst the rear right flank brigade occupied the abandoned part of the roadside ditch. The three Swedish brigades might have halted to bring on a fire action, but, against that decision, the tercio would certainly have used its extra weight more closely to engage the enemy foot. 
Terrible bloodletting as a tercio takes on 
three brigades.

Probably this was not a good decision by the Swedish foot, but the results were spectacular enough! The picture tells the story. Although the centre Yellow brigade was merely checked - it had lost a SP to earlier fire action - both flanking brigades handed out and accepted terrible punishment. The right flank Blue brigade was down to half-strength, but so was the tercio. Overall losses in the centre were so far about even.  


Near the burning town, the Swedes returned to the charge, their left somewhat covered by a unit of commanded musketeers. So far the extreme right flank Imperialist unit had taken a knock, but Colloredo's wing was still comfortably holding off the Swedes. 
Another great activation roll for the Imperialists. Losses 
have reduced the number of dice from 6 to 5.


By this time we were about up to Turn 7, the initiative won by the Swedes. Losses by now had reduced the Imperialists to 5 dice only (the Swedes were down to 8, almost to 7, by now). And then the Imperialist roll this array of activation dice: 5 or 6 more units might be activated than expected. Naturally they could be put to good use.

That bit of paper is still extant, with the addition of the SP losses so far: Imperialists 14SP; Swedish 33SP! Such a level of hurt ought possibly have terminated, if not the battle as a whole, but all aggressive moves by the Swedes. That was not going to happen! I think I just got carried away.

Imperialist left still fights on, though badly depleted
Both sides are mere shadows of themselves.
But I also rather think I added something to the Swedish count that ought not have been there. Most of the PW rule sets assign 6SP to the Army commander, but the Pike and Shot rule set doesn't. The commanders go towards command and control, and not so much to morale. I had placed a SP marker (die) beside the King's command element (as I had done also for Wallenstein), but need neither for identification purposes. It was simply force of habit.  I think. 

At any rate, the loss of just 27SP instead of 33 would justifiably have kept the Swedish Army in the fight.  Compared with the much lighter Imperialist losses, 27 was bad enough! 

The Swedes weren't done yet. On the Flossgraben wing, they still had reserves in hand. As Graf zu Pappenheim was still somewhere on the road, the Imperialists had no such luxury. Their tide of success began to ebb, beginning with the rout of one of the harquebusier regiments. Just 5SP out of 11 remained of this wing.
A second tercio enters the fray ...
In the centre, the plight of the lead tercio was slightly - and momentarily - relieved by the left hand tercio ranging up alongside to engage one of the enemy brigades.
The Swedes are very much battered and depleted in this front
And on the Imperialist right, Bernhard of Saxe-Weimar led his cuirassiers, pistoleers and commanded muskets once more to the charge.  
Initiative roll: Imperialists win; Pappenheim still 
a no-show...

Turn 8 and the initiative (red die) once more passed to the Imperialists. How they would have welcomed the arrival of Pappenheim's command (white die). No. Still not happening...
In their Turn, Swedes make a good 
activation roll...

For their part, the Swedish activation dice were now down to 6 (having begun with 9). But this was a pretty good toll - 27 - and badly needed. The Swedes were now in action all along the front, still trying to break through on the flanks, and to grind down the powerful centre. There were still plenty of reserves in hand. 
Imperialist left once again under pressure, though little remains 
of this wing for either army.

The Imperialist left exhibiting signs of imminent collapse - down to 4SP out of 11, and most of the forlorn hope (though not all) having been overrun; the injection of commanded musketeers and battalion guns, with the arrival of the last unengaged cavalry on this wing, promised to finish off the harquebusiers and Croats. In the absence of Pappenheim, that would have left open the flank of the tercio foot. 
The closely engaged infantry there were also exhibiting signs of wear and tear: the Imperialists having lost at least 4SP, the Swedish brigades 5. The whole of the latter's first line of brigades were now engaged, although, the right hand brigade was satisfying itself with a long range musketry duel.
On Colloredo's wing, the Imperialists were starting to take losses, so far 1SP from each arm of horse, foot and guns. But that could scarcely compensate for the innumerable losses incurred by Bernhard's troops. By now, though, the Swedes were starting to inflict slightly heavier losses than they were taking - 5 to 4.
Winning the initiative once more (green die)  - and Pappenheim still swanning around in the boonies - the Swedish army continued to press.... 
Disaster for the Holk's Imperialist command.
Almost nothing remains of it
... and at last broke through! A second harquebus regiment collapse in rout, and the remaining, with the Croats, were just barely hanging on. On this wing, the Imperialists were down to 2SP (from 11 - 3 from 14 if you included the remnants of the forlorn hope, still clinging to their roadside ditch).
An Imperialist tercio collapses in rout. But they take 
a brigade with it.
In the centre, the lead, having destroyed one brigade, found little relief in so doing. Inserting itself in the gap thus left, a reserve brigade maintained such pressure, that the tercio collapsed, reduced to a cloud of fugitives. Their comrade tercio to their left was also feeling the heat, getting rather the worse of the firefight with the brigade close by the ditches.
Swedes under Bernhard of Saxe-Weimar begin to damage
Colloredo's command but are themselves badly knocked about already
Some toll was also being taken from the Imperialist right as well, as what little remained of Bernhard's wing continued to carry the fight to the enemy. At last overrunning a gun battery, Bernhard's own cuirassiers stormed into and cut up a regiment of harquebusiers.  
The lines are looking a deal thinner that they were!
Nine Turns having gone by, with the Swedish army pressing on the mounting tide of success, all impetus suddenly deserted them.  At last they had reached the point at which their exhaustion obviated their further assaults. Actually, this had been reached a turn before, but, in all the excitement simply forgot - or may didn't feel like - calling it. The Imperialists had hurt them badly, but during the ninth turn, having lost a further 5SP for inflicting 3, they too had had enough. So the battle ended in mutual exhaustion.
But there was no question but this ought to have been counted an outstanding success for the Imperialists. With Pappenheim's cuirassiers, the armies would have been nigh-on equal in strength; without them, especially on the left flank, the difference might have been decisive.

The gallant fight of Holk's harquebusiers, and the adamant stand of Colloredo's wing, were decisive in stemming for most of the day the Swedish tide. By the time the latter began to make serious inroads, so great had been the damage to them, that they could not for long sustain it. I think we could count this one as defensive victory for the Imperialists.

Final assessment of the losses: 
Imperialists lost 24 Strength Points (against an exhaustion point of 21)
The Swedish lost 34 Strength Points (against an exhaustion point of 30)

Had Graf zu Pappenheim turned up - which even having to roll a 6 each Turn was odds on sometime during the course of a 9-Turn day (roughly 80%) - this would in all likelihood have been a decisive Imperialist victory, especially as they would still have been 6SP short of their exhaustion point.

On the whole, I considered this experiment of a large scale battle (about 400 figures all up, counting gun crews and command elements) a success. I simply have to do this again. Nordlingen, I think...

In case you are wondering, what appeared on the table is not my whole 30YW 'collection'. Only about half my Foot of both sides were there, and maybe two-thirds of the Horse. The whole of my Imperialist forlorn hope garnished the ditches, and 4 guns out of 6. The Swedish fielded all 5 of my battalion guns, and 2 of 4 heavies. Of course, to field both armies at full strength, I would need a bigger table...


Sunday, April 28, 2024

This Will Never Work - Portable 30YW Action

Massive activation roll for the Swedes moving first!

Following on from the previous but one posting, here begins an account of the Battle of Lutzen, 1632, as fought out on my table. The leading picture was taken upon the completion of the Swedish first turn. The Swedes begin 'with the initiative', that is to say, they went first in the first 'turn' of the IGoUGo action. How many units may be activated to move or shoot is determined by the number of whole multiples of 6 units there are, plus the number of 'generals', including their army commander. There being 30 units plus 4 generals, the 'Swedes' threw 9 dice, for the massive score you see in that leading picture: 39. This result is halved (dropping the odd half) allowing an action by 19 units out of the 30. The two gun batteries having fired, seventeen units lurched into motion.
Swedish left. led by their King, cross the 
Lutzen road
The Swedish army began its operations on the wings, King Gustavus Adolphus sweeping past the flank of the forlorn hope lining the road, whilst part of the right wing cavalry, commanded musketeers, accompanied by the flanking infantry 'brigade' attempted to storm the forlorn hope itself. The wall lining the road, by the way, really represents the roadside ditch that formed a species of entrenchment. I deemed it to be cover, which, despite the thin line having just 1SP per element, proved a serious obstacle to the Swedish attack.
The Imperialist forlorn hope at once engaged.
Surely they will be quickly overrun...

In their turn, the Imperialists at once counter-attacked on their left wing. Almost immediately the whole stretch of front from the Flossgraben stream to the Lutzen end of the forlorn hope line became the scene of a vicious fight that lasted the whole duration of the battle. Two harquebusier regiments and the Croats ganged up on the right-most Swedish horse, which, considering the advantage of the latter (+1 on the dice roll, and they got to roll for all three combats) went rather in favour of the Imperialists. The addition of the commanded musketeers and battalion guns might have come to the aid of the embattled horse.  We'll see anon with what effect. Thereafter, however, the harquebusiers relied upon their firepower, leaving it to the Swedes to bring on the close assaults.
Piccolomini's horse carry the fight to the Swedish right.


For the rest, the Imperialist army stood off to await the Swedish assault. There was no choice. In contrast to their opponents' terrific activation roll, 'Wallenstein's' was truly dismal.  There were but 6 dice to roll anyhow: three 'generals' on the table, and 20 units - just 3 whole multiples of 6. The roll: 16; halved = 8. The four gun batteries having fired in the artillery phase, just 4 units could be activated. Those four were the four horsed units on the left flank.
Imperialist first activation roll. Miserable.

Imperialist left fully engaged; the rest of the army waits
Nevertheless, there was plenty of excitement to be had on this wing. Winning the initiative for the second turn, the Swedes' roll was rather closer to the statistical expectation 31 or 32. The wings  absorbed most of the 15 'points worth' of attention, especially as the Imperialist left flank horse were putting up a tremendous fight. Already, Gustavus Adolphus had to survive one survivability test. But the Swedes were handing out a few licks of their own. 
Both sides carving each other up.
From the picture below, the Imperialists have lost at least 2SPs, possibly 4, but the Swedes have lost 6SP already, four of them inflicted by that forlorn hope line!
Swedish tight gradually forcing back the Imperialists
On the other wing, the leading Swedish cavalry, including a unit of cuirassiers, clashed with the Imperialist gun line. Once again, the Imperialists put up the kind of fight that exasperated their opponents, who were to spend much of the rest of the day entangled with the artillery, whilst the Imperialist harquebusiers waited for the chance to counter attack. Enveloping the Swedish left, the guns and commanded musketeers around 'Windmill' Hill poured hot lead and hot shot into the enemy flank.
Swedish left strikes the Imperialist gun line...

The Imperialists' second activation roll outdid the first for utter wretchedness: just 10 - eleven short of a roll that would be merely average. There's the statistical mean - and then there's really mean. So, with just 5 units that could be activated, and some of those had been taken up by the guns, that left even the embattled left wing cavalry short of options. The rest of the army continued, perforce, to wait.
10 on 3xD6 - a truly woeful Turn 2 activation roll!
And then! ... and then came karma, or the reward for patience. Or something. The Imperialists wrested the initiative from their opponents for Turn Three - and on top of that rolled a huge activation roll: 31 on just the six dice! 
On top of winning the initiative, the Imperialists
roll this huge activation roll!
Able to activate 15 units, less the two gun batteries that had fired this turn, the Imperialists were able not only to take the fight to the enemy on the flanks, but had enough movement to spare to loosen up the crowded centre. This led to the lozenge arrangement of tercios in the picture below. In case you're wondering, this was not at all motivated by the arrangement pictured in the engravings reproduced in the previous posting. But those engravings did go a long way to induce a feeling that it was 'right' when I noticed where this regrouping had led.  This arrangement was a lot easier to move about on the table - not that they did much moving.
The wings hard at it, especially in the foreground
The fight on the east wing carried on unabated, though the Imperialists were feeling the want of reserves in this part of the field. So far Graf zu Pappenheim still hadn't arrived (requiring a D6 roll of 6 to do so), and losses were mounting. But they were mounting on both sides. Although pushed back to their own side of the road for the moment, the harquebusiers were giving as good as they were taking.
The King's Own unit is looking shaky despite the 
presence of their monarch.

The following couple of pictures show the much improved arrangement of the tercios, and the Swedish centre, yet to move, covered by their guns. One of their battalion guns has begun to pepper the lead tercio unit.
This tercio arrangement looks far better articulated 
than that in which they began. that does leave 
the lead tercio a little vulnerable, though

Close by Lutzen, the Imperialists limited their operations to fire action. They were leaving it to the Swedes to get up close and personal.

The one real counter attack came from a harquebusier regiment trying to ease the pressure on one of the gun batteries.
Near Lutzen, the Swedish horse just can not catch a break

The battle continued to rage on the Swedish right with no breakthrough in sight, although all four Imperialist units had taken losses. So had the unit King Gustavus was leading, and they were looking rather shaken. Yet it seemed worth the risk to charge the enemy pistoleers in front of him: a 'three' good enough to hit, with the enemy requiring a 'five'. So of course, the Swedes roll a 'one' and the imperialists a 'six'; the unit dies; and the king is left isolated and alone.
The fierce bloodletting continues on this flank.
The King's charge is decisively repulsed and his
horsemen abandon him in their flight


Fortunately, this time, the King himself survived the action, but I wondered whether the harquebusiers ought to follow up. I decided not, as it was the King himself who brought on the close combat. If the rules do not imply that only the bringer on of a close combat can follow up a success, one feels inclined to make that explicit. The harquebusiers, by the way, are not so inclined, being designed for fire action, rather than the close quarter stuff.
A second Swedish cavalry unit is also thrown back


Meanwhile, the cavalry unit to his left was also driven back. Those damned cowardly harquebusiers were proving stubbornly resistant to persuasion that they quit the field.
The first Swedish assault on the right almost completely 
repulsed, but Imperialist losses have been almost as 
heavy.


One more we draw back to survey the field. Whilst the flanks remain bloodily, though indecisively, engaged, the Swedish battalia in the centre are approaching close enough to engage the centre tercio in a fire action.  The action is becoming general across the whole front. Though the Swedes are carrying the fight to their opponents, they are also on the whole taking the worse of the losses. After 4 Turns, the Imperials have lost 8 SPs, the Swedes - 20! 


All this while, the forlorn hope continues to hold out, the Swedish attacks getting nowhere, except where the brigade crossed the road, whence they engage the nearest tercio in a musketry duel. 


The Imperialist right continues comfortably to hold on against the ineffectual Swedish attacks. It is not the want of effort by the Swedes. Their losses on this wing have been heavy enough. One cuirassier unit has been destroyed - minus 4SPs right there - to no loss to the Imperialist wing, apart from the 1 SP from the leftmost battery... 


Here we will suspend the narrative, quite in the style of Henry Fielding, as being quite long enough for this posting. Will the Swedes overcome their misfortunes so far? Will the bellicose Swedish King survive to see victory?  And whatever has happened to Graf zu Pappenheim and his cuirassiers?

To be continued...