|
| View of the Austrian array as seen from behind Calderin village. |
Third January 2019 - bright, sunny ...
warm: just the right sort of day for a spot of war gaming. Mark, of the
Chasseur blog renown laid on a great day for us: near on 3000 Napoleonic soldiers to battle with, on a 16 foot by 6 foot table, all superbly presented. Drinks, potato chips and chocolate macaroons (that was my mistake) laid on. Mark and Paul ('Jacko' of
Painting Little Soldiers) took the Austrian roles - Feldmarschall Simbchen commanding the Austrian right and Archduke Charles on the left, respectively. Andrew was the French general of Division Molitor facing Simbchen; whilst I took on the mantle of Marshal Massena, facing the redoubtable Archduke, himself.
 |
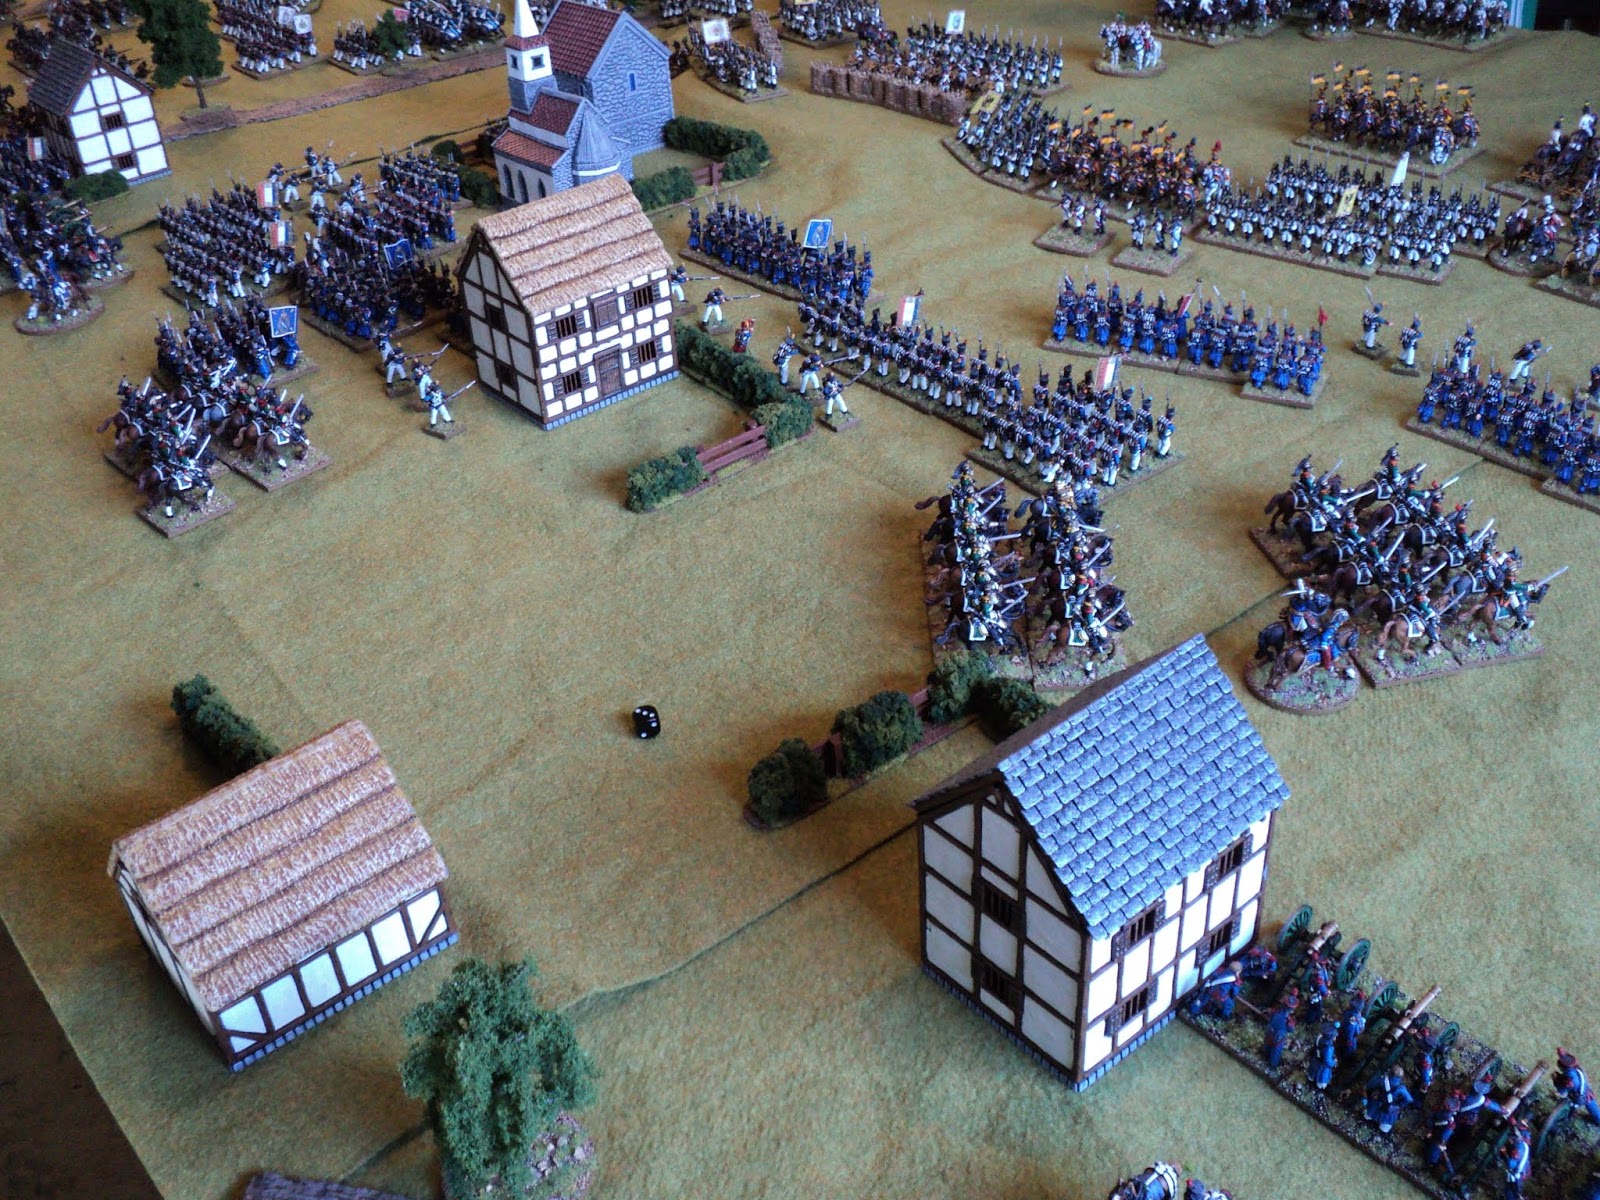
The French horde. The place with the
ecclesiastical edifice is Caldiero. |
The action was a refight of the 1805 action at Caldiero, in which the Archduke, discovering how mistaken his earlier appreciation that the French would make their main war effort in northern Italy, hoped to administer a check to Massena's army, then race off to the main theatre of war along the Danube River.
 |
| The Austrian right, occupying the high ground. |
I think on this occasion, the AAR will be less a narrative of the battle, but rather a ramble about the game, the set up, Mark's wonderfully presented armies - a kind of 'armchair and a beer' account. Maybe. We'll see how it goes. I have already gone through the whole gallery of pictures and captioned them, so much of the battle narrative is related there.
 |
French 'off table' reserves. Those two dragoon regiments
would have very different experiences! |
Mark's armies are a delight to look at and to play with. This is the third battle of this type that Mark has hosted, and very enjoyable they have been and all. The past battles have been with the
General d'Armee rule set. This is fairly tough on the Austrians, who begin with a -2 modification on their initiative rolls, but it's a handicap that forces one to think carefully about how to go about things. As Austrian commander, I've had nothing so far to complain of
their performance in battle!
 |
| The cuirassiers arrive, and swing off the the French right flank... |
This time, with so many figures on the table, Mark opted for a simpler, fast-play rule set of his own devising. They seemed to play pretty well. The acid test is of course, whether we got to complete the game in one session, and with how much action. The nine-move IGoUGo action was done and dusted with time to spare - we even had the best part of an hour for post-mortem and home in plenty of time for dinner. And there was plenty of action as well, probably mostly supplied by Andrew in his role as a French general. I'll plead the stubbornness of the Austrian garrison at Caldiero for my failure to get in a serious columnar attack on the Austrian left-centre, though the presence there of Austrian cavalry and guns as well as elite infantry had also something to do with it.
 |
| ...where the Austrian left is looking pretty thin! |
The villages of San Zeno (on Molitor's front) and Caldiero itself (Massena) formed, in effect, bastions somewhat inhibiting French attacks against the main Austrian line. My (Massena's) plan was to storm the town before developing a much heavier attack upon the rising ground beyond. Eyeing the rather exiguous looking Austrian flank, I sent the cuirassiers of Lacour's Division to join Goulos's infantry brigade with a view to rolling up the line.
 |
| Austrian gun battery overlooking Caldiero. |
I don't believe Andrew and I discussed 'Molitor's' part in the overall plan. That he had decided upon all-out attack became apparent fairly early in the piece. By pretty much pinning down the entire Austrian wing north of the main road, that pretty much accorded with my own plan, but as it transpired Andrew had something more ambitious in mind.
 |
| Caldiero itself, held by two Austrian battalions. |
My appreciation was that, in order to get a strong attack mounted against the centre of the Austrian line, Caldiero had to be taken. There was too little room for masking to be an option. I hoped that by taking Caldiero quickly we could exploit on the storm the hill behind it. Things didn't work out that way. It took a very,
very, long time for Caldiero to fall.
 |
| Austrian right-centre - a formidable array! |
The French assault upon the heights behind San Zeno (call them the San Zeno Heights) proved a solid grind that lasted all day. Progress was slow and costly, but it led to a perceptible commitment and thinning of Austrian lines between Caldiero and San Zeno. The latter village withstood all day French efforts to storm the place, and was still in Austrian hands at nightfall.
 |
| The French left-centre don't appear so very concerned... |
A comment here on Mark's rule set. This is intentionally quick-play, IGoUGo game system, designed for big armies. As Mark said after the game: he wanted a set of rules that would enable the completion of a 3000-figure game within a reasonable time frame, but using standard and familiar game mechanics. I think this one reached its 9-move time limit within no more than 6 hours.
 |
| The French right flank also advancing... |
Probably the main problem with IGoUGo sets is often the lack of player interaction whilst troops are being moved. This was at least partially resolved by charge declarations and initial reactions (moves, counter-action or shooting) being resolved at once and in turn, before other moves are made. Then come other moves, and finally shooting and then melees. The effect is to break up the waiting time for the 'non-phasing' player, and that, in my view, is a recommendation.
 |
... led by Tyrolean jaeger, the Austrian left flank brigade
come off the hill to meet them. |
From here, I think I'll let the pictures and their captions tell the story, with occasional remarks on the action and the functioning of the rule set.
 |
Mark (Simbchen) and 'Jacko' (Archduke Charles) with
their respective wings... The San Zeno village also crammed with
Austrian infantry. |
 |
| A bit of a conference in the centre... |
 |
The hand of General Molitor, directing his troops, being led and
screened by long skirmish lines. |
 |
Powerful French columns in the centre. First task: to take out
the Caldiero garrison! |
 |
A sight worrying to the French: the arrival of six regiments
of Austrian light horse, two of them uhlans, on the Austrian
left. |
When the six regiments of Austrian light horse arrived, followed not long after by four units of heavier horse, suddenly the Austrian southern flank looked a whole lot less vulnerable. I could command just 6 units of horse - 1 hussar, 3 dragoon, and 2 cuirassier.
 |
A general view from Marshal Massena's position of the sweep
around Caldiero. The arrival of that mass of enemy light horse
was to put a crimp in the Marshal's style... |
An early probe by a French regiment of dragoons struck an infantry unit that formed square betimes. The dragoons bounced off and headed back behind the lines of infantry. Losses were trivial (i.e. none) on either side, though the horse received one 'disorder' penalty. Mark's rules runs a Strength Point system that manages to look like
not a SP system. Units incur disorder or disruption - 'disorder hits' - indicated by offsetting in some way one or more of the component stands. Once all (usually 4, but they can vary) the component stands have been 'disordered' or 'disrupted', the unit is removed from the table.
 |
Brigade of cuirassiers enveloping the Austrian left.
But the Austrian infantry look ready enough! |
In effect, that gave the infantry and cavalry 4 SPs, and the artillery 3 or 4 depending on size (3 or 4 cannon, representing 6 or 8-gun companies). Disruptions are usually caused by combat - distant or close - but in the case of cavalry, the act of charging will automatically incur one 'disorder hit' in addition to any further damage from combat.
 |
| First assaults on Caldiero don't go so well. |
'Disorder' can be recovered by rallying - one of the specific activities available to a general officer. However, one disorder hit remains permanent: a unit can not recover fully. This was to be a factor in the early afternoon French cavalry attack.
 |
| French dragoons chance their arm against an Austrian square... |
Mention of 'Rally' as a specific general officer function brings me to the role of such gentry in the 'Fast Play' battle. At the beginning of the turn, each general, apart from the Army GoC, rolls a die against his command rating (ranging from 2- 'incompetent', to 5- 'strategist'). Passing the roll allows the formation under the general's command to advance towards the enemy if so desired (very much so on the French side!), in addition to which, the field officer himself may move up to 36" and issue a special order:
Advance! - for a more rapid approach move provided it does not come within musketry range;
Artillery bombardment - for more effective bombardment, but there is a potential cost
Glory! - join close combat OR rally a unit.
 |
Having taken the north half of the town, the French find
the remaining garrison very herd to shift. |
One can see the
General d'Armee parentage here, but the treatment is much simplified and a bally sight easier to follow. Nor does one need little labels strewing the battlefield, as the general's function is obvious.
 |
Battalion columns of grenadiers awaiting the fall of Caldiero
so as to press on to the hill beyond. |
The Army commander, by the way, can try and overcome a formation's hesitancy by joining the errant commander and re-rolling the test. Marshal Massena did not have a good day in this regard, three times during the day failing to urge on the local commander, which, for a commander rated 5 (fails on a roll of 6 only) was a pretty dismal showing. Twice it was General Goulos who failed to respond, and that did our infantry attack on the right flank no good at all. Possibly it should come as no surprise that it was Goulos's Brigade that finally broke up, leaving the unfortunate commander just one battalion still under command at day's end. Even his foot battery had vanished.
 |
On Molitor's front, French battalion columns and lines are already
assaulting the high ground, held by successive Austrian lines. |
 |
| Here comes General d'Espagne's Division of chasseurs-a-cheval... |
 |
| ...and the reason for their timely arrival! |
 |
| The action is now fairly general along the whole front... |
.....
 |
...but Lacour's cuirassiers and Goulos's hussars wait for the
effects of their respective brigades' artillery. |
 |
The brigade of Dragoons push past Gambion village to
help the French columns. |
 |
French foot battery tries to batter the Austrian counterparts
up the road ... |
 |
All out assault on Molitor's front. Heavy casualties from
attacking the protected gun battery. |
 |
| The Austrian threat to the French left seems to be abating... |
 |
| Ferocious action as the French attempt to storm the heights. |
 |
More bad news for Massena: the arrival of a Division of
Austrian cuirassiers. I wonder where they are going? |
 |
Marshal Massena is being a trifle more circumspect than his colleague
but his dragoons are eyeing the sole Austrian gun battery on this
flank... |
A particularly annoying Austrian foot battery was playing merry hell with the approaching French infantry of Goulos's Brigade, which might have explained their hesitancy that Massena had such difficulty overcoming (I think that commander four times during the day failed his command test, which Massena successfully overrode twice). Fortunately, the other commanders showed more temerity in attack, but against that, it is hard without supports for infantry to assault an opponent who has all arms, horse, foot and guns, available.
 |
| General situation in the centre. |
At once a regiment of dragoons was ordered to ride down the battery in a frontal assault. True, this was a high-risk operation, but something had to be done in the face of approaching Austrian horse. Squares are of course vulnerable to gunfire.
 |
| In go the dragoons! Straight over the Austrian guns!... |
Lacour need not have worried. The guns blazed away wildly with hardly a scratch to the dragoons, who swept over the battery. Carried away by the exhilaration, the horsemen rode into the infantry beyond. These infantry were grenadiers, who quickly formed square betimes (a die roll modified by unit quality and some other factors). Wiser, or cooler, heads might have suggested a hasty withdrawal, but not these fellows!
 |
| ... and, carried away by blood-lust, into a square of grenadiers! |
Actually, the player can make the decision, and this I like. It has always been my belief that some of the game player's morale in subsumed in the army, so these sorts of decisions ought in some way or to some extent be in the players' power to take. At least there was a chance of the grenadiers failing to form square (about 50-50 if I read the rules correctly). Having formed square, Mark estimated that a dragoon victory was a one chance in a hundred proposition. You can imagine the cheers that went up form the French ranks when the grenadiers' square broke! The 24th Dragoons were to get a glowing mention in Massena's report and subsequently in the Imperial
Bulletin.
 |
| Caldiero is proving a tough nut to crack... |
There was no doubt, though, that Massena would much rather have had possession of Caldiero by this. The remaining Austrian garrison took some shifting, and that at considerable cost to the attackers. When once they were evicted, a supporting battalion ought to swept in to reoccupy the place before the assailants could consolidate their victory. The French attackers were not able to follow up their success, but I'm not sure why. I think it likely that the attackers had taken enough damage to break the unit, leaving the French without the means of following up. But even if that were not so, that might represent the vulnerability of the attackers to counter-attack before they can properly consolidate their success. Once the renewed Austrian garrison had settled in, they proved even more stubborn than the previous defenders.
 |
The Uhlans' revenge! Erzherzog Carl Ludwig Uhlan catch
a French battalion in line. |
Of course, Massena was not waiting upon the fall of Caldiero to assault the Austrian main line. The hold up here was the advent of regiments of uhlans inducing the French infantry to form square, when they would be vulnerable to gunfire or infantry attack. One bold battalion elected to stand in line to receive the charge of uhlans. Actually, this is not the player's choice, but subject to a test. My guys failed, and got ridden down.
 |
Meanwhile the Merveldt Uhlans and guns keep the leading
battalion locked in square. |
The unit beside them - the 14th Light - had taken heavy damage from earlier gunfire and musketry, and when struck by the victorious uhlans, looked themselves about ready to collapse altogether. However, these veterans rose to the occasion and inflicted at least a partial vengeance for the fate of their fellows. They stood their ground, and it was the uhlans who made off to the safety of their own lines.
 |
| A dangerous situation has developed on the French right centre. |
 |
Austrians preparing a strong defence line against a possible
French attempt to roll up the southern flank. |
Thereafter, the situation stabilised on this sector of the front, as neither side seemed willing to try conclusions there.
 |
Having ridden down one battalion, the Uhlans try to crush
the battalion square of a battered battalion of
carabiniers. |
 |
| French dragoons facing off Austrian Hussars... |
 |
| Failing to break the square, the Uhlans are recalled. |
 |
Heavy casualties among the French columns trying to storm the town.
The Austrian hold is weakening, however. |
Whilst assaulting the southern half of Caldiero, the French opted to relieve the battalion occupying the northern half. Having taken two 'disorder hits' already, and under skirmisher fire, this unit was deemed too vulnerable to be left in the place. The pressure not being acute, however, the local French commander took the opportunity to relieve it with an altogether fresh battalion, that could in turn lend its weight to the eviction of the Austrians remaining in the town.
 |
Lacour's whole Cavalry Division charge. Dragoons and
cuirassiers against hussars - this can go only one way,
right? |
Meanwhile, big events were shaping on the French right flank. The Austrian refused left flank has comprised three grenadier battalions, the one forming the point of the angle coming under distant fire from a French horse and a foot battery. Hoping to make this fire more effective, Lacour brought up his horse guns to a more effective range, the results of which were soon apparent. For, menaced by the cuirassiers and light horse, the grenadiers had perforce to form square.
 |
Meanwhile, the artillery continue to batter the Austrian
grenadiers holding this flank. |
For his part, the Archduke brought in four hussar regiments to fill the intervals between the grenadier squares. Such a target could not pass by the French Horse. The Dragoon and the Cuirassier brigades both charged. Two medium and two heavy horse units against four light. Surely such a contest could have but one result? That one of the dragoon units had taken a hit earlier ought not affect the outcome too seriously?
 |
Black and white for a change: the battle still rages for the heights.
Molitor's wing is taking heavy losses, but is at least keeping
this wing pinned down... |
Before continuing the narrative of that charge, a quick overview of what is happening elsewhere on the field at the same time seems in order...
 |
...whilst Molitor's right wing, helped by infantry and guns from
Compere's Brigade bids fair to smash through along
the main road. |
 |
| The Austrian right flank... somewhat under-employed... |
 |
| Austrians still holding San Zeno village, never to be dislodged. |
.......
 |
| Will the Austrians never quit Caldiero?! |
Massena's rather sanguine hopes for his big cavalry attack fell somewhat short of expectation. Perhaps not fully recovered from their earlier exploits, the 24th Dragoons shattered at first contact with their opponents, with little damage to the latter. The other regiment of dragoons did better, but even here both sides fought each other to a standstill, with heavy losses. Nor did the centre cuirassier regiment do very much better, inflicting heavy loss but at a high cost.
 |
Outcome of the cavalry fight: One French and one Austrian
unit broken; the other two combats enough to put both units on
either side out of the battle for the rest of the day. |
Only the right flank cuirassier regiment scored a clear cut success, at once routing their opponents. But even they were glad to rally back to reorganise. The success of the charge was to leave the grenadier squares somewhat isolated, where gunfire broke the battalion forming the point at which the Austrian line angled back. What irked Massena was the lack of troops to hand to exploit what had been achieved.
 |
On the hill behind Caldiero, Archduke Charles oversees
the gun battery pounding exposed French infantry squares
between Caldiero and Gambion. |
All the same, the Austrians on this flank drew in their flank much closer towards the centre. For the rest, the battle rather petered out in this sector.
 |
But this sector of the Austrian line is looking thin... but for the
arrival Lipper's brigade of grenadiers in the distance. |
The pressure that Molitor had been mounting all day upon the heights northeast of Caldiero had tended to thin out the Austrian centre. The hill beyond the village, upon which stood the Archduke himself, was becoming denuded of troops, just two battalions supporting the gun battery. He was glad to see the arrival behind his position of a brigade of three grenadier battalions.
 |
| Molitor's attacks are progressing! |
Not that they deterred General Molitor. The Austrian gun battery astride the main east-west road, weakened by counter-battery from French heavy guns directed by General Compere himself, caught the eye of General Lenchantin's hussars. In a trice, the light horse rode over the guns, then straight up the hill to catch a foot battalion behind a line of gabions.
 |
| At last Caldiero has fallen! |
 |
...Whilst Lenchantin's Hussars, having stormed an already
battered gun line, storms on and over a redan. |
This occasioned a brief discussion among the players, whether such a thing was feasible. I took the example from Borodino in which the cuirassiers were involved in carrying the Raevsky Redoubt. I believe in the game, the infantry derived some advantage from the gabions, but how much, I'm not sure. As it transpired, the hussars rode down the infantry. Of course, this success could not be consolidated - hussars aren't made to hold ground. Once again, the French supports were too distant to exploit the breech.
 |
The Austrian centre has been breached! But neither Molitor
nor Messena have reserves immediately to hand to widen the gap... |
 |
Feldmarschalleutnant Simbchen calmly marshals his reserves to
seal the breach. |
As a result of this lack, once more the Austrians found reserves to heal the wound in their line. Compere tried to bring forward infantry, and the fall at last of Caldiero suggested that perhaps the Austrians could be edged off the hill beyond. There remained the difficulty before Gambion of the presence of Austrian cavalry, and the absence of French in sufficient numbers, almost all of which on the French side were out of action following the charge of the heavies.
 |
A low angled shot of the northern sector. Here the Austrian
positions, even San Zeno, having seen off French assaults,
remain in Austrian hands.. |
 |
Archduke Charles reforming his lines. His left flank having taken
a knock, he pulls his flank in a little closer the centre. |
Indeed, the close of the day tended to see the Austrians making most of the running, counterattacking Molitor's lodgement on the San Zeno Heights. A regiment of dragoons charged into the flank of the horse battery that had been brought forward into the gap between the Heights and the hill behind Caldiero. Not content with rolling up the guns, they allowed the infantry battalion flanking the guns no chance to form square. They too joined the exodus of large numbers of French troops straggling from the field.
 |
| I do like these low-angle shots... |
 |
The breach in the Austrian centre slams shut betimes, before
the French could bring reserves up to keep it open. |
All this while, the French were deterred from emerging from Caldiero itself by the guns at close range and their supporting foot. Actually, I felt that the Austrian command might throw in a heavy attack in the last couple of turns of the action in an effort to retake the place. Had they done so and succeeded, the victory would have been theirs.
 |
The Austrians are even emboldened enough to launch counter
attacks of their own. Kaiser Kürassier charge a French square. |
I think we can end the narrative there, as far as the action went. Molitor had secured a lodgement on the Heights south of San Zeno, but it looked as though the Austrians had fought them to a standstill. The French had taken Caldiero, and driven in the Austrian left. But such successes as had been achieved were far from decisive.
 |
Even so, it is a measure of Molitor's (Andrew's) progress that his
person was seen upon the heights, directing his troops... |
Yet the final adjudication gave the palm to the French - a major victory. The differences were the greater damage done to the Austrians (one more brigade broken), and the capture of Caldiero. Another possible objective was to open the road east. Although late in the day there seemed a fleeting chance of that being achieved, the quick arrival of Austrian reserves slammed shut the gate. I have to admit, the outcome looked very 'Borodino-ish' to me: a victory, but a Pyrrhic one.
 |
A rather thinned out Austrian left wing. The French horse
are taking too long to recover from their tough fight earlier. |
 |
| The French, too have taken heavy losses... |
 |
Nassau-Usingen Kürassier strike the flank of a French
horse battery... |
This was one of the most fun war games I have had, especially using a rule set I had not seen before. Apart from Mark, who wrote them, I believe, I don't think any of us had. Yet the whole thing went with a swing. Thanks to Mark for a great occasion, and the logistic support ('Victory' beer!). And thanks to my ally, Andrew and frequent over-the-table enemy, Paul. I leave a few more late action pics - especially the charge of the Nassau-Usingen Cuirassiers at the close of the day.
 |
| ... and exploit on the roll up an infantry battalion as well! |
 |
The victorious Austrian cuirassiers, get ready to retreat
after their successful raid. |
 |
Massena still commands strong reserves in the centre, which
might yet have proved decisive. |
 |
End of the action on the French right. The cavalry are at last
ready for another round, but night is drawing in... |