Thursday, November 30, 2017

A hex coordinate idea...

In a recent blog a method of identifying hex cells was offered that could be read off like a squared off map.  My own experience suggests, though, that it is very easy, when reading the 'against the grain' coordinate, to get  the zigs and zags wrong.  I've come up with a system that (a) obviates reading errors, and (b) no one will ever use. 

There it is.  All coordinates are read off in straight lines.  The black markers show which direction the labelled lines run.
In the diagram above, the 5-pointer star is at 6E the 6-pointer at 5J (Note that I have omitted 'I', for entirely arbitrary reasons).  I was wondering just how practical such a system would be.  Probably not very.  I can quite understand why many hex-grid board war games label every cell.

I'll close here with a snap from a 'set piece' playtest in preparation for the Operation Uranus game.  Let us say the 'chelovyek' are getting in some training.  I'm expecting a very tough battle of attrition to begin with...
The attacks go in.  It is not looking promising for the
Red Army...
Note that the trenches and obstacles merely indicate that the Axis troops are in well prepared fortified positions.  I was testing the idea that the defenders could ignore the first (but only the first) SP lost per unit, whether from artillery fire or under close attack.  The flank attacks should negate the fortifications, but in the actual event, army boundaries will put early flank attacks pretty much out of the question - until of course, a breakthrough can be achieved...


Monday, November 27, 2017

Disaster at Apresski

6th Shock Army on its start line.  Day 2 of its assault on
Apresski.


17th Panzer Division waits...
I had such plans for this particular posting, and the thing has come out a complete frost.  Well... not completely complete, but a chill in the air, all the same.  Informative, but not sure what conclusions to draw.  In my previous posting I set up a follow-up action to the 6th Shock Army attack that proved so fatal to the German 222nd Infantry Division.  Bringing up 544th Grenadier Division, a weak formation of just 11 SP, the Germans were to attempt the defence of Apresski, a communications nexus that was the original objective of the Soviet attack.

544th Division rather thinly deployed around Apresski itself
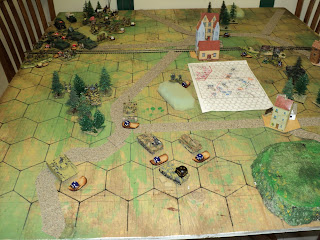
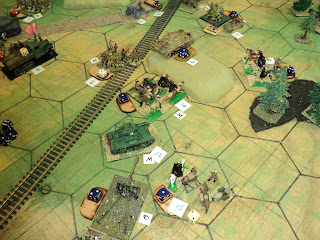
The next few pictures show the set-up: 6th Shock Army massed in the southern corner of the board, 544th Grenadiers defending a line spanning the high ground either side of Apresski itself, whilst 17th Panzer Division hung about to their left with some notion of counter-attacking the flank of the Soviet thrust.
Dawn breaks over the Russian Front...  The little buildings
in the village at lower right are home made.  The orange roofed
one accidentally made from plastic card.  I thought that
cardboard was behaving oddly...

The relative strengths of the opposing forces were about two to one.

544 Div HQ, near the village of
Obshchinovo.  Buildings home made,
one from a downloaded file.

Overall it looked more a challenge to the defenders than to the attackers.  The 544th were spread over a distance of maybe 20 kilometres - a bit of a stretch for such a small Division.   Their task was to hold, whilst 17th Panzer struck the right flank of the Russian attack.
Using order chits and priority markers. The latter are
activated in increasing numerical order.
It proved in the first action beyond the strength of 544th to hold for any worthwhile time.  At the purported time of the year, the hours of daylight lasted 7 game turns.  Three of the four infantry Divisions and the Cavalry Corps were to attack the town itself and punch through the difficult looking country about Apresski town.  The Tank Corps (139th, 140th and 141st Tank Brigades and 47th Infantry Division) was to attack and drive back the enemy Panzer Division.
The Soviet advance begins.
It was supposed that the attacks would go in with the Army artillery (3 SP) laying down a barrage by the map into the town.  Lo and behold if the very first salvo didn't roll two sixes on the three dice.  At this point I am forced to admit to a misreading of the HEXBLITZ combat tariffs, by so doing taking that as two hits, and the garrison - 489th Grenadier Regiment - abandoned the town incapable of further action.  However, one hit would have been a serious matter enough.  This raises the first point that might deserve consideration: ought the defenders in a town (and formal defence works) be given some bonus.  Two possibilities: (1) the town is given an SP=1 ( a fairly substantial place, unlike the outlying villages to the north and east); (2) this is where doubles might kick in - this will be explained anon.
140th Tank Brigade was delayed by a traffic jam.  Should it lose its
turn, or 'reserve' its move?  Here it 'lost its turn' but I think
'reserving' its turn until it could move is a better option.
As the infantry plodded forward - it would take all morning to close upon the town - the Tank Corps swung off to the right.  The Germans weren't going to lie down to be hit.  Whilst the panzergrenadiers held a line in the woods, the panzer battalions were to carry out a pincer counter-attack in the open country on either flank.
A fierce battle rages against the panzergrenadiers.  Soviet attacks
 by 47th and 316 Rifle Divisions are made separately and defended in
turn by the Germans.  The Germans could call in support against both
from the Panzer Div Arty. Probably only 47th Rifle Div should have been given
 artillery support from 8th Tank Corps Artillery, as, unlike the 47th,
 the 316th is not part of the Tank Corps.
Even before the panzers' intervention, the Soviet infantry got the worse of the battle in the woods, the early exchanges halving their strength, whilst the German lost just the 1 SP out of 5.  With my Soviet hat on, I would have preferred right here to have had the Russians' 316th and 47th Rifle Divisions break off the attack, pull back a space and then prepare to dig in.  The rule set seemed to indicate this was not permitted, but it is not totally clear on this.  I might well be mistaken. I'll raise this point later.
Heavy losses among 47th and 316th Rifle Divisions.
The action in that sector of the front was to exhaust the two Rifle Divisions and one of the Tank Brigades as well, at considerable risk to the Army's flank.
489th Infantry Regiment forced to abandon Apresski
under the weight of 6th Shock Army artillery.


However two of the Tank brigades maintained a northerly push on the right flank of 88th Rifle Division with a view to carrying the high ground to the east of Apresski, then held by 200th Grenadier Regiment.  The town itself was to be the objective of 88th Rifle Division.

Massed Soviet infantry about to swamp 490th infantry
and its anti-tank support.
Eventually, so weakened were the grenadiers along their entire front that the Rifle Divisions, together with the cavalry on their left, simply swept through the town, and the wood and the hills west of the place.
End of the action.  Apresski has been cleared of the
Hitlerite forces...
Seventeenth Panzer Division's victory over 8th Tank Corps was also dearly bought. Reduced to an exhausted state they had to pull out; the remains of the rest of the division taking to the road north, away from the action.  Apresski was taken, and, shortly afterwards, night also fell.
Battered but unbowed, 17th Panzer Division takes to the road.
The Panzergrenadiers' SP reduced to 0, it remains a force in being

The assault on Apresski (Alternative Universe). 
This one used the 5-5/6-6 results option.
So far, so apparently satisfactory.  Sixth Shock Army had taken its objective and forced the Germans to abandon this part of the line.  But the costs to 8th Tank Corps (and the day before to 5th Mechanized Corps)  had been prohibitive.

Then I noticed a 'continuity glitch' on the table: wood that wasn't there that ought to have been. This I might have let go, but then, re-reading the rule set, a suddenly realised my interpretation of one of the results was quite mistaken.  This had to do with hits being scored on rolling 'double 5 and 6'.  Now, my interpretation of 6 and double-5 was correct in logic, but wrong in context.  Faced with ambiguity I always do this.  Of course, what was meant was 'double-5 and double-6'.

This I couldn't let go.  So a couple of days ago I refought the action.

The missing woods were replaced, and the action was fought using the 5-5, 6-6 requirement to knock off one SP from a unit in 'defence'.  This did not go at all well for the Soviets.  It was a complete and utter disaster, as the following sequence of pictures will show.  After 5 game turns, the Germans had lost 6 SP; the Russians 27 - enough to exhaust the whole Army if I were using such a rule.  The next turn was sufficient to carry the 544th Division line, but by then to inflict 3 SP, the Soviets had paid another 7!  For its part, though battered after two days of action, 17th Panzer remained still in fighting condition.
Of the two results, it seemed to me the former was the more 'realistic'  The Germans were beaten out of their position in a two-day battle, but it cost the Red Army the bulk if its two best and strongest formations.
So what did I learn or conclude from this?

A general advance - no sophistication, here.
I'll begin by saying that HEXBLITZ is one of the most accessible WW2 rule sets I have even encountered.  For mine, it is just the type of game I want to play.  I could probably add Megablitz to this, since the former is an adaptation of the latter, open table rule set,  to a hex-grid set up.  Some further adaptations seemed to me desirable to 'fit' my collection of stuff, and it was going to be easier to do this with the orders of battle and possibly the rule set than to my armies.  We'll see.
Panzergrenadiers position astride a hex-side.  I adopted this
idea for this game.

Before continuing, a word on what I consider to be the core of HEXBLITZ.  Units have three possible stances, postures, or (as I tend to term them) modes: 'M' - Moving/Mobile, 'S' - Stationary, 'D' - In Defence/Dug in.  That's it. What makes the thing most elegant is that 'S' is entirely a transitory stance: on the way from ceasing movement to take up a defensive posture, or about to abandon a defensive posture and move off.  In combat, the fighting capability of units is affected by their posture, 'Defence' being the strongest.


47th Rifle Division broken, without inflicting the slightest hurt
upon their enemy.  Not a good augury for Soviet fortunes.
My first thought that this was really too simple - and was thinking more along the lines of the 'SMART' Megablitz system.  But I really want to give the 'DMS' system a good shakedown first. For one thing it was not always clear what an artillery unit's stance should be when supporting an attack, say.  After one game I figured that, unless under direct, close range assault, artillery should shoot only whilst in 'Defence' posture.  It seemed to me a good thing also that Corps and Army artillery could change targets only after a 1 turn delay, and what better method suggested itself than for them to switch from 'D' to 'S', then back to 'D'?  Divisional artillery being nearer the sharp end I figured would be less subject to delay, and could switch at once if a fire programme called for it, or a spotter were available to guide the mission.
490th Division proved almost as obdurate.
The rule set allowed defenders to call upon the support of friendly artillery for each attack against them in a single game-turn. A single artillery unit so engaged could support just the one unit or hex-location. But what about the attacker?  Could he call down supports for each attack, provided the target were the same each time?  Seems reasonable to me, and in fact, trials seem to indicate this is quite a good use of artillery in attack.  Each shoot would go to depleting ammunition supplies, so that one would need to have stockpiled a reasonable quantity in aid of a set piece attack, say.
Armoured clash east of Apresski.  As both were under
'M' orders, it was unclear after the first clash where to
go from there.  The Soviets got the better of the first contact
that much was clear!

Let's look at a number of other points that occurred to me. These I mentioned in an email to Bob Cordery (author of HEXBLITZ).  I've copied that part of the email here, hence the change of font. These are really questions of (a) clarification, and (b) making a decision one way or another as seems reasonable.  

1. Can an attack be broken off by the attacker before it is completely worn down?It seems to me reasonable that this be allowed, since attacks are made in 'M' posture, with the proviso that any such move does not enter the 'zone of control' of (hex adjacent to) of an enemy unit, nor carries it into a friendly unit (for the moment I don't allow stacking, though HEXBLITZ itself permits it (conditionally)).


2. Can an attacker change posture to 'S' and or 'D' whist still in combat, and does the combat continue?  Of course, if it does this, then breaking off becomes more problematic.On the whole, I think not.  But it's an idea!


3. Can a combat be broken off by the defender?  This I grant would be difficult, as I am still imagining it as going from 'D' to 'S' to bugging out, if it can, on 'M'.This should be allowed, to my mind, because it won't be easy to pull off.  But it might be a way of extricating a battered unit before it can be destroyed.  Might be fatal against a faster moving enemy!


4. What happens when two moving units collide?  (This is a typical case of something I discovered when I was a computer programmer - a zillion years ago, now - 90% of effort goes to 10% of cases.  Such combats won't happen often, but they will happen, especially when tank units are involved.) 
II/39 Pz Bn overrunning Russian infantry...


Attacking the 544 Division's line.  Losses among the Russians
were enormous.

As both are in 'M' mode, then the one moving gets in the first hits as attacker, and has the advantage accordingly. But as units are moved according to priority numbers drawn at the beginning of the turn (You want player interaction? You get it with this system!), a number of permutations present themselves. 
For instance, the German I/39th Panzer Regiment and the Soviet 141st Tank Brigade are both given an 'M' order.  The panzer draw a number 10, the Soviets a 17. The panzers take the opportunity of striking the enemy tanks.  Let's say both have 4 Strength Points. Both roll 4 dice. The 'attacking' panzers will knock off a Soviet SP for each 5 or 6 rolled; the 'defending' Soviets require a 6.

Now, when the Soviets' priority number comes around, do they attack, with the score requirements reversed?  Should they be considered to have made their move (after all it was just chance that allowed the panzers to move first)?  Should their stance be automatically changed from 'M' to 'S'?  All of these seem reasonable, yet they are mutually exclusive.  I probably prefer to allow the Soviets to play out their counter-attack or break-off(?) as their priority number comes around.  That will reflect the swirling, to-and-fro, and destructive nature of tank battles fairly well, I imagine.

This brings me to a more general application of priority rules.
  

5. When orders are being carried out that involve a change of status, are they dependent upon priority? An example cropped up when a 'M' unit was changing to 'S'.  That unit drew a highish priority number.  Not far off an enemy unit, still with 'M' orders, but with a lower priority number, took its opportunity to thunder in and make contact before our friend could use his number.  Now, does the defender count as 'S' or 'M'?  This is particularly critical when a unit changes from 'S' to 'D'.  The simplest method is to state that the order is in effect the moment it is issued - i.e. from the start of the turn.  That seems to be implied when priority counters are not assigned to 'D' units.  If we want priority to signify in these instances, maybe D->S S->M M->S and S->D order chits might be indicated (mainly as an aide memoire, really).
47th Rifle Division about to be overrun.

Losses have already proved prohibitive.


Look what's happened to the Soviet infantry, by Jupiter!
139th Tank Brigade, 88th and 259th Rifle Divisions
all decimated, as are the Cavalry Brigades.  Only the 301st
Rifle Division is still in action, rolling up what's left of
544th Grenadier division.
Although I like the idea of the previous order remaining in effect until the unit's priority number comes around, it does seem a deal more complicated to administer.  On reflection, if transitional order chits were being used, there would be no need for straight 'S' chits. For mine the jury is still out on this one. It would certainly simpler to give the order chits immediate effect.

6. Having artillery fire in support only in 'D' mode seems to work quite well I think.  I also like the idea of allowing an artillery stand to shoot in support of more than one attack (by units of the same formation or next echelon up) against the same hex/hex-side/hex-point.  I also quite liked the method of switching targets at corps level or higher by D->S->D. 


7. Units placed astride hexsides and upon hex-points seem like a really neat idea, but it's not that easy working out ranges.  I have some ideas about that, but they require a diagram to explain.  I'm also thinking that a unit placed on a hex-point is automatically in 'all-round defence' posture: no flanks or rear.  

The following diagrams suggest firing ranges out to 2 hexes, dependent upon facing.  The numbers in parenthesis apply to defence against attacks in flanks or rear.  Here I also suggest that a unit or formation occupying a hex-point ought to be (allowed) all-round defence.  There is no especial reason that this has to be mandated, but it seems to me an idea worth entertaining, at least.  It is possible that the ranges suggested here are too generous, and that 1 should be added to the corners of the triangles. 

I've also assumed that a unit or formation occupying 2 hexes at once stands astride a hex-side.
But what about along a hex-side?  The thought has certain attractions.  The unit will be covering a very wide front, with zones of control to match.  But it can also be subjected to a greater number and variety of attacks in any given game-turn.
Well past exhaustion, 6th Shock Army carry the town, but
their chances of holding the place against even a weak
counter-attack are remote.
Finally, a point that I have just been reminded of.  What happens when a unit's SP reaches zero.  It is not destroyed, and, if it can retreat, it survives in being.  If attacked again, then it is eliminated.  I assume that it must retreat one grid-area the moment its SP hits zero, though its status becomes 'M' only if it was already at 'S' or 'M'; and become 'S' if at 'D' when it lost its last SP.  What happens if it can't retreat?  I infer from the rule set it is still not destroyed, but will be when (or if) attacked during the same or subsequent turns.   
I'll leave it here with these questions remaining to a large extent open.  What is intriguing about them, is that I can come up with several disparate answers for most of them and they all make some kind of sense.  That is what makes the decisions so hard.

Monday, November 20, 2017

A Second Attempt

Overall picture at dawn, Day 2.  The table may be recognisable
from the previous day's action, but moved along and reoriented.

This is a quick posting - a deal shorter than planned - outlining the second day of 6th Shock Army's offensive.  On this occasion, the battered 5th Mechanised Brigade had been pulled out of the line, and the rest of the Army's formations have been drawn in, supported by one of its Medium Artillery regiments.  I have in fact already played out this action, only to discover:

1.  An annoying 'continuity error'.
2.  A misinterpretation of one of the combat mechanics - so badly that the result can not stand.

The battle will simply have to be refought! O, the hardship!
6th Shock Army on its start line.

Orders of Battle:

Soviet 6th Shock Army:

Commander, General M. M. Popovitchski
Army Staffs, sigs etc
Army Transport Column: LOG=2
1063rd (Medium) Artillery Regiment: (1x152mmm piece, half-track tow) SP=3
8th Tank Corps:
     General, SP=1
     HQ staff, sigs etc
     Supply Column, medium truck LOG=3
     139th Tank Brigade (T34 and infantry stand) SP=3
     140th Tank Brigade (T34 and infantry stand) SP=3
     141st Tank Brigade (T34 and infantry stand) SP=3
     47th Rifle Division (4 rifle stands) SP=4
     77th Field  Artillery Regiment ( 76.2mm field gun) SP=2
4th Cavalry Corps (weakened by losses, and less its Tank Brigade)
     General SP=1
     HQ: staff, sigs etc
     Supply Column, 3 pack horses LOG =2
     6th Cavalry Brigade (2 Cavalry stands) SP=2
     7th Cavalry Brigade (2 cavalry stands) SP=2
     Field Artillery Regiment (76.2mm field gun) SP=2
88th Rifle Division (6 rifle stands) SP=5
259th Rifle Division ( " ) SP=5
301st Rifle Division ( " ) SP=5
316th Rifle Division ( " ) SP=5

Totals by 6th Shock Army: SP=53; LOG=7

German Forces:

17th Panzer Divsion (weakened by losses):
     General SP=1
     HQ staff sigs etc
     27th Supply Column LOG=3
     I/39 Panzer Battalion (PzIVG) SP=3
     II/39 Panzer Battalion (PzIIIM) SP=2
     40/63 Panzergrenadier Brigade (4 stands, 1 halftrack) SP=5
     27th Panzerartillerie Regiment (Wespe SP 10.5cm light artillery) SP=2:

Totals by 17th Panzer Division: SP=13, LOG=3

544 Grenadier Division (arrived overnight)
     General SP=1
     HQ staff sigs etc
     544th Supply Column LOG=1
     200th Grenadier Regiment (2 Rifle stands) SP=2
     489th Grenadier Regiment (2 Rifle stands) SP=2
     490th Grenadier Regiment (2 Rifle stands) SP=2
     544th Panzerjager Battalion (PaK40 75L46 with truck tow) SP=2
     544th Light Artillery Regiment (10.5cm howitzer with horse traction) SP=2

Totals by 544th Grenadier Division: SP=11, LOG=1
   
A note on Strength Points.  Rather than using SP by stand representing a battalion, I have adopted a more collective approach to the infantry.  Infantry, still representing battalions (more or less) are grouped by regiment, brigade or Division, with a base line of 1 SP per base.  The number of stands will correspond approximately to numerical strength, but the SP values will be adjusted by troop quality, equipment, and mobility.  Apart from the small 47th Rifle Division, the Soviet Rifle Divisions' SP have been reduced by 1 apiece in accordance with their status as conscripts.
The observant reader might have noticed that the tank brigades of the Tank Corps all have SP=3, compared with the SP=4 or 5 of the Mechanised Brigade. This is in fact to represent numbers compared with the rather larger tank inventories in the Mechanised Corps.  The Heavy Tank Brigade in that Corps got an extra SP on top of that for its superior armour (KV85).  Meanwhile, 544th Grenadier Division, though fresh, is a very weak formation by German standards, qualitatively and quantitatively.


To the right is the table replotted onto a map.  Well, actually, the map was plotted first, and the table plotted from the map.  The pink arrowed lines purports to be General Popovitchski's battle plan.

To be continued.


...


...


...


Friday, November 17, 2017

HEXBLITZ approximately - the Assault against Apresski.

The Soviet push to take Apresski began at dawn, with a general advance by 4th Guards Cavalry Corps, 316th Rifle Division and 5th Mechanised Corps.  At once the 5th Mech Corps artillery began its bombardment of the German line, which stretched between heights 605 and 609.  On the right covering the defile between Hill 605 and a stretch of woodland stood 189th Infantry Regiment.  Thirty-second StuG Abteilung covered the heights themselves. Between the hills, the towed PaK40s of 181st Panzerjager supported the 35th Infantry Regiment.  Height 609 was crowned by the Marders of 239th Panzerjager and 125th Infantry.  Close by the Div HQ, 181st Artillery Regiment were dug in their battery positions.


As the opening salvos of the heavy Russian guns thundered through the dawn, 17th Panzer Division lurched into motion, passing through and to the west of Apresski town on their way to the front.
17th Panzer Division moving up

There was nothing sophisticated about the Soviet assault: a broad frontal attack straight up the Apresski railway line.  A reconnaissance the night before had indicated that both flanks of the German line were open, or at least occupied by nothing more than patrols.  On the left flank, 139th Tank Brigade (T34) was to execute a left hook around the forest onto the German flank.  On the right, 6th Guards Cavalry Brigade were to carry out the other wing of the planned double envelopment.
The frontal attack begins early. At considerable cost.
 140th Tank Brigade punches through 35th Regiment:
141st (Heavy) Tank Brigade tries to widen the breach.
Before these flanking movements could have been fully developed, the main attacks struck the German line.  Helped by the supporting heavy artillery, 140th (Medium) Tank Brigade pierced the defences of 35th Infantry Regiment, and drove them back.  But in following up this success, the tanks came under deadly flanking fire from the Marders and towed AT guns.
'All in the Valley of Death rode the T34s...' The Quad AA
is there just to make the German Div HQ look more ...erm ...
HQ-ish.  I have ideas about that, though...


Unable to escape the deadly flanking Anti-tank and artillery fire, 140th Tank was reduced to a pile of smoking scrap metal.  The heavy tanks of 141st Tank broke themselves trying to overrun the dug-in PaK40s of 181st Panzerjager Abt,  The German line remained, more or less, intact.

The Russian Heavy Tank Brigade, reduced to remnants,
(SP=0), pulls out of the line.
A point here on the narrative.  At times I will refer to flanking fire, or flank attacks, but they have no significance on the combat mechanics.  I've chosen to assume defenders have an all-round defence posture.  Where flank attacks do become significant is in the possibility of a formation's flanking units being caught by multiple attacks.  So 125th and 189th German infantry Regiments were particularly vulnerable.
The CavCorps light Tank Brigade has also lost most of its
armour, and pulled back.
The attacks on Hill 609 were also stalled.  The light tanks of the Cavalry Corps were soon depleted, leaving 7th Guards Cavalry Brigade sustaining an unequal battle until 316th Infantry Division should come into action, and 6th Guards Cavalry developed their flank attack.
139th Tank Brigade attacks 189th Infantry Regiment from the
west,  17th Panzer are still distant.
The lack of mobility of their infantry rather hampered the coordination of the Soviet attacks, for which the Tank Brigades suffered severely.  Even 139th Tank's attack began before the 5th Mechanised Corps' 47th Rifle Division could come up.
125th Infantry under attack front and left rear.
Once fully engaged the battle flared up anew, with heavy losses on both sides.  Beset on front, right flank and left rear, 222nd Division anxiously awaited the intervention of 17th Panzer Division.
The pressure mounts against the German right....

Soviet 316 Rifle Division throws their weight against Hill 609.

47th Rifle division taking heavy casualties; 189th Infantry Rgt
hangs on grimly.


Even at their best speed, the panzers intervention was already too late for the infantry.  Both flanks were already crumbling by the time 17th Panzer got close enough to make a difference.  However their intervention was timely enough to permit the remnants of 189th Regiment to pull clear.

A second narrative aside, here.  Under the HEXBLITZ system a unit or formation reduced to 0 SP is not automatically destroyed.  If it can retreat, it must do so at once one grid area, its 'mode' being changed to 'S' if previously 'D'; 'M' if previously 'S'.  If it can not retreat it remains in situ, but if engaged again does get destroyed.  So far, 35th and 155th German Regiments has suffered that fate, though in the case of the former, it was the following up T34s that sealed their doom.  Vengeance against the 140th Tank Brigade was swift and equally thorough.  On the other hand, the light and heavy Tank Brigades, both also reduced to 0 SP, were able to break off their attacks and pull back.

... At this point it might have been as well to check up upon the wellbeing of the several formations.  I was using the Portable Wargames convention in which once the overall SP of one or other side had been reduced to 50% or less of the original army total, then that side was exhausted and incapable of further offensive action.  By this time, 222nd Division had been crushed, pretty much, though the anti-tank units were still in action.  But 5th Mechanised had been equally decimated. 

Upon reflection, I think this simple approach is best, as a problem will arise if testing formation by formation when we consider the 1-hex formations.  Unless, of course the test is reserved for multi-hex formations...?
The acutely observant reader will notice the sudden appearance on the table of numbered and lettered cards.  Until now,  the passive posture of 222nd Division and distance of 17th Panzer indicated that a good deal of time could be saved in this solo game simply by playing it IGoUGo.  The intervention of 17th Panzer forced the assumption of the numbered priority system.  This turned out rather well for the Germans I/39 Pz Bn drawing a '5' and II/39 Pz drawing the '1', whilst 139th Tank Bde drew a '19'. The '10' drawn by 40th Panzergrenadiers would have been useful but for the '25' drawn by the remnants of 189th Regiment.  That meant the latter could not in time clear the former's front.
139th Tank Brigade might be in trouble...
Although the panzers did not quite succeed in destroying 139th Tank, their attacks allowed 189th Infantry to escape.
Hill 609 cleared, the cavalry follow up...


The Russians carry Height 605.  
On the other flank, 4th Guards Cav Corps had at last cleared Height 609, and swept on to catch up with the retreating Marders.  Caught up in a traffic jam of rear echelon and Headquarters troops only tardily lurching into rearward motion (very careless, this!) the Marders succumbed to the rampaging Soviet horsemen.

By now both sides had taken such losses that I bethought myself it were high time to check the remaining strength of both sides.   Out of 33 SP, the Germans had lost 17 - 15 from 222nd Infantry, 2 from 17th Panzer.  The Russians had lost 20 SP.  That ought to have meant both sides would abandon further attacks or aggressive moves; effectively bringing the action to a close.  Having miscounted the latter's overall strength at 41 SP (instead of 39) permitted the latter to carry on with their assault.
The panzers broke off their counter-attack and immediately put some distance between themselves and the enemy.  The HQ and transports of 222nd Division weren't so fortunate, the Soviet cavalry catching up with them and destroying the transports and the supplies they carried, and overrunning the HQ as well.  In fighting back, the German HQ units did enough damage to their assailants that the latter also broke off.  Meanwhile, the retiring German artillery, finding the road congested with the towed panzerjager elements had to take to the railway line to continue their retreat (one of the interesting effects of the priority card system!).  Fortunately for them the Soviets had nothing in hand to mount an effective pursuit.
The Germans break off the counterattack and pull back.
By this time the day was done (I didn't actually count the moves, but I think there were 6, possibly 7 played, close to the full period of daylight for an early autumn day).  The Soviets had carried the 222nd Division's defence line all across the front, but at a very high cost.  222nd Division was destroyed, pretty much, as a military formation (in a campaign context, there wouldn't have been enough left to reconstitute much more than a brigade - if so much).  There wasn't much left of 5th Mechanised Corps, either, the whole formation taking a terrible battering.  Nor had the Cavalry Corps come off lightly.  But 316th Infantry, the decisive reserve that had helped finally to clear Height 609, had hardly any loss to deplore (finishing the day with the SP they began with).
Close of the action.  The Soviet front line has been pushed some
12 - 16 kilometres northward.  The Germans still hold the town.
For all that, the result was satisfactory to neither side.  The Soviets were still well short  - 6 or 8 kilometres - of the town that had been their objective.  The Germans had lost their main defence line.  Still, the former still had three unengaged Rifle Divisions and the 8th Tank Corps available for a second attempt.  17th Panzer Division hadn't taken too much damage, and 544th Infantry Division moved up overnight to take up positions in and around Apresski.  Neither side was done yet.