|
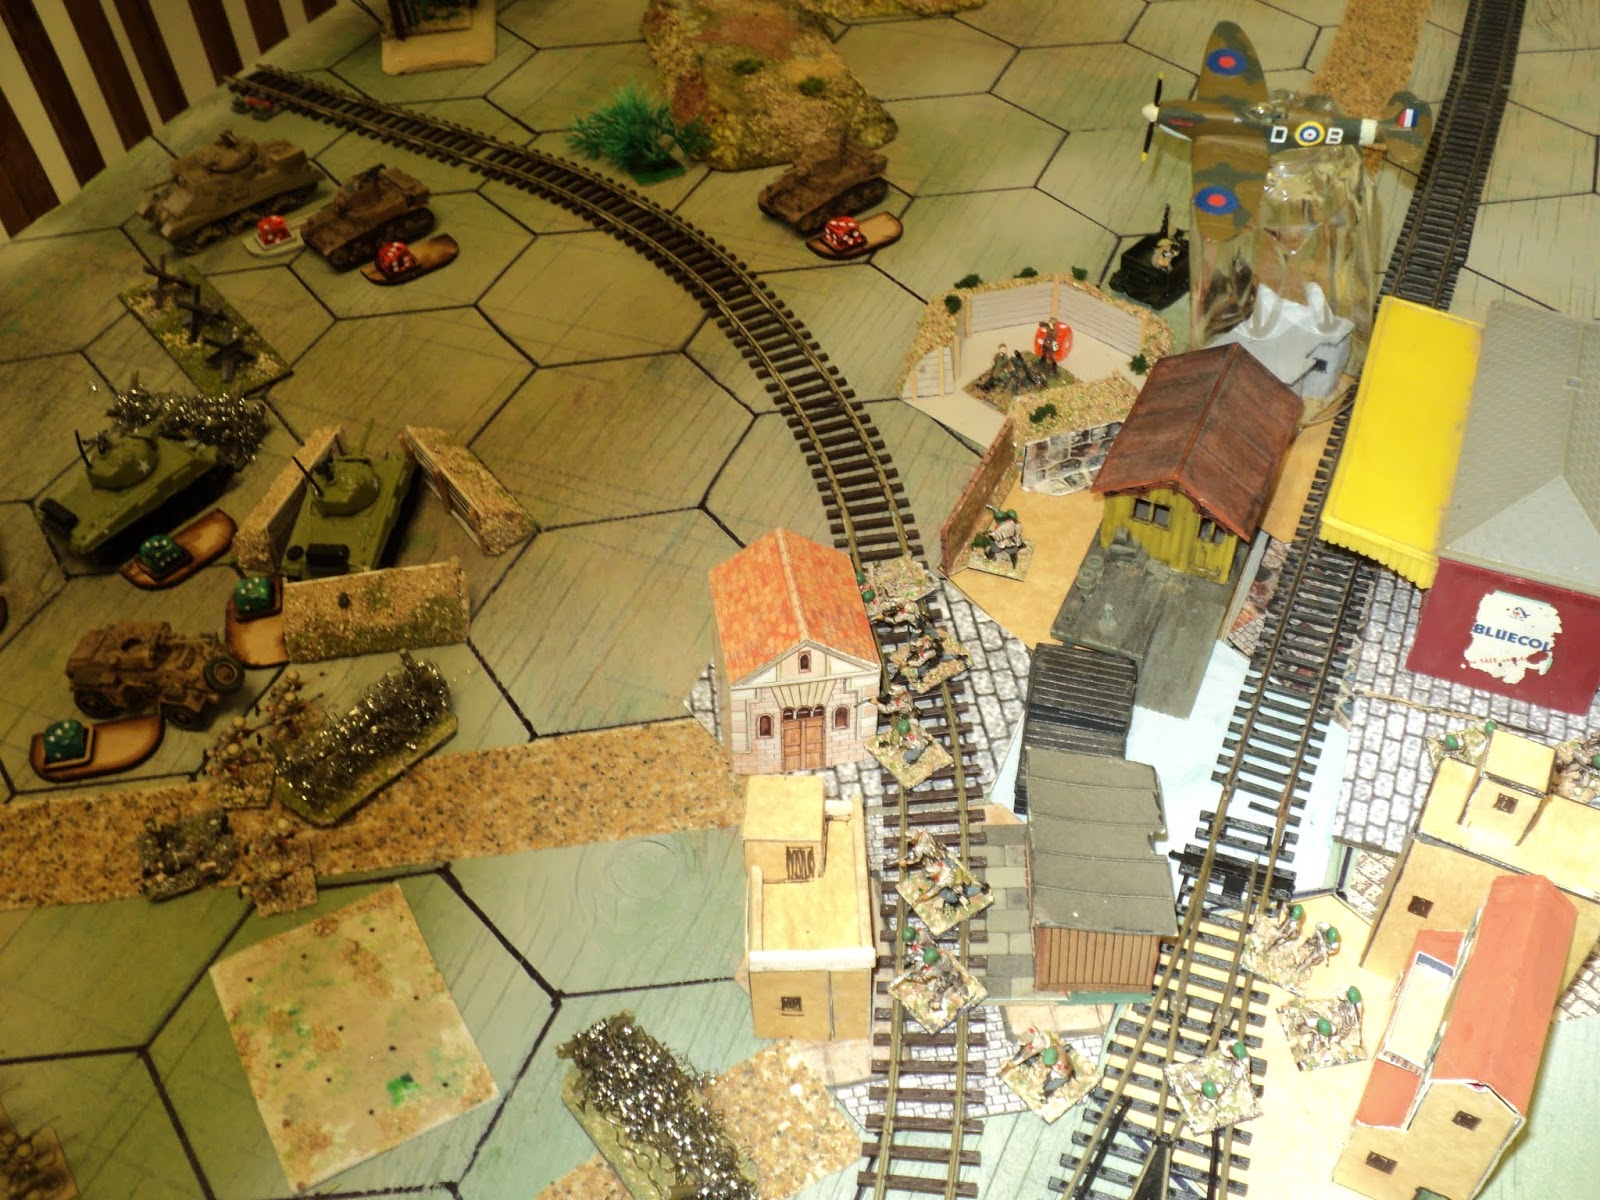
| 366 Sqn Spitfires strafing rebels in the town. |
As the Government Army, facing the dawn, surged forward from their start lines, the first salvoes of an entire 25-pounder field regiment thundered out, concentrating their pounding upon the BARF positions on the western edge of the Maibad Station. The soldiers of the 22nd Punjajoodi Battalion cheered and were cheered by a flight of 366 Squadron Spitfires, snarling overhead to strafe the rebels occupying the southwestern quarter of the town.
 |
Strafing run by A Flt/ 366 Sqn. The arrowheads show the
Revolutionaries' positions attacked. |
Before resuming the narrative of the ground troops' assault, I will relate here the flight of the A Flt/366 Sqn. The map showing the flight path will tell you how the the strafing runs were managed. As a single seater fighter, the Spitfire travels at 12 hexes the turn, reduced by 1 hex for each strafing. When turning, the aircraft may turn one 'angle' (60-degrees) only, and then only after moving at least one hex in a straight line. The map indicates the minimum turning circle, and overall how the whole flight was carried out. Allocating activations of flights and 4 batteries of artillery did rather mean that the Government attack developed fairly slowly, and in a more piecemeal fashion than I would have preferred, but that is the nature of this type of solo play. Contributing to uncertainty contributes to interest.
The first strafing run, into the town, was reasonably successful, the aircraft's machine guns and cannon scoring one hit (3 dice, 1 '6' rolled), resulting in A Coy, 2nd BARF Infantry taking a SP loss. The aircraft then fetched a wide sweep, circling around to attack on Move 3 the 6-pounder anti-tank battery on their portees.
 |
South front: Daimler armoured cars probing Revolutionary
positions. Both sides have taken hits... |
Those guns had been emplaced in a field redoubt whence they had let fly at a probing squadron of Daimler armoured cars. Both sides inflicted damage, but the guns were induced to abandon their position. Manhandled out of the redoubts, they were loaded up onto their portees, whence they resumed their duel, aided by the nearby mortars, against the armoured cars.
 |
| ...but it is the anti-tank battery that abandons the position. |
 |
| An unsuccessful strafing run - at a prime target! |
In the open, placed vulnerably upon their truck portees as they were, the 6-pounder battery might well have been destroyed right there. The aircraft let rip...
Wherever the bullets went, it was not aboard the portees. Not a single hit!
(Aside, here: the rule set called for 3xD6 for each machine gun, but as the minimum armament for any Spitfire was 4 MGs or cannon, I could scarcely imagine that 12 D6s (or 18, or 24) ought to be rolled for effect. Even with just 3 dice, the statistical expectation would have been for one hit, and that at better than two to one on. Actually, re-reading the rule set, Bob explicitly allocates 4 MGs to single-seaters, which indicates that I should have rolled 12 dice for each strafing run. Wow! At a statistical expectation, that could have been very damaging!)
The next point of aim was to be the mortar battery in the redoubt at the northeastern corner of the town. That required the flight to make a circle over the town before making their strafing run. Once again this proved ineffective, the protection offered by the field works serving to reduce the chances of injury to the battery. For the purposes of this game, I allowed just the three strafing runs for this flight, whereupon it could leave the battlefield (still requiring activation to do do) with no cost to the Army's Strength Points. So it did at Move 5. The results had been moderately disappointing.
 |
Tank duel. Outnumbered and outgunned, yet it is the
Revolutionary armour that score the first blood -
and the second! |
Meanwhile the Government main thrust developed in the left, intended to force its way through, over or around the obstacles and fortified line stretching northward from the town. As also on the south side, the line was angled back from the town's western edge, the whole defence line forming a shallow, blunt, arrow head. As the tanks closed in upon the open flank, the Revolutionaries' own armour raced forward to meet them. As a brisk tank fight developed, it became quickly apparent that the Government armour had become too bunched up. Squadrons C and D both took damaging hits (partly due to retreat being impossible) before so much as scratching the paint on the lighter armour facing them.
 |
The infantry defenders driven out of their field
works, A Sqn 6th Armoured Rgt occupies the redoubt. |
Possibly this was also partly due to at least one armoured squadron joining the Humber armoured cars in machine-gunning a company of the 'Sons of Revolution', reduced to platoon strength, out of their field works. As the survivors fled, A Squadron drove into the position and joined in the tank fight. By this time, both C and D Squadrons were down to one-third strength. The Grants of the 'Scimitar' Regiment had taken some loss but still retained more than half their numbers.
Apart from the disaster at Nawabisbad, the Revolutionaries' armour, outgunned and out-armoured as it was, had given throughout the campaign a very good account of itself against their Government counterparts. So it was proving here, somewhat to General Lord Redmond's concern. On the other hand, even after taking 4 losses to one, reducing the numbers to equality, the Government still retained a qualitative superiority. He ordered the tank fight to continue.
 |
Gunfire has caused the Revolutionaries to abandon part of their
defence line. |
In the town, the Revolutionaries were finding it difficult to withstand the heavy gunfire the Government was laying down upon their positions. Twice already, A Coy of 2nd 'Volunteers' had been forced from their positions, but Government troops not being on hand yet to exploit the situation, they had been allowed to return. The infantry of 31st Kashinkari had in the meantime avoided the minefield and closed up upon the barbed wire close by the abandoned redoubt, where they came under small arms fire from the town.
So had the 31st's MG platoon, losing half its strength to small arms as they struggled to set up their firing position. Their vengeance was swift and dire: Three sixes on 3 dice, 6's needed to hit. It was all too much for 'Sons' Battalion 'C' Company, the remnants also fleeing back into the town alongside the 'Volunteers' comrades.
 |
The reduced machine gun platoon lays down a very effective
support fire! |

As soon as they could clear the barbed wire, the 31st Kashinkari riflemen were ready to storm into the built up area that formed the nucleus of Revolutionary resistance. The barbed wire cleared, three companies from Kashinkari and A Coy from Punjanjoodi were already closing in, unchallenged, upon the outlying precincts of the town.

By this time, the armoured battle had seen the destruction of the 'Scimitars' D Squadron, the feared Grant tanks that had drawn the almost exclusive attention of the Government armour. But that had merely followed upon the equal devastation of the Government's D Squadron. Furthermore, B Squadron was also starting to take losses. The government tanks had still taken double the losses that the Revolutionaries had. So far, the planned sweep was still stalled. well short of the North branch railway line.
 |
Both sides 'D' Squadrons reduced to smoking ruin. But the
Revolutionaries still get somewhat the better of the armoured battle. |
The four companies defending the town, found the artillery and MG fire coming into the western precincts rather too much, drew back towards the commercial district and the railway station. Cautiously, the attacking infantry followed up and occupied the abandoned streets. It was going to be a hard slog to clear the rest of the town.
 |
Four Government infantry companies, supported my MGs
about to plunge into the town. |
This, despite the losses the garrison had already taken. So far, the Government troops had made little effort against the defences on the south side of the town. The probe by a squadron of Daimler armoured cars had left most of them smoking on the field (they lost the duel against the anti-tank guns backed by mortars, and were reduced to 0 SPs), after which little was happening in this third of the front. The acute pressure elsewhere led Col Peenut Buttahjars to order the anti-tank battery across to the right flank where they were to deploy behind the railway branch line, close by the 1st Battalion mortar battery.
 |
The burning remains of the Daimler Squadron. The
Revolutionaries shift the unengaged units on this south flank
to reinforce the embattled forces elsewhere. |
At the same time, C Company of the 2nd 'Volunteers' was ordered towards the railway station to beef up the crumbling resistance in the town.
 |
| Government pressure mounts... |
Gradually the Revolutionaries were being driven back, all along the northern front and through the town. The Government armour at last began to assert its superiority, though not without a steady stream of casualties. The Revolutionary armour were being pushed across the railway branch line, a gradual process that was not to be arrested, not even when the anti-tank battery arrived.
 |
Urban fighting. Though reduced to platoon strength (1SP)
C/31st Coy takes the fight to the enemy. |
Pushing directly from the west, C/22nd and A/31st Companies were in firm occupation of the residential area, but it was C/31st, reduced though it was to a mere platoon strength (1SP) that was in direct contact with the enemy. Outnumbered in this battle by three to one, nevertheless, the Kashinkari Rifles boldly took the fight to their opponents. It was not long before supports in the shape of D/31st and the 31st MG platoon came to their aid.
 |
| D/31st closing in... |
Moving up between the town and the captured redoubt, and braving enemy mortar fire, D/31st brought the defending company under small arms fire. The pressure was mounting.
 |
| A/22nd and B/22nd at last lurching into motion. |
Very little happening on the south front, Col Buttahjars had been thinning out the defenders there. Somewhat belatedly, B and C companies of the Punjanjoodi Battalion (B/22nd and C/22nd) moved up to join their MG platoon (MG/22nd) that had already established a position overlooking the southwest of the town. Perhaps the move ought to have been made the sooner, to tie down the defenders. Against that, now that the line had thinned out, the Government troops could hope for more decisive results.
 |
Government A Sqn alone takes on the Revolutionary
armour and anti-tank, whilst C Squadron
reorganises. |
Developments on the north side remained encouraging. Although C Squadron was now also reduced to a parking lot of smoking wrecks a little in advance of the smouldering D Squadron, and B Squadron had been forced back to reorganise, A Squadron boldly faced off against the two remaining squadrons of Revolutionary armour, and the recently arrived portee-mounted 6-pounder anti-tank battery. Not that the latter were finding conditions comfortable, as Government armoured cars sprayed them with MG fire. Meanwhile, although D/31st Coy had been driven back with loss to take shelter in the abandoned redoubt, it was not before its support, and that of the armoured cars, had helped the depleted C/31st Coy carry the warehouse district of the town. Now the 'Sons of Revolution' mortars found their flank directly threatened.
 |
| 25pr batteries moving up to better fire positions. |
Lacking targets, two batteries of 25pr gun/howitzers moved up to lend their weight to the attack. The Revolutionaries' hold on the town had been reduced to about a third, still clinging to the railway station itself.
 |
| Government attacks developing on the south front. |
Observing this satisfactory progress, Major-General Lord Redmond drove up in his scout car to join the 22nd's MG platoon, and to direct operations on the south flank. As the 'Volunteers' C Company moved to join the town garrison, their B company had been pulled out to main the redoubt that formerly housed the 6-pounder battery. The 'Volunteers' mortars opened up a rather desultory (i.e. ineffective) bombardment of the approaching Punjanjoodi companies. A firefight developed between those gentry and the exiguous defenders in the redoubt, outnumbered four to one.
 |
Infantry of 31st Kashinkari Battalion overrun
mortars and anti-tank positions. |
Events on the main fronts began to develop quickly. At about this time, or shortly after, the Revolutionaries losses had reached the point at which the overall strength was too depleted, and morale too battered for counterattacks to be mounted. The army reached its exhaustion point. The Government, on the other hand, was riding upon a tide of confidence, despite all the hard fighting it had undergone so far.
 |
| Winning the battle on the north front. |
Depleted to platoon strength as it was, C/31st Company failed to carry the enemy mortar position, and fell back towards the western edge of town. The mortars were given no respite. The fresh B/31st and rather worn D/31st Companies, supported by the armoured cars, flushed out the mortars and anti-tank crews. Their charges destroyed or abandoned, and lacking the means to fight, the transport portees and carriers made off without them.
 |
| Add caption |
Government infantry had advanced to and over the branch line, their left flank protected from the Revolutionaries armour by the Shermans tanks of their own A Squadron, though the armoured cars did take some loss to the Stuarts' 37mm guns.
 |
Revolutionaries force back Government infantry in the town
but are in no case to reoccupy the vacant sections. |
In the town, the defenders gained a brief respite for themselves. Thrusting back C/31st and A/31st Companies, the Revolutionaries' exhausted state precluded retaking the lost ground, even though that would have recovered half the town.
 |
| B/22nd join the action in the town... |
Having driven back the Revolutionary infantry threatening to take in flank the Government troops within the town, B/22nd Company themselves attempted to storm the place, though subject to a rather ineffective counter-fire from their own right flank. C/22nd's shooting was no more effective against the protected enemy infantry and the mortar battery.
 |
Shermans of C/6th Armoured join A/6th, and gradually
lever back the lighter Stuarts. |
Successfully reorganising, B Squadron Bananaramputra Hussars joined A Squadron's duel against the Revolutionary armour. The latter had fallen back to and beyond the ridge northeast of the town, where one squadron took up hull down positions along the high ground. But it was by now clear that they could not for long maintain themselves there, as Government infantry were already advancing beyond the eastern edge of the town. If the town's defenders didn't shift themselves soon, they would be in danger of being cut off.
 |
| 25pr batteries back in action. |
Even so, the revolutionaries were letting their enemies know they were still in the fight. Incoming mortar and rifle fire reduced C/22nd Company to half its strength, though successfully driving the rebel infantry from their field works. B/22nd company's assault was summarily repulsed, though with little loss.
 |
| Government troops once more advancing through the town. |
Fierce fighting erupted again within the town as once more the Government troops attempted to drive the Revolutionaries into the open. It seemed that, however ready to leave, the revolutionaries would not be hustled. Before mounting up and making off, the mortars fired off one last salvo ... against Punjanjoodi's machine gin platoon. Perhaps they had observed in the distance indications of the presence of the Government Army commander. As it happened, the machine guns were reduced by half their strength. General Lord Redmond had to dive for what scant cover the open ground might provide. The excitement over, he picked himself up and dusted himself off, with no injury but to his dignity.
 |
A mortar stonk lands upon the MG company, recently joined
by General Lord Redmond's HQ. Will he survive? |
At this point I called the battle. What remained of the Revolutionaries made off, the pursuit held off by the faithful 'Scimitars' light armour.
For all the tough fighting - and tough it surely was - this turned out to be a decisive Government victory. I found it surprising that the Government succeeded at all, given the dismal failure of the Revolutionaries attack the week before against Nawabisbad, where they encountered for the first time field works and field obstacles. Perhaps it was the weight of a full regiment of Government artillery that, although in action pretty much only for the opening stages of the battle, were instrumental is forcing the Revolutionaries to abandon their positions covering the town's approaches, and making it easier for the Government to mount an effective assault. In many respects, I found this the most interesting battle - certainly absorbing to play - of the series so far.
As usual, we append the casualty list:
Government losses;
6th
Bananaramaputra Hussars: -7SP (B Sqn -1, C Sqn -3, D Sqn -3)
22nd
Punjanjoodi Infantry: -4SP
31st
Kashinkari Rifles: -6SP (-3 from C Company)
90th
Bangagong Dragoons (A/Cars): -4SP (A Sqn -3; B Sqn -1)
Total loss: 21SP (Cf Exhaustion point 27)
Revolutionary losses:
1st 'Scimitar' Armoured: -5SP (A and B Sqns, -1 each; D Sqn -3)
1st 'Sons of Revolution' Infantry: -13SP (Rifle Coys, -11, Mortar Battery: -2)
2nd 'Volunteers' Infantry: -6SP
Anti-Tank Battery: -2SP (guns only)
Total loss: 26SP (Cf. Exhaustion point 17)
Having successfully recaptured the railway station, the Government forces must needs deprive the Revolutionaries of the only sea port in their possession, Khandibar, before moving on to Maimajikwand Valley, and the provincial capital therein. For their part, the Revolutionaries began to look abroad, especially to the north, beyond Nimruz, beyond Rhun and Kizil-Arvat, toward the Red Empire, the Collective Confederation of Collaborative Peoples (CCCP) for perhaps a badly needed augmentation to their ... Revolutionary equipage.
The narrative of this campaign will be interrupted by some diversions into other areas, a simple naval rule set, and a punitive expedition against Sheikh Rhatlin Rhol of Oasis Djonibigud.
To be continued...
The Campaign narrative resumes
here