Monday, January 30, 2023

Kavkaz Campaign - The Sea is No One's Friend

Ship's Log, I-ZNS Tsarina Elizaveta light cruiser.
Tuesday, 22 June 1875, about 40 kilometres off Poti coast. Course due south, cruising speed 10 knots, in company with TB flotilla, 3 vessels. Weather clear, light winds from NW, barometer high, but falling.

7 Bells of the Morning Watch, sighted smoke due west of our position.  Altered course eight points to starboard to investigate. Sighting proved to be TNS Hamidiye, protected cruiser.  Kapitan-Leytenant Aleksandr Markovitch Ramius ordered the attack, increasing speed to 18 knots. Czarina Elizaveta at the larboard end of the line, the TBs to starboard, echeloned forward.

1 Bell of Forenoon Watch:
Hamidiye alters course to due south, then after a short interval, resumes its easterly course to close the range on Czarina Elizaveta.

2 Bells of the Forenoon Watch: Range closing. Enemy vessel fires his first salvo... 

First sighting...


As this action was fought the same day as 'Third Zugdidi', but was over fairly shortly, I thought after all that I would post this account first.  Fact is, I played it out after the big battle. This particular action I played using Bob Cordery's 'original' pre-dreadnought naval rules. These offer a very quick action, the only 'paperwork' required being to count 'hits' on the respective vessels. I also used the vessel 'stats' as tabled in the Balkan League book, rather than my own list of stats.  I 'll make some comment about that at the end of this narrative. 

The Ships:

Protected cruiser Hamidiye.

Turcowaz:
Hamidiye, protected cruiser: 10FP,  Range/Dice - 4/5D6; Move 3.

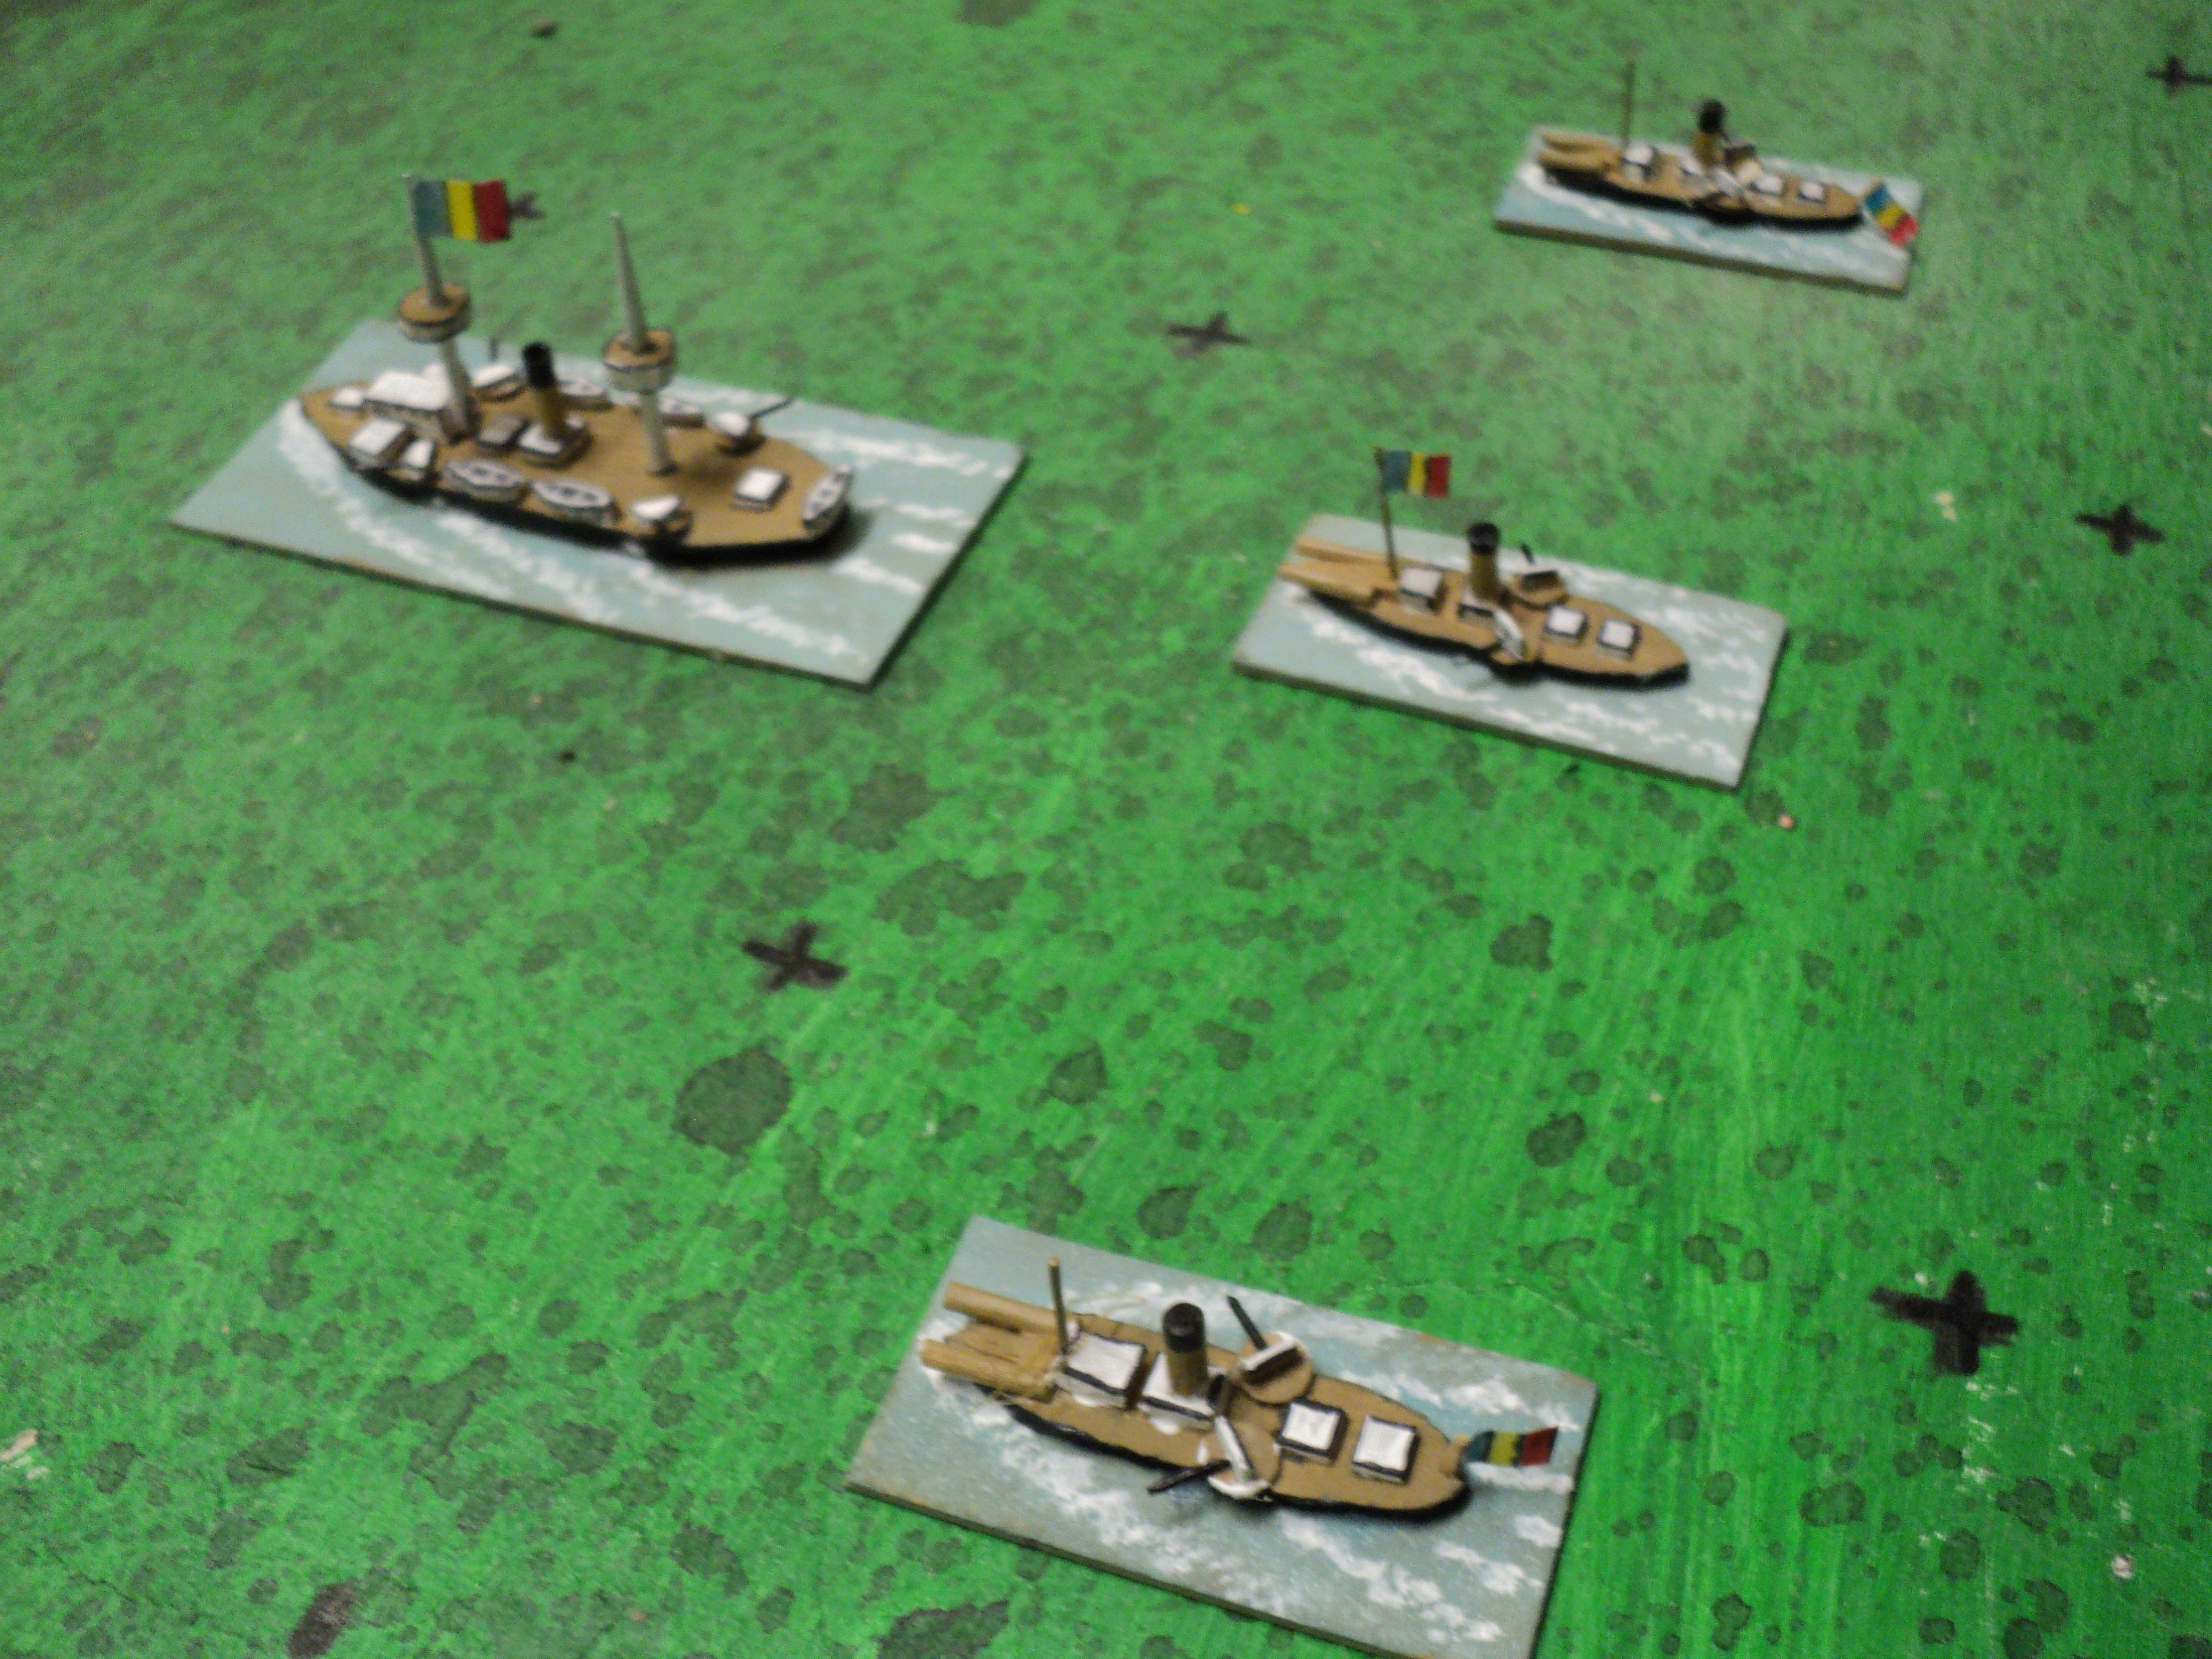
Izumrud-Zeleniya flotilla, led by 
Tsarina Elizaveta.


Izumrud-Zeleniya:
Czarina Elizaveta, light cruiser: 8 Flotation Points (FP); Range/Dice - 3/4D6; Move - 3 squares.
TB1, Smeul, torpedo boat: 4FP; Range/Dice - 2/3D6; Move 4; 2 Torpedoes fixed bow.
TB2, Naluca, torpedo boat: 4FP; Range/Dice - 2/3D6; Move 4; 2 Torpedoes fixed bow.
TB3, Sborul, torpedo boat: 4FP; Range/Dice - 2/3D6; Move 4; 2 Torpedoes fixed bow.


Izumrud-Zeleniya form a concave 'cordon'.
With the respective sides on directly opposite courses, Czarina Elizaveta came within range of Hamidiye's main guns.  Fortunately, it required some time before Hamidiye got the range.
Adversaries on opposite courses...

Sharply altering course to larboard, Kapitan Ramius planned on crossing the enemy 'T' with his flagship, whilst the TBs came in upon the Hamidiye's beam. The plan was to use the torpedoes to best effect. Events didn't quite run as anticipated. Czarina Elizaveta crossed the enemy 'T' all right, but its pop-gun broadside failed to stop the latter's onset. Hamidiye slammed into Czarina Elizaveta's side.

'Ramming speed!'
The damage to Czarina Elizaveta, though severe, was as nothing compared with the following salvo from Hamidiye's forward primary and secondary guns. Badly damaged and in flames, Czarina Elizaveta turned to port, reversed its course, and staggered out of the battle.
After ramming, Hamidiye fires into 
Tsarina Elizaveta
So far, Hamidiye had taken little enough hurt, though the ramming had caused some hull damage. By now, though, the TBs, still considerably abaft Hamidiye's larboard beam, were now racing in. The cruiser could not hope to outrun the speedy small craft, but resolved to fight them off instead. Ship-Captain Hazik Nasan ordered the course reversed to due west. That might not have been the wisest decision.  

Perhaps this was occasioned by the incoming fire from the nearest torpedo boat,  TB3 - Sborul, which, the course having been altered to the south, had been placed in the lead of the line echeloned back from the larboard end. Her first salvo, at maximum range, not only found its target, but managed to put its shells where they could do maximum damage. At once Hamidiye was in real trouble.

Up until this point, Hamidiye had taken a hit from Czarina Elizaveta and lost a further flotation point (FP), self inflicted, from the ramming.  Reduced to 2 FPs, Czarina Elizaveta was forced to stagger out of the battle. But now Sborul, firing with 2 dice at extreme range (2 squares) rolled two sixes!  Four FPs at one blow! Hamidiye's return fire did some damage, but not enough.

As Hamidiye ploughed onward, TB3-Sborul came in under her stern whilst TB2-Naluca came in from abeam. TB1-Smeul was not yet quite where she could release its torpedo. Pressing in close, under a welter of incoming gunfire, the TBs soon launched a torpedo each. The torpedoes away, it was time, perhaps, to depart... if they could.

Czarina Elizaveta limps off, covered by TB attacks


Too late.  At short range, Hamidiye's gunfire was deadly and lethal.  TB2 and TB3, already both somewhat damaged, were last seen entering a maelstrom of exploding shells and water spouts. Neither emerged.

What of the torpedoes, then?  They were on their way, the range was short, nothing could stop them. That from TB3-Sborul struck under Hamidiye's stern, where it caused enough damage to have persuaded the cruiser to abandon the fight (3D6s yielded 1 point of damage).  The fatal blow came from TB2-Naluca.  The torpedo struck amidships, tore out a huge hole and tore into Hamidiye's vitals.  Three D6s yielded a 5 (-1 FP) and a 6! (-2FP). That was it.  Although it took long enough for the few survivors to be got off, Hamidiye at last slid beneath the waves to join the vessels she had killed and was killed by.
TNS Hamidiye's last moments...


You could call it a victory - and Izumrud-Zeleniya's Press Services certainly did - but it was a costly one.  Two torpedo boats sunk, and Czarina Elizaveta out of commission for months to come. But TNS Hamidiye had been the pride and joy of the Turcowaz navy - not for her size, but for the quality of its crew.

Some post-action comment.

There were a number of ways I could have played this. For one thing, this is the first action I played out on a square grid table instead of my hex grid. The other is that, contrary to my usual practice, I used Bob's technical stats instead of my own. To be sure, the Izumrud-Zeleniyan flotilla had a considerable measure of luck in this action - especially the 4FPs of damage right off TB3's first salvo of gunfire. That at once compromised Hamidiye's chances of survival.

Now, I haven't done any technical stats for the Izunrud-Zeleniya's vessels (actually 'Romanian'). But I rather think they would have been considerably less powerful than they were in this action. Looking up the 'historical' versions of these vessels, I find that Hamidiye was rather faster at top speed than any of it's opponents. The Turcowaz ship might well have been able to stand off out of their range, and shoot them to pieces. Methinks it would have gone hard for Izumrud-Zeleniya, had I chosen to use 'my' alternate stats and Hamidiye had found the convoy - especially had the troops still been aboard...

Aftermath.

The loss of Hamidiye put paid to Turcowaz naval operations in support of the Kavkaz campaign.  But their enemy hoped that something might yet be achieved with what remained of their flotilla. There was no question about Czarina Elizaveta's having to return to Sebastopol; the damage enough to compromise her seaworthiness. There remained, then, one merchant cruiser, Yevgeni Onegin,  and one torpedo boat.  

Not a lot to work with...

To be continued: Third Zugdidi.


Sunday, January 29, 2023

Kavkaz Campaign - The Turcowaz Complacent?


Third battle of Zugdidi. Izumrud-Zeleniya 
on their start lines.

Attentive readers of this campaign may recall the previous card driven move sequence that had terminated in a Joker being drawn (A Busy Week). A die roll (D6) indicated that the Special Event so signalled would apply to the Turcowaz.  What was the Special Event, then?  Another die roll (D6): a '1'.  Turcowaz were barred from moving for 4 turns of the cards.  This was pretty bad: two of the next four cards were red (Turcowaz), but it was what followed that really sent the ordure hurtling into the rotors. 

TNS Hamidiye


Observe:

16 June: Joker:  Turcowaz don't move for four turns of the cards; and the deck reshuffled.


16 June: J: ignore


17 June: 9: Having disembarked, the Landing Force (Guards Legion and Matelot Regiment) march towards Zugdidi.
Leaving the merchant cruiser Yevgeny Onegin  to guard the troop ships, the convoy escort continues due south to seek out a Turcowaz unit thought to in the offing. Henceforth called 'the flotilla', this force comprises Tsarina Elizaveta light cruiser and three torpedo boats, T1-3.


18 June:7: Ignore


19 June: 9: Under cover of lighted campfires, the Kavkaz column abandons Gakhomela position and marches to Zugdidi
Flotilla continues south patrol.
This ends the Special Event...


20 June: Q
: Landing Force marches toward Zugdidi, where it joins and becomes part of the Coastal Column. This formation carries out a reconnaissance of Zugdidi, preparatory to an attack to recover the place. The recce is moderately successful
Flotilla continues patrol south.


21 June: 7: Kavkaz column carries out reconnaissance of Zugdidi preparatory to attack from the east. The recce is moderately successful.
Flotilla encounters TNS Hamidiye some 30 nautical miles due west of Poti. They immediately pursue.


22 June K: At this point, though separated by the Zugdidi hex, it seemed reasonable to place the separate Izumrud-Zeleniya forces under one command. The combined forces begin their assault at daybreak.


Izumrud-Zeleniya Euxine Sea Flotilla:
I-ZNS Tsarina Elizaveta and torpedo boats.


Also 22 June:
At 2 Bells of the Forenoon Watch (0900 hours, the time was decided by die roll the hour after 6:00am.  2D6 - I rolled a 3) the opening salvos begin the sea battle of Poti... 


Saturday, January 28, 2023

Kavkaz Campaign - Disappointment at Gakhomela

Turcowaz camps laid out with 
field works
In the pause following the Izumrud-Zeleniya two-day retreat from Kutaisi, the Kavkaz Column and the Kars Command eyed each other across the small braided Tekhuri stream on the far side of which, nestled in a loop, lay the village of Gakhomela.  Successive reconnaissance operations by both sides proved only partially informative. But the week-long halt was partly owing to Count Ignatieff's concern for his vulnerable line of communications. 

To begin with, he could count on a line to Zugdidi, but the loss of that town loss left him with the road that skirted close to the right flank of the enemy immediately before him. Yet he dared not attack - not unless he was reinforced. That could come only from the Coastal Command of General-Leytenant M.M. Kutizedoff.  It was with remarkable promptitude that that commander sent the whole of his 1st Grenadier Division.  With it, Ignatieff undertook to push back Abdul Ameer - all the way back to Kutaisi, if possible. 

Izumrud-Zeleniyans on their start lines
The assault took some time to organise, not helped when news arrived during the night of 11-12 June that a Turcowaz assault had taken Zugdidi and forced Kutizedoff's command back up the coast road.  Now Ignatieff's corps was in a very parlous strategic position. However, for the moment the Turcowaz Trebizond Command seemed disinclined to move - it's own strategic position none too comfortable at that.
General view looking north

The country over which Ignatieff proposed to fight his 'Battle of Gakhomela' presented a stark contrast on either bank of the stream.  East of the river, where the Turcowaz  had laid out their camp, was low-lying and flat, dotted about with shallow meres and ponds.  West of the river was hill country, the more broken up as the road neared Zugdidi, two day's march away.  The forces available were respectively:
 

Izumrud-Zeleniya 

Kavkaz Corps HQ: General Ignatieff (Good)  6SP (Strength Points)

2nd Rifle Division:
    Div HQ: 1SP
    5th Rifle Rgt 2SP (Average) 
    6th, 7th Rifle Rgts @3SP (Average) = 6SP 
    8th Rifle Rgt (disbanded)
        Div Strength = 9SP

1st Grenadier Division (attached):
    Div HQ: 1SP
    1st, 2nd, 3rd Grenadier Rgt @3SP (Elite) = 9SP
    4th Grenadier Rgt 4SP (Elite)
        Div Strength = 14SP

2nd Light Cavalry Division:
    5th, 8th Lancers @ 2SP (Av) = 4SP
    6th, 7th Lancers @ 3SP (Av) = 6SP
        Div Strength = 10SP

2nd Mountain Artillery Regiment:
    I Battalion 1SP (Av)
    II Battalion 2SP (Av)

Trains:
    1st, 2nd, 5th Medium and 1st, 2nd Pack Transport @1SP = 5SP

Total Units: 21.  Median 11(+1 for 'Good' Commander);  Activate 11/12/13
Army Strength Points: 47SP, Exhaustion: -16, Rout: -24

Turcowaz

Kars command HQ: Abdul Abulbul Ameer (Average) 6SP 

4th Division:
 
    Div HQ: 1SP
    37th Infantry Regiment = 2SP (Poor)
    38th, 39th, 40th Infantry @ 3SP (Poor) = 9SP
        Div Strength = 12SP

5th Division:
    Div HQ: 1SP
    41st, 42nd, 43rd Infantry @ 3SP (Poor) = 9SP
    44th Infantry = 4SP (Poor)
        Div Strength = 14SP

6th Division: (off table)
    Div HQ: 1SP
    45th, 46th, 47th Infantry @ 2SP (Poor) = 6SP
    48th Infantry = 3SP (Poor)
        Div Strength = 10SP

X Machine Gun Unit = 1SP (Av)

Cavalry Brigade:
    22nd, 23rd Cavalry @2SP (Av) = 4SP

Artillery:
    V, VI Mountain Artillery @ 2SP (Av) = 4SP

Trains: 
    102, 103 Medium; 113, 114 Pack @1SP (Poor) = 4SP

Total Units: 25. Median 13; Activate 12/13/14
Army Strength Points: 55SP, Exhaustion: -19, Rout: -28

Contemporary sketch of the battlefield

Before continuing the narrative, I should mention that these events had largely been brought about by the card draws (see earlier posting). The battlefield itself was drawn from a Google Map area in roughly the right location in Georgia.  I ought perhaps to mention, though, that I got the road map hideously wrong.  Too bad: we're stuck with it now.  The above map shows Ignatieff's broad plan: 

Left: 3rd Division to take the water mill hamlet then push on to the field work beyond.  
Centre: 1st Division to cross via fords and the bridge towards the wood and field works north of the mere.  
Right: Cavalry, having crossed the southmost ford during the night, to engage the Turcowaz line south of the mere.

Turcowaz machine guns.

That he proposed to attack a force numerically stronger, Count Ignatieff was only too aware, not helped by the enemy making use of the week-long halt to lay out field works to protect his camp lines.  
Attack on the north flank.  The defenders outnumber 
their assailants.


The Third division's attack began well enough, carrying the water mill hamlet in short order and chasing the garrison back to the field works some distance beyond. Following up, the Division found itself attempting to storm fortifications against a numerically stronger enemy - not a good portent.

Cavalry attacking the southern flank 
earthworks
The cavalry on the other wing undertook to take out the fortifications there. Having crossed a footbridge overnight, they were prompt to the attack at dawn. Closing in on a line of fieldworks, the horsemen used their lances to good effect, but during the cut and thrust of bayonet and lance, they could discern heavy reinforcements coming up through the wood behind. The Turcowaz 6th Division had been camping some distance behind the visible tents (i.e. immediately off-table) and was harrying up to join the action.
High hopes were placed upon the 1st Division's thrust towards the Turcowaz centre. Almost immediately things started to go wrong Coming under direct gunfire as they splashed across the fords, their advance became disjointed, not helped by the early demise of General-Major Ya.Ya. Diebitch. Caught by a shellburst in the middle of the stream, Diebitch was killed outright.

(What was happening was the Grenadiers were receiving 'retreat' results, and I didn't want to be too generous about converting them to 'kills'. So all along their line the push became a series of two steps forward and one back - a real mess. Then almost the first time the fate of the General Officer Commanding 1st Division had to be determined, he rolled a 12 - immediately fatal.  Ya. Ya. stand for Yakov Yakovitch.) 
 
Attacks have become disjointed
 and piecemeal
This was not to say that the Izumrud-Zeleniya had nothing to show for their attacks. On both wings they were handing out a few licks as well as taking them. Considering the protection their targets enjoyed from their field works, the artillery support proved fairly effective, knocking out some of the enemy artillery and machine guns.
The Izumrud cavalry heavily overmatched for numbers.


All the same, by the time the Grenadiers were approaching the woods that, astride the highway, were their first objective, it was already plain that too much was being asked of the Kavkaz Column. General Ignatiev sounded the recall, the Green tide receded, and, apart from the water mill hamlet, the Zrleniyans fell back across the river.


There they awaited the Turcowaz attack, but that was not forthcoming. So ended an action that turned out to be little more than an affair of outposts.
Somewhat surprisingly, losses were fairly similar on both sides, and amounted to a few hundreds. In the following tot up of losses, the only difference was the Strength Point represented by the deceased General - 6SP lost to Turcowaz, 7SP to Izumrud-Zeleniya. As I classed the battle as more-or-less drawn, the rallying of stragglers yielded a net loss to both sides of 3SP.  Of course, a replacement had to be found to command 1st Division - Colonel S. Yu. Malenkin of 1st Regiment being assigned. 
1st Division straggling into the attack, their 
lines ragged from artillery and machine gun fire

This was one of those battles that, from time to time, I get the balance entirely wrong. I had hoped that the qualitative superiority of the Izumrud-Zeleniyan regulars over the Turcowaz rabble would answer for the latter's superior numbers. But then, considering that the armies had been facing each other in this locality for some time, it seemed reasonable to suppose that they would both have built up some protection for their encampments at the very least.  
The situation moments before 
Count Ignatieff sounded the recall.


Readers might recall from the last paragraphs of a couple of postings back that the campaign card draw sequence had ended after this action with a joker. The result affected the Turcowaz (diced for), and led (a die roll of '1') to its paralysis for four card draws (their colour being immaterial). The sequel will be detailed next time, but we'll hint at the possibilities here.

Following this action, the Turcowaz settled down to await the Izumrud-Zeleiyan retreat up the Fort Ghori road. However, that night, the light of the campfires in the hills above the Tekhuri Stream showed no sign of the enemy moving. It was not until well into the following morning that Abdul Ameer was advised that the enemy had stolen away. And it was not until later in the week that they heard distant heavy gunfire and he discovered where they had gone...

To be continued...

Postscript.
I will admit right here that I made a right mess of this battle. Carried out with brain, the attack might have been feasible, given the greater range of the Zeleniya rifles. The infantry could have stood off out of musketry range and subjected the defenders to unanswerable rifle fire. The defenders might have been induced to come out of their earthworks, with who knows what result? Never mind, sometimes these things come to try us.


Saturday, January 21, 2023

Kavkaz Campaign - A Second try at Zugdidi

On the day following the successful defence of Zugdidi, 7th of June, the Commander of the Coastal Column, General Kutizedoff detached 1st (Grenadier) Division and sent it down the Kutaisi road to join up with Count Ignatieff's Kavkaz Column. The Count was only two days' march off, but his situation had become more than somewhat perilous.  His line of communication - the Fort Ghori turnoff - ran past the enemy right flank, vulnerable to a raid.  By adding the Grenadier Division to his strength he hoped to drive back Abdul Abulbul Ameer's command, leaving himself the freer to link up with the Coastal column main body.

Meanwhile, the Ameer, following up the retreat of Count Ignatieff's corps, caught up with it a short distance from the aforementioned turnoff. Eager to attack, he ordered a reconnaissance that indicated that the enemy before him had not yet received any addition to its strength.(Die roll = 5). But Count Ignatieff  had settled himself into a fairly strong position behind a small stream that circled a considerable tract of hill country beyond.  Upon the arrival of the grenadiers, the Count for his part, also ordered a reconnaissance that determined the enemy numerical strength even yet greater than his own. For several days, both sides glared at each other on opposite sides of the braided Tekhuri stream.

As the situation in Ignatieff's command had changed before the Kars Command had the opportunity to attack, I decided that a second recon was called for. But I now think it might have been a good idea just to go ahead with the attack, with the Turcowaz unaware of the enemy's acquisition of strength. Or I could have subjected the question of either or to a die roll. At any rate, the second recce was carried out on the 13th, and obtained evidence that Ignatieff's Command was stronger than it had been.  
At Zugdidi, General Bashir Ed Din Pasha had become by 10th June aware that the Izumrud-Zeleniyan forces on the far side of the Inguri River had somewhat diminished in  numbers (Recce die roll = 4). Not one to miss an opportunity that presented itself so obligingly, the Pasha ordered the attack for the next day. 

His plan was simply a repetition of 6th June: 1st and 2nd Divisional columns storming the West Ford and Middle Bridge; 3rd Division to assault the town directly across the fords along the town's river front and the East Bridge. The Gardner guns would again deploy at the outside angle of the river bend, and, with 1st Artillery Regiment supporting  the assaults by 2nd and 3rd Divisions as seemed most likely to effect results.  At the West Ford, 1st Division, led by what remained of the cavalry, had in support the 2nd Artillery Regiment.

Turcowaz Trebizond Command: 
Command: Bashir ed Din Pasha (average commander) = 6SP


1st Division: HQ (1SP elite), 1st (3SP), 2nd (3SP), 3rd (2SP) Regiment (average) = 9SP

2nd Division: HQ (1SP elite), 4th (2SP), 5th (3SP), 6th (3SP) Regiment (average) = 9SP

3rd Division: HQ (1SP elite), 7th (4SP), 8th (4SP), 9th (3SP) Regiment (average) = 12SP

IX Machinegun Battalion = 2SP (average)

1st Cavalry Brigade: 20th Cavalry(average) = 3SP

I, II/ 1st Field Regiment @ 2SP (average) = 4SP

III (2SP), IV(1SP)/ 2nd Medium Regiment (average) = 3SP

101st Medium Transport Battalion @ 2SP /3CP (carrying capacity)
111th, 112th  Pack Transport Battalion @ 2SP /2CP = 4SP/ 4CP

22 Units (including command); activation 10/11/12 units per turn
55 Strength Points (SP); Exhaustion Point (EP) = -19, Rout Point (RP) = -28 
(represents an army of about 28,500 troops, 40 machineguns, 140 artillery pieces)

Casualties and the detachment of a whole division left the Coastal Column with:

Izumrud-Zeleniya Coastal Column:
General-leytenant Malakhai Malodorovitch Kutizedoff (average commander) = 6SP

3rd (Rifle) Division - HQ (1SP elite) 
    9th, 11th, 12th Infantry Regiments (average) @ 3SP
    10th Infantry Regiment (average) @ 2SP

    Totalling 12SP

1st Light Cavalry Division -
    1st Hussar Regiment (average) @3SP
    2nd, 3rd, 4th Hussars (average) @2SP 
    Totalling 9SP

1st Field Artillery Regiment - I and II (Field) Battalions @2SP (average) = 4SP

Naval Artillery Detachment -
     V (Naval) Artillery Battalion = 1SP (average)
     VI (Naval) Machinegun Battalion (Nordenfelds) = 2SP (elite)

3 Transport Battalion columns @2SP/3CP = 6SP/9CP .

17 Units (including command); activation 8/9/10 units per turn 
40 SP; EP = -14, RP = -20
(represents an army of  about 13,000 troops, 40 machine guns, 100 artillery pieces.


In much the same manner as four days earlier, the progress of the respective columns differed. As before, the 2nd Division column outpaced their comrades on either flank, and reached the Middle Bridge even before their supporting machine guns and artillery had reached the positions at which they were supposed to deploy. Sixth infantry thundered across the bridge and attacked the startled defenders in the woods beyond. 

The action at the Middle Bridge was well under way before the lead elements of the 1st Division had even dipped their toes into the ford north of the peach orchard farm. The Izumrud-Zeleniyan artillery covering this flank thundered out a warning. It was answered by challenge by the Turcowaz mediums lining the riverbank between bridge and ford.


That line of ordnance of course discouraged the defenders simply ling the riverbank to prevent a crossing. But a quick counter attack by two hussar regiments struck the head of the column as it crossed. A stern struggle ensued as the Zeleniyans tried to throw the Turcowaz back over the river, and the latter struggled to expand their bridgehead.

Assailed front and flank, even with the backing of the lead infantry regiment, the sole Turcowaz cavalry unit was unable to make progress. It was not long before they were driven through the infantry following up and into the ford. At once a traffic jam ensued as, until the ford were cleared, the following two infantry regiments could not cross.

Fortune was going against the assault at the Middle Bridge as well. The defenders - infantry, machine guns and artillery - proved too strong, especially as the Turcowaz own supports were not yet up. Leading the transpontine assault, 6th Infantry was flung back with heavy loss, their depleted ranks retiring across the bridge, to bring 5th Infantry into the action.


So far, Izumrud-Zeleniya had contained the early attacks quite comfortably, and with scant loss. But they had served to commit the defence, leaving the Turcowaz 3rd Division to move up, 9th Regiment leading, alongside the north-south reach towards the East Bridge. The trailing unit, the 7th, swung left to splash across the fords into the flank of the machine gunners at the south end of town. Machine gun and artillery fire from back across the river 'shot in' this rude irruption. The machine gunners were quickly overrun.


The 9th Infantry storming across the East Bridge, and the 8th across the fords to the left, momentarily caught the Zeleniyan 12th Fusiliers isolated.  It was to be some time before the 11th came to help.


Although their flank attack having overrun the machine gunners, 7th Turcowaz Infantry now had a foothold in the town, the assault at the Middle Bridge, despite the leadership of Major-General Arslan Pasha in person also found the defence too tough. Among the latter losses were mounting, however, and the Turcowaz at the far end of the bridge were as yet far from bereft of resources.


At the West Ford, despite the heavy losses inflicted upon the attacking column, the Izumrud-Zeleniya cavalry found the pent up columns impossible for long to contain. The deadly accurate artillery drove back the flanking 2nd Hussars all the way to the west road where they finally broke up, and in turn the Turcowaz infantry forced back 1st Hussars alongside. The counter pressure relieved, the Turcowaz cavalry returned, and the following columns were able to fill the expanded bridgehead.


The Turcowaz were making progress at the Middle Bridge as well, although at heavy cost. Fifth Infantry finally routed the 9th Fusiliers at of the woods. They then turned to assault the Zeleniyan artillery in the redoubt, just as the depleted remains of 6th Infantry attacked in front. Fourth Infantry followed across the bridge. Now the Turcowaz drive was on.


Bitter fighting also developed at the East Bridge, 9th Infantry embattled at the bridge itself, and the 8th pushing, for the moment unopposed, into the town.  


Soon enough, the Zeleniyan 11th Fusiliers counter-attacked. Completely stalled, the Turcowaz losses mounted (both units had lost a strength point by this), though the 12th Fusiliers were equally knocked about. 


By now it must have been plain to General Kutizedoff that the forces he had left in hand could never recover the lost ground. The battle must already be lost. His last reserves, the 10th Fusiliers, he led directly against the depleted 7th infantry at the south end of town. Given the reinforcements available to the enemy about the Middle Bridge, this was something of a forlorn hope.

By this time, the artillery position in the redoubt had already been overrun. This freed 5th Infantry to fall upon the flank of 10th Fusiliers.  


The defenders also conjured up reserve cavalry once again to contest the West Ford river crossing. Already the 2nd and 3rd Hussars had long since been spent forces, crushed under the weight of enemy artillery bombardment.  First Hussars were still in action, but, much depleted, for how long was by now problematical.  


A confused cavalry battle developed between 4th Hussars and the ever-resilient Turcowaz horse. Flung back once, twice, the Hussars were unable to prevent the Turcowaz crossing the road to attack the Izumrud-Zeleniyan artillery in their fieldworks. Fortunately, the Turcowaz were too weak to overrun the gunners, who defended themselves with trail spikes and rammers. Nerving themselves for just one more charge, 4th Hussars struck the Turcowaz mounted remnants in flank, and routed them for good and all.


This was all by now just to keep open the northwest road. The battle clearly lost already, it was becoming doubtful whether indeed Kutizedoff's command could even effect a withdrawal up the coast road. The Zeleniya artillery remained in a position more or less to cover a withdrawal, but there were already Turcowaz elements who had the road within range of their rifles, and there remained the very capable medium artillery on the far bank.


In the town, 10th Fusiliers were being driven steadily back by double its numbers...
... and although the 9th Infantry was momentarily repulsed at the bridge, before long, back they came. 

This time they drove in the Zeleniyan defenders, all the way out of the town.  Alongside, the 11th Fusiliers finally succeeded in throwing their assailants into the river, but were themselves forced to drop back. The town of Zugdidi almost completely in Turcowaz hands after stiff street fighting, General Kutizedoff finally sounded the retreat.  


The Turcowaz had won. They had won a resounding strategic victory that put the Izumrud-Zeleniya's whole campaign in jeopardy. Retreating up the coast road, Kutizedoff's command, deprived of detached grenadier Division, was completely cut off from the Kavkaz column, somewhere down the Kutaisi road. And that command was itself parlously placed (as already hinted and will be further related), not least of which, it had no superiority in numbers over either of the enemy commands between which it lay.

It so happens that I called this Second Battle of Zugdidi before the Zeleniyans had quite reached their exhaustion point - just one more would have been required to reach the threshold of 14SP.  It transpired that the Turcowaz had spent rather more of their strength than I realised in achieving what was clearly a decisive victory. Sixteen SP, it cost them, still 3 short of their EP.  

Translated into numbers, the Turcowaz had lost 4000 casualties out of an army of 28,500; Izumrud-Zeleniya 3250 out of 20,000.

Following this victory, the Trebizond command settled down to occupy the town and contemplate their next move.  The Zeleniyan coastal command, for their part, put some distance a day's march at least between themselves and their recent adversaries. Much hope was now placed upon the troop convoy, somewhere off the coast and not yet landed.

Meanwhile, two days later, and two days' march down the Kutaisi River, Adul Abulbul Ameer carried out a second reconnaissance of the enemy positions at Gakhomela, to discover that the local enemy had undergone an acquisition of strength. He was still contemplating his next move when, two days after that, at dawn of 15th June, a runner came into his pavilion to interrupt his leisurely breakfast and to announce that Izumrud-Zeleniya were crossing the river and attacking.

To be continued...
Disappointment at Gakhomela