Sunday, November 29, 2020

First Blacklands War - A Blood-Letting at Dimitrovgrad


Columns marching into a collision.

Apart from being fought mostly within its realms, the first three weeks of the Blacklands War  had gone well for Turcowaz, with an almost unbroken string of victories on land and sea. Contrary to expectation one of the its armies had even invaded probably the most powerful of the enemies of the Supreme Door, Chervenia, and scored there a notable victory. Had there not been a second Chervenian army at large in the southern part of that Kingdom, Nazim Pasha might well have bethought himself to laying siege to the capital, Sofia. Instead, he took the perhaps rash decision to seek out that other army - the IInd Chervenian - and bring that, too, to battle.

Battle of Dimitrovgrad, showing approach roads.

For their part, after having recovered from their mauling in Thrace, IInd Army hastened westward through the province, eager to bring the intruders to book. Racing towards each other like gamecocks, they eagerly sought the clash - and the sizable market town of Dimitrovgrad looked likely to where that clash would occur.

The Map:

I had determined ahead of time that this would be an encounter battle, with both sides beginning the action feeding troops onto the table. The map being generated using the Bob Cordery system, it seemed the randomly generated road (the southern east-west one) was insufficient as the built-up area of Dimitrovgrad developed. So I added in the extra road network. That suggested that the armies both approach each other in two columns each, along the north and south east-west roads.

I also determined upon certain special 'rules' or procedures for this battle, upon which I shall enlarge, following the list of the forces engaged. They were to be very evenly matched - in some respects at least!

Turcowaz First Army:
  • Command: Nazim Pasha (Poor) = 6SP 
  • 1st Infantry (veteran) = 4SP
  • 7th, 8th, 13th Infantry (trained) @3SP = 9SP
  • 14th Infantry (trained) = 4SP
  • 23rd, 24th Infantry (green) @4SP = 8SP
  • 1st Cavalry (trained) = 3SP
  • 3rd Cavalry (green) = 3SP
  • 1st Field Artillery (trained) = 2SP
  • 5th Medium Artillery (trained) = 2SP
  • 1st, 2nd Transport Columns @1SP = 2SP
14 Units: Activation Median = 7-1 = 6 (Poor commander)
Strength points 43, Exhaustion Point -15SP.
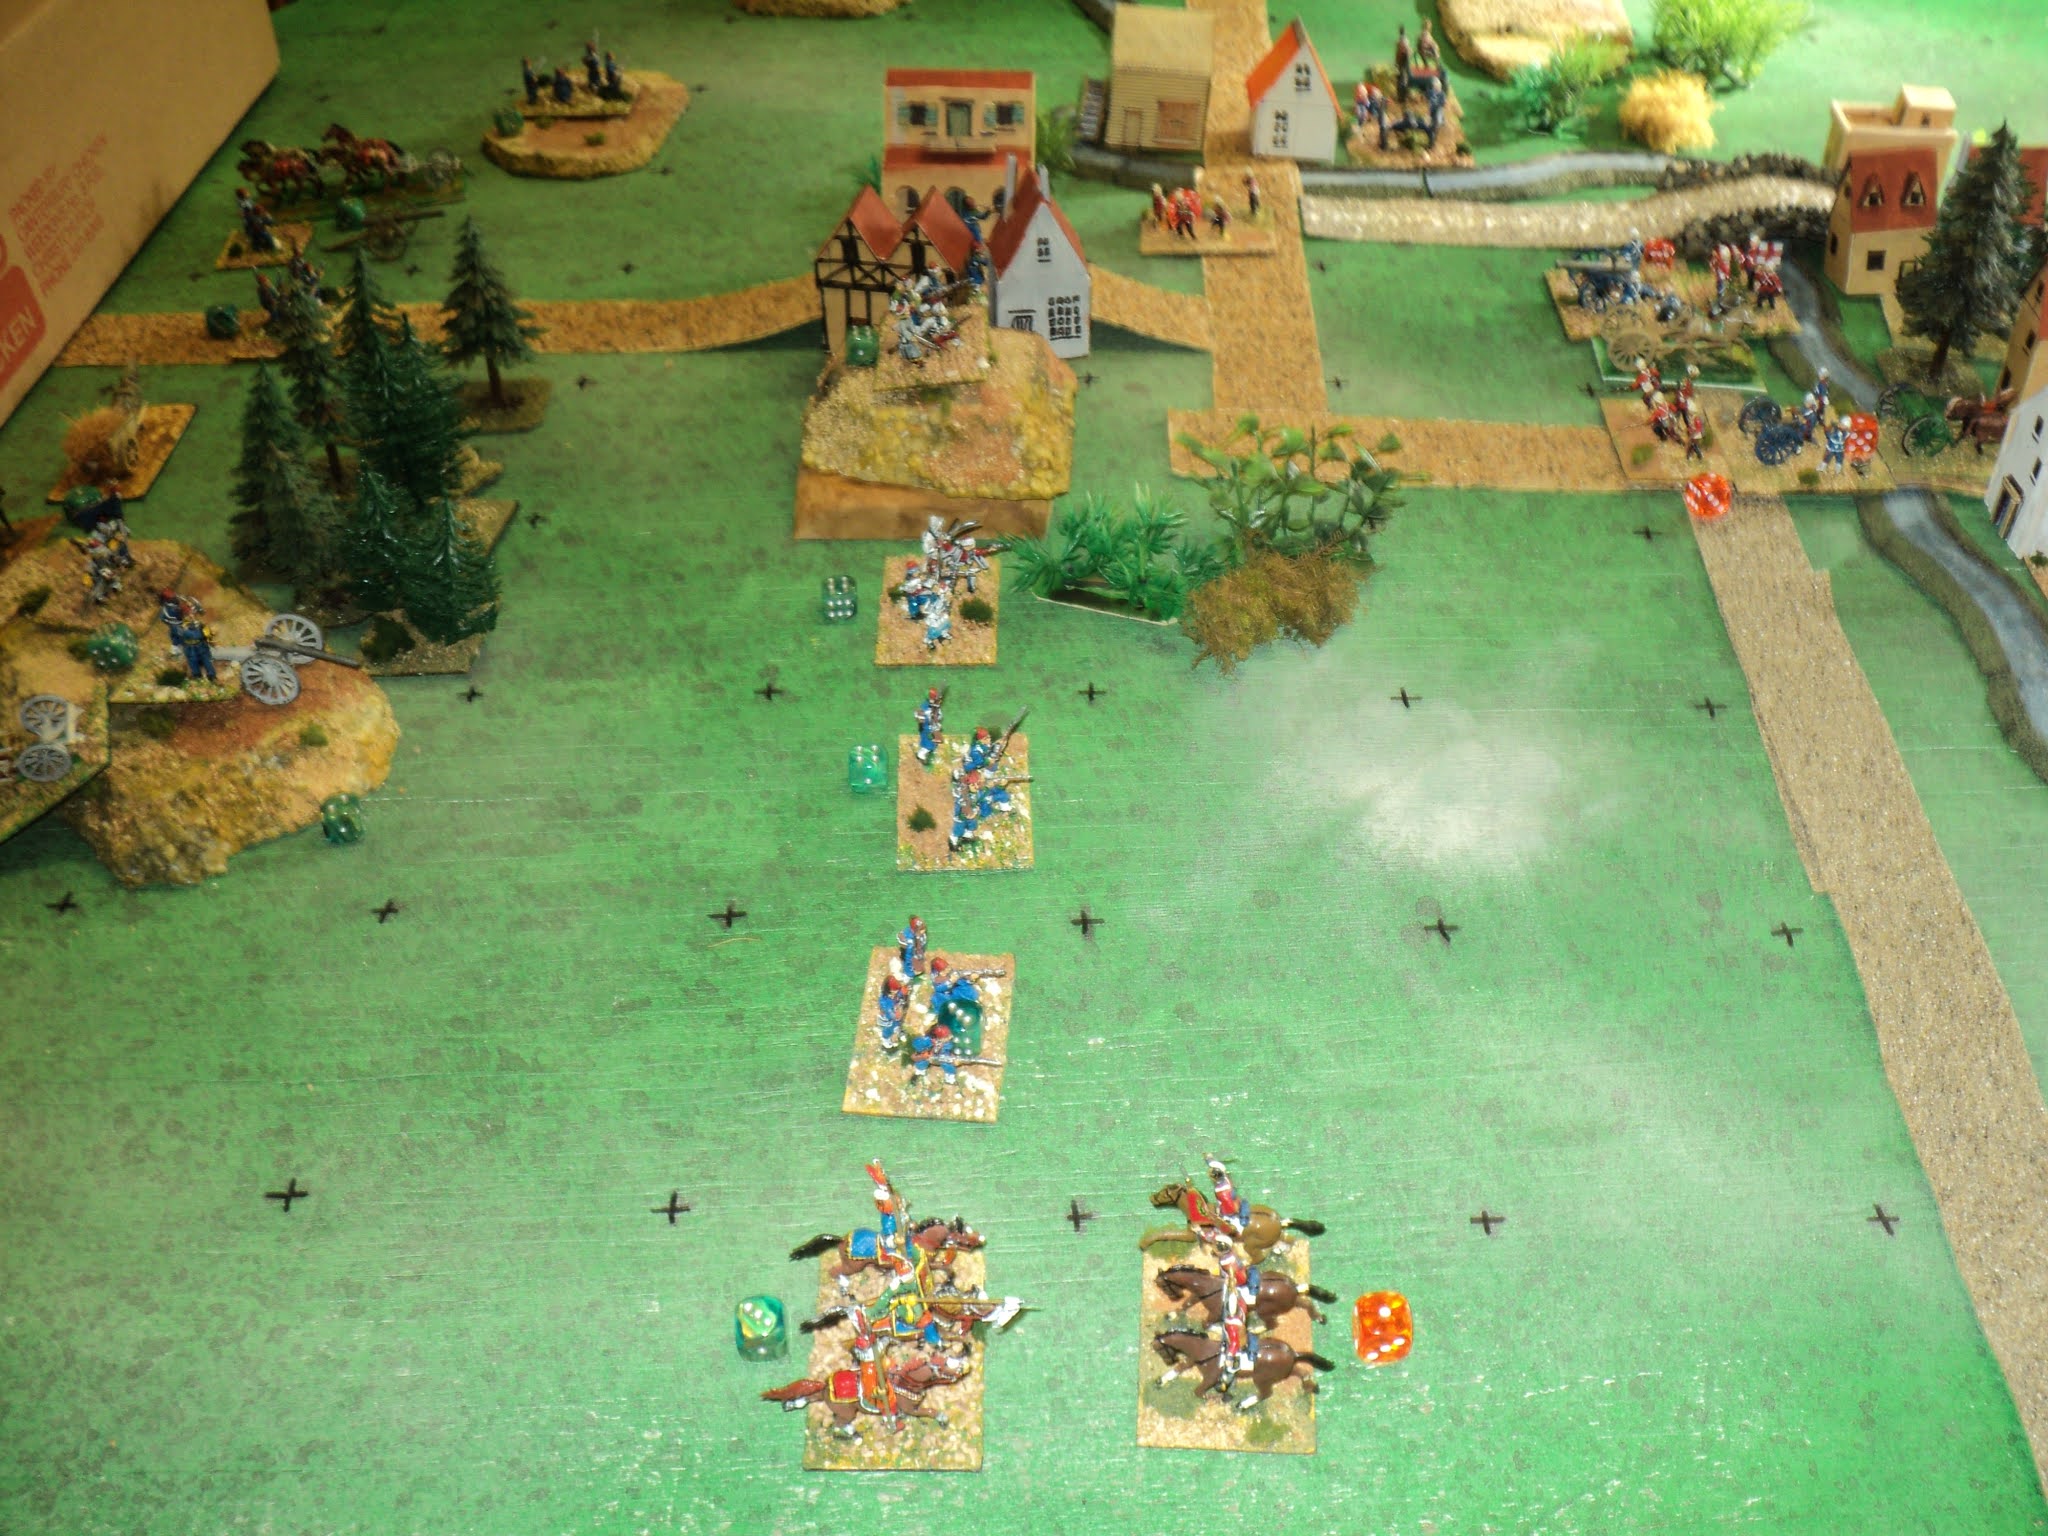
Chervenian 3rd Cavalry in trouble.
Chervenia IInd Army:
  • Command: General Nicola Ivanov (Average) = 6SP
  • 8th, 9th, 11th, 12th Infantry (trained) @ 4SP = 16SP
  • 10th Infantry (trained) = 3SP
  • 18th Infantry (green) = 4SP
  • 19th Infantry (green) = 3SP
  • MG detachment = 1SP
  • 3rd Cavalry (trained) = 3SP
  • 5th Cavalry (green) = 3SP
  • 4th, 5th Field Artillery (trained) @ 2SP = 4SP
  • 7th Heavy Artillery (trained) = 2SP
  • 3rd, 4th Transport Columns @1SP = 2SP
16 Units: Activation Median = 8 (Average commander) 
Strength Points 47, Exhaustion Point -16SP.

I'll have to 'fess up, here, as I made a right mess-up translating these lists to the table-top, and inadvertently gave all units the 'default' SPs.  This without changing the list SP total and exhaustion points.  As it happened, both sides gained equally, so neither gained an 'unfair' advantage thereby.  

Encounter battle special rules:

Both sides began the action off-table, feeding in the troops according (a) to an order of march, (b) up which road they were marching, and (c) the dice-rolled Activation score. A maximum of 4 units could march onto the table up any given approach road (which rather negated the advantage to the Chervenians if they rolled high on their activation die). Both sides had two roads by which they could approach, the Turcowaz from the west, the Chervenians from the east.

This tended to complicate the decision-making by both sides.  Once the leading troops were on the table, were they to mark time whilst reinforcements were brought on; should they stake out territory; or advance to meet the enemy, with reinforcements only later to be fed into the action?  This really proved to be quite an interesting exercise in its way.


Action was joined early as the advance guards hastened to engage the enemy as far forward as possible.  The Turcowaz seized Dimitrovgrad town right off, and hastened to put the place in a state of defence, whilst the field artillery and 3rd Cavalry covered the northern flank.  In front of the town, the leading Chervenian infantry and 5th Cavalry formed a front along the road north, to cover the arrival of 4th Field and 7th Heavy Artillery.  Then, as the field artillery made ready to open fire, 9th Infantry, astride the road, slid off to the ridge to the left, forming an embrasure through which the guns played upon the town.  The defending Turcowaz, 13th Infantry, at least twice found the east face of the town too dangerous to occupy, and retreated into the middle of the built up area.
As the fighting near the town developed into a rather pin-pricking exercise of penny-packet local attacks with no great result, developments seemed to promise more decisive results east of the road T-junction south of the place. The veteran infantry leading the Turcowaz march pushed beyond the orchard opposite the T-junction in the hope of pushing back the enemy before they became too strong. It was hoped in particular the the medium battery would make an early difference sufficiently decisive to permit an irresistible advance. Meanwhile, 1st Cavalry would make a serious attempt upon the 5th Field Battery then marching up the centre of the field.

Coming up towards the leading Chervenian elements, the remainder of the column, including the machinegun detachment, was not far distant.  But behind the three infantry regiments, single cavalry and the medium battery, Nazim Pasha had nothing at all in hand by way of reinforcement. Nor was the cavalry thrust against the limbered artillery successful. The Chervenian gunners deployed their pieces betimes, and drove the Turcowaz horsemen back over the hills to their front.  
Foiled in their attempt upon the enemy artillery, those same horsemen, 1st Turcowaz Cavalry, joined in an attack upon Chervenian infantry occupying the ridge east of the town.  The Turcowaz 14th Infantry had passed through the town and the adjoining woods to attack along the feature.  Held at the first onset, the infantry called upon the assistance of the horse. Together they forced the enemy from the high ground.  

At about this time 3rd Turcowaz Cavalry hoped to clear away their opponents and open up the northern flank.  Mounting a steep rise to their front, they surged down the other side - and met what might as well have been a brick wall.  The Chervenian horse - as green as their opponents - set an implacable defence against charge after charge.  It was a depleted Turcowaz cavalry that finally gave up the contest and retreated to the gun line.


The Turcowaz were finding themselves gradually giving ground on the southern flank as well. Driven back to the orchard, they found themselves under increasing pressure as the day wore on.

Now, during the course of this action, the SP losses had for some time been tracking in favour of the Chervenians, by a margin of two.  Early on it was 3SP to 5, later 6 to 8. Perhaps it was upon the strength of this I was inclined to take extra risks with the Chervenians. It has to be admitted, though, that some perhaps unnecessary losses were due to the column on the northern approach road preventing retreats by the unit in front in the face of incoming rifle fire. All the same, if progress was slow, their resistance was proving costly to the Turcowaz. 

Rather more tangible progress was being made, however gradually, on the southern wing.  Although 8th Infantry still occupied part of the long central ridge, the rest of the Turcowaz line had been pressed back to the line of the orchard and the Dimitrovgrad road.  Not that these advances were being made for free.  I was very surprised when the third or fourth the count of total SPs lost came to 12 for the Turcowaz and 15 for Chervenia!
 

It seemed that General Ivanov had been over-sanguine about how things were developing. Losses had been very heavy on both sides - and neither seemed willing yet to give it up. As reinforcements came up, they managed to edge back much of the Turcowaz line from the road. The battered 1st Infantry was clinging onto its orchard in the face of effective machinegun fire.  

Even that hold had to be given up. But by this time, the fierce Turcowaz resistance finally told: the Chervenian army had reached its exhaustion point. Further advances not possible, the Chervenians still had their rifles, machine guns and artillery. For their part, the Turcowaz on the north flank were still inclined to chance their arms in attack. But in the process of driving the Chervenians well back from the town, they too fetched up well beyond their exhaustion point.  

As the day faded into the late autumn evening, the battle sputtered to a close.  

This was a tough battle, no error, but so evenly matched were the armies, neither could achieve the decisive edge. Chervenia had lost 19SPs, Turcowaz, 18 - hardly a significant difference. In the town sector, Turcowaz had lost the more heavily - 10 SPs to 8. It was in the south that Chervenia's seeming irresistible advances came at so high a cost: 11 SPs to 8. In terms of troop numbers, 47,000 Chervenians faced 43,000 Turcowaz; losses were 9500 and 9000 respectively.


Both sides claimed the victory.  Such a mauling had his IInd Army received, that General Nicola Ivanov ordered a retreat into Northern Chervenia for a badly needed rest and reorganisation. His army would be out of the war for at least a fortnight.  Yet the action at Dimitrovgrad could scarcely be called a defeat to Chervenian arms.

Nazim Pasha's invasion of Chervenia was at an end - that much was certain. A Turcowaz victory might have laid open the road to Sofia, and possibly Chervenia's withdrawal from the war.   Instead he had to decide into which Imperial province he would retreat - North Macedonia, Rhodope of West Thrace? Probably Rhodope was safest, as there he was less likely to run into enemy forces than in the other two.  

This decision was decided by a die roll.  As I have only D10s sitting by me, the probabilities will be determined, weighted in favour of the middle option:
  • 1-2 Retreat to North Macedonia
  • 3-8 Retreat to Rhodope
  • 9-0 Retreat to West Thrace. 
Rumours of the Bejelan return to Vardar, with the consequent threats to North Macedonia and Monastir, decided Nazim Pasha's resolve.  Though his army was but a shadow of its former strength, something had to oppose itself to the invader!  The die roll was a '1'.

To be continued: East of Salonika: another Turcowaz-Chervenia clash. 

Saturday, November 21, 2020

Naval Chromium

This is a bit of an inter-acte waiting for the next series of battles.  Following publication of the recent  Blacklands War naval action off the Gallipoli Peninsula, the thought arose concerning adding a little 'chrome' to the naval rule set I was using (Gridded Naval Wargames, "Pre-dreadnoughts ... in Action").  Bob had added in his book an example of how damage might be recorded on each ship during the course of a battle.  

What follows is a bunch of ideas along these lines.  They have yet to be play tested, and some of them I'm not sure will make the cut into a final rule set.

My modification (simplification) of the Bob Cordery 
damage allocation chart.

It seemed to me that, given the variations in design of the ships I've built so far, that I'd have to draw up diagrams for all of them.  I even considered varying the number of hull and waterline 'cells' according to the flotation 'endurance' of each vessel.   To my mind that appeared to represent a lot of work, each time I wanted to play a game.   

A rethink from 'first principles' (whatever is meant by that) led to my coming up with a 'standard' elevation and plan schematic good for any and all vessels, from torpedo boat destroyers to modern pre-dreadnought battleships, but with departures from the standard resolved by other means - possibly dice. The above picture is a good representation of ships the type of Georgios Averof and Lemnos. Whenever a '6' is rolled to register a hit on a vessel, a card is drawn, with its value and colour - sometimes its suit - determining where on the vessel the shot hit.  A '5' also counts as a hit, starting fires and generally reducing the target's endurance, but without any specific damage. 

The bottom row of the hull in the diagram (i.e. cards 2-5) represents a waterline hit, costing 2 flotation points (all other hits represent 1 FP, plus local damage).  By the way, I discovered a small hitch in Bob's diagram: he forgot that a 'one' card in a standard deck is in fact the Ace.  

Now, a vessel like Turgut Reis has three main turrets.  Suppose a hit was scored, and we drew a Queen, representing a turret knocked out. Instead of determining which by the card colour, roll a die, with the effects:
  • 1,2 - forward ('A') main turret KO
  • 3,4 - midships ('Q') main turret KO
  • 5,6 - after ('X') main turret KO.
In several battle accounts one reads of a single main gun still in action aboard a badly battered warship.  It is simple enough to extend the list, for twin-gun turrets, if you want:

A: Georgios Averof:
  • Q-heart: Forward turret, starboard gun
  • Q-club: Forward turret, port gun
  • Q-diamond: Rear turret, starboard gun
  • Q-spade: Rear turret, port gun.


B: Hayreddin Barbarossa:
  • 1 = 1 gun 'A' turret KO
  • 2 = both guns 'A' turret KO
  • 3 = 1 gun 'Q' turret KO
  • 4 = both guns 'Q' turret KO
  • 5 = 1 gun 'X' turret KO
  • 6 = both guns 'X' turret KO.


I reckon that a card, once drawn and the damage assessed, must be shuffled back into the deck.   This might lead to the same card being drawn a second time.  That should be fine.  Its effect upon flotation is the same, and it compounds partial damage - e.g.  a partly damaged turret is altogether knocked out.  A second waterline hit in the same spot as an earlier hit incurs the same flotation loss.  

The strange gun arrangement of the Hydra class ironclad battleships can easily be sorted.  A Queen represents a hit on the main armament; a Jack, a hit upon the secondary.  Dice rolls determine as follows:

Primary Armament:
  • 1,2, = hit on starboard forward gun
  • 3,4  = hit on port forward gun
  • 5,6 = hit on after gun turret.
Secondary Armament:
  • 1 = hit on forward starboard gun
  • 2 = hit on after starboard gun
  • 3 = hit on forward centre-line gun
  • 4 = hit on forward port gun
  • 5 = hit on after port gun
  • 6 = reroll.
These need not be written in stone - merely illustrate ad hoc methods of tweaking the main set of rules to accommodate design differences.   One need not in my view even maintain a 'ship's card for each vessel, but keep a log of damage and status.  

Torpedoes away!

Torpedoes, then.  If they hit, they can be only waterline hits, or damaging to the screws or the rudder.  I'd suggest that of a 'pattern' of three dice, as called for by the parent rule set, only a '6' counts as a hit, 2-5 representing hits along the waterline, a '1' striking the rudder (affecting steering) and a '6' striking the screws (affecting speed).  I'd also suggest that any torpedo hit does 1D6 flotation points of damage.  Very chancy things, torpedoes!

List of gunnery effects:

These are ideas based somewhat upon the Gridded Naval Wargames chapter, 'Mimi and Toutou Go Forth'. They have yet to be play tested. 

When determining gunnery effects, only '5' and '6' count for hits.  Hits on a '5' count for 1 FP reduction only.  When a '6' is rolled, the target's FP is also reduced by 1, but card is also drawn randomly from a standard deck, which will include one Joker. 

Red Ace = rudder hit.  -1FP. Ship maintains present course, or turn, for 1-3 activations (die roll).
Black Ace = screws hit.  - 1FP. Reduce speed by 1 hex.  Cumulative.
2 = waterline hit, bow; -2FP
3 = waterline hit; -2FP
4 = waterline hit; -2FP
5 = waterline hit, stern; -2FP
6 = hull hit; -1FP
   6 Spade = forward magazine hit; magazine flooded to prevent exploding, turret may fire once more only
7 = hull hit; -1FP
8 = hull hit; -1FP
9 = hull hit; -1FP
   9 Spade = rear magazine hit; magazine flooded to prevent exploding, turret may fire once more only
10 = funnel hit
   Red 10 = -1FP. Forward funnel hit
   Black 10 = -1FP. Rear funnel hit 
   (if more funnels than 2, determine by dice roll)
   When all funnels hit, speed reduced by 1 grid area.
J = -1FP. Secondary armament hit.  See diagram and descriptions above.  If secondary armament arranged differently, the hit may be determined by dice roll.  Effects reduced by percentage basis. 
Q = -1FP. Primary armament hit.  See diagram and descriptions above.  One may choose to take the effect by gun rather than by turret as a whole, as earlier suggested.
Red King = -1FP. Mast hit, communications with other ships knocked out.  Vessels in formation, stay in formation
Black King = -1FP. Bridge hit.  Steering compromised, ship maintains course for 1-6 activations.  If it turned during the turn, it must continue turning in the same direction for remaining activations.  If shooting during the turn, must continue shooting at the same target, if available, otherwise, cease shooting.
Joker = Magazine hit, not flooded in time, causing a catastrophic explosion.  Ship sunk.

Now, I really would value some comment on what I've suggested here.  Is it altogether too much?  Perhaps I've overlooked something.  I hope to do a little bit of a play test soon, to see where this goes.

To be continued...

Tuesday, November 17, 2020

The First Blacklands War - the Fourth Week

Three weeks of battle on land and sea, saw the Allies in a position none too encouraging. Eight engagements, and only one clear victory to be had - one dearly bought and indecisive, at that. Invasions of Turcowaz territory by Bejela and the Black Mountains Principality had both been thrown back, as had the Chervenian descent upon North Macedonia. The Black Mountains Army, however, was once more at large, marching though the Abilonian littoral without opposition. Only the garrison of Scutari represented Turcowaz military presence along the Adriatic coast.

For the moment only two Allied Armies were facing Turcowaz forces inside the Settee Empire itself, the Hellenic and IIIrd Chervenian - and both stood at the end of long and tenuous lines of communication.

Side Note: In the narrative that follows, I will outline the moves of the respective armies, then follow that with a map and summary of how the decisions were effected.

First Blacklands War: Situation at the beginning of Week Four
As the War entered its fourth week, the Turcowaz armies seized the initiative. Rather than pursue the defeated Ist Chervenian Army into Sofia, which city would have been much too difficult to take, and impossible to besiege given a second Chervenian Army at large in the province, Nazim Pasha had several other options available:
  • to seek out and engage Chervenia's IInd Army;
  • to move back into Vardar in anticipation of Bejela's second invasion;
  • retire into North Macedonia;
  • retire into Rhodope
Bellicose to the point of bullheadedness, Nazim Pasha chose the first course of action: to bring IInd Chervenian Army to battle.

The Second Turcowaz Army might have been expected to anticipate the Bejelan move, or perhaps to come to the assistance of Fourth Army, then facing the Hellenic, and whose rear, rumour ran, was menaced by the approaching IIIrd Chevenian Army. Instead, Ali Riza Pasha chose a third course: to march into South Macedonia to cut the Hellenians off deep inside the Empire, and thus, eventually, to force its surrender.

Having repaired its wounds and recuperated after its battle of  Week Two, Third Army once more marched in East Thrace to guard the western approaches to the capital.   

Fourth Army was in something of a dilemma - attack the Hellenic Army with Chervenians in the rear, or vice versa. Halepi Zeki Pasha intended to attack the Hellenes, but discovered they had absconded during the hours of darkness of a wet and windy October night.  Eager for action, instead he led his army eastwards. According to messages received, Second Army was moving to intercept the Hellenic withdrawal.

In view of the Turcowaz move against his line of communications with his own country, Crown Prince Constantine had in effect no real choice. So tempting to fight a great battle against the hated enemy immediately before him, but to do so would have been to invite disaster. The Hellenic Army began its trudge southwestward. They would be lucky to get by the converging Second Army without a fight.

For their part, the Bejelans were, in effect, beginning anew. The two armies had been merged into one, under the command of the able General Petar Bojovic. How to employ this army?  Ignoring Chervenian appeals to help repel the Turcowaz invasion of that country, Bojovic ordered the advance southward, once more into Vardar Province. Intelligence received indicated that First and Second Turcowaz Armies were employed in other enterprises, and would not be in a position to oppose the occupation of Vardar.

The Chervenians were rather constrained in their options. The battered Ist Army had no option but to fall back into Sofia, where, together with that fortress's garrison, they should discourage any attempt upon the place. With an enemy army abroad in the province, and Ist Army's resistance problematical, IInd Army had perforce to abandon a projected invasion of Thrace, and to march to face the the invaders. Only IIIrd Army seemed free to carry out its plan: to advance into East Macedonia and trap, if the Hellenic Army cooperated, the Turcowaz Fourth Army.

Finally, the small Blacklands Army, having entered North Abiloni found itself outside the fortified city of Scutari. The question was whether to attempt an immediate assault, or to lay siege to the place.  Or maybe to advance into South Abiloni. The last option seemed out of court on account of enemy forces, even if only a garrison, in the Army's rear. An assault stood to gain much, but the Black Mountains Army was hardly larger than the Scutari garrison. On the other hand, all the Turcowaz armies were so distant, and otherwise engaged, a siege was clearly indicated. So the newly appointed Major-General Iskander Bogotan ordered.

First Blacklands War: Moves, battles... and a siege.

What of the war at sea? The Turcowaz Admiralty had long had the notion of employing their fast light cruiser, Hamidiye, with its well-trained crew, as a commerce raider against Hellenic shipping, and perhaps as an ever present preventive against Hellenic descents upon Turcowaz coastal towns. Although the blockade had officially been broken, and in fact the Hellenic Navy could maintain only a discreet and distant watch upon the Dardanelles, it would be necessary to protect Hamidiye against the heavier Hellenic units should they attempt to intervene. Sufficient repairs completed to the battleships Hayreddin Barbarossa and Mesudiye, and destroyers S167 and S168 made available, they would make up the escort. 

For their part, the Hellenic Naval Council had long apprehended such a move by the Turcowaz Navy. Once into the open Mesogesean Sea there may be no knowing where the raider might choose to operate. Their one vessel fast enough to match Hamidiye's speed was this moment laid up in dry dock undergoing extensive repairs. They simply had to hope that timely intelligence from Ionople, an alert watch, and a huge dollop of luck, would lead to the interception of the cruiser's sortie. A small squadron of observation was to be maintained at Lemnos Island, comprising:
  • Lemnos, battleship
  • Spetsai, coastal battleship, sister to Hydra and Psara
  • Leon, destroyer
  • Aetos, destroyer

Campaign Journal

The manner in which the decisions were arrived at was as follows.
A.  The order of moves was determined by die roll, resulting in
  1. Turcowaz
  2. Hellenia
  3. Bejela
  4. Chervenia
  5. Black Mountains Principality
B.  Each army was presented with a range of options. Occasionally a given army's move might be mandatory.

Turcowaz First Army (In South Chervenia)
  • Move to engage IInd Chervenian Army in S. Chervenia (D6 = 1,2)
  • Move to Vardar to intercept likely Bejelan invasion (D6 = 3,4)
  • Move to North Macedonia (D6=5)
  • Move to Rhodope (D6=6)
Die Roll = 2: Move to engage IInd Chervenian Army 

Turcowaz Second Army (In North Macedonia)
  • Move to East Macedonia to engage Hellenic Army (D6=1,2)
  • Move to South Macedonia to cut Hellenic Army's LOC (D6=3-6)
(Note that I weight the responses according to my view of their likelihood)

Die Roll = 3 Move to South Macedonia 

Turcowaz Third Army (In Ionople)
  • March into East Thrace (D6=1-4)
  • Remain in Ionople (D6=5,6)
Die Roll = 1 Move to East Thrace

Turcowaz Fourth Army (In East Macedonia)
  • Attack Hellenic Army (D6=1-3)
  • Attack Chervenia IIIrd Army in West Thrace (D6=4-6)
Die roll = 2 Attack Hellenic Army.  However, this one was overtaken by events, and the army turned to attack Chervenia IIIrd Army instead.  See below.

Hellenic Army (In East Macedonia)
  • Stand and fight Turcowaz Fourth Army (D6=1-3)
  • Retreat into South Macedonia (D6 = 4-6) 
Die Roll = 4 Retreat into South Macedonia (without engaging Fourth Army).  This stood, but it left Fourth Turcowaz Army with a quandary: to follow up, or to turn about face to deal with IIIrd Chervenia. I could have let the army stand, recast the options, or simply gone with the option remaining. I went with the last. Probably better would have been to leave Fourth Army where it stood, and have an ATTACKER-DEFENDER action in East Macedonia, rather than on the border with West Thrace.  However, the whole point of the thing is arrange battles... 

Bejela Army (In East Bejela)
  • Invade Vardar (D6=1-4)
  • Go to help of Chervenia, move to South Chervenia (D6=5,6)
Die Roll = 3 Invade Vardar

Chervenia Ist Army (In South Chervenia)
  • Retreat into Sofia (capital) (Mandatory)
Chervenia IInd Army (In South Chervenia)
  • Attack Turcowaz First Army in South Chervenia (D6=1-4)
  • Invade East Thrace (D6=5,6)
Die Roll = 4 Attack Turcowaz First Army 

Chervenia IIIrd Army (In West Thrace)
  • Advance into East Macedonia to attack Fourth Turcowaz (existing plan).
Black Mountains Principality (In North Abiloni)
  • Lay siege to Scutari (only feasible option)
As it was fairly easy to bring the navies into some kind of action, the narrative was developed accordingly. So there will be a naval action off Tavsan Adasi (Battle of Pirasi) between the squadrons listed above.

The net result will be 
  • Encounter Battles in South Chervenia, South Macedonia and on the border between East Macedonia and West Thrace.
  • Siege of Scutari
  • Naval action south of the Dardanelles.
To be continued ...


Thursday, November 12, 2020

First Blacklands War - The War at Sea

This picture taken fairly early in the action: 
Georgios Averof using its extra speed to try and 
'cross the T', and the Turcowaz fleet in the process of 
turning in succession into a course nor'west by north.


The land war going so well for the Turcowaz Armies, apart from the defeat much too close to the Imperial capital for complacency, the Imperial Admiralty bethought it not before time to break the Hellenic blockage of their main - almost their sole - access to the open sea.  To be sure, there were other sea ports to the east along the Anatolian littoral, but they had little naval protection and in any case had nothing more than small craft for local defence - hardly any military value whatever. To the west, that was where the major sea ports lay, and they for the moment, were inaccessible. What if Halepi Zeki Pasha's army were to be bailed up in Salonika?  Could they be evacuated by sea?  Not with the blockade in force.  Finally, there was the significant factor of Zeleniya, very interested in the reopening of the Bosphorus and Dardanelles as an International Seaway into the Mesogesean Sea.

Fleets on converging courses, the Hellenic 
nor'west by north; the Turcowaz, due west.


The return, however badly its damaged state, of the ironclad battleship TNS Mesudiye offered some hope that the blockade might be broken, even if temporarily. In its passage, Mesudiye had ensured the Hellenic coastal battleship, HNS Hydra would be out of action for at least as long as the Turcowaz ship - probably longer. Refurbishment work upon the sister ship TNS Muhtesem* due for completion about October 20th, orders went out for the breakout attempt to be made on the 25th, when, the meteorologists advised, the weather would be fair, with light breezes from the south west.

Side Note: The British built Mesudiye was to have a sister ship of the same design, but, when built, it was never delivered.  Instead it fetched up in the Royal Navy as HMS Superb.  In this world, however, the Ruberian ship builders, contractors and admiralty came through and made good on the deal.  The sister ship was named Muhtesem - Turkish for ... 'Superb'.  

For their part, the immediate Hellenic reaction was to place one of Hydra's sister ships,  HNS Psara, to maintain watch over the exit of the Dardanelles. The main body of the Blockade Fleet would remain at the island of Lemnos, close enough to support Psara in the event of a breakout.

Turcowaz breakout attempt.

As promised, the 25th October proved as fair and tranquil as could be wished of a late autumn morning. Weighing anchor just after midnight in the darkness of a moon two days new, the breakout squadron began a leisurely journey down the Dardanelles Straight, arriving at its mouth shortly after first light. As the morning brightened, just as the battle line turned onto a course due west towards the northern edge of Lemnos island,  the lookouts spied smoke far to the south:  HNS Psara, on patrol.  

For its part, Psara spotted the Turcowaz squadron as distant pale ghosts against the loom of the Gelibolu Peninsula.  At once that vessel turned its course to parallel the enemy.  Meanwhile, anticipating the breakout move - apparently Hellenic agents in Ionople had got the word out betimes - the main body of the blockading squadron had stood out from Lemnos Harbour  at about the time the Turcowaz fleet was exiting the Dardanelles. Discovering that the enemy was not attempting to break out to the south but instead to the west, the Hellenic fleet turned onto a northwest by north heading, hoping to intercept.  As the courses converged, Psara joined the squadron and took up its station at the rear of the battle line.  

Hellenic battle line.


The Hellenic Blockade Squadron, led by Rear Admiral Pavlos Poliomyelitis comprised:
  • Georgios Averof, Armoured Cruiser, 10,000 tons, 4 x 9.2-inch; 8 x 7.5-inch;  F/P=12 C/P=3
  • Lemnos, Modern Pre-Dreadnought Battleship, 13,000 tons, 4 x 12", 8 x 8"; F/P=20 C/P=5 
  • Psara, Coastal Battleship, 5,000 tons, 3 x 10.8"; 5 x 5.9"; F/P=12 C/P=3
  • Ierax, Destroyer/ Torpedo boat, 1000 tons, 4 x 4"; torpedoes; F/P=5 C/P=1
  • Panthir,  Destroyer/ Torpedo boat, 1000 tons, 4 x 4"; torpedoes; F/P=5 C/P=1
The main battle line comprised the three ships, in line astern on a northwest by north heading, with the destroyers forming a parallel line to port, somewhat protected from enemy gunfire.  Rear Admiral Poliomyelitis hoisted his flag aboard Lemnos.


Turcowaz battle line.


Converging upon the Hellenic line, the Turcowaz fleet came on undaunted, still on its course due west. The two most powerful warships led, the second of which, Hayreddin Barbarossa, carried the flag of Admiral Basmati Reis.  The breakout squadron comprised:
  • Turgut Reis, Older Pre-Dreadnought Battleship, 10,000 tons; 6 x 11", 8 x 4.1"; F/P=15 C/P=4
  • Hayreddin Barbarossa,  Older Pre-Dreadnought Battleship, 10,000 tons; 6 x 11", 8 x 4.1"; F/P=15 C/P=4
  • Muhtesem, Coastal Battleship, 9000 tons; 2 x 9", 12 x 5.9"; F/P=12 C/P=3
  • Hamidiye, Protected Cruiser, 4000 tons; 2 x 5.9", 8 x 4.7"; F/P=10 C/P=2
  • S165, S166, Destroyer/ Torpedo boats, 665 tons; 2 x 8.8cm, 2 x 37mm, torpedoes; F/P=5 C/P=1

    F/P=Flotation Points; C/P=Critical Point
As did the Hellenic fleet, the destroyers formed a separate, parallel, line starboard of the main four-vessel main battle line.  

Trying the range: Battleship Lemnos lets fly.

As the courses converged and the ranges closed, Lemnos, with its longer ranged 12-inch guns, opened fire on the leading Turcowaz vessel.  Continuing on through the ineffective fire, Turgut Reis led the battle line until well within range of its own main battery, turned onto a course parallel with the Hellenic, and let loose its first salvo against Georgios Averof.  

Near miss from HNS Lemnos - not yet in range 
of Turcowaz guns.
Admiral Basmati Reis having ordered a course change in succession bearing northwest by north, the lead Turcowaz ship, Turgut Reis, came in for the undivided attention of Georgios Averof and Lemnos, both.  Five damaging hits opened up holes and started fires aboard the Turcowaz battleship.  But Turgut Reis gave back with interest - three hits only upon the Hellenic armoured cruiser, but they with 11-inch shells - all three seriously damaging (3 sixes = 6 flotation points struck off).  

The following ships had not reached the turn when Turgut Reis fired off its first salvo.  Only Hayreddin Barbarossa had the range, and could reach with its broadside the Psara, and not the Lemnos battleship. One hit struck a blow upon Psara's upper deck, causing minor damage.    

Telling exchange of salvos begin the action.

Now, Georgios Averof had almost from the outset been ordered by Rear Admiral Poliomyelitis to use its speed to head reach upon the Turcowaz battle line, in the hope of crossing the 'T', whilst the rest of the squadron continued to engage the enemy from abeam. This plan reckoned without the accuracy of Turcowaz naval gunnery - another salvo such as already received might well see the end of Hellenia's pride and joy.
TNS Turgut Reis taking some stick at the beginning
of the change of course to parallel the Hellenic battle line.


HNS Psara in action.

As the Turcowaz battle line settled upon its new course, the action became formalised into ship-for-ship gunnery duels.  In this, Georgios Averoff found itself rather overmatched by the heavier and more numerous main battery of the Turcowaz pre-Dreadnought battleships. That 'Q' turret, of course! Perhaps if the heavy cruiser could have brought its secondary armament into range - far more powerful than the 4.1-inch secondaries carried by the Turcowaz battleships - maybe the fight would have been more equal.  As it transpired, she put two hits aboard Turgut Reis, but once more took far greater damage in return.  Ablaze from end to end, and with a pronounced list to starboard, Georgios Averof altered course to due west, and limped out of the battle. 
The Turcowaz battle line having almost completed 
its change of course.


The duel between the respective flagships went slightly - only slightly - in favour of the Hellenic vessel, with both sides receiving severely damaging hits. The Lemnos was the better able to withstand the punishment, however. Had this been a single ship duel, no doubt it would have gone hardly with the older battleship. Handicapped by its limited broadside Psara got the worst of the early exchanges with Muhtesem. It was clear that the Hydra class of warships did not favour the formal battle line. 
Georgios Averof at full speed, planning to cross 
the 'T' of the slower moving Turcowaz line.

At this point I shall interrupt the narrative with a side note on the ships' fighting capabilities, as interpreted by Bob Cordery's naval rule set for Pre-Dreadnought warfare. Instead of taking Bob's firing system for broadsides standardised by ship type; I made them the default for 4 guns (broadside) and 2 (fore and aft batteries) down to protected cruiser level. For destroyers and small craft I left them 'per spec'. Now, they fit very well 'as is' with vessels like Lemnos and Georgios Averof. But it seemed to me they didn't take into account the extra midships 11-inch gun turret on the Turcowaz (Turkish) pre-Dreadnoughts, nor the idiosyncratic gun arrangements upon Muhtesem/ Mesudiye, Hamidiye and Psara/Hydra. Hence the stats I published two or three postings ago.

Both sides scoring damaging hits.

In the case of the pre-Dreadnoughts, the extra two guns gave the Turcowaz battleships' 6 11-inch a firepower equal to or greater the 4 12-inch guns carried by Lemnos - once they got within range, of course!  The 12-inch still had a two hex range advantage!  


With Georgios Averof falling out of the battle line, the Rear Admiral ordered the destroyers to attack, with Psara also altering course to northeast by north to approach and engage more closely the Turcowaz battle line Lemnos would continue as the sole unit remaining in the nor' by nor'west battle line.  

As Georgios Averof staggers out of the fight,
Psara and the destroyers are signalled: 'Engage 
the enemy more closely'.

Admiral Basmati Reis was of like mind: it was high time the destroyer torpedo boats contributed to the combat.
Turcowaz destroyers go in.

Suddenly the sea was criss-crossed with converging wakes and gunfire.  Lemnos brought such a punishing fire down upon Turgut Reis that very shortly she was forced to fall out of the battle line just as Georgios Averof had been.  For its part, Turgut Reis still managed to start a couple of fires on the Hellenic flagship.  Possibly Hayreddin Barbarossa ought to have kept firing at Lemnos, but had instead switched its attention to Psara, upon which vessel it struck several heavy blows, whilst taking a couple of minor knocks in reply.  Muhtesem added a couple of hits to the damage Psara was accumulating at an alarming rate.  With no major target available, the protected cruiser, Hamidiye, concentrated all its firepower upon the approaching Ierax destroyer.  It was overkill.  In a welter of explosions Ierax vanished quickly beneath the waves.

The battle lines aflame!

The other Hellenic destroyer was scarcely luckier. Taking a hit from an enemy destroyer, and several from the powerful secondary armament of Muhtesem, Panthir was forced, without ever releasing its torpedoes, to limp off, still under way, but otherwise reduced to a wreck.  

Nor was the destroyer S165 able to complete an attack before taking hits from Lemnos, Psara and a near miss from Panthir.  Lucky to remain afloat, S165 made off , passing across the wake of S166 as that destroyer pressed on to release its torpedoes against Psara's stern.

A further aside, here.  In the above picture, the green and big white dice are the main gun salvos; the small white and coloured dice, the secondary armaments. It appears that before taking this picture I had removed the 'misses' from Lemnos's main guns, but all the remaining rolls are there.  Now, at this point so exciting was the action I simply forgot to take pictures for a short while.  Ierax was sunk, and Psara crippled, and about to try and break off the action.  So I had perforce to substitute the following diagram of the action.  


In lieu of pictures, a diagram.  The action was 
getting pretty lively hereabouts!

As Turgut Reis fell out of its station leading the battle line, the latter carried on their course, covering the withdrawal of the stricken battleship.  Hayreddin Barbarossa and Muhtesem exchanged further pleasantries with Lemnos, adding to the carnage, but without forcing any vessel to abandon the fight. Of the destroyers, only S166 remained in action.  As Psara turned away towards the northwest, she took a couple of damaging hits from Hamidiye, but the coup de grace was delivered by S166.  Firing a pattern of 3 torpedoes (my 'narrative interpretation' of Bob's rules concerning torpedo firing), the Turcowaz destroyer had only the Psara's stern at which to aim.  Two of the torpedoes missed, but the third struck home, wrecking the steering, opening up a gash into which the seawater poured unstoppably, and leaving the ironclad dead in the water, and sinking. 
Two telling hits from Hamidiye, and a torpedo 
strike from a Turcowaz destroyer sends 
Psara to the bottom of the sea.

That was the end of the action, pretty much.  Shorn of its supports, the Hellenic battleship could scarcely make head alone against what remained of the Turcowaz squadron.  Reluctantly, Rear Admiral Poliomyelitis called upon the retreat, following and protecting Georgios Averof and Panthir.  Both were crippled but at least afloat, making off to the west, and the safe anchorage of Lemnos Island.  For their part, the Turcowaz fleet, relieved perhaps at not having to fight Lemnos to a finish, also made off to the northeast, later on shifting course for the entrance to the Dardanelles.  The battle was over.


The battle over, the wreckage of  two Hellenic vessels
 burn as the fleets disappear over the horizon.

Of course the Turcowaz sailors were cock-a-hoop, as was the Ionople Press and the people of the capital.  The blockade was broken, and the Turcowaz Empire could appeal to International Opinion and Convention to insist that, if the Hellenic Navy wished to reimpose the blockade, the standard period of notice would be required.  The generally Turcophobic nations of Europeia found themselves unable to find any excuse to deny the claim; but that was a matter for diplomatic wrangling in obscure corridors of international discourses. The Hellenic Navy had taken a hard knock: a major unit sunk, and their pride and joy, Georgios Averof reduced to a flaming wreck, not to mention a destroyer lost and another that would take months to repair (Actually, considering the size of that armoured cruiser - close to 10,000 tons - perhaps 15 Flotation Points might better reflect its endurance).  It might be several weeks before a blockade could be reimposed - and the Turcowaz navy was better placed to break it again.  By comparison, the Turcowaz fleet had got off lightly...

For the time being, the protected cruiser, Hamidiye was being hastily provisioned for a commerce raiding cruise into the Mesogesean Sea...

An addendum to the Admiral's report and the Hayreddin Barbarossa ship's log has come to light concerning the outcome of the battle:

Battle log recovered from 
Hayreddin Barbarossa.

Much to my surprise, not having played out a fleet action using the Bob Cordery set (really only the stats were modified, and they only slightly), the Turcowaz fleet performed very well - far better than the Ottoman historically. It appears that in my world, the Turcowaz gun crews received as much instruction upon gunnery as they did upon gun drills. Georgios Averof received so much punishment so quickly, it was out of the action all too soon after it began, and lucky to get off still afloat. 

The whole action went very quickly; I doubt it took an hour. In fact, this action, together with the battle of Klyutch played earlier, was finished the same morning. Left as is, one could comfortably fight a fleet action with many more vessels than the eleven engaged in this one. Mind you, my game board is no great size for this kind of battle: I had to 'scroll' the action at least every other turn - not that that presented any real problem. From my perspective that would tend to limit the battles to not much more than what I have now available.

I have a feeling that the next time these squadrons are engaged in battle, I'll be introducing a little bit of extra detail, hit 'sixes' having some effect upon motive power, steering or gunnery, say - just to add a little 'colour' to the battle narratives.

For all that, there was plenty of excitement to be had, to the point that at its climax, I simply forgot to take pictures, whilst imagining I was still doing so!  

To be continued: what happens during the Fourth Week of the First Blacklands War.


Monday, November 9, 2020

First Blacklands War - Battle of Klyutch


Early Turcowaz advances.  Already it is plain the 
main weight is on the right.


Following the Second Turcowaz Army's near-miraculous victory in Vardar, the separate Bejelan and Chervenian armies retreated rapidly across their respective borders. This left the road open for Second Army to continue its march into North Macedonia. It also left a wide range of options from which Nazim Pasha, commanding First Army, could choose.  

Overall situation third week of the war.

Now the good Pasha was not the brightest star in the Turcowaz constellation of generals, but he was certainly one of the most pugnacious, judging from his decisions so far. Scorning to await events, but wary of nebulous affairs in Bejela (where his spies indicated the two armies were consolidating into one), Nazim chose to set off in pursuit of the Chervenian army. Scuttling across the Rhodope Mountain Range, the Chervenian 1st Army, led by the redoubtable Vasil Kutinchev, came to a halt near the village of Klyutch. There the Chervenians turned at bay, to face their pursuers.  
Early dispositions.  Turquoise = Turcowaz
Pink = Chervenia

This was to be no easy task for an army whose infantry arm had been badly depleted in battle. The Royal Guard Cavalry had also been seriously weakened. On the other hand, he did have his machine guns, and a strong artillery arm. The Chervenian Army comprised:

1st Chervenia Army
  • Command, General Vasil Kutinchev ['Good'] = 6SP
  • 1st, 2nd Royal Guard (veteran) @ 4SP = 8SP
  • 4th, 7th Infantry (trained) @ 4SP = 8SP
  • 1st MG = 2SP
  • Royal Guard Cavalry (veteran, reduced) = 2SP
  • 2nd Cavalry = 3SP
  • 1st, 2nd Field and 6th Medium Artillery @ 2SP = 6SP
  • Transport Columns @ 1SP = 2SP
13 Units; median = 7+1 ('Good General') = 8
37SP; exhaustion Point = -13.

Against them, the First Turcowaz Army went into battle with:

First Turcowaz Army
  • Command, Nazim Pasha ['Poor'] = 6SP
  • 1st Infantry Regiment (veteran) = 4SP
  • 7th, 8th, 13th, 14th Infantry @4SP = 16SP
  • 23rd, 24th Infantry @ 4SP = 8SP
  • 1st Sipahi (trained) = 3SP
  • 3rd Sipahi (green) = 3SP
  • 1st Field Artillery = 2SP
  • 5th Medium Artillery = 2SP
  • 1st, 2nd Transport columns @1SP = 2SP
14 Units; median = 7-1 ('Poor' General) = 6
46SP; exhaustion point = -16.

View from behind Chervenia lines, looking westward.
The Chervenians had placed their main line astride the Likvidatsiya River, a watercourse that meandered through the foothills through which the mountain pass highway descended on the Chervenian side. In one of the more settled regions were four villages, forming a rough quadrangle, the westmost of which stood upon the more gentle slopes of a hill  over which the road ran. Upon this hill, General Kutinchev had placed 7th Infantry, installing in the village itself his machine-gun detachment. This little force was intended to break up the Turcowaz attacks before they reached his rather exiguous main line. His cavalry covered the more open left flank, and half his infantry were on the right, with ideas of counter-attack in mind, should the enemy carry the village and push into the main Likvidatsiya valley.
Nazim Pasha had but one idea in mind: the crush the enemy before him. His main attack, supported by his field artillery, comprised two infantry and his two cavalry regiments, who were to clear the whole field south of the river. Anticipating such a course, Kitinchev had also placed his cavalry, hoping that their better quality would offset their slight inferiority in numbers (5SP against 6).  
Chervenian MG company defending Gabrene.
At the same time, Gabrene village was to be stormed by the mass of the Turcowaz infantry, four whole regiments. Only 14th Infantry remained, standing as flank guard on the left.
The first shots were exchanged in the centre, as the 23rd and 24th Infantry lined the woods opposite the Gabrene Ridge and began a brisk firefight with 7th regiment opposite. Advancing up the road, 13th Regiment were met by a sleet of MG fire that within short order reduced their strength by 75%. Nothing loth, 8th Regiment went in, closed right up to the town, and at the point of the bayonet pitched the machine gunners out of the place.
13th Regiment repulsed.

Charging through the village, the attackers were halted at the eastern edge. In the resulting scrimmage, the machine gunners were reduced to half strength, but managed to force their assailants, with loss, out the far side of the village.  Meanwhile, the firefight had reduced the strength of 7th infantry by 25%. (Considering just 6 stands were involved, this was proving quite a bloody little fight, though the Turcowaz in the woods had as yet suffered no loss.)
8th Regiment storms the village.
In view of the lack of pressure against his right flank, Kitinchev bethought himself that his own troops in that sector might try their hand against the Turcowaz left. Finding a ford to their front, 1st Royal Guard began to cross, as the accompanying field artillery drew up to the bank. Fourth Regiment could find no ford across the marshy river as it looped around Scrat village (decided by die roll, 50-50 call), and so prepared to cross instead by the river bridge.
The scrap in full swing around Gabrene village, on the left flank the Chervenian cavalry charged the advancing Turcowaz. Already galled by gun and rifle fire that had caused both units some loss (1SP from both units, for no loss to the enemy from the Chervenian artillery), the Chervenian horse hoped to reverse the fortunes of the day.
Chervenian cavalry charge - already both 
regiments have taken losses.
All Chervenian counter operations were insufficient to save the situation on Gabrene village, however.  Briefly reoccupying the village, the machine gun company were very soon compelled to give it up. Back they went, down the road - ahead of them the former defenders of the ridge, for whom the incoming rifle fire had also been too much to bear. Altogether, in inflicting 4SP loss to the attackers, the defenders had taken 3SP loss. General Kitinchev thought that not too exorbitant an exchange. Neither did Nazim Pasha.  
1st Field and 4th Infantry Regiments change front


The loss of Gabrene village rather put a damper upon any notions of counter attack by the Chervenian right. First Artillery and 4th Infantry turned their attention southward, against the flank of ant Turcowaz advance from the village. First Royal Guard infantry were left for the duration high and dry on their own, engaged in a desultory hilltop firefight with 14th Turcowaz Regiment, whilst the real battle was fought elsewhere.

Having taken Gabrene, and the ridge upon which it stood, Turcowaz infantry began from that place to pour a heavy rifle fire down upon the artillery lining the riverbank. This turned out to be not the best location the Chervenian medium artillery could have chosen.


First Royal Guards move up on the Chervenian
right.  This was intended to be part of a more
powerful counter attack.

By now, the Chervenian southern flank was beginning to crumble. The untrained Second Cavalry melted away, and although the veteran Guards lasted much longer, they were caught in an invidious position of having to fight where they stood, or run a gauntlet of rifle and gunfire were they to try and break off.  
Second Cavalry destroyed, the Mounted Royal
Guard are on their own.


End of successful first phase of Turcowaz 
offensive - seen from Chervenian lines.
In an attempt to mitigate the galling fire from Gabrene ridge, 4th Infantry essayed a counter attack against the village supported by 1st Field and 5th Medium Artillery. Nothing came of it. 8th Regiment were in the village to stay. From henceforth, the Turcowaz right-centre push became a steady progression.  
Situation in the centre.  Gabrene lost,
counter attacks fail to recover the place
The Royal Guard Cavalry (0SP) scattered, and although 7th Infantry joined 2nd Royal Guard to try and hold the line at the point at which the river bent eastwards, Turcowaz now had the numbers. Both sides had field artillery available, though the Turcowaz 1st Artillery was forced to move up in order to bring the new defensive line within range. In the centre, steady and accurate rifle fire silenced the machine gun company and medium artillery, despite the damage caused to 8th Infantry in the village.  There was nothing more to be done.  General Kutinchev ordered the retreat to be sounded.  Yet again, Turcowaz had won.
Chervenian army about to quit the field


The result of this battle caused shock waves to run through the whole of Europeia.  Azuria's Paris Firelighter railed against a resurgent Settee Empire; the Berlin Blatter wrung hands at the role Grauheim's military advisors were playing in Turcowaz's string of victories; the Zelenian Letopisanie began to adopt a tone rather different from their usual philippics against the Supreme Door. What was worst from the Chervenian perspective was that losses, heavy as they were, were inflicted across all arms. They amounted to 7,500 altogether; Turcowaz lost 4,500 only. Tactically, the victory was decisive.  

(Side Note: despite the difference in strengths, I didn't give the Turcowaz much chance in this action, especially when 13th Regiment right at the beginning of the action was repulsed with 75% casualties. At one stage the MGs had inflicted 4SP loss for none received.  But the real difference lay in the quality of the generals - or at least, that was my expectation. But Nazim Pasha (the 'poor' general) outshone himself with a fair number of high activation rolls (though there was more than one low roll as well!), and General Kutinchev (the 'good general') had a few low rolls. Overall Turcowaz lost 8SP Infantry and 1SP of  Cavalry; Chervenia 5SP Infantry, 5SP cavalry, 5SP artillery and MGs - 15SP altogether.

But the strategic implications had yet to be decided. Having pushed into Chervenia, there was some doubt as to whether First Turcowaz Army could get itself out again. It seemed unlikely that Nazim Pasha would pursue the enemy into Sofia, not with a second Chervenian army - a larger one - somewhere loose in the province.

Strategic situation of Turcowaz First Army

In Ionople, the news sheets and bulletins were full of the victory over Chervenia - for a few days, at least. Then, right at the beginning of the fourth week of the War, came the tidings of a great sea battle off Gallipoli, which wiped from the minds of nearly every Ionopolitan all thought of the War on land.

To be continued.  Rather than begin the fourth week with the strategic situation and moves, I thought I'd start with the sea battle (since it has already been fought, and no doubt readers are all agog), and then revert in the posting after that the Fourth Week moves and counter-moves.