Wednesday, October 25, 2017

Sittangbad Revisited (4)


General view of the action with Allied armour finally getting by
Bir Isen, though that place remains in German hands. The last of the
supply convoy leaving town.
Although the hamlet of Bir Isen remained untaken, the place was left to the New Zealanders to deal with whilst the 4th Light Armoured Brigade group bypassed the place to press on towards their main objective, Sittangbad itself.  This was somewhat problematic for the Sherman squadron, which had to pass close under the walls of Bir Isen.  This they did, engaged the machine-gunner garrison at close quarters with HE and MG fire, then continued on past.  The PW rules permit breaking off from close assault provided that doesn't land the unit in question into another one.  This occasion seems to me a fine use of that feature.
2nd German Rifle Coy holding off the KRRC before falling
back upon Sittangbad.
Pinned down as they were, the machine gunners were in no position to discomfort B Squadron as they went by, and were soon under attack from the Kiwis' 'A' Coy. Badly depleted (1 SP remaining) as 'A' Coy was,  Colonel Corncobb felt it incumbent upon him to lend the weight of his presence to their assault.  On the other side of the road, 'C' Coy was still pinned down in front of the village.  On the southern flank, 'D' Coy and the Vickers gunners continued to be stymied by fire from the Reconnaissance Unit's armoured cars.
The 25-pounders deploy, but suddenly
 they are out of useful targets!
That, however, was about to change.

Before continuing,  I feel the need to comment on the 'pin' feature.  Now, at first I thought the 'pin' applied only to a unit that took damage, but a check rudely disabused me of that notion.  What it meant was that for a considerable time, a close assault was ongoing in the southern half of Bir Isen, with both sides (#1 Schutzen and 'C' Company) pinned down, unable to break off the action.  Pinned units can not move, even when hit with a 'Retreat 1 grid area'. whence they take a loss instead.  Nor may they spend a turn 'unpinning' whilst still closely engaged.

Frustrating as this was at the time, and I did spend some time after the action thinking about possible changes, I've just about come round to accepting that the thing works just fine as is. Sometimes it is a good idea to take your first thoughts under advisement, and check out what your second, or even third, thoughts tell you.   Possibly I found persuasive the suddenness with which the deadlock was resolved.

The fall of Bir Isen.  'D' Company's sweep
from south to north of the town.
It was the squadron of Shermans that effected the resolution, though the Vickers gunners helped. Emerging from behind the north end of town the Sherman gunners could scarcely ignore the group of armoured cars facing southward.  Swift shots up their exhaust pipes, and accurate AP fire from Vickers machine guns swiftly put paid to the Recon Unit's gallant stand.   They didn't go down altogether fruitlessly.  They had held the Kiwi left flank in play for a long time, even without doing them much damage (1 SP from the MGs, and that only moments before their own demise).  The Vickers gunners themselves ran out of luck not long afterwards, the mortars in the town finding their range and wrecking the remains of the platoon.

With nothing to protect their right flank, the Bir Isen garrison found itself attacked from two sides.  'D' Company swarmed over the fences and walls of the village, rolled up the garrison's line in short order as far as the road, and attempted to cross it.  After a brief resistance, the German machine-gunners, too, joined their comrades 'in the bag.'  After such a prolonged 'sticky' action, in which the Bir Isen garrison by themselves accounted for at least 11 Allied SP, the collapse came remarkably quickly. 
The 6pr portees and engineers arrive.  The Dodge truck
is the engineers' transport.
Free from the constraining influence of the enemy-occupied village, the Allied group surged onward. Second Schutzen Coy had briefly engaged the KRRC on the eastern fringes of the Palm grove, before fading back in a withdrawal that was to take them all the way to the entrenchments on the north side of Sittangbad itself. They easily outpaced the KRRC riflemen and 'A' Sqn's Honeys were too distant to catch them up.
Events after the capture of Bir Isen happen with a rush.  The
Allies very soon are approaching Sittangbad itself.
Within an hour or so the pressure was coming down on the town's garrison, augmented as it was by the remains of Herzog's battlegroup. Some time before, the last of the Royal Dragoons' armoured cars had been knocked out. This permitted Second Schutzen Coy to scuttle into the works that had been home to the light infantry gun company, which had pulled pack into the north edge of the town itself. The anti-tank gun company was also freed to engage the approaching Crusaders and Shermans.
Pressure upon the town's defenders from north and east.
The engineers are already poised to leap out from cover
and start cutting wire.

Same picture as previous using the
'Zeke' filter.  I like the arid look of this!
Considering their long, circuitous retreat from Bir Isen, and the adventures encountered therein, #2 Schutzen Coy had come though remarkably unscathed (all 4 SPs intact). Yet even within the relative safety of the Sittangbad field works, they found themselves all too soon under attack from the light tanks and rifles of 4th Light Armoured, whose pursuit had finally caught up with them. The reception they offered the light tanks, two thirds of their number already strewing the desert east of the palms, to draw back out of the range at least of the infantry's anti-tank weapons. The KRRC company were scarcely more eager to push the matter home.
KRRC resumes the attack, whilst the Honeys lick their
wounds and the Daimlers burn.

By this time, the last of the large convoy of transports laden with supplies, fuel and ammunition, had departed the town, across the bridge, and were well on the way westward. Oberstleutnant Herzog began to think about withdrawing elements of his garrison as well. The point was brought sharply to mind when some well directed mortar rounds suddenly descended into the fieldworks manned by #3 Schutzen Coy. Those gentry swiftly abandoned their earthworks, leaving a dangerous gap in the line.  Gunfire from the oncoming tanks also scored damaging hits on his Marder company close by his own position.  Once more the Oberstleutnant survived a near miss.

Southern side of the battlefield.  It is the
Germans' move.  They had only 6 units
left apart from the pioneers anyway...
As the Allies drew up to the barbed wire, the Engineer troop had been moving through the palm trees with the view to clearing the obstacles northeast of the town.  A brisk fire was already being exchanged between tank and anti-tank.  The 25-pounder artillery added their bass accompaniment to the symphony of gunfire.  The hit upon the Marders, and a hit upon  #2 Schutzen - their first substantive loss of an eventful day for them - was enough to take the German losses past their Exhaustion Point (13/36 SP).  Not that the Germans were in any shape to launch a counter-attack. A sharp pep talk induced #3 Schutzen to reoccupy their field works, and the Kiwis weren't quite yet up to the wire, let alone in a position to contest the move.

Crusaders receive a warning shot "Non plus ultra!"
The final decision was brought by the accurate return fire from the Marders and PaK guns. The Crusaders were stopped in their tracks, but it was the Shermans who took the beating. Within two turns the Marders had scrapped the lot.  They, and damage to KRRC, took the Allies also past their Exhaustion Point (20/54 SP), just one turn after the Germans (that the losses had reached 20 suggests I might have miscounted the turn before.  Not that it made any difference).


The view from the main street looking eastwards.
There ended the action.  The Allies had been too knocked about to attempt an assault with their remaining strength upon an objective well garrisoned and protected with field works and barbed wire. The German garrison was content  to wait out the day or in their own time to pull out under no greater pressure than a harassing fire from the Kiwi Field Regiment.  That would make a change from  the headlong retreat of the previous few days...


The end of the action.  The allies too knocked about to continue their attacks.

Still on WW2, 'Jacko' and I have begun working on a little project: Operation Uranus: the Attack upon 3rd Romanian Army.  'Jacko' has been building a Romanian Army - the Romanian Army, really, along the lines of Chris Kemp's upscaled version of Not Quite Mechanised.  We've put together ORBATs for 3rd Romanian Army (including Group Simons) and XLVIII Panzer Corps (less detachments), and for part of 1st Guards Army, 5th Tank and 21st Armies, and part of 65th Army for the Russians.   I've undertaken to write up a fairly formalised version of the Chris Kemp rule set for our purposes.  They'll probably be free form, though I may yet change my mind and adapt them to a grid format game.

Monday, October 23, 2017

Sittangbad Revisited (3)

As the grey dawn draped itself over the December 1942 Libyan landscape, the Allies began their advance, on a broad front, towards the town of Sittangbad.  The plan was to clear the hamlet of Bir Isen, and exploit on to the town itself.  The object was to carry intact the bridge over the difficult obstruction of the Wadi Wasir; the hope was that the move would be quick enough to seize the vast quantities of supplies and munitions known to remain in the place.  The place would have been a fine target for a sizeable bombing mission, but low cloud obviated such an expedient.
Played solo, this game once again featured the Portable Wargames card driven unit activation.  Having 18 units altogether, the Allies could draw RED 8, 9 or 10 to move so many units.  With a mere 12 units, the Germans move just BLACK 5, 6 or 7 units per turn, depending on the draw.  The game began with a die roll to determine who went first.  It was the Allies.  Drawing a 10, the Allies led off with the entire available troops from 4th Light Armoured Brigade advancing over and around the northern flank of Djebel Isen.  These comprised the tanks of the Royal Scots Greys, A Company, King's Royal Rifle Corps, and C Squadron, Royal Dragoons.  On their left, the lead New Zealand wave comprised the Carrier and Vickers platoons of HQ Company, 21st Battalion, with A and C companies to assault the southern quarter of the hamlet, and D Company to make a wide sweep through the nearby palm grove thence swing north to flank the garrison.  The machine gunners were to support the attack.
Ready for an early attack by the Allies, the German commander, Oberstleutnant Johann von Herzog switched his panzers and one of his infantry companies (#2) to the north flank to face the British armour swarming over the Djebel Isen.  Before doing so, however, the panzers had to survive the early attentions - fortunately ineffectual - of the British Crusaders and Sherman tanks above them on the higher ground.  A brief return of fire was no more effective, whereupon the panzers completed their move.  The Marders, in rear of Bir Isen, moved across to protect the left rear of the place.
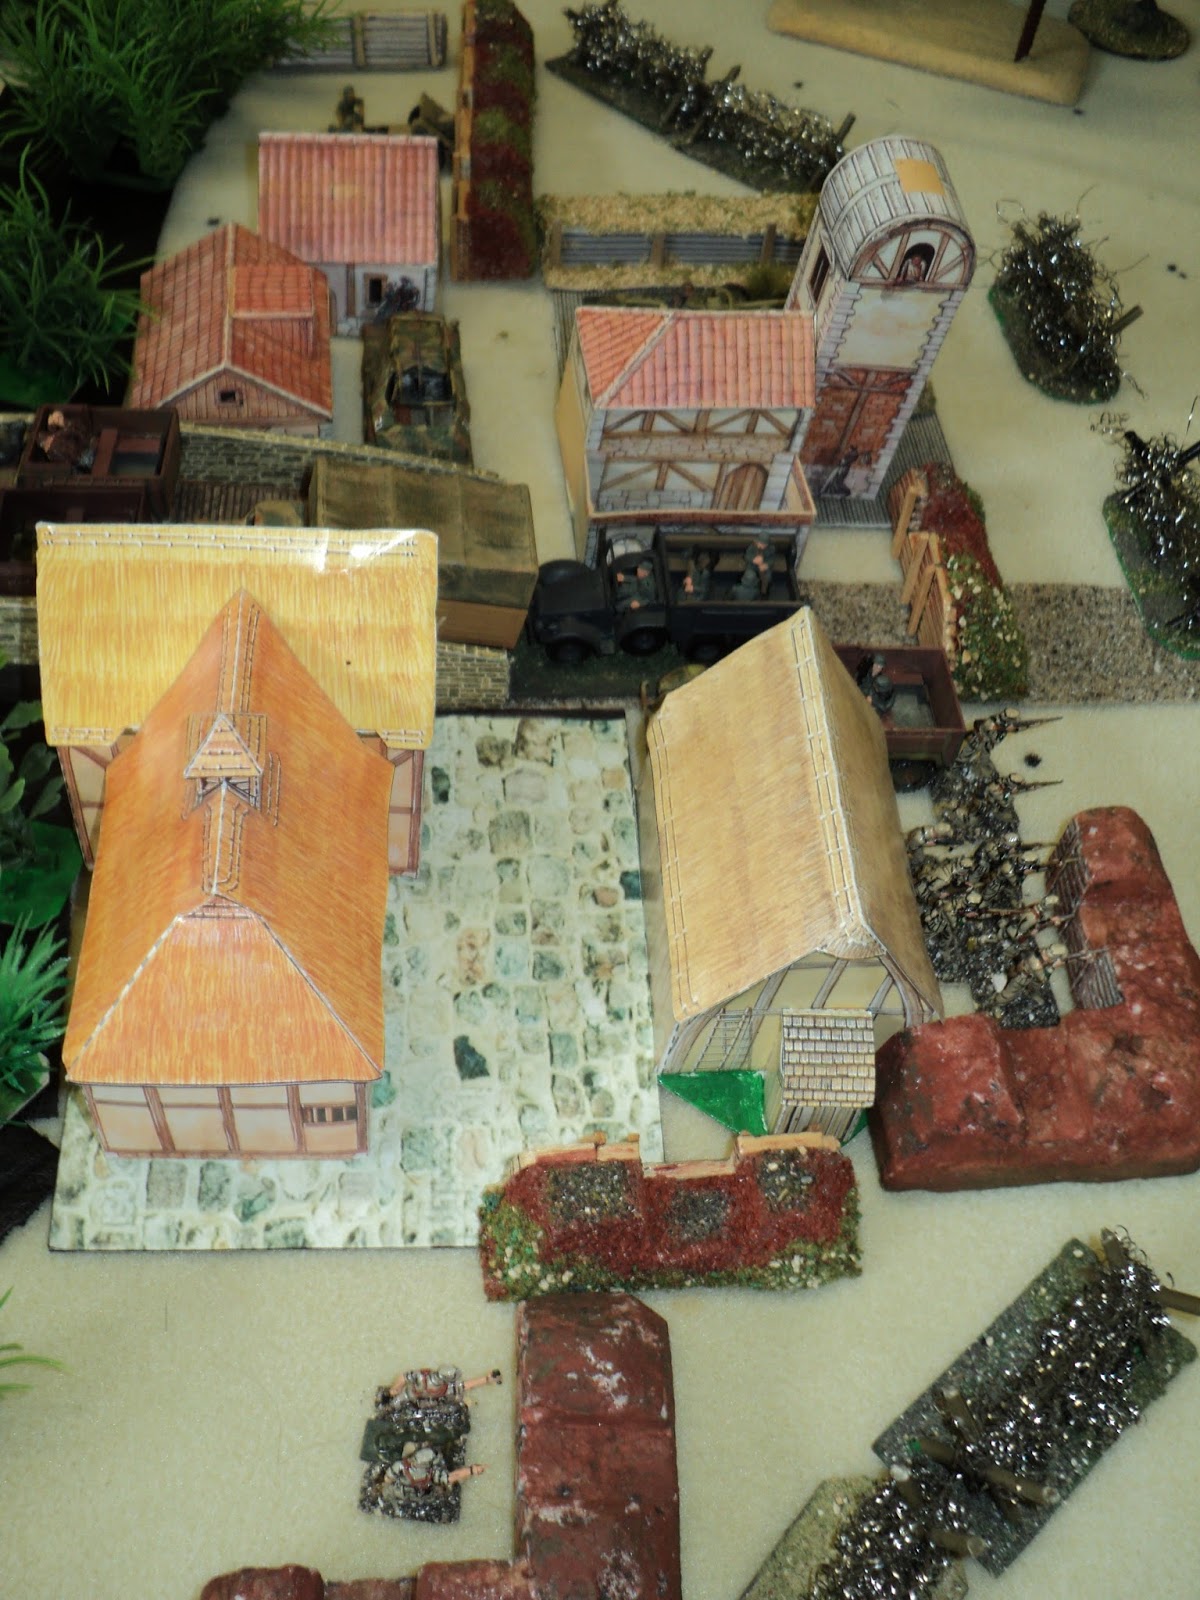
In Sittangbad itself, the column of transports began their laborious exodus.  To place some kind of time constraint upon the action, I placed 8 trucks on the bridge and main road.  Each German turn would be marked by the removal of one transport up the road, off the table.  This required no 'charge' upon the movement activation cards, unless the German commander wished to hurry up the process.  In that case one additional vehicle in any given turn could be allocated a card pip and also be brought off.  During the course of this action, the German commander found but one occasion upon which he could do so.  For the remainder of the action he was too busy with other concerns.

Having completed the switch to the left, the panzers opened fire and scored hits upon A/RSG light tanks.     At this point I shall digress and discuss some 'battlefield' decisions and game mechanics.  This narrative will be interrupted from time to time with such digressions.  This is quite in the style of Henry Fielding or Herman Melville...

1.  The Allied 'broad front' advance, I had decided upon more or less as I drew up the ORBATS for both sides. Those ORBATS, by the way, were as near as I could get to a 20th century 'equivalent' to the 18th century forces of the original scenario. At any rate, the effect of this broad advance was pretty much to leave out of the battle for too long the considerable artillery available to the Allies; the best part of a whole regiment of 25-pr guns, and the Kiwis' organic mortars.

On reflection, it would have been better to have brought the artillery onto the table - OR into action from off-table - from move 1 or 2.  But on move 1, with no one on the table, who is to direct the fire, bearing in mind artillery fire takes place before move allocation?  I had intended that the artillery be brought on quickly, after the first wave, but for several turns, the Allies could scarcely proceed beyond their start line.  There simply was no room for them. Nor was there time, as the Allies struggled forward against fierce German opposition.

2.  This brings me to the artillery phase opening each turn, before the cards are drawn for movement.  I tried this early, when both sides used this phase to engage in an anti-tank duel, and then had to recall which units had done the shooting once I started allocating moves.  At that point I simply dropped the artillery fire phase for the remainder of this game, and included it in the fire phase.  

This decision I did not want to make, nor did it prove altogether satisfactory.  I liked the artillery fire phase in principle.  How to work it into a card activated solo game? 

Simple.  I can't think why I didn't figure this out at the time.  Too focused on the action, maybe.
  • Draw cards for both sides at the beginning of the turn.
  • Artillery fire phase.
  • 'Mark off' on the drawn card(s) units that have fired in this phase.
  • Roll for first move this turn.
  • Continue per rule book
This has one unlooked for virtue: the possibility of two consecutive movement phases by one or other side.  The 'alternate draw' system had obviated this in order to avoid the 'long runs' that had been such a feature of my earlier battles with the PW system.  But it seemed to me desirable that there be some chance of at least a 'run of two' to come up from time to time.  The phase sequence here seems to be the answer to two questions.

The move by the Panzer and #2 infantry companies was not uncontested.  In fact it was a whole deal more dangerous than I appreciated, as the 4th Light Armoured were not about to let the chance go by.  I rather feared for the Germans, here, as, although the panzers had inflicted some loss upon the light squadron, attacked subsequently by British riflemen in front and light tanks in flank, their retreat was cut off by the palm thick palm grove to their rear.  For their part, it was fortunate the infantry had to face just squadron of Crusader tanks.  The Shermans of B Squadron, constrained by the German occupation of Bir Isen, had perforce to try and storm the place.


By now, the leading Kiwi infantry were already beginning their assaults.  Whilst the carrier platoon brought the north end of the hamlet under LMG fire, A company began a direct assault upon the southern end.  C Company was to flank the place, but found themselves having instead to deal with enemy armoured cars detailed to prevent that very action.


The ferocity of the fighting can be seen by the dice rolls in the above picture, though, rather annoyingly, some explanation is called for. The white (and red) dice were to determine hits; the green were for effect.  Now, I have normally a very strong memory, but it does have one little trick it plays on me. Every now and then it inverts what I wish to recall.  So, having achieved hits, I was taking 1-3 to mean 'retreat, pinned' and 4-6 for 1 SP lost and pinned - the exact reverse of the rule book (all the troops were classed as 'average' for this action).  Shortly after this I noticed my error, but for the sake of consistency, and as the odds were the same anyway, carried on as I had begun. 

At any rate, A company having already taken a loss as they approached, took another in the close assault, but not without inflicting some hurt on the garrison. Although the result was a 'retreat', the Germans were not yet ready to abandon their charge.  They took the loss instead. The Shermans were equally unlucky, the grenades and other anti-tank devices available to the defenders causing the tankers to take a loss, and to draw off.

Caught in the defile between Djebel Isen and the palm trees, the panzer company was in trouble and beginning to take losses.  The infantry facing the British cruiser tanks were holding their own, however, and, still unpinned, were able shortly after this picture was taken, to pull back into the cover of the palm trees.
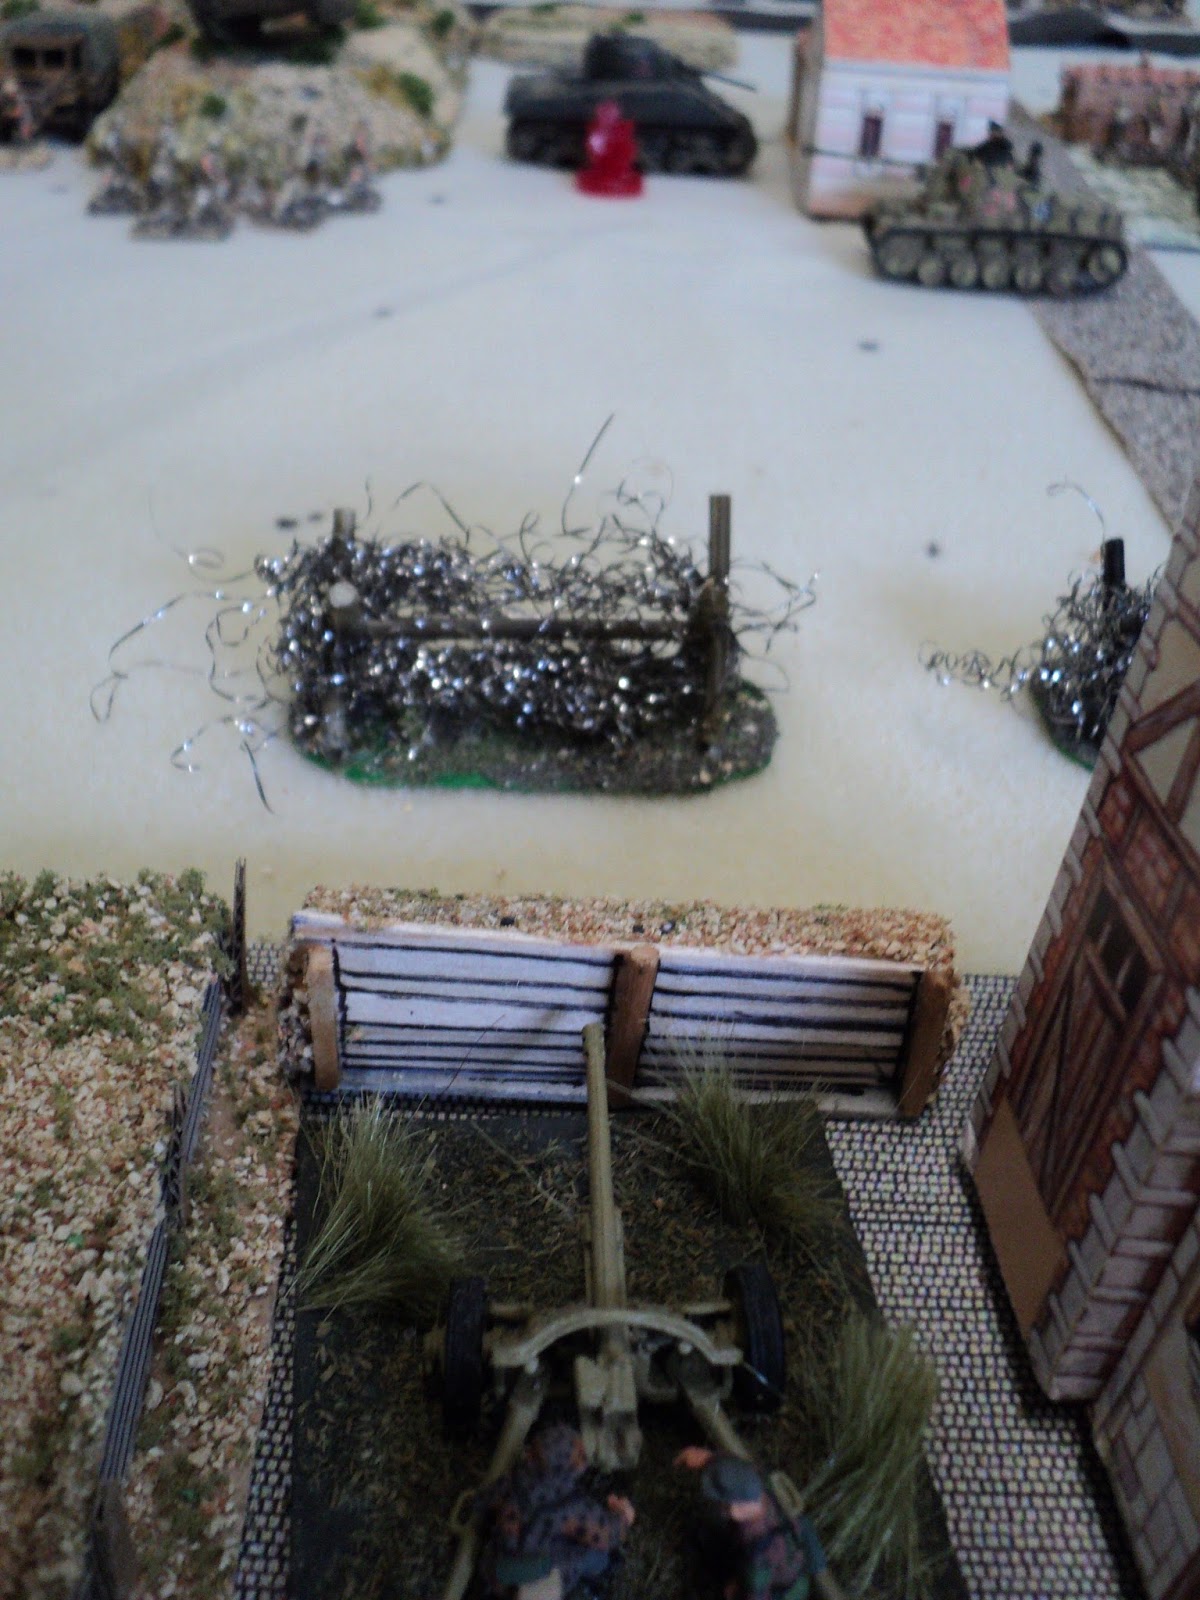
Meanwhile, back in Sittangbad, a PaK38 antitank company had been eagerly watching the action unfold.  When the Sherman squadron turned to attack Bir Isen, they presented a flank to the lurking gunners.  Now, another 'battlefield decision' confronted me.  Was it permitted to shoot at a unit engaged in close combat?

This might seem a silly question, especially as I see no prohibition in the PW rules.  Probably I should simply have gone with that.  But, so accustomed am I to rule sets that disallow any such thing, it did raise questions, especially in respect of indirect fire.  For the purposes of this action, I allowed direct fire by units themselves not engaged in close combat at units that were, provided the friendly troops so engaged did not block line of sight.  Indirect fire I disallowed, pending further thought. Frankly, I am still in two minds about that.  At any rate, at extreme range, the anti-tank gunners missed...
At this stage, however, the Germans had been doing remarkably well.  The Bir Isen garrison, exhorted by von Herzog himself, was holding comfortably enough.  The Marder company's flanking fire induced the Crusader squadron to break off its attack on the infantry, who had, betimes, themselves disengaged successfully.  The panzers had even forced back the KRRC motor company.  

The only dark spot seemed to be the armoured car thrust down the far side of the oasis, with nothing to oppose them. On the other hand, the machine gunners in the village followed up its repulse of the Shermans by destroying the carrier platoon in short order.

Before carrying on, the observant reader might have seen the occasional explosion marker placed against some vehicles.  To begin with I had it in mind to use them as 'strength point loss markers'  This would have been fine, but, feeling the want of 'pin' markers, switched to that use instead.  Readers will notice soon the reappearance of my strength point dice holders, with the explosions alongside pinned units.

The armoured car squadron's hurtle off into the blue was not as aimless as it appeared.  The Germans were not having to include any of the Sittangbad garrison in allocating card pips to the Kampfgruppe Herzog units.  The hope was that by sweeping into the deep left flank of the town, the Daimlers would at least draw the attention of the garrison. 

At that point the New Zealanders would have appreciated just about any help they could get.  Hardly had the carrier platoon met its quietus, when B Company, arriving on the field behind A Company, came under an accurate and effective machine-gun fire.  This short, sharp sequence of pictures tell the story.  Three hits...
 Three strength points down...
 One stand remaining.

You will notice, perhaps, a extra, single figure stand with the remaining 2-figure stands with each of the depleted A and B NZ Companies.  These were 'command' figures, but had no game significance apart from ... they just look good with the extra figure.  They did not add to strength points. 
Suffice it to say, that after the loss of 10 SPs in the assault so far - 1 Sherman, the 2 from the carrier platoon, and 7 infantry - the Allies seemed no nearer taking Bir Isen than they had at the beginning. I was thinking at this point the whole operation might end up a rather ignominious Allied defeat.  Now might have been the time for the garrison to pull out.  But they, too, had been taking some hurt.  The MG and schutzen companies were both pinned down within their defences.  The hamlet itself was almost cut off from Sittangbad altogether.
Having survived a couple of near misses - the Commander supporting a unit that takes hits - Oberstleutnant Johann von Herzog at last concluded  that his august person would be better employed elsewhere. Accordingly he had handed over the defence of Bir Isen to Oberleutnant von Kronberg, wished him good luck, and betaken himself in his armoured halftrack back into Sittangbad, bringing with him - unscathed for a wonder - the small company of Marder assault guns.
The north face of the town was by then already under fire from a squadron of armoured cars, who were engaging the attention of the infantry gun and anti-tank units holding that end of the garrison's line.
There was little else remaining to hold up 4th Light Armoured.  Attacked front and rear, the panzer company was reduced to a parking lot of smoking scrap metal (the gap between the Honey and the KRRC motor company in the above picture), though the light tank company had themselves taken losses from a close assault in their turn by #2 Schutzen Company (in the same picture, obscured by the palm fronds).  The German infantry then found themselves being given the undivided attention of two armoured squadrons and a motor company.


Considering that they were the last rifle company to be engaged, the destruction of B Company came as something of a surprise. But the German MG company was having on the whole an easier time of it than #1 Schutzen. A company also gave up its attempt to take the village, and fell back a scant quarter of its original strength. Undaunted by their comrades' losses, C Company flung themselves into the action, just as the Sherman squadron resumed its attempt against the north side. D Company tried to storm the southside, but were handily repulsed, then driven further back by the armoured cars protecting the southern flank rear.


Within the Sittangbad palm grove, #2 Schutzen Coy came under attack from light and medium tanks and the KRRC motor company.  By this time, Colonel Greenlees Corncobb had been able to give some thought to bringing up his idle regiment of artillery, and the company of engineers, as well. One battery ('C') deployed not far from Bir Isen, the other two ('A' and 'B') could find room to deploy only on the far northern flank. It soon became apparent that the latter pair no longer had useful targets within range, so rapidly had the Germans outside Bir Isen fallen back.  They had, perforce, to move...


As this is already a very long posting, I will call here for a pause for tea and biscuits.

To be continued.


Saturday, October 21, 2017

Sittangbad Revisited (2)

Looking eastwards down the coast road towards the
approaching Allied advance guard.
My apologies for taking so long bringing this account of World War Two Sittangbad to you, and the fact is, the action is still ongoing - barely begun withal.  Need batteries for my camera.  The ones you see here are from my Smart phone. 

The leading picture shows the field of battle, facing east down the coast road in Libya, somewhere between Agedabia and Wadi Zem Zem.  Apart from the palm groves, the greenery depict in the middle distance an impassible stretch of marshy country; and closer to the line of the Wadi Wasir.  The lateral dark line in the distance is the edge of the battlefield.
Congestion on the Sittangbad bridge and in the main street
as truck loads of essential equipment and supplies are
being withdrawn - one vehicle per turn.
These early picture were taken after the Allied first turn. They turned a RED 10 for allocating movement.  There were a number of options here.  To begin with, the Allies begin 'off-table'. The first turn brought the troops and vehicles onto the first row of squares only, to count as a full move, but with units allowed to shoot at targets in the open.  Elements of the 4th Light Armoured Brigade advanced on the right flank, over the Djebel Isen: the tanks of the Royal Scots Greys (RSG), a company of Kings Royal Rifle Corps (KRRC), and an armoured car squadron from the Royal Dragoon Regiment (RDR).
Kampfgruppe Herzog.  The infantry and heavy machine guns
 of the garrison proved a hard nut to crack.
The left flank of the advancing Allies comprised the 23rd New Zealand Battalion.  The lead elements were A and C companies, flanked on their right by the battalion's carrier platoon, and on the left by the Vickers MMG platoon.  Flung out on the left flank, D company pushed its way through the fringes of a palm grove.
Elements of 4th Light Armoured Brigade swarm over the
high ground.
The medium squadrons of the Royal Scots Greys fired at the Pz III company, for a 'force back' or 'retreat' result. The infantry companies found the light armoured car company within range, but their fire was ineffective. I did consider using the 25pr field guns off table, but of course the Allies will need somebody present on the field to direct their fire. That option is not yet out of court.
21st New Zealand Battalion, advancing up the coast road,
are about to run into some stiff opposition.


Bir Isen.
Elements of Kampfgruppe Herzog were placed in and around the small village of Bir Isen. the Machine Gun Company north of the road, #1 Schutzen Company south of it, facing eastward down the road. Perhaps rather arbitrarily I decided the other 4 units of that command should be placed on a square orthogonally adjacent to the village. The second Schutzen company and the Panzer squadron we so placed to switch to the north to confront whatever might appear over the Djebel Isen, the Marder company was then to protect the northern flank of the village, whilst the Armoured Car company covered the southern flank.

In the coming narrative, I became aware of certain features of the Portable Wargame, as developed in Developing the PW (short title), that might not work so well in a card-moderated solo game.  The first of these was the preliminary artillery fire that opens each given turn.  This is independent of determining which side goes first in the subsequent actions for that turn.  To incorporate that into a card moderated game, one would have to remember that so many units fired in the artillery phase.

I played this once, and then abandoned it, yet I like the idea in principle.  It allows an attacker to 'shoot in' an assault; or a defender to try to break up an attack.  Something to think about in battles in future.  The other points I'll touch on in the subsequent narrative...

To be continued...


Monday, October 9, 2017

Sittangbad revisited...


  • II NZ Corps in pursuit: elements of 4th Light Armoured Brigade
    with 23rd NZ Battalion supported by 3 batteries
     of the 4th (NZ) Field Regiment
    The Allied pursuit, after Alamein, across the deserts of North Africa, was, if not speedy, at least relentless.  Almost nowhere could the Panzerarmee Afrika establish itself for a protracted defence.  Pulling back from El Aghiela, in the southeast corner of the Gulf of Sirte, Feldmarschall Rommel found, at the end of December, 1942,  that a bottleneck had developed at the small town of Sittangbad.  A great deal of equipment and fuel had been accumulated there, and, as a brief overnight deluge of rain left in spate the Wadi Wazir, that crossed the road west of the town, the bridge over it was the only route available in that direction.


This square grid map has been adapted from the hex-grid map for the same scenario in Bob Cordery's Developing the Portable Wargame book.  This has included the field works and barbed wire as added there.  However, I have added in the small rise east of the salt marsh that existed in the original Young and Lawford book, Charge!  


Leaving Hauptmann Johann von Herzog to supervise the withdrawal and rearguard, the Feldmarschall retired westwards along the via Balbia. The hauptmann was none too pleased with his assignment. His battlegroup, drawn from the exiguous remnants of 21st Panzer Division lay drying out after the overnight rainstorm about the hamlet of Bir Isen, a kilometre or so east of Sittangbad.  The town itself was garrisoned by a small group from the same Division, under the command of Captain Sapten.  Further to the east the leading elements of the pursuing force, from the recently constituted 2nd New Zealand Corps, lay not too far distant - possibly only three or four kilometres.


How Herzog would have preferred a hasty withdrawal out of Sittangbad, across the Wadi and to blow the bridge behind him.  A single hour's respite from pursuit would have been welcome.  But first had to be evacuated the tonnes of fuel, ammunition and equipment before any thought could be given to organising the retreat of his command.  Oberleutnant Fuchs, who had reported the situation to Herzog at his HQ in one of the less demolished hovels in Bir Isen, was rather glad to take the ride back into town whilst Herzog, in no serene state of mind, grimly issued his orders.

Orders of Battle:

German:

Battlegroup: Elements of 21st Panzer Division (Haupt. J von Herzog SP=6)

  • Coy/ 5th Panzer Regiment, Panzer III L medium tank, SP=3
  • Coy/ 200th Assault Gun Unit, Marder III 'medium' AFV, SP=2
  • #1 and #2 Coys, I Bn, 104th Schutzen Regiment, e@ SP=4, total SP = 8
  • 4th MG Company, 104th Rgt SP=2
  • Armoured Car Coy, Sdkfz222, 3rd Reconnaissance Unit, SP=2

    Total Strength Points, incl command = 23
    ..
    Rearguard elements of 21st Panzer Division
Sittangbad Garrison: (Kapitan Sapten)
  • #3 coy, I Bn, 104 Schutzen Rgt SP=4
  • PaK Coy, PaK38, 50mm AT gun, 8 MG Battalion SP=2
  • Mortar Coy, 8cm mortar, 8 MG Bn SP=2
  • Infantry Gun Coy, 7.5cm light infantry gun, 8 MG Bn, SP=2
  • Pioneer Coy, 200th Pionier Bn, SP=3.

    Total Strength Points = 13 ..
    Further elements of 21st Pz Div make up the garrison.
Field Defences:
  • 5 squares of field works: SP=5
  • 6 sections of barbed wire: SP=6

    Total Stregth Points = 11
Total Strength Points = 47.
Number of units, including command: 12
Card median = 6


Allied:

Elements of 2nd NZ Corps (Commanded by Lt-Col Greenlees Corncobb SP=6):..
21st NZ Battalion at the top of the picture; to the lower right,
tanks of the Royal Scots Greys, an armoured car squadron from the Royal Dragoons,
and a motor company of the KRRC.  Lower left is the 4th NZ Field regiment.


Elements, 4th light Armoured Brigade:
    Royal Scots Greys (Armoured Regiment)
         A Sqn - M3 Honey light tank: SP=3
         B Sqn - M4 Sherman medium tank: SP=3
         C Sqn - A15 Crusader III medium tank: SP=3
     A Coy, King's Royal Rifle Corps (KRRC) motor battalion: SP=4
     B Sqn, Royal Dragoons, Daimler II armoured car: SP=2

Elements, 2nd NZ Division, 5th Brigade:
     23rd NZ Battalion
         HQ Coy: 
             Mortar platoon: 3" mortar with carrier: SP=2
             Vickers platoon: MMG: SP=2
             Carrier platoon: SP=2
             AT Gun troop (Attached from 7th AT Rgt), 6pr portee: SP=2
         A, B, C, D Coys, each SP=4.  Total, SP=16
     4th Field Regiment:
             3 Batteries (A,B,C) 25pr field artillery @ SP=2:  SP=6
     7th Engineer Coy: SP=3

Total Strength Points: 54
Number of units, including command = 18
Card median = 9


Allied forces begin off table and may enter only as allowed by the activation cards.
..
Elements of II NZ Corps in pursuit of DAK, December, 1942.

Special rules:

1. The German pionier company are held by the bridge where they will be assumed to be preparing charges.  They may,. however, be 'activated' for some other task.  To resume this primary task,  they have to return to the bridge, and be 'activated' to begin.

2.  The fuel and ammo supplies supposed to be evacuated will be loaded on trucks that will be lined up, in pairs, along the main road beginning with the exit square.  At the end of each German turn, 1 vehicle will be removed as having driven off.  Spending ONE 'activation point' will allow one further vehicle to be exited.  To simulate the column inching along a crowded highway, the vehicles will be removed from the rear.

3.  The Allies begin the action 'off table', and are brought on only as activated.

4.  The German rearguard begin the action in any of the eight squares indicated in the second map.

5.  The Sittangbad garrison begin the action in any of the 10 squares indicated in the map, with the pioneer company on the bridge square.

To be continued...