Saturday, May 30, 2020

A nostalgia piece - 488th Mechanised Brigade

The lengthy correspondence between myself and Neil Patterson in the Comments Section following my previous posting reminded me and got me thinking about my battles long ago with the Command Decision rule set (Versions 1,  and 2 still my favourite).  The question came up concerning elements, units and command levels, a matter in which I suspect Neil and I were talking at somewhat at cross purposes.  Now, the peculiarity of the Russian formations was that, apart from 'self ordered' elements, such as recon, FOs, HQs and Staffs, the lowest command level was the battalion.

Just to make the point clear, here is the Command Decision Mech Bde OOB in brief:
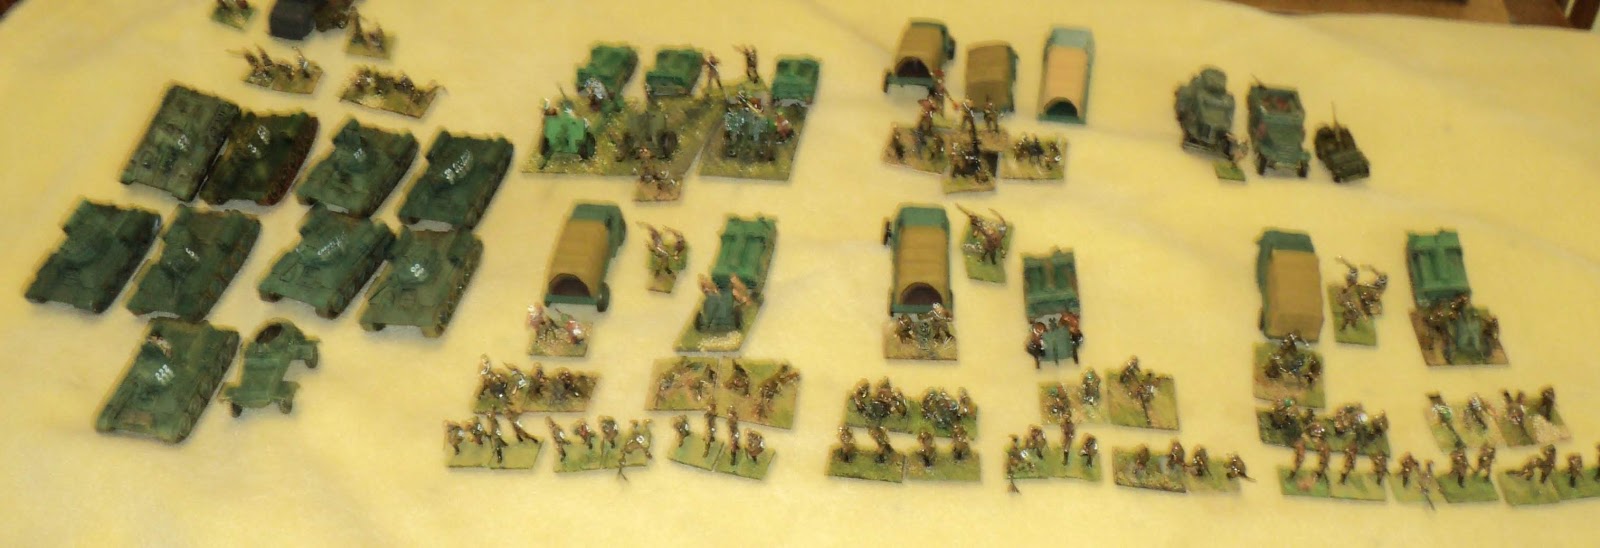
How my 488th Mechanised Brigade used to look.  The shortage
of motor transport left the infantry mostly 'leg'.

488th Mechanised Brigade:

HQ: command stand, staff radio vehicle,
Supply Company: Ammo vehicle
Recon Coy:

     1 x Ba32 a/car (self ordered)
     1 x recon SMG stand (self ordered), scout car
     1 x recon jeeps with AAMG (self ordered)
AT Rifle Coy: 2 AT rifle stands, truck
AAMG Coy: omitted
SMG Coy: 2 x SMG stands
Tank regiment:
     1 command T34
     1 recon BA64 armoured car (self ordered)
     8 T34s in 4 coys of 2
3 x Motor Rifle Battalion, each with
     1 command stand
     1 x SMG platoon stand, light truck
     3 x rifle coy each with
          2 infantry stands, medium truck
     MMG Coy:  2 MMG, medium truck
     Mortar Coy: 1 82mm mortar, truck
     Anti-Tank Gun Coy: 1 x 45L46 AT gun, crew, lt tractor
     Anti-tank Rifle Coy: 2 x PTRS AT rifle stands, medium truck
Artillery Battalion:
    Command stand,
          'spotter' stand (self ordered), 2 cars
    Staff radio truck (I don't recall this element as part of the original OOB)
    Ammo truck with trailer
    3 x Firing Battery each with
         1 x 76L39 gun, crew,  heavy tractor, ammo vehicle
Mortar Battalion:
    Command stand,
          'spotter' stand (self ordered), 2 cars
    Staff radio truck (I don't recall this element as part of the original OOB)
    Ammo truck with trailer
    2 medium batteries with:
         1 x 82mm Mortar, truck, Ammo truck
    1 heavy battery with:
         1 x 120mm Mortar, truck, Ammo truck.

Now, any stand capable of giving orders, including to itself, could issue 1 order only.  Self ordered stands could simply move independently.  Command and staff stands could issue orders to all or part of their commands or units.  Note that no one required a command to shoot: that was automatic.

When in effect you could issue one command only to a regiment of 9 model tanks, or to 14 infantry and 'weapons' stands, you have a pretty inflexible bunch of units, especially with a whole variety of kit trailing along.  The battalion commanders would fetch up issuing orders to part of the unit - the rifles, SMG and possibly ATR companies, 8 stands, say, moving up, whilst the rest,  staying put, offered supporting fire. 

Having no integral command stand, the Brigade troops came under Brigade or Staff command, but they could be ordered over to a battalion, say, where the local commander could attach them to his own command with a 'take command' order. This could help beef up the rather puny assault capability of a battalion by adding extra SMG and AT Rifle stands.  If they were close enough to hand, a single order from Brigade was enough send the whole SMG and ATR companies together to their destination - provided it was the same destination.  Commands went to 'groups' rather than 'units', though more often than not a unit was the group.

The tank  regiment, including a very bad attempt to build a
BA64 from an Airfix SdKfz234/4 Armoured Car.  Apart
from the 'self ordered' BA64, the sole commander in this
group was the regimental commander.  If I wanted more
flexibility I sought it from the Brigade staff.

That these formations were barely playable translated into: 'but they are playable' - quite a challenge, and surprisingly perhaps, interesting.  And one did treat these units as units.  A little added flexibility, if you needed it, might have been obtained by the intervention of the Brigade staff.

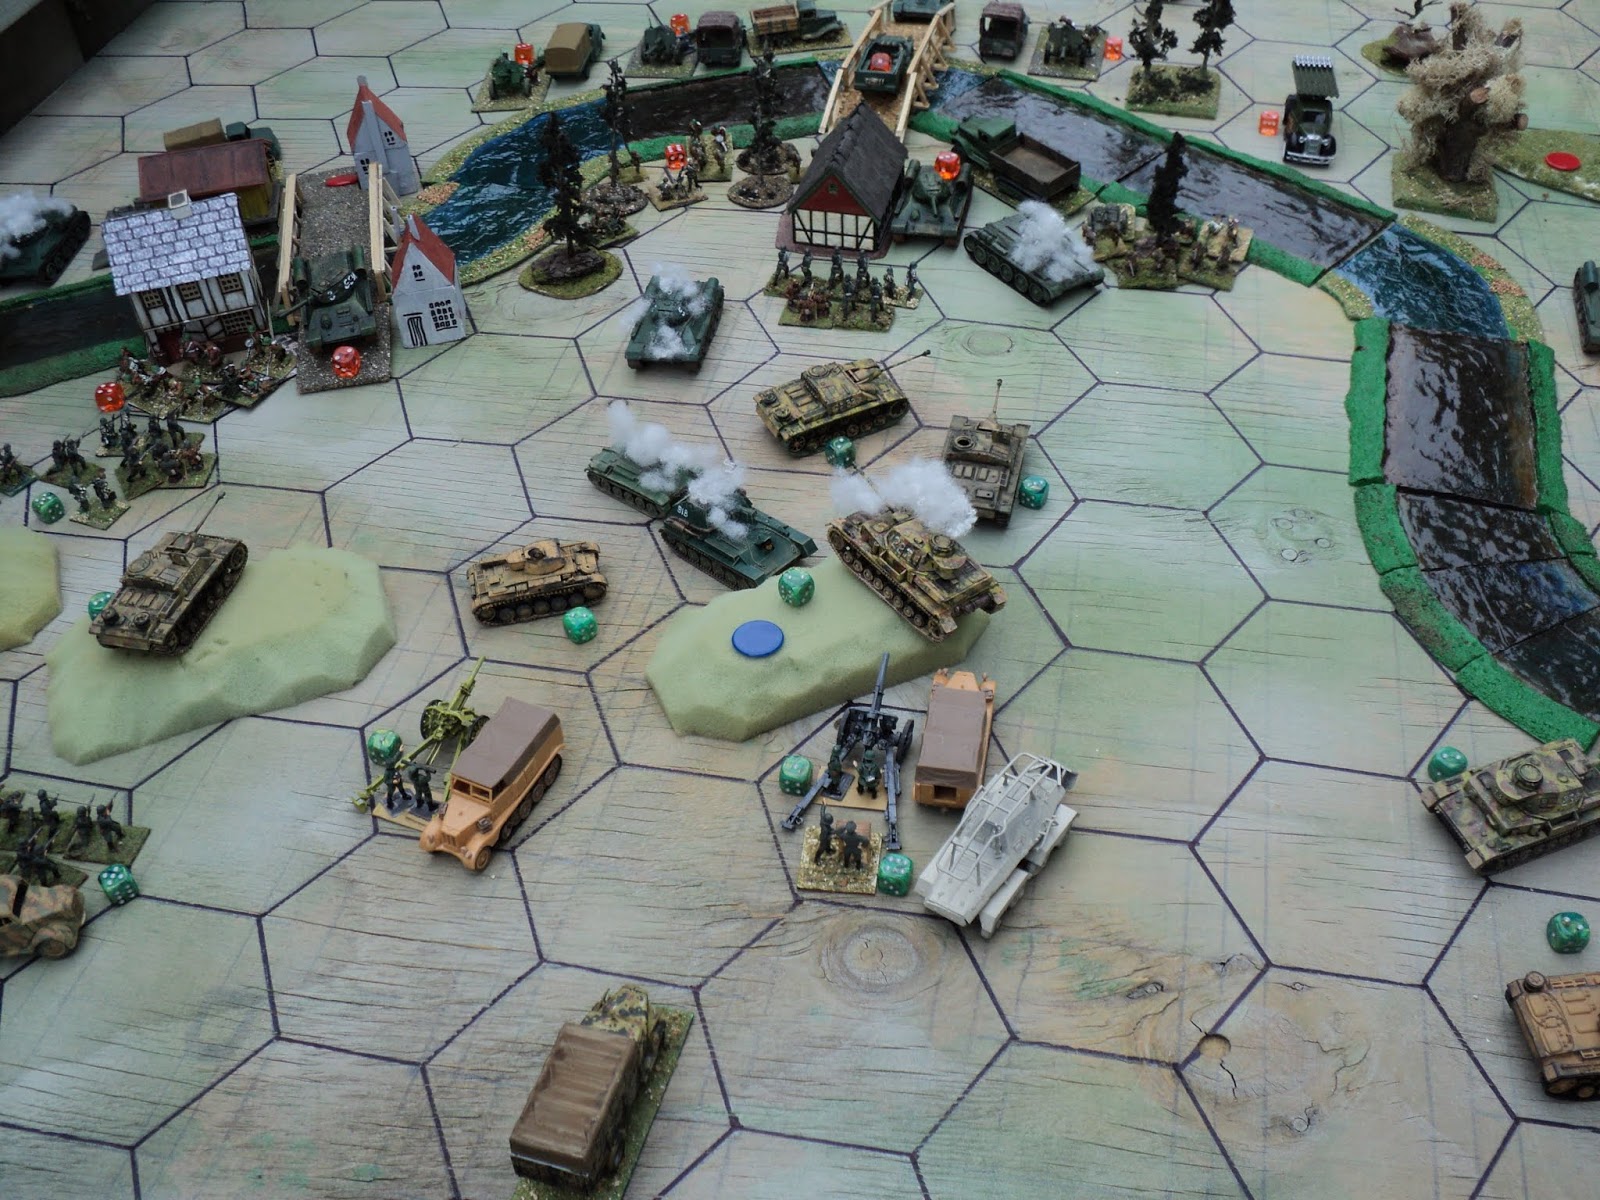
In one memorable action, I had my tank regiment advancing up the left flank to seize a ridge where they were to take up hull down positions.  Beyond the ridge, my recon units had espied a body of Panther tanks heading for the same objective.

I used the regimental command to order two companies (20 tanks = 4 models) up onto the ridge (cautious advance) to take up hull-down positions and engage the enemy.  At the same time I used the Brigade 'staff order' to send the Regimental Commander and the rest of the unit off to the right flank: 'full advance'.

One of the 3 battalions: 3 rifle , 1 MMG,  and 1ATR coy.
mortar and AT gun coys, HQ SMG platoon and commander.
There ought to have been 5-6 more trucks to carry this battalion,
but I simply didn't have them.
Now the orders are issued with chits, a full advance being a solid arrow, a 'cautious' being a hollow one.  The facing of the unit at the start of the ordered move is immaterial, but upon its completion, the unit and its elements must be facing the direction of the move, that is to say, the arrow.

So my tank HQ and 2 coys fetched up sitting close to the right hand edge of the table, apparently aiming their guns at whatever was on the next table over (this action was played at the Club).

Come the next turn, the tanks needed no staff intervention.  The hull-down companies on the ridge having engaged the enemy's attention could without orders happily carry on  their duel with the enemy panzers to their front, honours so far roughly even.  Meanwhile the colonel issued a 'cautious advance' to the tanks under immediate command, with the movement arrow almost, but not quite, in the reverse direction of the previous order. Call this direction '7 o'clock'.

Down came the 25 tanks (5 models), booming onto the flank of the Panthers.  Caught in a crossfire as they were, flank armour vulnerable, the Panthers were left, in a trice, smoking and disabled in front of the ridge.  Thrown onto the defensive, the Germans fell back.  The rest of the action was something of a pursuit, though chasing after a still fairly agile enemy (whose lowest command level was company), with 14-stand battalions was never going to be rapid.  In fact, most of the support stuff got left behind, as the rifle and ATR armed guys chivvied the enemy infantry into retreat.

As I said earlier: 'Barely playable' = 'Playable'.

This was probably my only real 'formation in a box', and 20-30 years ago, it got a fair amount of action.  Only the troops and their weapons were 'in the box', the transport and the tanks being housed elsewhere.  But it made retrieval for pick-up games very easy.

I mentioned to Neil a Club Tournament played in the early '90s.  A club member had put together a points system (much flawed in my view, but such things aren't easy to develop), and we chose our forces according.  Of course, I simply had to field 488th Mechanised Brigade, but points limit forced me to pare away two of my T34s, and even than they had to be the 76mm gun version.  I think I dropped a rifle battalion as well.

The tournament featured I think 7 or maybe 9 players.  There were four rounds, using the Swiss System of pairing.  So who got the bye in the first round?  Yep: you guessed it.  That I probably knew more about the Swiss System than anyone else at the club was not sufficient to persuade the organiser that who got the bye in such events got the full point.  I didn't even get half a point.  Word, if ever you are organising a tournament on a Swiss System basis, as after the first round, the bye goes to whoever has the fewest points.  Not that I was all that fussed - I wanted to see how my guys would go.

The other point of interest going into this was that I must have had by far and away the weakest force of them all.  All my tanks were T34/76s - seven of them.  The only other force with as few as 7 AFVs included 3 King Tigers to go with his 4 PzIVHs.  Of my other two opponents, one fielded a couple of Jagdpanthers along with his other kit, the other, presumably part of the Allied effort post May 1945 to show Stalin what was what, fielded 8 or more Comets and Challengers - along with an elite battalion of paras - among his forces.

Mind you, the Brit paras were the only 'elite' troops my guys had to face.  All the rest - all of them in the whole comp - were veterans.  I didn't have a single veteran in my lot: 'experienced', they were classed as.  That placed them inferior in fire power, and at that time inferior in sticking power as well.

Artillery Battalion of 3 batteries, Battalion Commander, and
forward observer.  3-inch field guns. The tractors are new -
I used trucks back then. These are my cardboard guns.
Well, I didn't win a game.  But I didn't lose any, either.  My guys stood up well against superior opposition, and might have won any of them.  The Brits, on 3 out of 3 going into the last round, my chappies fought to a standstill.  No picket fence for him! (Chess followers will know what I mean). Two companies of T34s caused mayhem with a surprise flank attack onto the flank of a line of Comets and Challengers occupying hull down positions along a ridge.  Unfortunately the enemy got in a few licks of his own, with his elite paras knocking out the lone tank company I had left (mistakenly) to guard the right flank, and his attack on a defended town was slowly gaining ground.  All in all, though, I was satisfied with my 3 draws from 3.

Four-eighty-eighth Mechanised Brigade lost but one battle in its entire career - as it transpired, it was to be its last.  I was showing a beginner a game and its mechanics.  He had Germans with, among other stuff, a company of Tiger I tanks. Things were going OK when his Tiger company happened by a village I was in the process of occupying (and setting up a 45mm AT popgun in the street aiming at the flank of the none-too-distant enemy).  Between my tank regiment and the tigers was a low ridge. 

Now, in a close quarter fight, I rather fancied the chances of my 9 T34/76s against 4 Tigers.  Here was the plan: 'a cautious advance' to take me to hull down positions on the ridge line, followed by another to take me right in amongst the whole streak where I'd be getting shots in against side and rear armour.   Lay orders laid down with 'Command Order' placed over the top to conceal them... And then the reveal.

Mortar Battalion: 1 x 120mm and 2 x 82mm batteries.
Horror.  I had inadvertently placed a 'full advance' arrow.  You could still shoot with that order, but only in the close fire phase.  Now, what I ought to have done was to accept the situation and used it to go hooning over the ridge and have it out, even though the enemy would have got in the first shots.  Had I paused for reflection I might have nutted that out, but I generally play my war games fast, and make quick decisions.  Usually they are the right ones - or at least, they work out.  Not this time.

In my attempt to make the best of it, I decided to do as I had planned, just accepting that any action (even twitching) still counted as a 'full advance', drove up to the ridge line.  There I lost a tank or two to incoming.  Then the next turn got stuck in up close.  Well, he got opportunity fire, this time din' 'e?
Carnage ensued, and although I still had some tanks in action come the close fire phase, I think I knocked out one Tiger and scratched the paintwork on another.  More than half my regiment was wreckage.

Then (this is going to be the Bad Part, eh?) came the Morale Check.  You could hear Fate, coming down the corridor in hob-nailed boots and dragging her swagger stick along the wall.  Roll the D10 die: '10'.  It could not have been worse - several elements destroyed this turn, enemy armour close enough you could smell the bratwurst, and I can no longer count -1 for 'large group'.  The crews baled out of the few remaining runners, and did a runner themselves.

I'd lost my entire tank regiment.

Reconnaissance Unit, minus one of the AAMG jeeps it was
 supposed to have.  At that the jeep should be carrying one
of those pintle mounted quad AAMGs.  The armoured car was
made from cardboard, even unto the wheels.

I probably could have carried on the action, and maybe yet have fought the enemy to a standstill.  One weakened company of Tigers couldn't be everywhere (although he might have had some other armour somewhere; I don't recall, now).  But I called the game pretty much right there, a German victory.  After that, I never got to play CD very often.  Pity: it is a fine rule set.  And I still fondly remember 488th Mechanised Brigade.  You know, I never did assemble an equivalent formation from my German and Commonwealth armies...


Tuesday, May 26, 2020

Further thoughts - WW2 ORBATS

Following from the previous posting methought it meet to add here some of my thoughts upon Orders of Battle - ORBATS, OOBs, TOandEs or what have you.  This time I'll be featuring some German lists for the last 18 months or so of WW2.

Let's start with something exciting: the Panzer Division (I hope one can follow this: I'm copying this over from an EXCEL file, and I haven't quite got the hang of formatting it so that it transfers across neatly).

German Panzer Division 1944-5 - Div Level
Commander:  Commander, car 1 SP  Command
HQ:  Staff, signals, vehicles
Logistics: Supply Column 1 x Lorry with Trailer  6 LOG
POL Column 1 x Lorry or tanker  4 POL
Recon Abteilung:
1 x SdKfz234/2 Puma 2SP Recon
1 x SdKfz250/1 2SP Recon
1 x SdKfz251/1 2SP Recon
1 x SdKfz250/9 2SP
1 x Towed PaK40  2SP MdAT
OR SdKfz251/22
OR SdKfz234/4
4 x recon Infantry stands 4SP Recon
Panzerjager Abteilung
1 x Towed PaK40 3SP MdAT
1 x SdKfz251,  3T
OR SdKfz11
OR RSO tractor
1 x StuG III G 3SP MdAT/MdAr
1 x Marder II or III 3SP MdAT/OT
Pioneer Battalion
4 x engineer stands 4SP Eng
1 x truck or halftrack 4T
1 x bridging half-track 1T Eng
1 x pontoon truck 1T Eng
Anti-Aircraft Battalion
1 x 88L56 FlaK  2SP 3AA Hv/AT
1 x SdKfz7 tractor 2T
1 x 37L98 SP FlaK 2SP 3AA 
1 x 20L110 SP Quad FlaK 2SP  4AA
Panzer Regiment
HQ: half-track, 20mm SP Quad Flak 2SP 4AA
Panzer Battalion: 4 x PzV Panther  Coys each 1 tank @ 3SP 12SP Hv AT/ Hv Ar
Panzer Battalion: 4 x PzIVG-J Coys each 1 tank @ 4SP 16SP MdAT/MdAr
Panzer Grenadier Regiment (gepanzert):
I Battalion (gepanzert) 3 Rifle, 1 MMG, 1 Mtr, 1 Pz/faust stands  6SP
1 x Armoured half-track 6T
II Battalion (motorised) 3 Rifle, 1 MMG, 1 Mtr, 1 Pz/faust stands  6SP
1 x medium or 2 light trucks 6T
Panzer Grenadier Regiment (motorised)
I Battalion (motorised) 3 Rifle, 1 MMG, 1 Mtr, 1 Pz/faust stands  6SP
1 x medium or 2 x light truck 6T
II Battalion (motorised) 3 Rifle, 1 MMG, 1 Mtr, 1 Pz/faust stands  6SP
1 x medium or 2 light trucks 6T
Artillery Regiment:
FOO with armoured car or light tank 1SP Recon/ Cmd
SP Battalion 1 x Wespe or Hummel SP artillery 3SP
Light Battalion 1 x 10⁵L28 Howitzer 3SP 
Medium Battalion 1 x 150L30 Howitzer 3SP
Notes:
1   Each vehicle or gun represents a squadron, company or battery.
2.  Each strength point represents about 5 vehicles or guns.
3.  AFVs are classed by gun power and protection.  So although the PzIV Battalion's 4 companies have 4SPs (representing 22 AFVs in each)  and the Panther Companies just 3SP (representing 17 AFVs per company), the latter's heavier front armour and more powerful gun should outweigh the PzIV extra numbers.
4.  AT and Ar(mour) classes will modify the number of dice rolled in combat.  The provisional rule will run as follows (this using the Hexblitz/ Megablitz combat system, in which each side rolls for damage to one's own side):
  • The number of dice rolled in combat is equal to the current SP value.
  • Add 1 to the number of dice if your AT class is higher than the enemy's armour class
  • Subtract 1 from the number of dice to be rolled if your AT class is lower than the enemy's armour class
  • Add 1 to the hit score if attacked in flank or rear OR armour class is less than enemy's AT class
  • Subtract 1 from hit score if your armour class is greater than enemy's AT class.
At the moment the AT and Armour classes envisaged are: Light, Medium, Heavy, Extra Heavy.

For an example of how this might work, imagine a tank battle against a fresh PzIV Battalion (6SP)
attacking a regiment of IS2 (2SP - actually a bit generous, as I think the Red Army heavy tank regiments comprised just 20-odd AFVs - barely even the size of a PzIV company!).

Let us suppose that both sides will take hits on a standard score of 5 or 6 (this is not 'per rule set', but used to illustrate the effects of the system proposed here).

To determine the effect of incoming,
  • The PzIV battalion rolls 2 dice, +1 for the IS2 gun being a higher class than the PzIV armour - 3 dice in all.  The PzIV also adds 1 to each score to determine the effect, so will lose 1 SP for each 4, 5 or 6 rolled.   The panzer battalion can 'expect' to lose 1.5 SPs
  • The IS2 regiment rolls 6 dice, less 1 for the IS2 armour being heavier than the PzIV AT gun class - 5 dice only.  The IS2 also subtracts 1 from each score to determine the effect, so will lose 1 SP for each 6 rolled only.  The IS2 regiment can expect to lose 5/6 of a SP.
  • Methinks the Panzer Battalion has caught a Tartar - possibly quite literally!

    Although outnumbered three to one, the IS2 regiment will be no
    pushover for the panzer battalion!
I feel I'm on to something here, but it is looking as if I might have to make considerable changes to the Hexblitz/ Megablitz combat systems to get it to work!

4.  For the moment the values given for LOG and POL are fairly arbitrary until I determine their basis in my armies.


 Panzer Regiment ('Army Level' OOB).  The single StuG
stand represents the various vehicles of the panzerjager
abteilung.
German Panzer Division 1944-5 - Army Level
Command: 1SP
HQ: 1SP
Supply: Supply Column 1 x Lorry with trailer 6LOG
POL Column 1 x Lorry or tanker 4LOG
Recon Abt: 1 x Armoured Car (8 rad) 1SP Recon
1 x Recon infantry stand 1SP Recon
1 x Light Armoured half track 1SP 1T, Recon
Panzerjager Abt:
1 x Towed PaK40 with 1SP MdAT
1 x SdKfz11  3T
OR 1 x StuG III G 1SP MdAT/ MdAr
OR 1 x Marder II or III 1SP MdAT/ OT
OR
1 of the above alternatives @ 3SP 3SP
Pioneer Battalion
1 x Engineer SMG stand 1SP  Eng
1 x Bridging half-track 1T Eng
AA Battalion: 
1 x 88L56 FlaK + SdKfz7 2SP 3AA
OR
1 x 37L98 SP AA
OR other SP AA vehicle
Panzer Regiment:
Panzer Battalion 1 x PzV Panther 5SP HvAT/ HvAr
Panzer Battalion 1 x PzIVG-J 6SP MdAT/MdAr
Panzer Grenadier Regiment (gepanzert)
4 infantry stands  4SP
1 armoured half-track 4T
Panzer Grenadier Regiment (motorised)
4 infantry stands 4SP
1 medium or 2 light trucks 4T
Artillery Regiment:
1 of:
Wespe  3SP Lt or Md HE
Hummel
105L28 howitzer
150L30 howitzer


A few things to note. 
1.  Each vehicle or artillery model represents a battalion, unless otherwise stipulated.

2.  Every 2 infantry stands represents a battalion, usually depicted with a rifle stand and some support weapon stand (MMG, Mortar or infantry armed with an anti-tank launcher).  However, unless stipulated in the ORBAT, battalions (much less companies) have no separate identity or existence.  The 4-stand German regiments represent units comprising 2 battalions (c.f. the 6 stands that represent 3-battalion regiments in the Red Army, or the 3-battalion Commonwealth brigades).

3.  My Strength Point regime follows the Bob Cordery/ Tim Gow system so far as AFVs and Artillery is concerned (1SP to 15 AFVs or 12 guns).  For infantry, I have settled upon 1 SP per stand.

4.  Morale, training, troop quality or technical differences are not subsumed in this SP system (here I depart from the Cordery/Gow systems, whilst acknowledging this will add a layer of complexity to the game system).  Those differences will determine the number of dice rolled in combat, and their effect.  Apart from a brief glimpse earlier, how I see this working I'll leave for another time.

5.  AFVs will be classed by weight of anti-tank firepower, and weight of protection (armour).
        In the above list, you will observe that the PzIV battalion is given 6SP, the Panther battalion only 5.  This would translate as 90 PzIV tanks in their battalion (establishment was actually 98, as of June 1944), and 75 Panthers in theirs (est. 78).  But the heavier (front) armour and more powerful tank gun should outweigh the difference in numbers.   

       By the way, 21st Panzer Division on 5 June 1944, had just the one panzer battalion present; the other having been sent to Germany for re-equipping with Panthers (not to rejoin 21st Panzer for more than 6 months).  I suggest the remaining PzIV battalion be given 7SP, or even 8SP, representing the 112 or so tanks available.  I don't know whether the French AFVs with which the absent battalion had been 'equipped' were retained or abandoned.

Next time, I'll add in something at the other end of the excitement and 'cool kit' scale: the Luftwaffe Field Division.  Well, it does have the 8.8cm FlaK, which is not nothing!


German Regular Infantry Division of 1944-5.  The 3
assault gun and SPAA vehicles could instead have been
subsumed into a single Marder or StuG at 3SP.

Saturday, May 23, 2020

Afterthoughts on the Mius Operation...

For a long time, now, I have been exercising my mind (racking my brains) upon the topic of how I am to organise my considerable WW2 collection of ... stuff. Actually, compared with at least two other collections in this town, it isn't all that huge. Not when a friend turned up one day to lay out on my lounge floor his whole regiment of T34 tanks - all 47 of them (not to mention his 20 other AFVs of varying sizes and weights); or that other club occasion when we could not pass up the presence of a temporary boxing ring left over from the previous night's entertainment and ropes and posts removed. A brief dash home fetched what armour we could, and there ensued a great battle between 100 Soviet tanks against 70 German. Almost the entire collection was Nick's; my contribution was 13 - my entire Red Army inventory of AFVs at the time - though I was put command of a further 16. Man that was fun!

But.. mine is not so very huge a collection, but still in want of proper organisation and housing.

My armies have grown since that day, my Red Army now able to field
- 14 x T34
- 5 x M4 Sherman (or 10 if I throw in my die cast tanks)
- 6 x IS2
- 6 x KV Is and IIs, OR  5 may be replaced by KV85s (have swappable turrets)
- 2 x T26
- 1 x T70
- 1 x SU85
- 3 x SU76


Now, highly taken with accessibility and appearance of the game designs of Bob Cordery (Portable Wargame, Hexblitz), Chris Kemp (Not Quite Mechanised) and Tim Gow (Megablitz and Little Cold Wars) - to which one might add a couple of articles by Martin Rapier - I have been wondering how to organise my stuff that I can put together a game without my usual safari among various boxes (and rooms) to hoik out what I want and need.


Overall picture of what my 6th Shock Army will look like.
Present are the Mechanised and Tank Corps; and one of
the four Rifle Divisions. Absent is the Cavalry and
three Rifle Divisions.

The 'formation in a box idea', though tempting, won't quite work with my stuff - not definitively, at any rate, a certain items will probably be 'shared' among game systems. Even the AFVs will be so tasked, with, for example, certain British and Red Army items being roped into a Little Cold Wars type of campaign between the 'Republic' of Tchagai, and the Nimruz S.S.R. - set in the 1950s and 1960s.

Yet I do want at least a settled ORBAT for all the kit, and the recent 'Unquiet Flows the Mius' game took me far along to road towards that goal. I have settled upon a 'Two Tiered' system: what I call a 'Div Level' list, and an 'Army Level' list. I'll start here with my late war Red Army Mechanised Corps.

Mechanised Corps (Div Level) 1944-45

Corps Commander      (1SP)
Corps HQ, Staffs and sigs:   (1 SP)
Supply Column:
  
- 2 x Supply Truck with trailer  (6LOG)
  - 1 x Supply Truck or Bowser   (3POL) (Provisional)
Tank Brigade: 
  -  3 x Tank Battalions, each with 1 T34 @ 4SP - (12SP Md or HvAT) 
  -  Motor Rifle Battalion:
           - 2 Rifle stands, 1 SMG stand, 1 82mm Mortar, 1 PTRS ATRifle, (5SP)
             1 medium truck or 2 light trucks:  (6T)
3 x Mechanised Brigades, each comprising:
           - 1 x Tank Regiment with 2 T34 @ 4SP - (8SP Md or HvAT)
           - 1 x BA64 (or other armoured car) 2SP Recon
           - 1 x AAMG quad 1SP 2AA
           - 1 x 45L66 AT gun (or 57mm for a Guards Corps) 2SP LtAT
           - 1 x PTRS stand 1SP CCAT
           - 1 x Field Artillery Regiment with 1x76L39 gun 3SP
           - 1 x Mortar Battalion with 1 x 82mm or 122mm mortar 3SP
           - 3 x Motor Rifle Battalions, each with
              - 3 rifle stands, 1 MMG stand, 1 Mortar stand, 1 PTRS stand
                 1 medium or 2 light trucks  6T   
Light Self Propelled Gun Regiment:
  - 1 x SU76 4SP LtHE, MdAT
Heavy Self Propelled Gun Regiment:
  - 1 x SU152 or SU122 or ISU152 4SP Md or HvHE
Tank Destroyer Regiment:
  - 1 x SU85 or SU100 4SP (Hv or EHv AT)
Mortar Regiment:
  - 1 FOO stand, motor vehicle 0SP, Recon/ Artillery Observer
  - 2 x 120mm Mortar @ 3 SP: 6SP (Represents 2 Mortar Battalions)
Anti-Aircraft Battery:
  - 1 x 37L70 AA gun, towing vehicle 2SP, 2AA
Anti-Tank Battalion:
  - 1 x 45L66 Anti-tank gun, towing vehicle, 3SP LtAT
Guards Mortar Battalion:
  - 1 x BM-13 MRL 2SP 4MdHE
Engineer Battalion:
  - 2 x Engineer SMG stands 2SP 2ENG
  - 1 x Medium engineer truck with trailer 2 LOG
Reconnaissance Battalion:
  - 1 x Armoured Car  1SP Recon
  - 1 x Scout Car Company:
    - 1 x M3A1 (White) scout car  (2T)
    - 1 x SMG SMG recon infantry stand 2SP Recon
Motorcycle Battalion:
  - 1 x Armoured Car 1SP Recon
  - 1 x Motorcycle SMG stand SP1  Recon
  - 2-3 selected, 1 only of each, from:
    - 1 x Scout Car Company, with:
       - 1 x M3A1 scout car (2T)
       - 1 x SMG recon stand (2SP Recon)
    - Halftrack Company, with:
       - 1 x halftrack (2T)
       - 1 x SMG recon stand (2 SP Recon)
    - 1 x Armoured car company  1 x BA32 or similar 2SP Recon
    - 1 x Tank Company: T34/76 tank 2SP MdAT
    - 1 x Artillery Battery: 1 x 76L39, tractor 1 SP LtHE
    - 1 x Anti-Tank Battery: 1 x 45L46 AT gun 1SP LtAT
    - 1 x Anti-Aircraft MG Battery: 1 x AAMG 1SP LtAA

Notes:
1.  Strength points (SP) based on numbers only, not troop quality.  Although the systems in use have the virtue of simplicity, I've never felt fully comfortable with combining quantity and quality in the same SP system.  One tank represents 1 Battalion or half a regiment; each SP represents  5 tanks, roughly.

2.  Though the 2 tanks comprising the Mech Bde tank regiments count as separate 'units', they may never be separated by more than 1 grid area.

3.  I've labelled the weight of anti tank according to 5 categories;
CC (close combat, viz AT Rifles and bazooka-type weapons), Light, Medium, Heavy and Extra Heavy.  For the moment I haven't settled upon a definition.  Apart from the question of gun ranges, there remains that of effectiveness.
3A.  I have left open the question of AFV protection (armour) for the time being.
3B.  I'm thinking of modifying combat outcomes by adding to the SP factors for firepower, protection (self and external), type shooting, type of target, experience/ quality.

4.  The idea I have in mind do complicate the game, but I am hoping not unduly, and not such as to detract from the action.

5.  A lot of the 'extra bits and pieces will get subsumed in the Army Level ORBAT:

The Mechanised Corps (sorry about the picture quality)

Mechanised Corps (Army Level) 1944-45

Corps Commander 1SP
HQ: staff, sigs etc, truck. 1SP
Supply Columns: 4 POL and 4 LOG (Provisional)
Tank Brigade:
  - 1 x T34, 1 x SMG:  5SP MdAT
    (Represents 3 tank battalions of about 20 tanks each, plus motor rifle battalion)
Mechanised Brigade:
  -  Tank Regiment: 1 x T34: 3SP Md (T34/76) or Hv (T35/85) AT
  -  Brigade Infantry:
     - 3 x Rifle, 1xMMG, 1 x Mortar, 1 x PTRS 6SP
  (Represents 1 tank regiment of about 45 tanks plus 3 motor rifle battalions).
Mechanised Brigade:
  -  Tank Regiment: 1 x T34: 3SP Md or HvAT
  -  Brigade Infantry:
     - 3 x Rifle, 1xMMG, 1 x Mortar, 1 x PTRS 6SP
Mechanised Brigade:
  -  Tank Regiment: 1 x T34: 3SP Md or HvAT
  -  Brigade Infantry:
     - 3 x Rifle, 1xMMG, 1 x Mortar, 1 x PTRS 6SP
Mortar Regiment:
 - 1 x 122mm Mortar 2SP MdHE
Recon/motorcycle Battalions
 - 1 x Armoured Car 1SP Recon
 - 1 x SMG stand and M3A1 Scout Car 1SP Recon
 - 1 x motorcycle SMG stand  1SP Recon - provisional on availability of motorcycles.

Artillery, Self-propelled guns, Anti-tank, Tank destroyer, Anti-Aircraft and Engineers are treated as Army Troops.

Notes:
1.  Here, each tank represents a battalion or regiment.  Each SP represents about 15 tanks, but the Tank Brigades get 1 extra SP for the additional SMG stands. The Tank Brigades act as a single integrated whole.
2.  The Mechanised tank and rifle elements are not so integrated, the tank and rifle elements being able to operate separately.  However, I am likely to place a restriction upon their separation.


Mech Corps with Strength Points allocated.

The whole inventory is to be organised as 6th Shock Army (fictitious) which comprises:
8th Tank Corps
5th Mechanised Corps
4th Cavalry Division (under strength)
88th, 259th, 301st, 316th Rifle Divisions
Army Troops:
     275th Howitzer Regiment
     332nd Howitzer Regiment
     1163rd Gun Artillery Regiment
     508th Tank Destroyer Regiment
     765th Tank Destroyer Regiment
     22nd Guards Mortar Regiment
     1069th Anti-Aircraft Regiment
     259th/828th Engineer Battalions.
Attached (this is a non-historical formation after all) will be:
    44th Heavy Tank Regiment, with KV85 (briefly) and then IS2.
     200th Heavy SP Artillery Regiment with ISU152

The following pix are of my proposed Rifle Division and Tank Corps.


Rifle Division:

3 rifle regiments each with 6 stands, 1 horse or tractor-drawn field artillery, 1 horse or tractor-drawn anti-tank gun, LOG elements (wagon, pack animals or lorries). Divisional command, signals etc.
Rifle Division with horse drawn heavy weapons and
logistics elements

Rifle division with SPs allocated


Tank Corps:

3 Tank Brigades each with 1 tank and and 1 integral element of tank desantski SMG infantry;
1 Mortar regiment, 1 recon/motorcycle composite unit, POL and LOG elements, command, sigs etc.
Tank Corps.  The SMG elements are integral to the Tank
Brigades, and tanks count as their transport.

Tank Brigade with SPs allocated.  This really is a terrible picture,
but I hope the idea is clear.

The varying base sizes of the infantry have no significance apart from a long, long history of not being able to make my mind up what size the stands should be. As much as I admired the Command Decision game system, I always had a problem with the base sizes as far too small, especially if you wanted properly to accommodate MMGs, mortars and anti-tank rifle teams.


To be continued.


Saturday, May 2, 2020

Unquiet flows the Mius (4)

General view of battlefield. looking northeastward.
Early afternoon.
 As the July morning drifted into afternoon, it appeared that the Red Army's attempt to break out of the Kozhenya bridgehead had been contained, if not altogether repulsed. But losses on both sides had been heavy. The early clashes had cost the Soviets the more heavily, but it was not too long before they were giving at least as good as they were taking. On both sides, the armour were wearing most of the punishment. Overall the respective losses at this stage of the battle were Germans, 12SP; Soviets, 18SP. Considering that at one stage the 'score' was 2-10, the Soviets could take a measure of satisfaction.
Germans recapture Pt138, though with heavy losses.
 At around Pt138 the battle flared up anew.  In the early fighting,  I/79 PzGr Bn had taken some stick (2SP's worth) from Red artillery, and had fallen back behind Pt138 to recuperate. Now they were called upon to join the counter attack to recover the high ground. Together with the light tanks, they stormed the height, supported by a much reduced company of PzIVs to their right, and at least one StuG company to their left. The Russian assault guns were soon edged off the feature, to be destroyed in the plain beyond. But a handful of T34s remained to contest the further German advance in this sector.
German attack on Dmitrievka.
 To the north, however, the Russians had been forced back into the town, which they placed in a state of defence. I/6th Rifle Battalion having long since broken and scattered, II/6th garrisoned the north sector on the west bank, whilst what remained of 2nd/6 Tank Coy guarded the bridge approaches. Having retreated to the east bank behind Dmitrievka, 1st/6 Tank Coy, much reduced, began moving to cover the river bank north of the town. The attacking German infantry of 515th Regiment were joined by a company of Marders and one of StuGs. For all the weight of the attacks, the Soviets proved stubbornly hard to shift. 
II/79 PzGr Bn - 'held in reserve'.
 The Germans found their task no easier when Russian tanks appeared on the far bank and began firing into the flank of II/515 Battalion. Meanwhile, the II/79 PzGr Battalion had been withdrawn into reserve on the German left centre (by which is meant that, owing to the limits placed upon one's freedom of action through the unit activation scheme, I was simply not finding the time to bring the unit into action).
Fierce fighting between high ground and river. What happened to
6th Pz Coy (Tank 233)?
 The recapture of Pt138 came at a serious cost to the Wehrmacht. The last tanks of 5th Pz Coy were reduced to smoking wrecks, and I/97 PzGr had taken further losses. Meanwhile, advancing up the riverbank into the bend, 6th pz Coy had wandered into the range of the hitherto dormant battalion of BM-13 rocket launchers - Katyushas, a.k.a. Stalin's organs. Down came the whining missiles, up went the mass of explosions, and back went half the panzer company (down to 2SP out of 4).  The other half remained flaming or abandoned along the riverbank.
At last, II/4th Rifle Battalion driven into and across the river.
On the southern flank, with great effort Kampfgruppe I at last managed to lever the II/4 Battalion out of their exiguous bridgehead and into the Mius River. About one third of the Soviet battalion remained (2 out of 6SP), but they had taken a considerable toll. It required the whole of 60th PzGr Regiment, plus at least one panzer company  to drive them out, by which time both panzergrenadier battalions had lost 20% of their strength, one PzIII company was left gently smoking on the field of battle, and the other two  PzIII companies has also lost vehicles.
Beginning to attack Kozhenya
Finally destroying the last of the Soviet armour, Axis command ordered the exploitation onwards to take, seize or carry the Kozhenya village. Two companies of StuGs accompanied I/79 PzGr to the edge of the village. The original anti-tank garrison had long since departed, to be replaced by a fresh company of T34 tanks.  
Lots of burning armour scattered about. On the left,
 Marder crossing to east bank.
Shortly before this time, the Soviet forces had reached their exhaustion point. Heavy armour losses in the centre and northern flanks left them with very slender means to strike blows. Counter attacks being now out of the question, they pulled their forces back into their tight perimeters. However, the Germans were close to exhaustion themselves - within just one Strength Point. I had planned that, having destroyed the remnants of 1st/6 Tank Coy, the Marder would cross the river north of Dmitrievka to seize the objective point on the far side of the bridge. It was hoped, too, that a quick thrust at Kozhevnya might secure that objective point as well, however unlikely.
Russian perspective, at close of the action.  Russians on the defensive,
but German attacks petering out.

Assessing the likelihood of German success as near zero, I called the battle here, probably wrongly. It is true that the Marder company was at least 2 move away from its objective, which was unlikely to remain unoccupied. On the other hand there was at least a slender possibility - very slender - that the Germans could take Kozhenya. The odds against securing one of the objective points for victory before losing that final SP were still pretty steep. Overall, the result was a draw, tactically and strategically. The Germans had failed to eliminate the bridgehead, and indeed, given Soviet continued occupation of the east back sectors of Dmitrievka, it had expanded along the riverside, at least. Other than that, the Soviets were as distant as ever from a breakout.

Losses had been very heavy, especially in armour. The overall 'butcher's bill' now stood at Wehrmacht 23SP lost; Red Army 29SP. German armour lost 12SP, 11 of them from the panzers; Russian armour lost all of 19SP. A day later, 2nd Guards Mechanised Corps was drawn out of the line, for refitting, refurbishing, and employment elsewhere. For their part, the Germans could not be withdrawn, and waited apprehensively for the next Soviet attack...

(Aside:  Had this been a campaign battle, the Germans would have got 12SP back from the 23 lost, 6 going to the armour, specifically the panzers, 3 to each battalion.  I Pz Bn would have been rebuilt to Coy strengths of 3, 2, 2SP; and II Pz Bn to 3 and 2 SP. This recovery would be attributed to battlefield recovery of slightly damaged and abandoned tanks, and the odd replacement from Div workshops, Army shipments and what have you. On the whole I prefer a different handling for the Red Army: withdrawal and replacement of whole  formations rather than of units. Something to think about, anyhow.)

Friday, May 1, 2020

Unquiet flows the Mius (3)

By mid-morning of 18th July, 1943, the Soviet attacks out of the Kozhevnya bridgehead seemed to be promising great gains. Before Dmitrievka, at the north end of the line, Soviet infantry attacks, with tank support, had largely cleared the ridges, though German StuG assault guns still sat upon the trig points 141 and 143. Heavy losses to I/6th Motor Rifle Battalion prevented their following up, and II/6th, left at the tail of the column as the 6th Mechanised Brigade crossed, was too far off just yet to throw its weight into the fight. 
The Germans recovered quickly. At once 79th Panzergrenadiers retook the heights, whilst anti-tank fire from the StuGs criss-crossed the plain towards the town. Both 1st and 3rd T34 Companies of 6th Tank Regiment lost many tanks; and I Rifle Battalion was reduced to less than 20% of its strength (1SP remaining from 6). The 1st Medium and light tank companies of 5th Tank Regiment had also taken heavy losses, what remained of the former being early on forced back into the bridgehead. (In the above picture I count at least 12SP lost to the Soviets; the Germans, maybe two or three).
The light PzII tanks of 2nd Panzer Regiment also occupied Pt 138 betimes, before the Soviets could take advantage of the Germans failing to seize the feature earlier.   Not that that move discouraged the Russians.  The lead company of SU76 'Голожопый Фердинанд'* assault guns having traversed the bridge and the village of Kozhenya, raced across the plain, joining the 2nd T34 Company of 5th Tank.  In a trice they shot the light panzers off  Pt138, whereat the SU76 company followed up.
There below them lay the German gun line, which at once came under assault. Unfortunately for the Russians, the 5th Brigade Rifle battalions failed to stir from their bridgehead positions - a fine moment to cement their success had they done so. To the right, a fierce battle continued to rampage back and forth over the ridge, the Germans for the second time giving up Pt141. II/6th Rifle Battalion with tank support cleared half the high ground, but without managing to take the Pt143 objective point.

Meanwhile a private little battle was taking place on the southern flank. Faced only by the 2nd Panzer Company, II/4th Rifle Battalion forced their way across the river helped by supporting fire from the armour. Tank losses mounted on both sides, 1st Tank and 2nd Panzer Companies both losing all their tanks. First and 3rd Panzer Companies were also somewhat reduced. Though it took a little time, II/60th Panzergrenadier Battalion joined the combat. For all the strength arrayed against them, though, the Soviet riflemen proved stubborn defenders.  It took all day to drive them out of their small bridgehead.  

In the distance II/2nd Panzer Battalion, followed by I/60th Panzergrenadiers, were moving up beside the river bend. Occasionally shooting across the riven at the 4th Tank vehicles, their focus tended more toward events developing in the centre, towards the main bridgehead. Swinging around the end of Hill 138, the PzIVGs of 5th Panzer Company engaged the flank rear of Russian medium tanks some distance to the north.


An aside is indicated here, I think. Although a target's facing is critical for close assaults, under the DPW rule set, it is not for shooting - especially anti-tank shooting. Now, I appreciate that in this action the ground scales have been fudged more than considerable, but even so, it raised the question of anti-tank shooting at an enemy facing the wrong way. It seems to me that flanks and rear of units should still be sensitive to incoming from a flank. It was just a thought; I made no change to the rule set as written.

What led me to this was the German counter-attacks mounted against the Russian central thrusts.  Fifth Panzer Company approached a body of Russian armour (3rd Coy, 6th Tank Regiment, which had strayed all the way southward from Dmitrievka to before Point 138) from the latter's left rear.  At the same time attacks by StuGs from the other flank, and a direct counter-thrust by the PzIIs of 4th (Light) Panzer Coy, flung the SU76 group off Pt138.  But not before both German artillery battalions had lost some of their guns and crews.

The Russian armour nevertheless reacted effectively against the flanking PzIVs. Though losing some tanks as they turned to face the PzIVs, Russian tank gunnery proved more effective than the German. As the PzIVs climbed to the summit of Pt138, they left behind them three quarters of their strength burning and abandoned.
The remaining pictures of this posting depict the overall situation at about mid to late morning. At the southern end of the line, a Panzer (I/2nd) and Panzergrenadier (II/60th) had contained but were still struggling to shift II/4th Rifle Battalion from the west side of the Mius.  
In the centre, the Germans had almost recovered Pt138, but at the cost of the better part of a powerful PzIV company, and half the artillery.  The Russian armour was still maintaining itself in their forward position, though under pressure from three sides.  
On the German left, the Germans had finally and definitively repulsed the Russian attacks on Pts 141 and 143.  Now was to begin a general German advance of assault guns, 515th Infantry Regiment and 79th Panzergrenadiers against the town.


To be concluded... Will the Germans after all eliminate the bridgehead, or will a resurgent Russian army break out after all?
* 'Голожопый Фердинанд' - 'shortarsed Ferdinands' - an ironic allusion to the huge German 'Elefant' or 'Ferdinand' assault guns.