Sunday, December 25, 2022

Yorktown Inventory

Having recently bought 10 horsemen to add to my small collection of BMC Yorktown figures, methought it time to take an inventory of just what I have. Here they are, laid out on my kitchen table.

I've placed them in 'units' of 10-12 foot figures, but have no real formal organisation except insofar as the larger contingents represent the major principals of the American War of Independence; the smaller the  allies (French) or paid mercenaries (German - I've painted them up as Brunswickers, and given them a Brunswick battle flag).  The battle flags are my own modifications on some of the figures, the pole made from slender skewers, and the flags printed off from some online source.  Before printing, I used Microsoft Paint to skew the image vertically, to give the flags better 'drape'.

Inventory:

1 Field Emplacement
2 Field cannon
2 Siege Mortars

USA:
5 Cavalry
5 Artillery (Officer and 4 gunners)
1 Mounted Field Officer
2 Officers on foot
1 Flag
3 NCOs
24 Musketeers (4 wearing brown jackets + NCO may represent a skirmishing group)
Total: 41 figures

French Allies:
1 Mounted Officer
1 Foot Officer
1 Flag
10 Musketeers
Total: 13 Figures

British Red Coats:
5 Cavalry
5 Artillery (Officer and 4 gunners)
1 Mounted Field Officer
2 Foot Officers
1 Flag
2 NCOs
22 Musketeers
Total: 38 figures

'Hessians' (actually Brunswickers):
1 Foot Officer
1 Flag
12 Musketeers
Total 14 figures.

Overall that gives me 54 on one side and 52 on the other. I have deliberately made the gunners fairly ambiguous, as I can think of scenarios in which the cannon will be on one side or the other, rather than evenly split.

This has been one of those little sidelines that have been sadly neglected for years, yet the limited numbers ought to make gaming with them quite convenient.

Saturday, December 24, 2022

Season's Greetings...


Not much happening on the ackshull war gaming front right at this present point in time - just a bit of minor tinkering here and there.


This plastic Prussian Army was badly in want of some tidying up and reorganisation.  It was not in want of the two metal cavalry units I bought at the bring and buy a couple or so months back (see pic below). For my Big Battles for Small Tables, the whole represents three Army Corps. Could use a couple more artillery, though, methinks.

My light reading at the moment: Napoleon's bulletins. Not to read for literary style, but very interesting reading, all the same.  Informative - especially of what's happening away from 'centre stage' as well. Very generous in mentioning - and praising - Napoleon's commanders and plenipotentiaries, and occasionally his adversaries. He sure lord doesn't like the perfidious Albion!

In an idle moment, listening to some item or other on Youtube or Facebook, a few days ago I drew up this field of hexes on a 45cm (18-inch) square tile board(?), then drabbled green paint all over it. For small games especially with Samurai or Mediaevals. Took maybe an hour or so to make. The hexagonal grid areas are slightly distorted (flattened), but that is not at all apparent in this orientation. The bits and pieces on it are just waifs and strays needing to be put somewhere.  They include 4 stands of pack animals for my Chromatic Wars...

Finally, what happens if an item strays under my notice in idle moments - an armoured car outlined in black. Something of an experiment. Note the Martian landscape...
Off now for a shower, and once Karen's louise cake is done, to roast up our Christmas dinner...

All my best wishes go to you all for Christmas and the coming New Year.  

Sunday, December 18, 2022

Kavkaz campaign - ...

Following their second defeat at Kutaisi, the Izumrud-Zeleniyan Kavkaz Column resumed their retreat towards Zugdidi, where they might join hands with the Coastal Column.  Of great concern to their commander, General Count Ignatieff, was the depleted state of his infantry, which had taken very heavy losses over the past week.


Card draw:
Ace ♣  / Jack  / Ace

Over the next three days, 5th-7th June, 1875, these were the developments:

Ace  
- Coastal Column at Zugdidi carries out reconnaissance of river and the enemy on the far bank.  Poor results (rolled a '2' - a dark and stormy night recon - learned nothing). 
- Kavkaz Column retreats, reaches halfway point between Kutaisi and Zugdidi.
- Convoy travels slowly to the south east of Sakhumi.

Jack 

- Turcowaz Trebizond Command carries out attack across the river at Zugdidi
- TNS Hamidiye moves north, with orders to interdict the coastal sea lane from Sakhumi 

Ace 

- Kars command follows up retreating Kavkaz column, but remains a day behind.
- Trebizond Command: news awaited of the result of the attack on Zugdidi 
- TNS Hamidiye changes course to NE by E, heading for the mouth of the Ingari River.

Note that

  • Aces permit all formations to move 1 grid space;
  • Naval units (at sea) are able to move whenever their own colour card appears.  However...
  • The Izumrud-Zeleniyan troops being transported by sea, once landed will move only if the Coastal column suit (club) turns up. In the likelihood of columns combining, attaching or detaching, the allocation of suits for movement will probably change. This will be explained in due course.

If the state of the Kavkaz column's infantry was concerning Count Ignatieff, the Turcowaz command had concerns of their own.  The Kavkaz column, having abandoned its direct line of communication with the towns north of the Kavkaz Mountains, were now in fairly close contact with the Coastal column, just two day's march away.  It was likely that the two commands combined would have the central position, and therefore able - with some risk to the safety of the coastal road, it's true - to attack the Turcowaz columns separately.  

With that consideration in mind, the commander of the Trebizond Column, Bashir ed Din Pasha, decided upon an attack directly across the Inguri River at Zugdidi.  If he could storm the town successfully, he would place the Izumrud-Zeleniyan expedition in a seriously comprising position: the Kavkaz Column cut off with all roads cut off, and the Coastal Column forced to try and break through to reopen the coast road north.

Turcowaz Trebizond Command: 
Command: Bashir ed Din Pasha (average commander) = 6SP


1st Division: HQ (1SP elite), 1st, 2nd, 3rd Regiment @ 4SP (average) = 13SP
2nd Division: HQ (1SP elite), 4th, 5th, 6th Regiment @ 4SP (average) = 13SP
3rd Division: HQ (1SP elite), 7th, 8th, 9th Regiment @ 4SP (average) = 13SP
IX Machinegun Battalion = 2SP (average)
1st Cavalry Brigade: 19th, 20th Cavalry @ 3SP (average) = 6SP
I, II/ 1st Field Regiment @ 2SP (average) = 4SP
III, IV/ 2nd Medium Regiment @ 2SP (average) = 4SP
101st Medium Transport Battalion @ 2SP /3CP (carrying capacity)
111th, 112th  Pack Transport Battalion @ 2SP /2CP = 4SP/ 4CP

23 Units (including command); activation 12 units per turn
67 Strength Points (SP); Exhaustion Point (EP) = -23, Rout Point (RP) = -34 
(represents an army of about 27,600 troops, 40 machineguns, 160 artillery pieces)


Izumrud-Zeleniya Coastal Column:
General-leytenant Malakhai Malodorovitch Kutizedoff (average commander) = 6SP
1st (Grenadier) Division - HQ (1SP elite) + 1st through 4th Regiments @4SP (elite) = 17SP
3rd (Rifle) Division - HQ (1SP elite)  + 9th through 12th Regiments @4SP (average) = 17SP
1st Light Cavalry Division - 1st through 4th Light Horse (Hussars) @3SP (average) = 12SP
1st Field Artillery Regiment - I and II (Field) Battalions @2SP (average) = 4SP
Naval Artillery Detachment -
     V (Naval) Artillery Battalion = 2SP (average)
     VI (Naval) Machinegun Battalion (Nordenfelds) = 2SP (elite)
4 Transport Battalion columns @2SP/3CP = 8SP/12CP .

23 Units (including command); activation 12 units per turn 
68 SP; EP = -23, RP = -34
(represents an army of  about 27,100 troops, 40 machine guns, 120 artillery pieces.

As the observant reader will notice, these forces are very evenly matched - the Turcowaz having a slight preponderance of artillery; the Zeleniyans the more powerful cavalry.


To be continued: Combat at Zugdidi.

Sunday, December 11, 2022

Assault on Kutaisi

The town of Kutaisi is a considerable habitation along the great northwestern highway from Tiblisi, lying on the west bank of the River Rioni, nestling within a bend of the stream. An outlying farm connected by bridge to the town, lies on the opposite bank. A separate bridge crossing carries the main highway into the town. The river is crossed a third time by the road south, on the way to distant Baghdati on the road to the even more distant Kars. Some distance to the north of town a fourth bridge takes a minor road across the river, whence it eventually connects with the road to Ghori, and the Kavkaz mountains beyond. It is at this place, that Count Ignatieff chose to take a stand.

The country round about is dotted with a few hills, cultivated fields and tracts of forest or swamp. The elevation close by the town to the southwest the Count caused to be crowned by a redan which contained the 20 guns of III Mountain Battalion (the other 20 having been lost at Khashuri).  The region close by the 'north bridge' being open to gunfire, he also had constructed there a redoubt into which he placed the 8th Regiment.  Covering them to the rear was the IV Mountain Artillery battalion.  


The main body of infantry garrisoned the town: 5th Regiment covering the bridge south, and 6th and 7th watching over the bridge crossings to the east.  His powerful cavalry stood ready to strike at any crossings the enemy might make north (7th and 8th) or south (5th and 6th) of the town.  
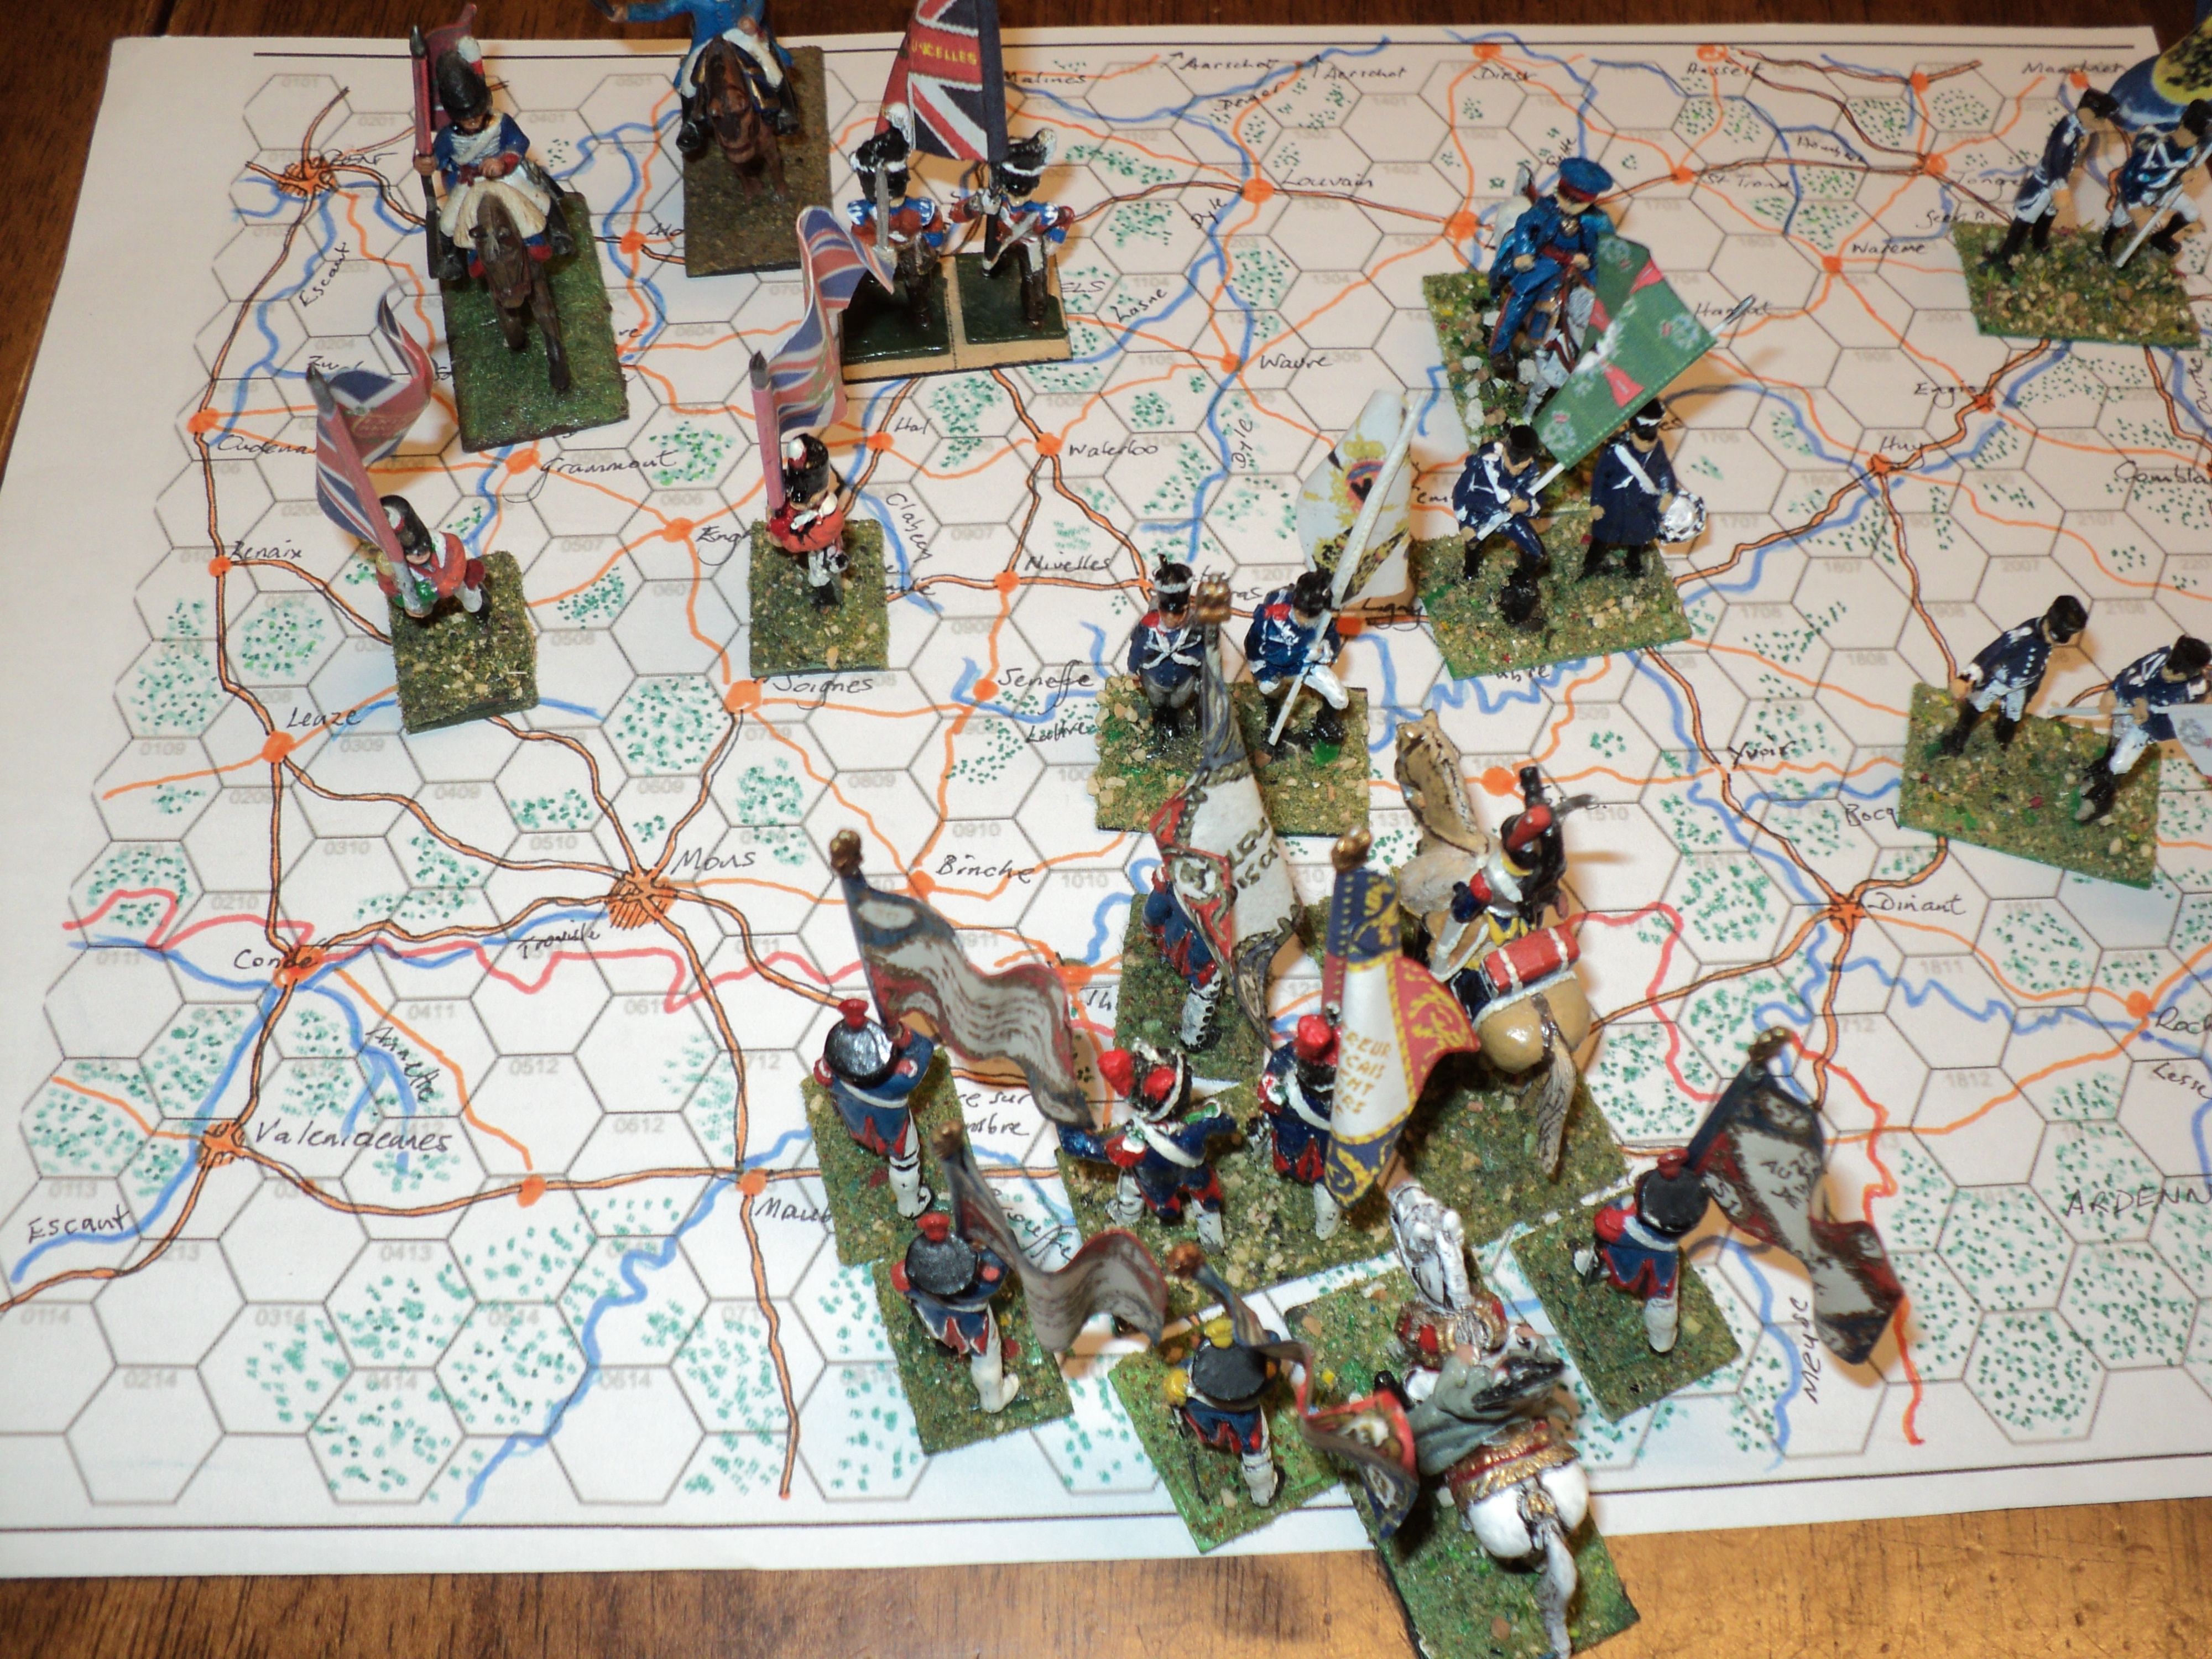
Before resuming the narrative, I have to state here that the accidents of terrain design, especially of rivers, meant that the map I generated had to be reworked a little for things to 'fit'.  Here's the map as generated: 


It turned out that the river sections simply wouldn't 'go'.  So I had to make certain adjustments that led to the elimination of the marshy ford just north of the town, and the creation of a bridge crossing at the top edge of the map. The forded sections having been decided by a die roll (straight sections only, requiring a '6'), the northern one had to be replaced by a bridge. The resulting table looks more like the emended map:


A word about the generation of this map.  The table comprising 10x10 square cells, I used the Portable Colonial Wargames system of battlefield generation, but with D10s in place of D6s.  The town was a set piece, intentionally located fairly centrally, but the river was semi randomly generated along its length.  


Observing minutely the layout of the defences (very good recon), the Turcowaz commander, Abdul Abulbul Ameer, opted for a direct frontal attack by one of his three infantry Divisions (5th), whilst the two others carried out a double envelopment.  The Machine Gun detachment and V Mountain Artillery would support the 4th Division on the right or the 5th in the centre as seemed likeliest to do most good; VI Mountain Artillery would carry the same role on the other wing.

Izumrud-Zeleniya defences...


The force that Ameer had with him had been somewhat diminished by the sharp encounter the week before, but remained nevertheless a formidable army with which Count Ignatieff's Kavkaz Column had to deal.  

Turcowaz: Kars Command

Army Command, Staff and HQ: Abdul Abulbul Ameer (Average) 6SP

4th Division: HQ (3SP elite), 37th Rgt  @2SP, 39th Rgt @3SP 38th, 40th @4SP  = 16SP (poor)
5th Division: HQ (3SP elite), 41st, 43rd Rgts @3SP, 42nd, 44th Rgt @ 4SP = 17SP (poor)
6th Division: HQ (3SP elite), 45th, 47th Rgt @2SP; 46th, 48th @ 4SP  = 15SP (poor)
X Machinegun Battalion = 2SP (average)
2nd Cavalry Brigade: 21st @1SP;  22nd, 23rd Cavalry @ 2SP = 5SP (average)
V, VI/ 3rd Mountain Artillery @ 2SP (average) = 4SP
101st, 102nd Medium Transport Battalion @ 1SP /2CP (carrying capacity) = 2SP/4CP
113th, 114th Pack Transport Battalion @ 1SP /2CP = 2SP/ 4CP

Totals: 
26 units, median = 13.  Units activated per turn = 12/13/14 
Turcowaz 6th Division at the southern
end of the battlefield.

69 Strength Points (SP): Army Exhaustion Point -23SP; Rout Point -35SP 


The Count set some store by the defensive possibilities the Kutaisi position seemed to offer.  Somewhat concerned for his left - his northern - flank, he hoped that his mounted reserves would recover any lost ground there.  He had available:

Izumrud-Zeleniya Kavkaz Corps:


Corps HQ: General-Major Graf N. P. Ignatieff  (Good*) = 6SP

2nd Rifle Division: 
     HQ (3SP elite), 5th, 7th Rgt @3SP; 6th, 8th Rgt @4SP = 17SP (average)
2nd Light Cavalry Division: 
     5th, 8th Rgt @ 2SP, 6th, 7th Rgt @ 3SP = 10SP (average)
2nd Mountain Artillery Regiment:
      I Bn @1SP, II Bn @2SP = 3SP
Train: 
     5th Medium Transport; 1st, 2nd Pack Transport columns (Poor) @1SP/2CP = 3SP/6CP

Totals:
15 Units; Median = 8. Units activated per turn = 8/9/10 ('Good' Commander)
39 SP: Army Exhaustion point -13SP; Rout Point -20SP


Turcowaz 4th and 5th Divisions fronting up to 
the river line.


The Ameer's infantry, buoyed by their success the week before, seemed eager to come to grips. Their first activation roll was high, and as the transport units weren't going anywhere, quite a lot of fighting units were very soon engaged. The Ameer had them drawn up in Brigade columns so that movement and manoeuvre would be the more brisk (i.e. 2 stands {regiments} to the hex and activated together for movement). With the assailants' artillery and machinegun support immediately to hand, they soon had the Zeleniyan lines under heavy pressure in the town and to the north.


Having farther to march - and that under artillery fire - before they could properly envelop the southern end of the Zeleniyan line, 6th Division was longer coming into action.  However, they had more than the one bridge crossing by which to reach the edge of the town, the river being fordable in two places: close by the bridge on the east side, and a little farther off on the west.  Fortunately for the Turcowaz in this sector of the field, the Zeleniyan practice was none too effective, the 46th taking some loss, but the 48th without loss reaching the bridge and the other two regiments lining the river bank to their right.


All this while, the 5th Division attacks were going in.  Seizing the farm, 43rd Regiment stormed across the bridge beyond.  Soon they found themselves embroiled in street fighting on the edge of the town, alongside the 44th Division crossing the other bridge.  The defenders had been stretched across the whole east face of the town. That is to say, both stands were deployed across 2 hexes, which extended their line, but had the effect of making their lines thinner - more enemies could attack them.  This might not have been the wisest decision.

4th Infantry Division and 2nd Cavalry Brigade
fighting their way across the North bridge

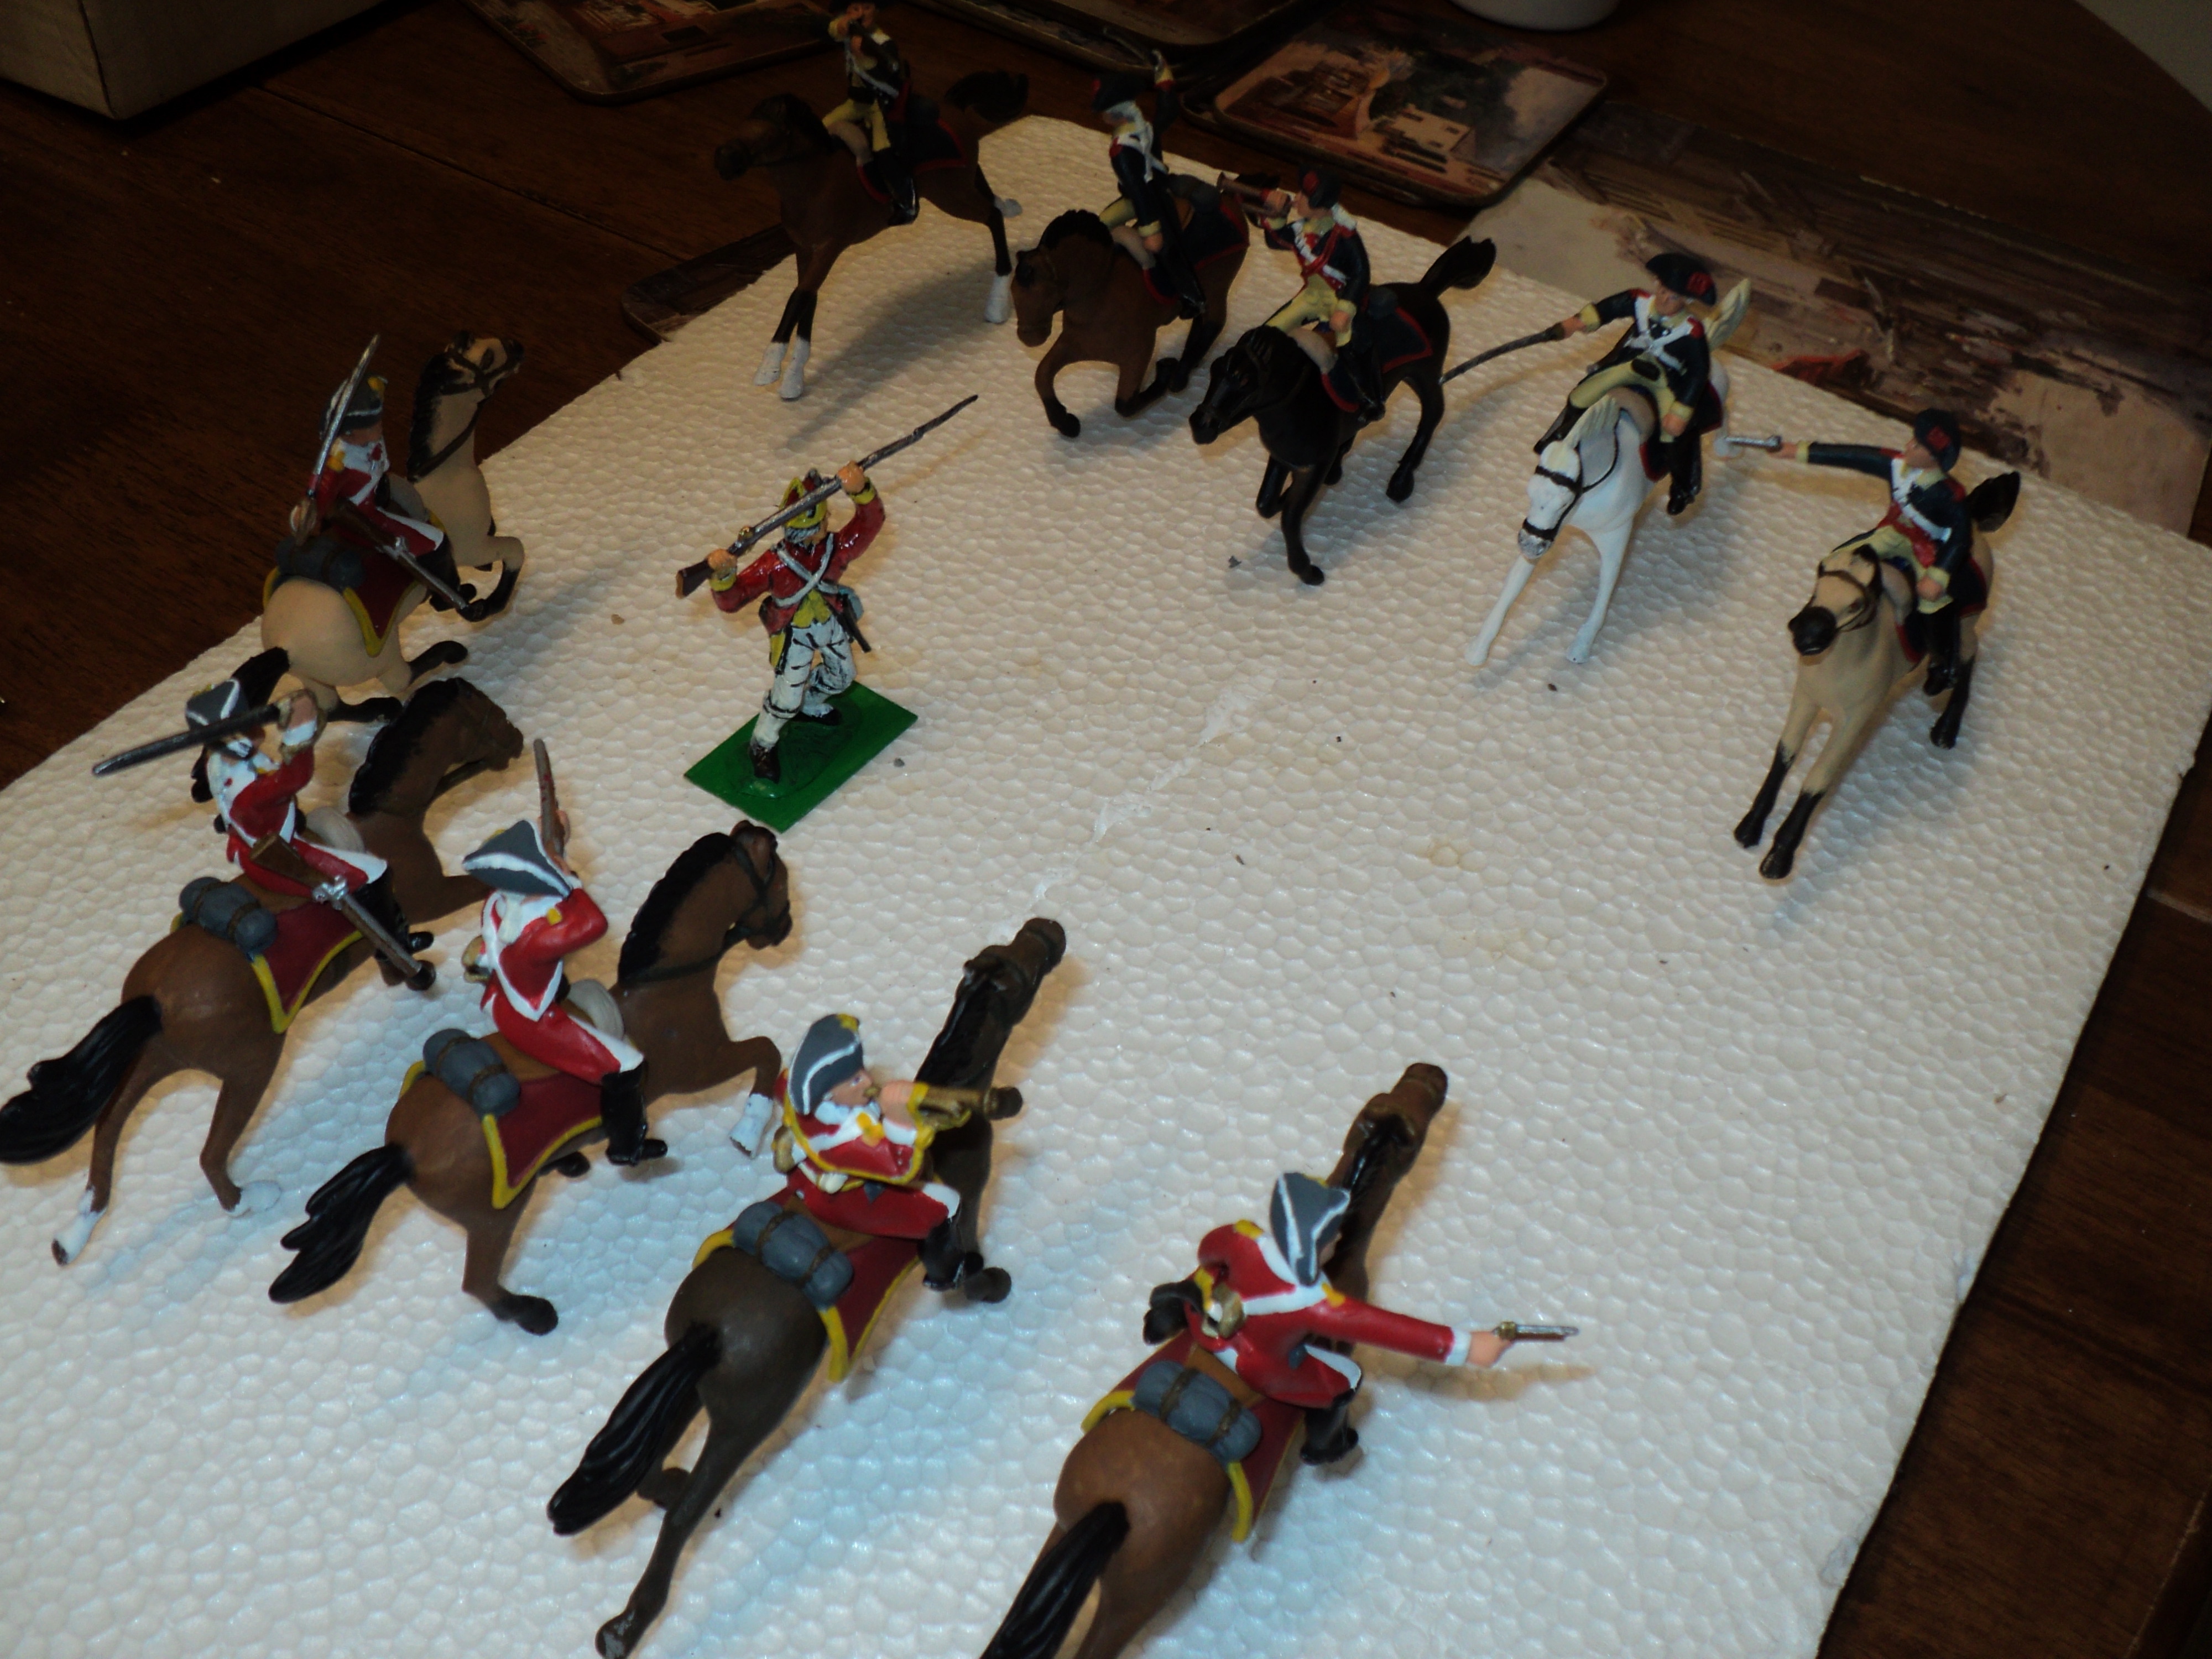
Meanwhile the right wing Turcowaz column, 36th and 38th Regiments, had forced their way across the bridge crossing and were tackling the fortifications beyond. Although they had the support of V Mountain Artillery Battalion, they discovered that their immediate objective lay outside the range of the machine guns meant to aid the assault. With 38th Regiment shooting them in with rifle fire, along with the rest of the Division peppering the redoubt from across the river, 36th Regiment went in to close assault.

This was to reckon without the Zeleniyan cavalry, standing either side of the gun line, some distance beyond the river.  Suddenly 36th Turcowaz Infantry found themselves assailed in flank by vengeful lance-armed light cavalry.  Such a rude irruption ought to have occasioned a sharp repulse - and so it did, Turcowaz infantry seen fleeing across to their 'own' side of the river.  But it was too late. 36th Infantry held up the Zeleniyan light horse just long enough for the 37th to burst into the redoubt at the point of the bayonet and wipe out the garrison. 

(I admit here that the fog of war descended a bit in this sector, lacking a vital picture of this front between the garrison with 1 SP left still occupying the strongpoint, and what is clearly the 37th Regiment (4SP) subsequently installed (see later).  What I have described seems to me a plausible account of events.)


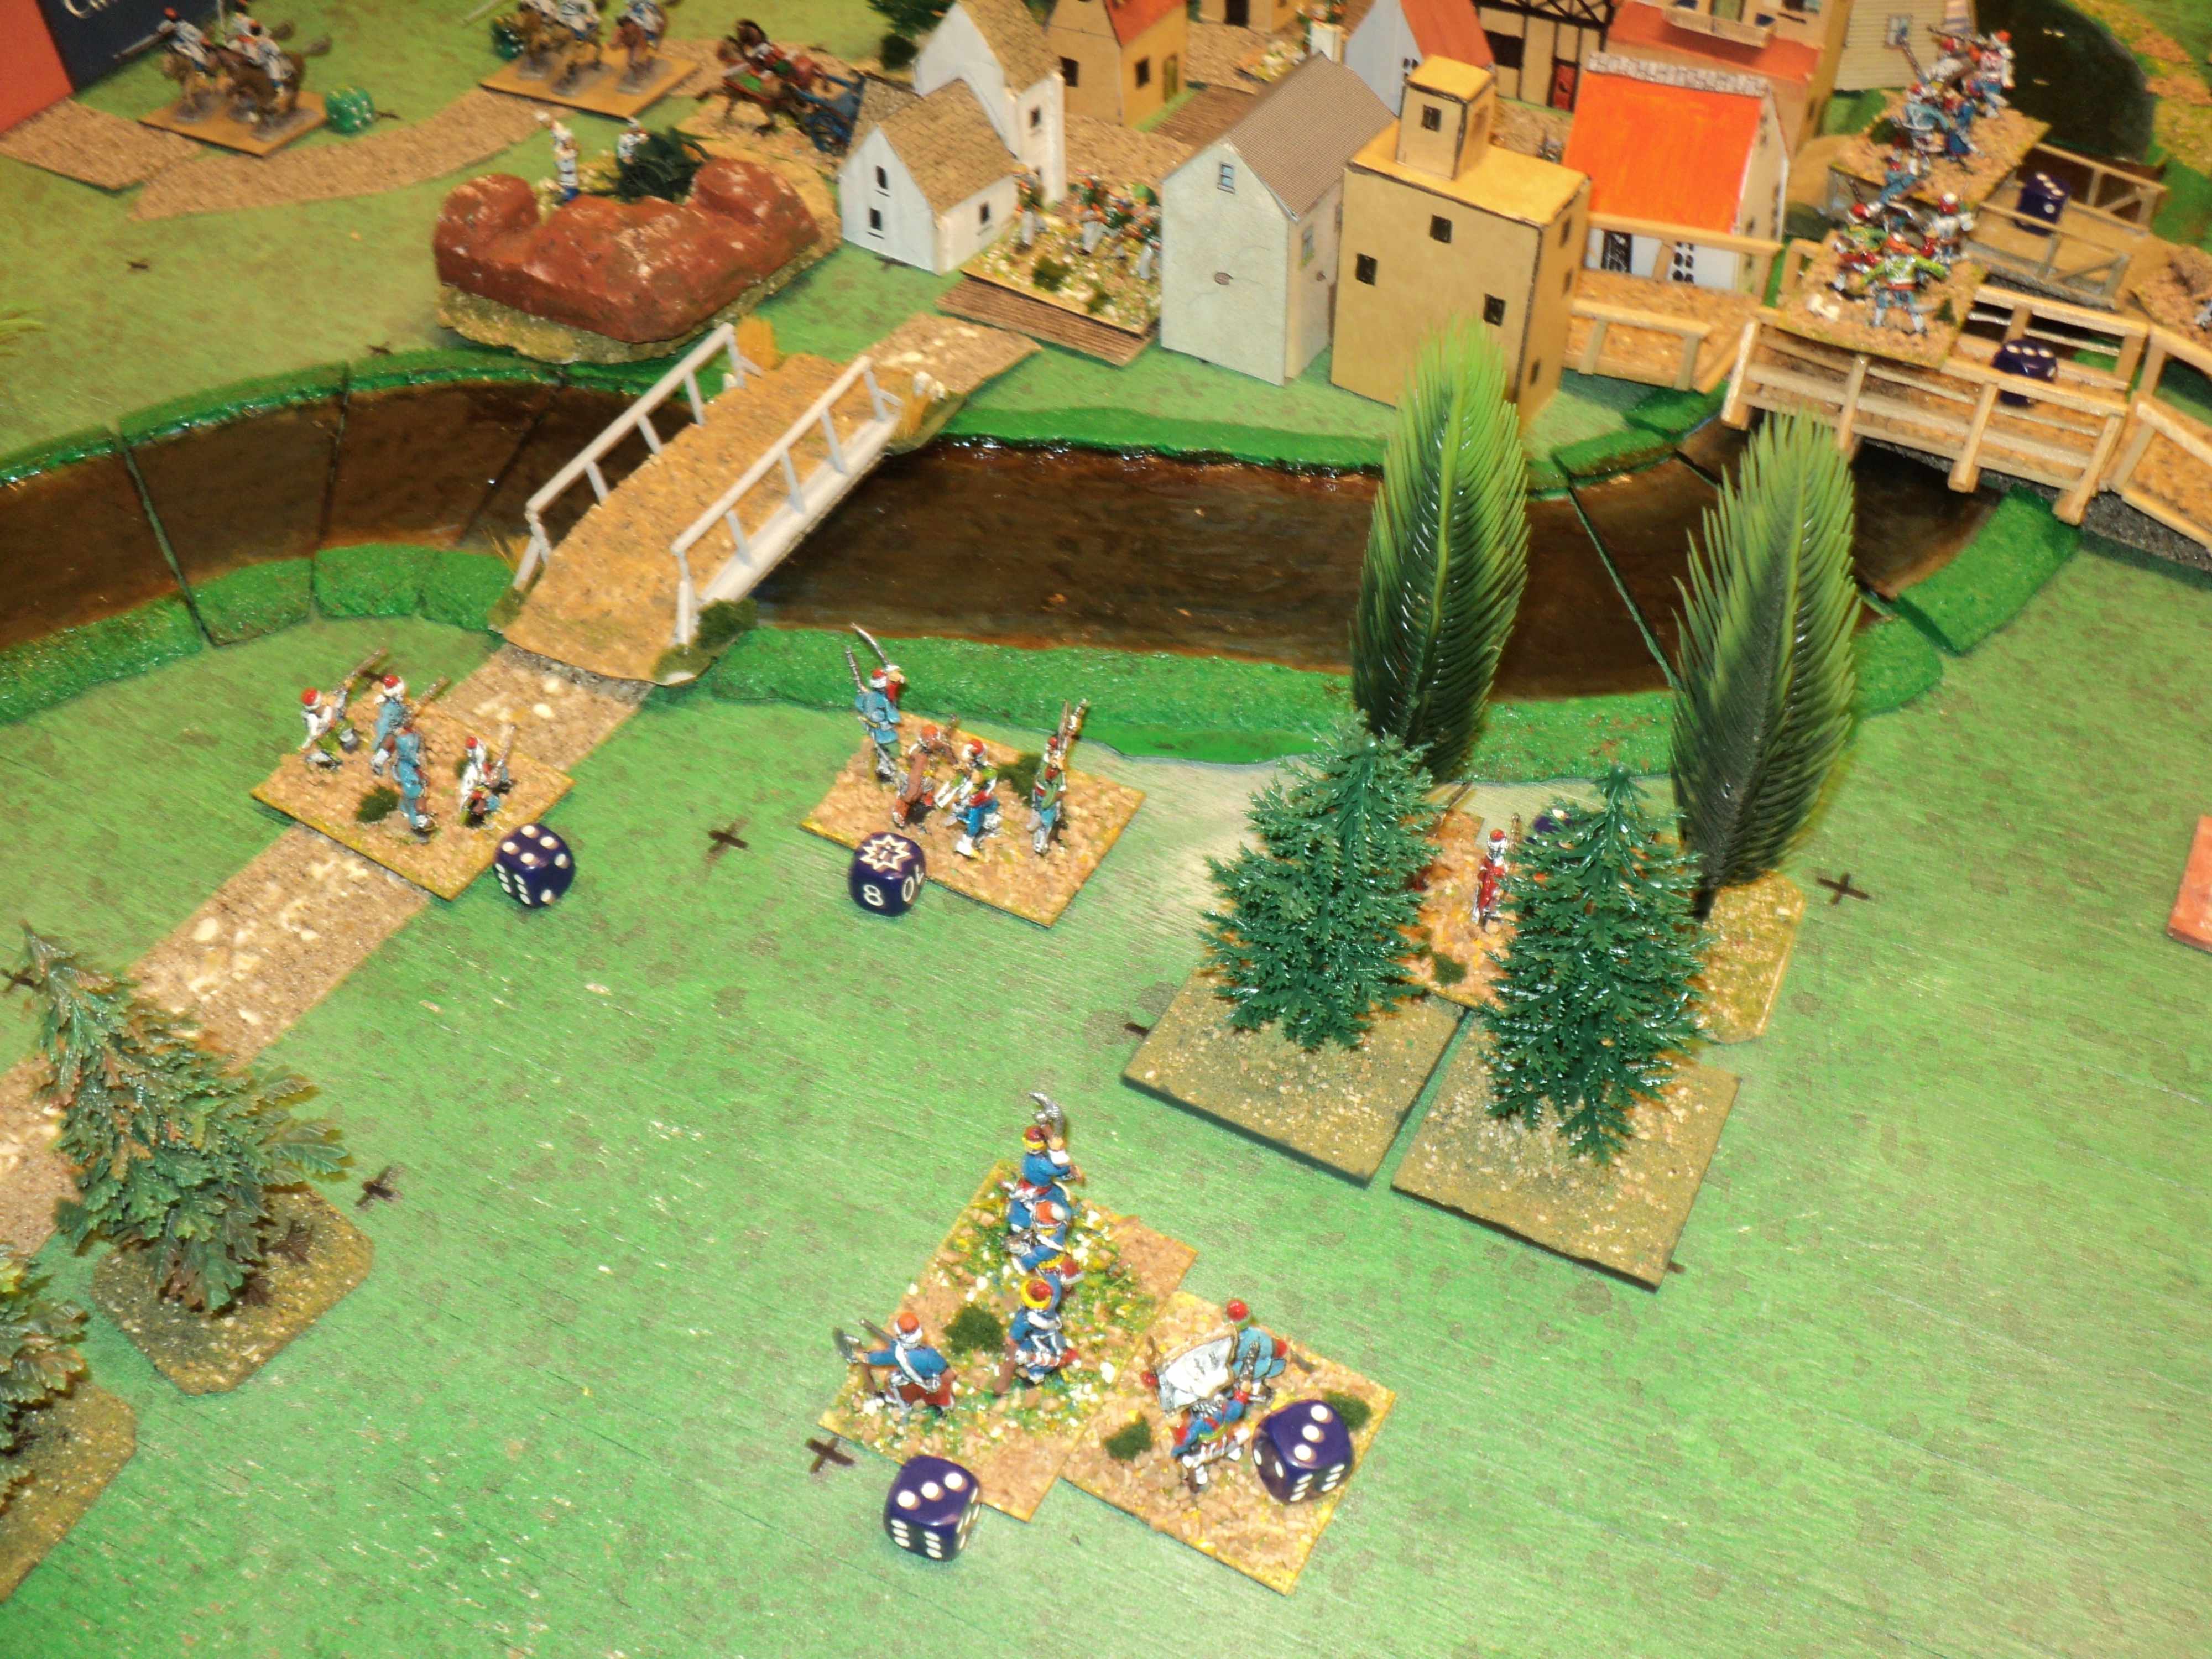
At the far end of the line, the lead units of 6th Division were beginning their own storm across the river and into the town. The galling flanking fore of 20 cannon at short range caused heavy casualties to 48th Regiment crossing the bridge, but engaging the Zeleniyan 5th Infantry Regiment, prevented its intervention to relieve the pressure upon the 6th.


The Turcowaz machine guns lacking alternative targets, they added their fire to the rifles of 41st Regiment and the guns of VI Mountain Artillery into the northeast quarter of the town, held by the Zeleniyan 7th Infantry. The combined firepower (an an episode of truly awesome dice rolls in one turn), reduced the town's quarter to rubble and splinters, ash and smoke. Their right wing at the same time under close assault, 7th Infantry simply fell apart, its survivors reduced to a horde of fugitives. Under mounting pressure, 6th Infantry fell back, joined by Count Ignatieff himself, and still fighting. But that uncovered the flank of 5th Infantry defending the south bridge, which now found itself fighting on two fronts as the Turcowaz infantry drove further into the town. 


By now it was becoming plain that the river line as a whole had been lost and would not be recoverable. Even the remaining toehold upon the town could not retained much longer. For his part, the Ameer was finding that, despite having taken the redoubt, breaking out from the northern bridgehead proving something of a trial. He flung the two lead regiments of his weak cavalry brigade in an effort to drive off the opposing horsemen whilst the infantry behind them renewed their attacks. 


Much to the Ameer's surprise and gratification, the expedient proved remarkably successful. The lead Zeleniyan horse (8th Light Horse) were driven back and fled. The 7th Light Horse held the following up Turcowaz, and even destroyed the weak regiment leading, but the damage was done. There was little left with which to hold up the Turcowaz tide - even with the two unengaged light horse units hurrying up from the south.  


Count Ignatieff had already issued orders for the evacuation of the transport columns. The IV Mountain Artillery pulled out of their redan just before the Turcowaz 48th Infantry (depleted at they were) could turn their attention to the enemy that had been galling their flank all day. The weary Zeleniyan infantry in the town offered a fluid defence (falling back, when allowed the option, rather than 'taking hits').  Overall, the Count acknowledged the battle as lost, and sounded the retreat.

The remaining pictures show the gradual Zeleniyan withdrawal.  


This was one of those occasions in which the outcome of the battle was clear well before either side's losses had reached their exhaustion point. Although I didn't play out the whole withdrawal - just enough for the transport columns to get clear and the artillery to be well on their way - the Zeleniyan losses were still short of their exhaustion point and unlikely to reach it. So the Zeleniyan column retained its order (apart from the wreckage of 7th and 8th Regiments), as they made their way westwards. 


Somewhat surprisingly, the Turcowaz losses turned out (again!) to have been heavier than their enemy's. It was the 6th Division, on the south flank, that incurred the heaviest casualties, a measure perhaps of the determination and vehemence behind their attacks. Overall, they lost 15SP against their exhaustion point of 23SP (C.f. Izumrud-Zeleniya 11SP against E.P = 13).
62

Breakdown of the 'Butcher's Bill':

Izumrud-Zeleniya:
5th Infantry (3SP) -2SP 
6th Infantry (4SP) -2SP
7th Infantry (3SP) -3SP (destroyed)
8th Infantry (4SP) -4SP (destroyed)
Other arms - no loss 
Total loss: 11SP

Net loss 7SP (2/3rds rounded, having lost the battle)

Turcowaz:
4th Division (16SP)    -3SP
5th Division (17SP)    -1SP (surprising this, as they bore the brunt of the urban fighting in the centre)
6th Division (15SP)    -7SP (equally surprising - the other way!)
Machine Guns (2SP)   -2SP (company silenced by Zeleniyan artillery, but too late to save 7th Infantry)
Cavalry (5SP)             -2SP
Other arms - no loss
Total loss: 15SP

Net loss 8SP (1/2 rounded, having won the battle)

Translated into numbers, the Zeleniyans, 14,500 strong at the outset of the battle, admitted to 2750 casualties.  The 27,000 strong Turcowaz lost 3750.   

To be continued...

Retreat of the Kavkaz column -
Situation at nightfall 4 June 1875


Wednesday, December 7, 2022

Yorktown Recent Buy

Pictured are the cavalry I was lucky enough to find and buy off Trade Me late last week. They arrived on Monday. Pricey - but worth it to round off my small forces. Pre-painted to a good standard, too. I'm very pleased with this purchase.


The figures come with separate horse furniture and riders, so they'll need gluing together. The horses have useful spikes under their hoofs, so should be easily mounted upon some suitable basing. These 5-figure troops will add a bit more variety to the possible scenarios I can set up.
The foot figure is by way of comparison.

Wednesday, November 30, 2022

Kavkaz Campaign - resumed...

Following the defeat at Khashuri, the Kavkaz column of Izumrud-Zeleniya withdrew, and began a rather leisurely retreat northwest towards Kutaisi, a town on the north bank of the river Rioni. Perhaps the withdrawal was a little too dawdling, for Abdul Abulbul Ameer's column ran them to earth within a couple of days. For a few days, the two forces stood whilst the Ameer ordered a reconnaissance of the Zeleniyan positions.  


After the combat at Khashuri - night, 21 May 1875

The reconnaissance and further attempts to develop the Zeleniyan position proved a failure (the Turcowaz rolled a '2'), whereat the latter were able to break contact on 27th May and resume their retreat to Kutaisi, arriving there the following day. Meanwhile, the Trebizond Command, marching up the road from Poti, had arrived opposite Zugdidi, whence they began a reconnaissance of the Rioni river line and the Zeleniyan defences along the northern bank. Forming a rough idea of the enemy strength - the '5' on the  ♥Q card in the picture infra - the reconnaissance also discovered one or two fords along the stream in front of the town.  The forces nearly equal in strength, both settled down to formulate their plans.
Developments from 22-26 May 1875


Just a break in the narrative here to remind readers of the meaning - given the month-long break in this series - of the card system of movement. The actual mechanics may be found in Bob Cordery's book The Portable Colonial Wargame. But here are a few small tweaks for the purposes of this campaign.  Instead of the simple BLACK/RED suit split, I have assigned a suit to the four commands:
  • Heart: Turcowaz Trebizond Command (Suleiman Husnu Pasha) including supply transport by sea, and the protected cruiser Hamidiye*.
  • Diamond: Turcowaz Kars Column (Abdul Abulbul Ameer)
  • Club: Izumrud-Zeleniya Coastal Command (Generalleytenant Malachi Malodorovitch Kutizedoff) including the naval convoy* and the Guards Legion under Count Ivan Skavinsky-Skavar.
  • Spade: Izumrud-Zeleniya Kavkaz Column (Count Ignatiev).


    'Graf Ivan Skavinskii-Skavar'
As this is a solo campaign, rolling for reconnaissance would have limited meaning or value unless one placed more meaning to the results. I have already suggested that a roll of '1' - signifying an attack without a preliminary recon - suggests some kind of ambush. At the other end of the scale, a '6' would indicate a surprise attack. We'll come to this. So what about the results in between?  

As the situation at Zugdidi now stands, the contending forces, very nearly equal in strength, are standing on opposite sides of the river. The Turcowaz just arriving, had the initiative, and rolled a '5' on their compulsory recon dice. So they know that the force opposite is a match for them, but also know something - but perhaps not everything - about bridge and possibly ford river crossings. The attack and defence might have to be programmed ... somewhat.

However, in subsequent moves, I gave priority to the naval elements, which implies that the initiative might well pass to the Zeleniyans at Zugdidi. But they in turn would have to conduct a reconnaissance of the Turcowaz opposite, and the river crossings as well. The Izumrud-Zeleniyan convoy began its slow journey down the coast from Sakhumi on 26th May. A week later, having delivered a supply transport at Trebizond, the Turcowaz protected cruiser Hamidiye set a course due north. Its mission: to seek and sink any Izumrud-Zeleniyan vessels upon the high sea.

* One issue that does concern me, is that naval movements seem to me a little too sluggish. After all, they could get about a deal faster than any land transport could. I propose henceforth to allow then to move:
  • according as the card colour comes up - not just the suit, and 
  • in addition to whichever land force is being activated. 

    I think this will bring on a rather brisker chain of events!  

Situation, dawn, 27th May

On 30th May, Abdul's command caught up with the Kavkaz column, who, having reached the Kataisi town, decided to offer battle from behind the river line. This time, the reconnaissance ordered by the Ameer was successful and thorough (the die roll was a '6'!). Not only were the Zeleniyan defence lines comprehensively mapped out, the river crossings were as well.  

Developments 27-31 May

The stage was set for a second encounter between the commands of Abdul Abulbul Ameer and the Count Nikolai Nikolaivitch Ignatiev. On 5th June, 1875, the Turcowaz launched their attack...
 
Developments 1-3 June.  

To be continued... assault on Kutaisi.

Tuesday, November 22, 2022

Hundred Days Campaign...

I've been doing some (further) prep work for a Portable Wargame Hundred Days' Campaign. In possession of a very fine campaign map from Columbia Games Napoleon, methought it would form a fine basis for a campaign map were it contained in a field of hexes. Now, I could have scanned a hex-field I have on file onto a transparency, then scanned the map with the transparency covering it.  I might do that yet. But in the meantime, I created this cartographical masterpiece:


My hand drawn map on a hex-field.  The thing is printed on a 
single A4 sheet. As someone suggested, I may be forced to create
game counters for this thing. 

The original seemed to have two classes of road, so I have outlined the 'better' class with black. I think this will work in the same way as my Kavkaz Campaign, that is to say, using the Portable Wargame campaign system outlined in the Portable Colonial Wargame.  

Having looked at the Hundred Days carried out by others (notably Murdock's Marauders and Blunders on the Danube blogs) the problem I run into is that it is hard to improve upon Emperor's opening strategy of the 'central position'! However, if I use Bob Cordery's card driven system, and the opening dispositions of the respective armies the thing might take some unexpected courses.

What I propose there is that if we assign the Allies the RED suits and the French the BLACK, we can further split the Allied suits:
♠ - French Moves - may be split between Right (Grouchy) and Left (Ney) wings
♥ - Prussian Moves
♦ - Anglo-Dutch Moves

My map with starting positions... just to show 
the concentration of the French Armee du Nord
against the dispersed Anglo-Prussian armies.


As there are quite a lot of formations involved - we might have to be a bit more generous with what may be activated per turn. 

The French (Napoleon) have the Imperial Guard - horse, foot and guns; five Army Corps, and four Cavalry Corps(unless the four are retained collectively under Marshal Grouchy);
The Prussians (Blucher) have four Army Corps;
The Anglo-Dutch (Wellington) have three Army Corps (one of these under Wellington's own hand), and one Cavalry Corps.  


Same pic - different angle.  Shows where the 
army commanders are (more or less)


We might have to take into account the possibility of detaching/re-attaching Division-sized formations from their parent Corps, although the form of the map seems to indicate that a Divisional level of formation is probably not appropriate.  
The Columbia Games Map with starting positions.
It's a really nice map.

Before closing, I will admit to placing this article here because this thing is what I've been thinking about lately. And that might well be due to my recent finishing off my Plastic Prussian army. A couple of mumfs back I bought a couple of Prussian-looking metal 12 figure cavalry units, thinking that my army was deficient in this arm. Turns out I was mistaken - discovering a whole bunch of unpainted plastic figures I didn't know I had. These were the horrible Italieri chappies, but, biting the bullet of  fear and loathing, I finally painted them up to an OK-ish standard, and now have SEVEN units - far more than this army needs. But, of course, no more than this army can use! I'm betting that, just to show me, these fellows will fight like demons...

I don't know when this campaign will get started. The Kavkaz Campaign must (of course) take priority.  And there's the vexed matter of the suspended Byzantiad saga to consider.

To be continued... some time.