
II: Kansuke's Charge
 |
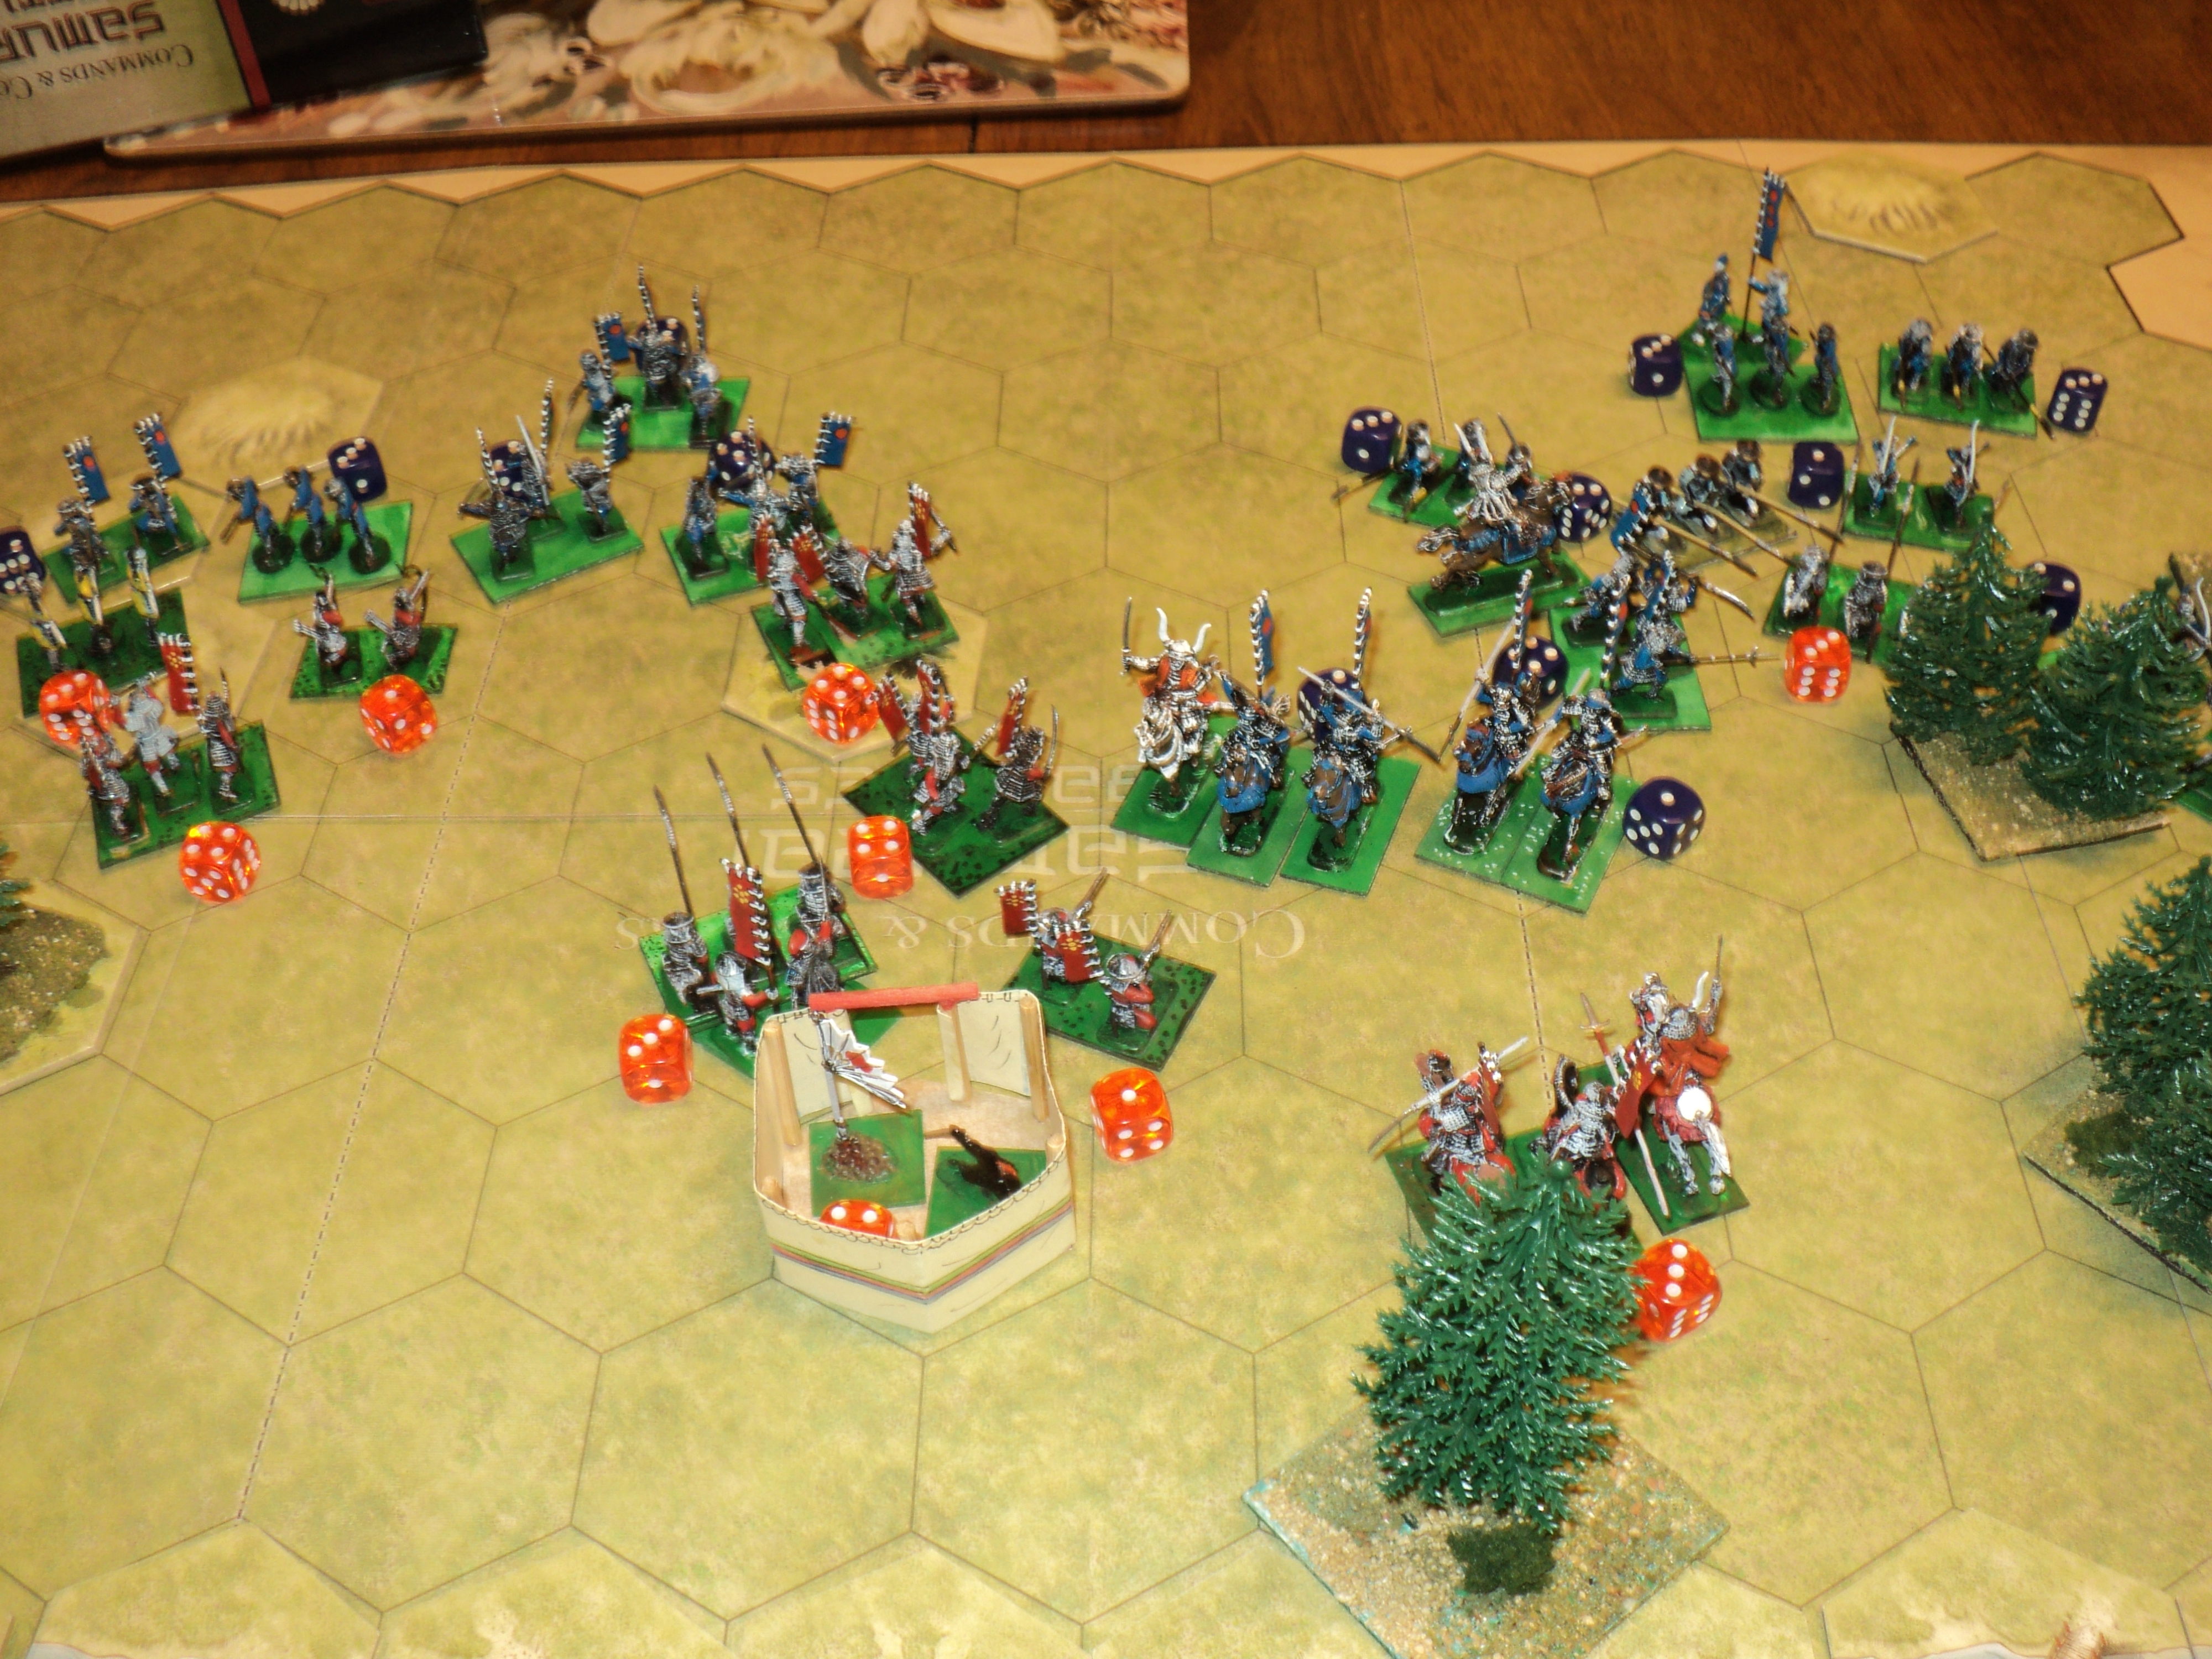
| Opening set-up. The Uesugi army is represented by the Blue army. The red and yellow parasol represents an unnamed commander. |
As the Uesugi 'Winding Wheel' attack developed, the Takeda author of the 'Operation Woodpecker' plan, Yamamoto Kansuke, realised that his scheme had failed disastrously. Superior numbers of Uesugi troops bore down upon the isolated wing of the Takeda army, which was also less well placed to reinforce his front line. Who knew where the 'left hook' was? For all anyone knew they were still on the far side of the river on Mount Saijo.
 |
| Commanders identified. The asterisked command is represented by the parasol, and has not been named. |
The Armies:
Takeda (Red):
1 unit Mounted Samurai = 3SP
3 units Foot Samurai spear@4SP = 12SP
1 unit Foot Samurai bow = 4SP
5 units Ashigaru spear @3SP = 15SP
1 unit Ashigaru bow = 2SP
1 unit Ashigaru arquebus = 2SP
3 commanders
12 units => 5 Activation dice
38SP => Exhaustion Point = -13SP; Rout Point= -19SP

The Armies:
Uesugi (Blue):
1 unit Mounted Samurai = 3SP
3 units Foot Samurai spear @4SP = 12SP
1 unit Foot Samurai bow =4SP
6 units Ashigaru spear @3SP = 18SP
2 units Ashigaru bow @2SP = 4SP
1 unit Ashigaru arquebus = 2SP
3 commanders (the asterisked commander in the blue army is unnamed)
14 Units => 5 Activation dice
43SP => Exhaustion Point = -15SP; Rout Point = -22SP
Note that I have reversed the army colours from the Command & Colours scenarios. |
| After all the hard fighting so far, the Uesugi army's morale remains high! |
The Takeda front line having been driven, in the Uesugi army surged forward, successive lines reinforcing and replacing the exhausted front ranks. Their enthusiasm might be measured by the Activation Roll, the 5 dice reading (6+6+5+4+3)/2 = 24/2 = 12 units out of fourteen, pound forward to engage the Takeda first line of 5 ashigaru units.

The first clashes are disastrous for the Takeda army. Almost at once, the right flank ashigaru yuma are overwhelmed. Bungo-no-Kame leads his samurai unit straight into a counter-attack against the Uesugi left wing, which is threatening to envelop and overwhelm the Takeda line. Shot up by enemy bowmen as they close, Bungo-no-Kame takes several arrows, as do many of his samurai. He dies before he and his men fairly close with the sword.
This is a poor harbinger for Takeda, as the loss of a unit brings his unit count to eleven, and hence the reduction of his activation dice to four. The loss of a commander further reduces the activation dice. Now Takeda has but three.

Nevertheless, having joined a mounted samurai unit himself, Katsuke manages to bring his entire line into the fray. They have the numbers on their left wing, but look very thin in the centre and on the right.


With his horsemen Katsuke tries to break through the Uesugi line, but behind it Uesugi have plenty of reserves in hand.

Despite the potential loss of command and control, the Takeda remain well in hand for the time being. An activation roll of 15 with 3 dice permits action by seven units (15/2 rounded down). By great efforts Takeda throws back the Uesugi line. Their line recoiling, they leave a yari unit stranded, embedded in the Takeda line.


Recovering and rallying their lines, the Uesugi left whales into the Takeda right wing, relieving the stranded ashigaru, and isolating the Takeda units on the extreme flank. Uesugi also tend to concentrate numbers against the Takeda left. This thins out the Uesugi centre, which Katsuke is determined to exploit.


In fact it is Masatoyo who gets in his charge first, crashing into the flank of a column of Uesugi samurai.

For his part, the Uesugi diamyo Hirotsuna essays a charge with his own ashigaru against Takeda spearmen. Both sides are further depleted, but Hirotsuna himself gets on the wrong end of a spear thrust that promptly removes him from the battle line.

For all their successes in the centre, Takeda finds the superior numbers of Uesugi troops prove too much to overcome. Heavy losses accrue to both sides, who, even upon reaching their exhaustion points, refuse to break off. The Portable Sengoku Wargames rules permit units closely engaged to remain so unless and until forced back or destroyed. If victorious, they may not follow up. The downside, perhaps, is that losses can become very heavy before the battle fully comes to an end.

So it was in this part of the action. When at last the armies drew apart, both sides had lost 18 Strength Points - Takeda just 1SP short of their rout point.

With reserves in hand, Uesugi Kenshin led them forward to relieve his depleted battle line, and to push forward as the Takeda remnants fell back beyond Takeda Shingen's own reserve line. There in the distance stood Shingen's command pavilion. There was Kenshin's objective! Shingen gone, Kenshin would become Lord of four provinces!
III: Attack against Shingen's command post
It was a formidable array that lined up to advance against the Takeda lines. But perhaps the fierce resistance the Uesugi army had faced so far had taken the steam out of their enthusiasm. The activation roll (6 dice) was a poor one: 13, which, halved to the nearest whole number down, meant just 6 units got immediately into the action. Here are the armies, with the Uesugi activation dice...

Uesugi (Blue):
1 unit Mounted Samurai spear = 3SP
1 unit Mounted Samurai bow = 3SP
3 units Foot Samurai spear @4SP = 12SP
1 unit Foot Samurai bow =4SP
5 units Ashigaru spear @3SP = 15SP
2 units Ashigaru bow @2SP = 4SP
1 unit Ashigaru arquebus = 2SP
4 commanders
14 Units => 6 Activation dice
43SP => Exhaustion Point = -15SP; Rout Point = -22SP

Takeda (Red):
1 command pavilion = 4SP
2 unit Mounted Samurai spear @3SP = 6SP
2 units Foot Samurai spear @4SP = 8SP
1 unit Foot Samurai bow = 4SP
4 units Ashigaru spear @3SP = 12SP
1 unit Ashigaru bow = 2SP
1 unit Ashigaru arquebus = 2SP
3 commanders
12 units => 5 Activation dice
38SP => Exhaustion Point = -13SP; Rout Point= -19SP

The rather tentative resumption of the battle so far successful was far overmatched by the response of the Takeda army. Something of a gap in the Takeda line might have suggested to Kenshin that this early might have been the time to exploit it, but instead he undertook to envelop the 'inner' flank of Nobukie's wing. That diamyo hurried to join a mounted samurai unit hastening forward (both having to move, 2 activation units were required to make this junction) to drive back the threatening enemy horse and relieve a badly depleted unit of ashiguru yari.

 |
| Terrible picture, but I had to show the activation roll! |


Of course, with a decisive victory in the offing, Kenshin presses forward to hasten the collapse. His masses wipe out the remainder of the Takeda right wing, whilst his mounted samurai continue pushing the lone mounted Takeda unit off, well away from any help it might have given to Shingen.


There was no doubt that Uesugi Kenshin's army has continued its tide of success, and could count this phase of the overall battle as a victory. The losses inflaicted upon Takeda Shingen's army has been the greater - 17 to 15 in this phase of the battle. But it is equally clear that Shingen has saved his army, and has, withal, placed himself in a position to exploit certain events that have taken place not so very far from this battlefield. The issue remains in doubt.
Of these events, more anon.
To be continued...
Of these events, more anon.
To be continued...


