Friday, June 28, 2024

A 'Star Trek' Space Opera

Some months ago, glancing through a very old (January 1993) issue of the local club's war games magazine Southern Sortie, I lit upon  a brief account of a clash between two of the major galactic powers that feature in the TV show, Star Trek. Although not much 'into' SF war gaming, and not much of a 'Trekky' either, so highly do I think of the action, that methought after 30 years, it need not be so soon lost to antiquity. Having received the author's go-ahead, the following account is the his narrative, with just the occasional editing.

STAR TREK - The Border War

by Elliott Campbell

Introduction

Recently I completed running a simple strategic-level campaign based on hostilities between the United Federation of Planets and the Klingon Empire. The campaign was originally based around the Organian conflict (the subject of one of the original TV episodes), but without the annoying appearance of 'strange energy beings' stopping it all. In the interests of making the game a little 'meatier', both sides were beefed up considerably in term of warships and preparedness. In the event the scale of the ensuing conflict was enormous - it turned into a fully fledged bitter border war. By the end of the campaign, both sides had suffered horrific losses, and Star Fleet had resorted to unconventional warfare. In fact the the war had such a devastating effect upon the Federation that by the end of the game its very future existence was in grave doubt (thus providing me with good background information for any future campaign).

For those readers who are Star Trek purists, I can explain away this complete [departure from] the ideals and morals of Star Trek by saying this all happened in an alternative universe... The following article will describe events ibn the border war, the most costly war in men and materials either the federation or the Klingon Empire had ever fought.  The players were: Star Fleet - Stefan Park; Klingon Empire - Philip Dew and Blair Sang. All were schoolmates at the Christchurch Boys' High School where the campaign was run (during the second and third terms, 1992).
Border war: attacks, and counter-attacks


The War Begins: The First Phase (Stardate 2/0801.09 - 2/0804.19)

On Stardate 2/0801.09 hundreds of Klingon warships swept through the frontier into Federation Space. Vola fell to the Klingons after Star Fleet forces fled the system, and the entire Star Fleet squadron defending Selka, consisting of thirty-five Fenlon monitors and five Nelson scouts was destroyed in a surprise attack by over a hundred Klingon T-5 assault ships, with a sizeable cruiser and frigate escort. Andromeda was overwhelmed as as well by a Klingon fleet of over sixty D-9 and D-10 cruisers - the Star Fleet defenders didn't stand a chance.

But it wasn't all bad news for the Federation, who were very much on the back foot - Jannill was successfully defended by its monitors and scouts against a superior Klingon cruiser force, and the battle for Archon ended with a crushing Klingon defeat - the value of UFP Constitution class showing up against ageing D-7As. Organia was also successfully defended by a scratch force of Anton class cruisers and escorts against a meagre Klingon attack.

The worst blow was delivered by a massive Klingon fleet of three hundred D-7 cruisers attacking and  destroying Star Base 27. The complete destruction of this facility really was a blow for Star Fleet that was already very sorely stretched.

Then Star Fleet counterattacked at Andromeda and forced the occupying Klingons to withdraw.

Star Base 12 came under heavy attack from Klingon cruisers and assault ships, and after the Star Fleet defenders withdrew (leaving three Constitution class cruisers destroyed), the assault ships proceeded to bombard the base, and marines were landed.
..
Star Fleet Admiral


Jannill was attacked again, and this time the system fell - Star Fleet losing twenty-nine monitors in the process.

Talos and T'Vamz also fell to pressing Klingon naval forces, but heavy ground fighting continued on the latter.

Klinon forces arrived in the Alphosa system and discovered no defending Star Fleet units. The system refused to surrender, and heavy ground bombardment by T-3 assault ships and D-7 cruisers as well as marine landings met stiff resistance from UFP ground forces and the civilian population. Six D-7s were destroyed by6 planetary defence systems before they were rendered inoperative by the assault ships and their marine.

The Selka system saw the arrival of thirteen Z-48 defence outposts. Unfortunately a communications and logistical glitch meant they arrived unescorted, whilst the occupying naval forces had left. As they were being assembled by their support ships, the Star Fleet units that had fled Jannill and T'Vamz arrived in the system - including four Constitution cruisers. The helpless Klingons were completely butchers - a turkey shoot...


Not a good day for the Klingons in the Selka System


This first phase of the war ended with Star Fleet urgently requesting more ship, troops and supplies. A diplomatic mission (albeit a very hopeful one) was launched into Romulan Empire by way of the 'Triangle' for their support! The Klingons, a little shocked at the intensity of the defence and their losses, but pleased with the excellent territorial gains, did the same. Not surprisingly neither diplomatic mission was ever heard from again.

The War Intensifies: The Second Phase (Stardate 2/0804.20 - 2/0807.30


Shortly after the Klingon diplomatic mission being sent in a vain search of the Romulans, the Klingon war effort, the Klingon war effort suffered a set-back when the front-line commander, Admiral Klair zantai-Sang, was executed in H'Rez by a member of a rival family (who had at that moment stolen the Emperor's favour from the Sang Family Line). Admiral Khilip zantai-Dew became the new commander (after he's rigged evidence of treason and corruption against Sang). 

Following this falter, and under new leadership, the klingon forces made fantastic advances into Federation territory, albeit with some heavy losses. Two attacks on T'Vamz and Selka cost the Imperial Navy two hundred and sixty-six cruisers (!) and forty assault ships. However, the sheer enormity of the invading forces was able to soak up the casualties.

Much to Star Fleet's horror, they lost Star Base 12 - reduced to a blackened ruin. Its defence cost the Federation eighteen much-needed cruisers.

Klingon forces moved on in on Delta Vega and began bombarding it. Resistance continued on Alphosa, frustrating the Klingon attackers. Once Delta Vega fell, though, so did Capella.  Things were looking rather grim for the UFP.

Klingon Admiral of the Fleet

During the later stages of this Second Phase, converted Federation merchant ships were arriving at the front to help in the desperate defence. A large Star Fleet squadron at that time was also on its way - with nuclear weapons. Once Star Fleet realised just how badly they were doing, they appealed to the Security Council and General Assembly for the authorisation to use the old nuclear stockpile (left over from the days of accelerator cannons and lasers). The debate began tearing the Union apart. In disgust, the Vulcans and their like-minded allies quit the Federation - seeing what was happening as in violation of everything the UFP stood for.  The 'Rump' Assembly ratified the 'Rump' Security Council decision to authorise nuclear weapons to be used against the Klingon invaders.

The nuclear armed warships began arriving just as Comstock fell to the Klingons.

The War Reaches a Climax: The Third Phase (Stardate 2/0807.31 - 2/0811.09

For the first time since the war began, Star Fleet struck into Klingon Space - an attack on Merai Zine. Unfortunately for them, it failed - losing over twenty cruisers in the process. 

Jannill was retaken by Star Fleet, but the siege of of Alphosa finally came to an end when it surrendered to the superior Klingon forces who had been bombarding the system for months.

On Stardate 2/0811.01 Star Fleet launched three nuclear strikes - an act that shocked even the klingons. The first was upon the major military facility and ship-yards of H'Rez. It suffered 83% destruction in an attack that Star Fleet only just got through the enemy defences.

Merai Zine was next, but the strike force met very heavy resistance and was beaten off., though not before some warheads were released - 12% destruction of the planet and facilities was recorded. 

The third and most and most destructive of the strikes was at Veska - a staggering 92% destruction.

As news spread along the battle-front, there was shock on both sides.  Star Fleet looked in horror upon what they had done, and the Klingons were taken aback at the nature of the defence. Fo reasons of its own, fighting along the front gradually ceased in an atmosphere unreal to both sides.

By the time of the ceasefire on Stardate 2/0811.09, the Klingon Imperial Flag flew over Comstock, Star Base 10, Capella, Delta Vega, the wreckage of Star Base 12, Vola, Alphosa, Talos, T'Vamz, Andromeda, and Star Base 23.  H'Rez had been obliterated, and what was left of Veska was Star Fleet's. Both Arcanis and Selka were still disputed at the ceasefire date, as was Jannill.

Nuclear strikes, and new borders...


Conclusion

The war officially ended on Stardate 2/0812.20 with the signing of the Phillo[Tok Treaty.  Under its terms, Alphosa, Vola Star base 12, Delta Vega, Capella, Star Base 10, Comstock, Andromeda, T'Vamz and Jannill were ceded to the Klingon Empire.

However, already storm clouds are brewing again. Many rather militant factions within the Federation have already celled for the resumption of the war. The Orions are most upset at increased Klingon pressure upon them regarding the new borders. There are rumours that open conflict between the Romulans and Klingons will soon erupt regarding the new Triangle border arrangement.  The Triangle is on edge - it has now lost its frontier with the Federation, and Klingon and Romulan warships are massing at its borders... 

There is even the threat of the Federation dissolving, as some members argue on the humiliation of the Phillo'Tok Treaty, the weakness shown by the President, his advosors and the Council, as well as the disgraceful use of nuclear weapons - an act against all the articles of the Federation. The war faction of Earth, Tellar, and Andor are left presiding over an assemblage of planets a mere shadow of the former Assembly. With the Vulcans and their allies gone, the federation's future is definitely in doubt, not to mention the horrendous losses to Star Fleet during the war. Virtually its entire cruiser force had been destroyed, and some member and former member states are claiming Star Fleet warships for their own. Several mutinies have broken out...

The future is grim indeed...


Friday, June 14, 2024

Portable White Mountain (3)


We left the action last time with Confederation spoiling attacks along most of the Imperialist front stalling their advance. The cavalry thrust on the Imperialist right had been met, contained and defeated; two Confederation tercios were being assailed by horse and guns around Remy; the cavalry attack to the left of the woods, though overrunning a gun battery, was being defeated; and close by Ruzyne reinforcements have sustained the embattled Imperialist cavalry. 

As the victorious Confederation horse rally, the Imperialists push a tercio far out to the right. An artillery battery covers the resulting gap in the line, to bring the milling Confederation horse under fire. It will take time for the reserve infantry to firm up the line, though there is probably little enough that three depleted cavalry units can achieve here.


In fact, gunfire soon scatters one of those units. At about this point, Turn 6, with yet another unimpressive activation die roll, the Confederation gives thought (well, I did) to breaking off the spoiling attacks. The Imperialists are beginning to establish an ascendancy, losses are mounting, and there seems to be a need to consolidate the main line.

And then the Imperialists go and make an even dismaller activation roll. Gunfire, useful as it is in knocking holes in enemy troops (especially tercios) is taking up a good deal of Imperialist time. Three batteries in action leaves just 5 units doing anything.


Priority is given to the situation on the Imperialist left wing. The harquebusiers in the centre having seen off the enemy attack, they now swing over to catch an already depleted cavalry unit in the flank.
The decision already having been made to break off the action, the freshest cavalry unit is already in the process of withdrawing close by the walled park.

This leaves the two - now reduced to one - depleted units holding off for as long as possible the concerted attacks by three Imperialist units. Destroying one unit by fire action, there is no follow-up onto the last remaining.

For a wonder, the Imperialists win the initiative for Turn Seven, and promptly cast a truly horrible activation roll. Tilly and Co are finding it really hard to chivvy forward the unengaged parts of the army. Its front cleared, the tercio between the wood and the river ought to be advancing, but too much is happening elsewhere.  

The Confederation response is equally sluggish. Much of their effort, apart from pockets of close action, is being spent firming up their main battle line.

It seems' however, that the Confederation commanders are starting to get a better grip upon events, and win back the initiative. Having formed the plan to consolidate their line, they begin to pull back the most forward units, apart from what remains of the tercio embattled near Remy. That formation is doing a fine job stopping up the bottleneck between that village and the copse. Considering the single gun battery in action, a middle-range activation roll (10) is pretty useful!


And, of course, the Imperialist response remains as lackadaisical as ever. There's three tercio there behind Remy, and a unit of harquebusiers as well, and none of them have stirred all day. There are others out of the picture no more energetic. 'They are robbing me of my victory!' raves Graf Tilly, shedding fistsful of hair...

The Confederation has at last formed something of a flank on their left, the intent gradually to pull back and in towards the flank gun emplacement. The depleted remnants of the forward tercio continues to fight what has become something of a covering action whilst the Confederation consolidates. Nearer Ruzyne, an Imperialist tercio has begun pushing forward in the face of enemy gunfire. Close by that village, the Confederation cavalry having been driven off or routed, two harquebusier units close upon the right-flank enemy tercio and begin shooting it up.

This is probably the last action of the day, as gunfire and pistolry cuts the grey tercio to ribbons (2SP left from 6). Although the Confederation army has reformed their line, very little of their cavalry remain, and losses have somewhat demoralised (exhausted) the army as a whole. 

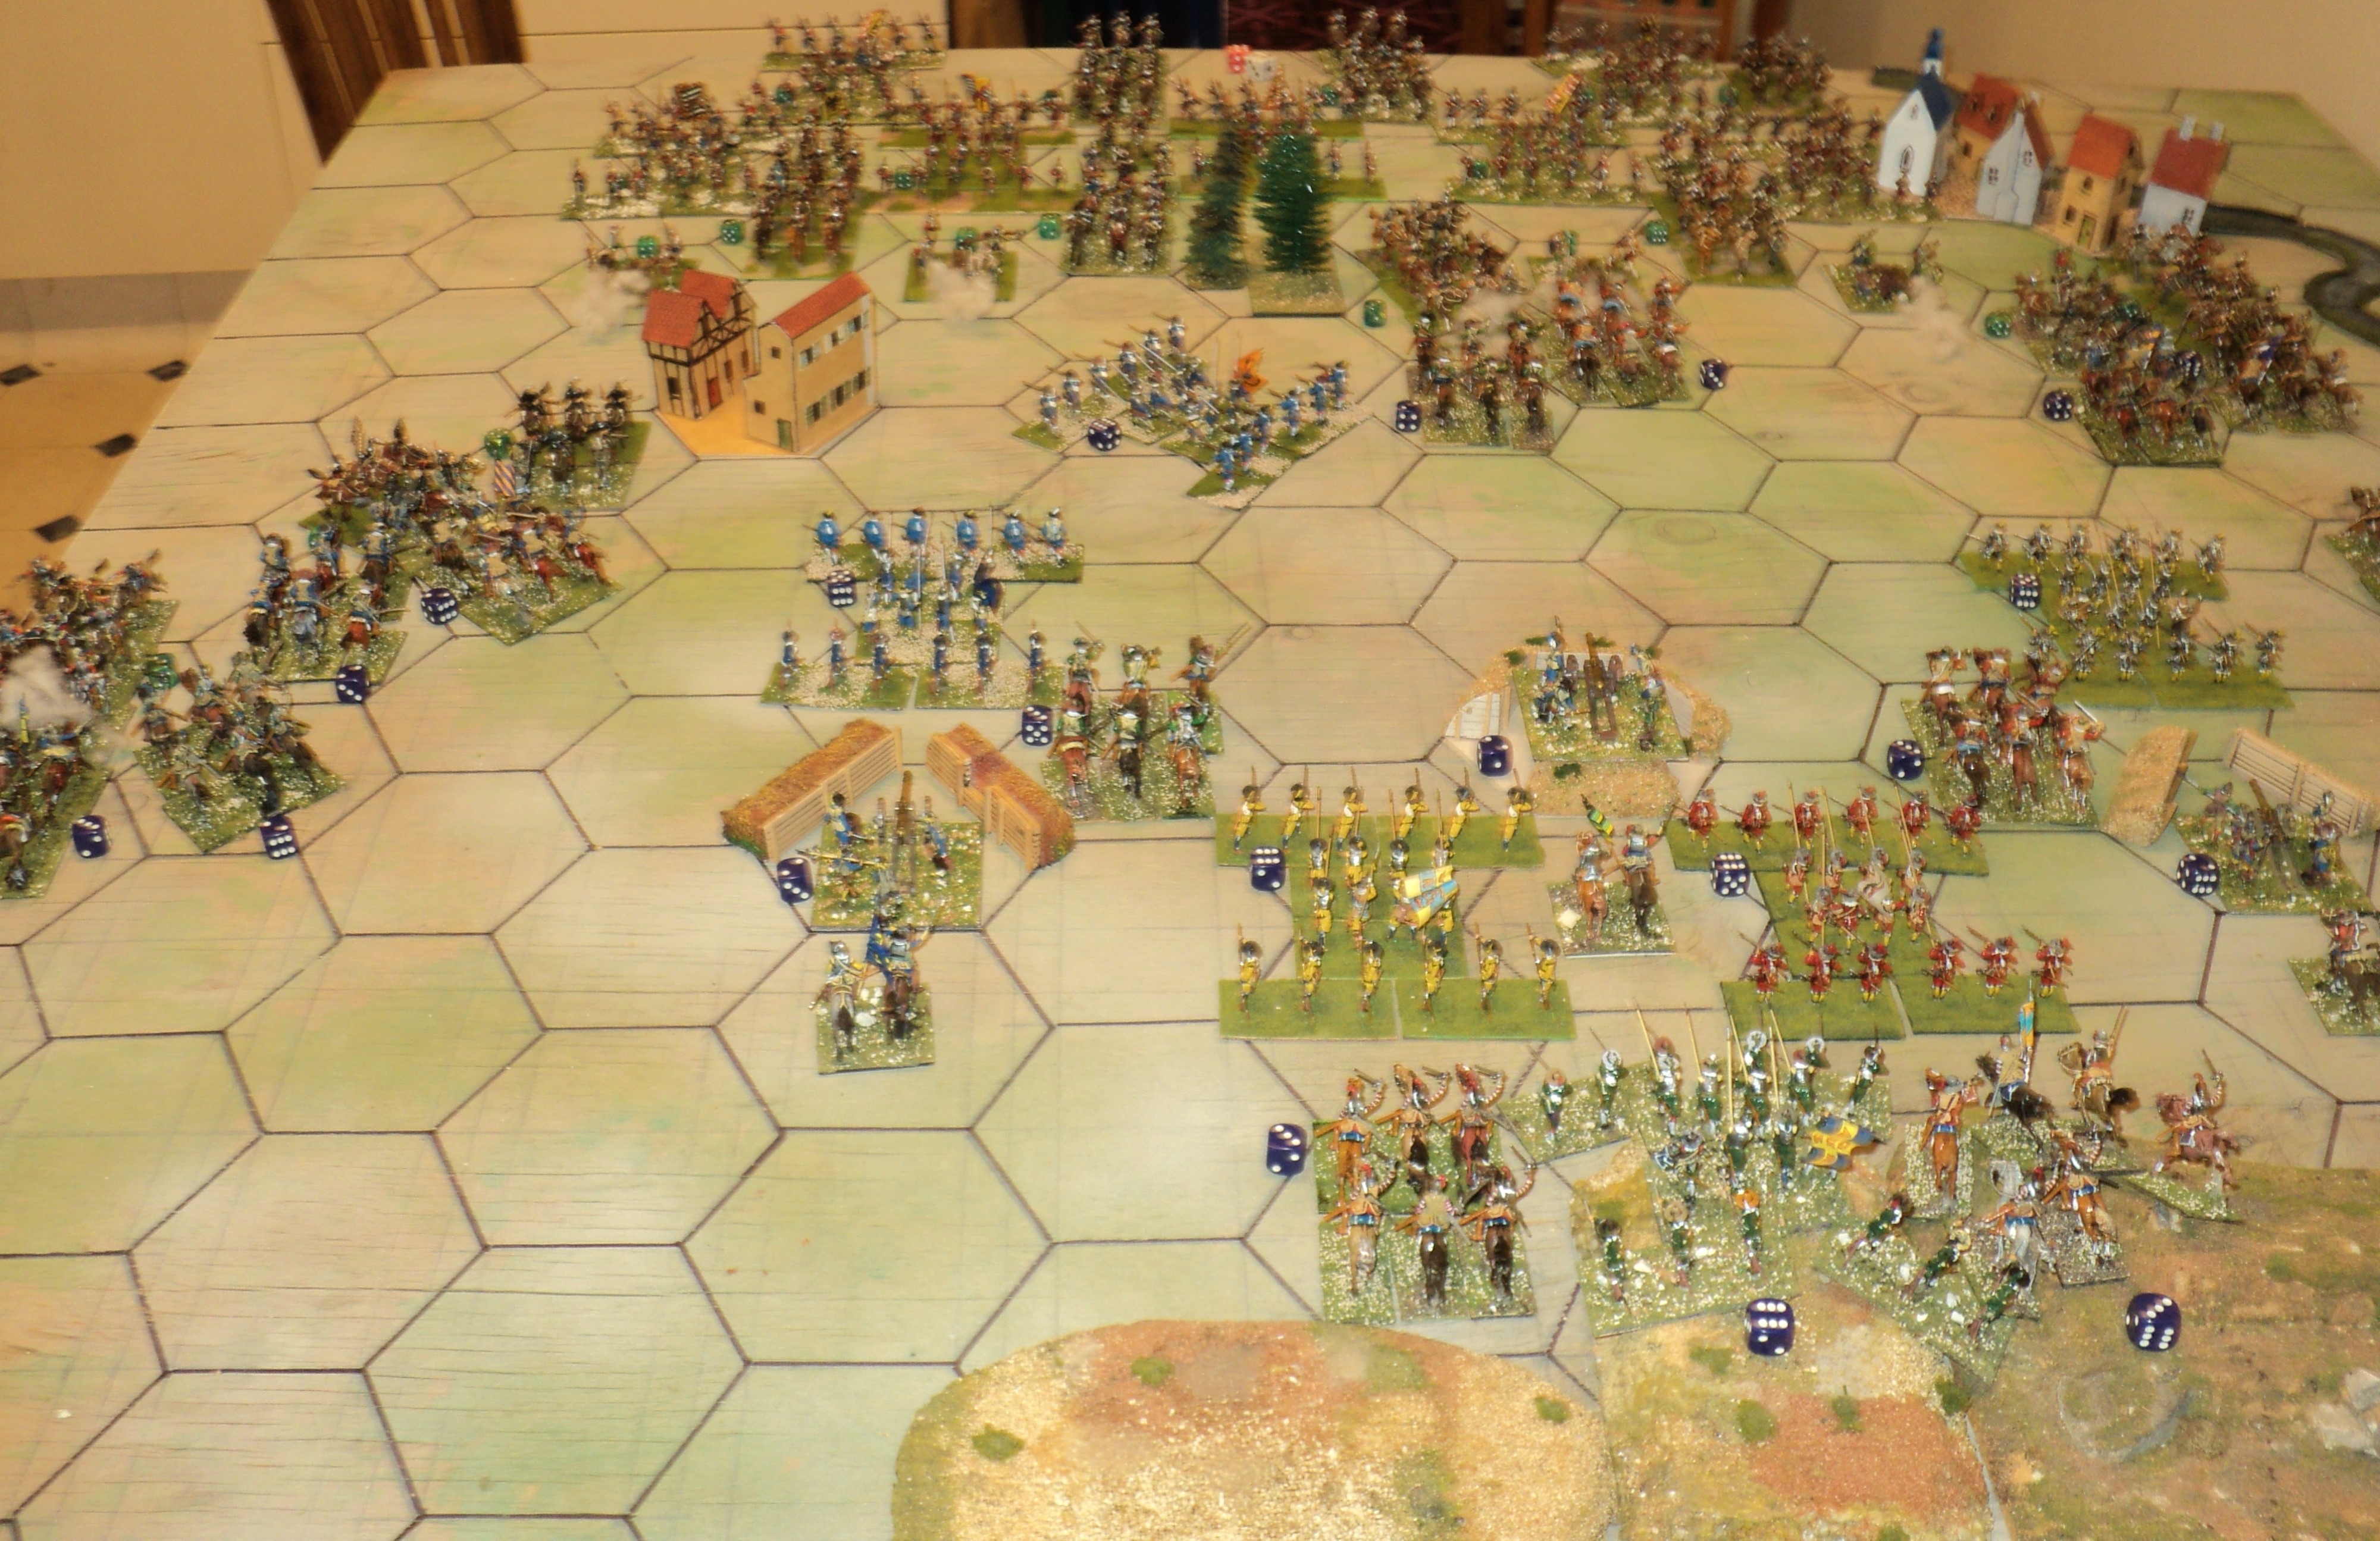
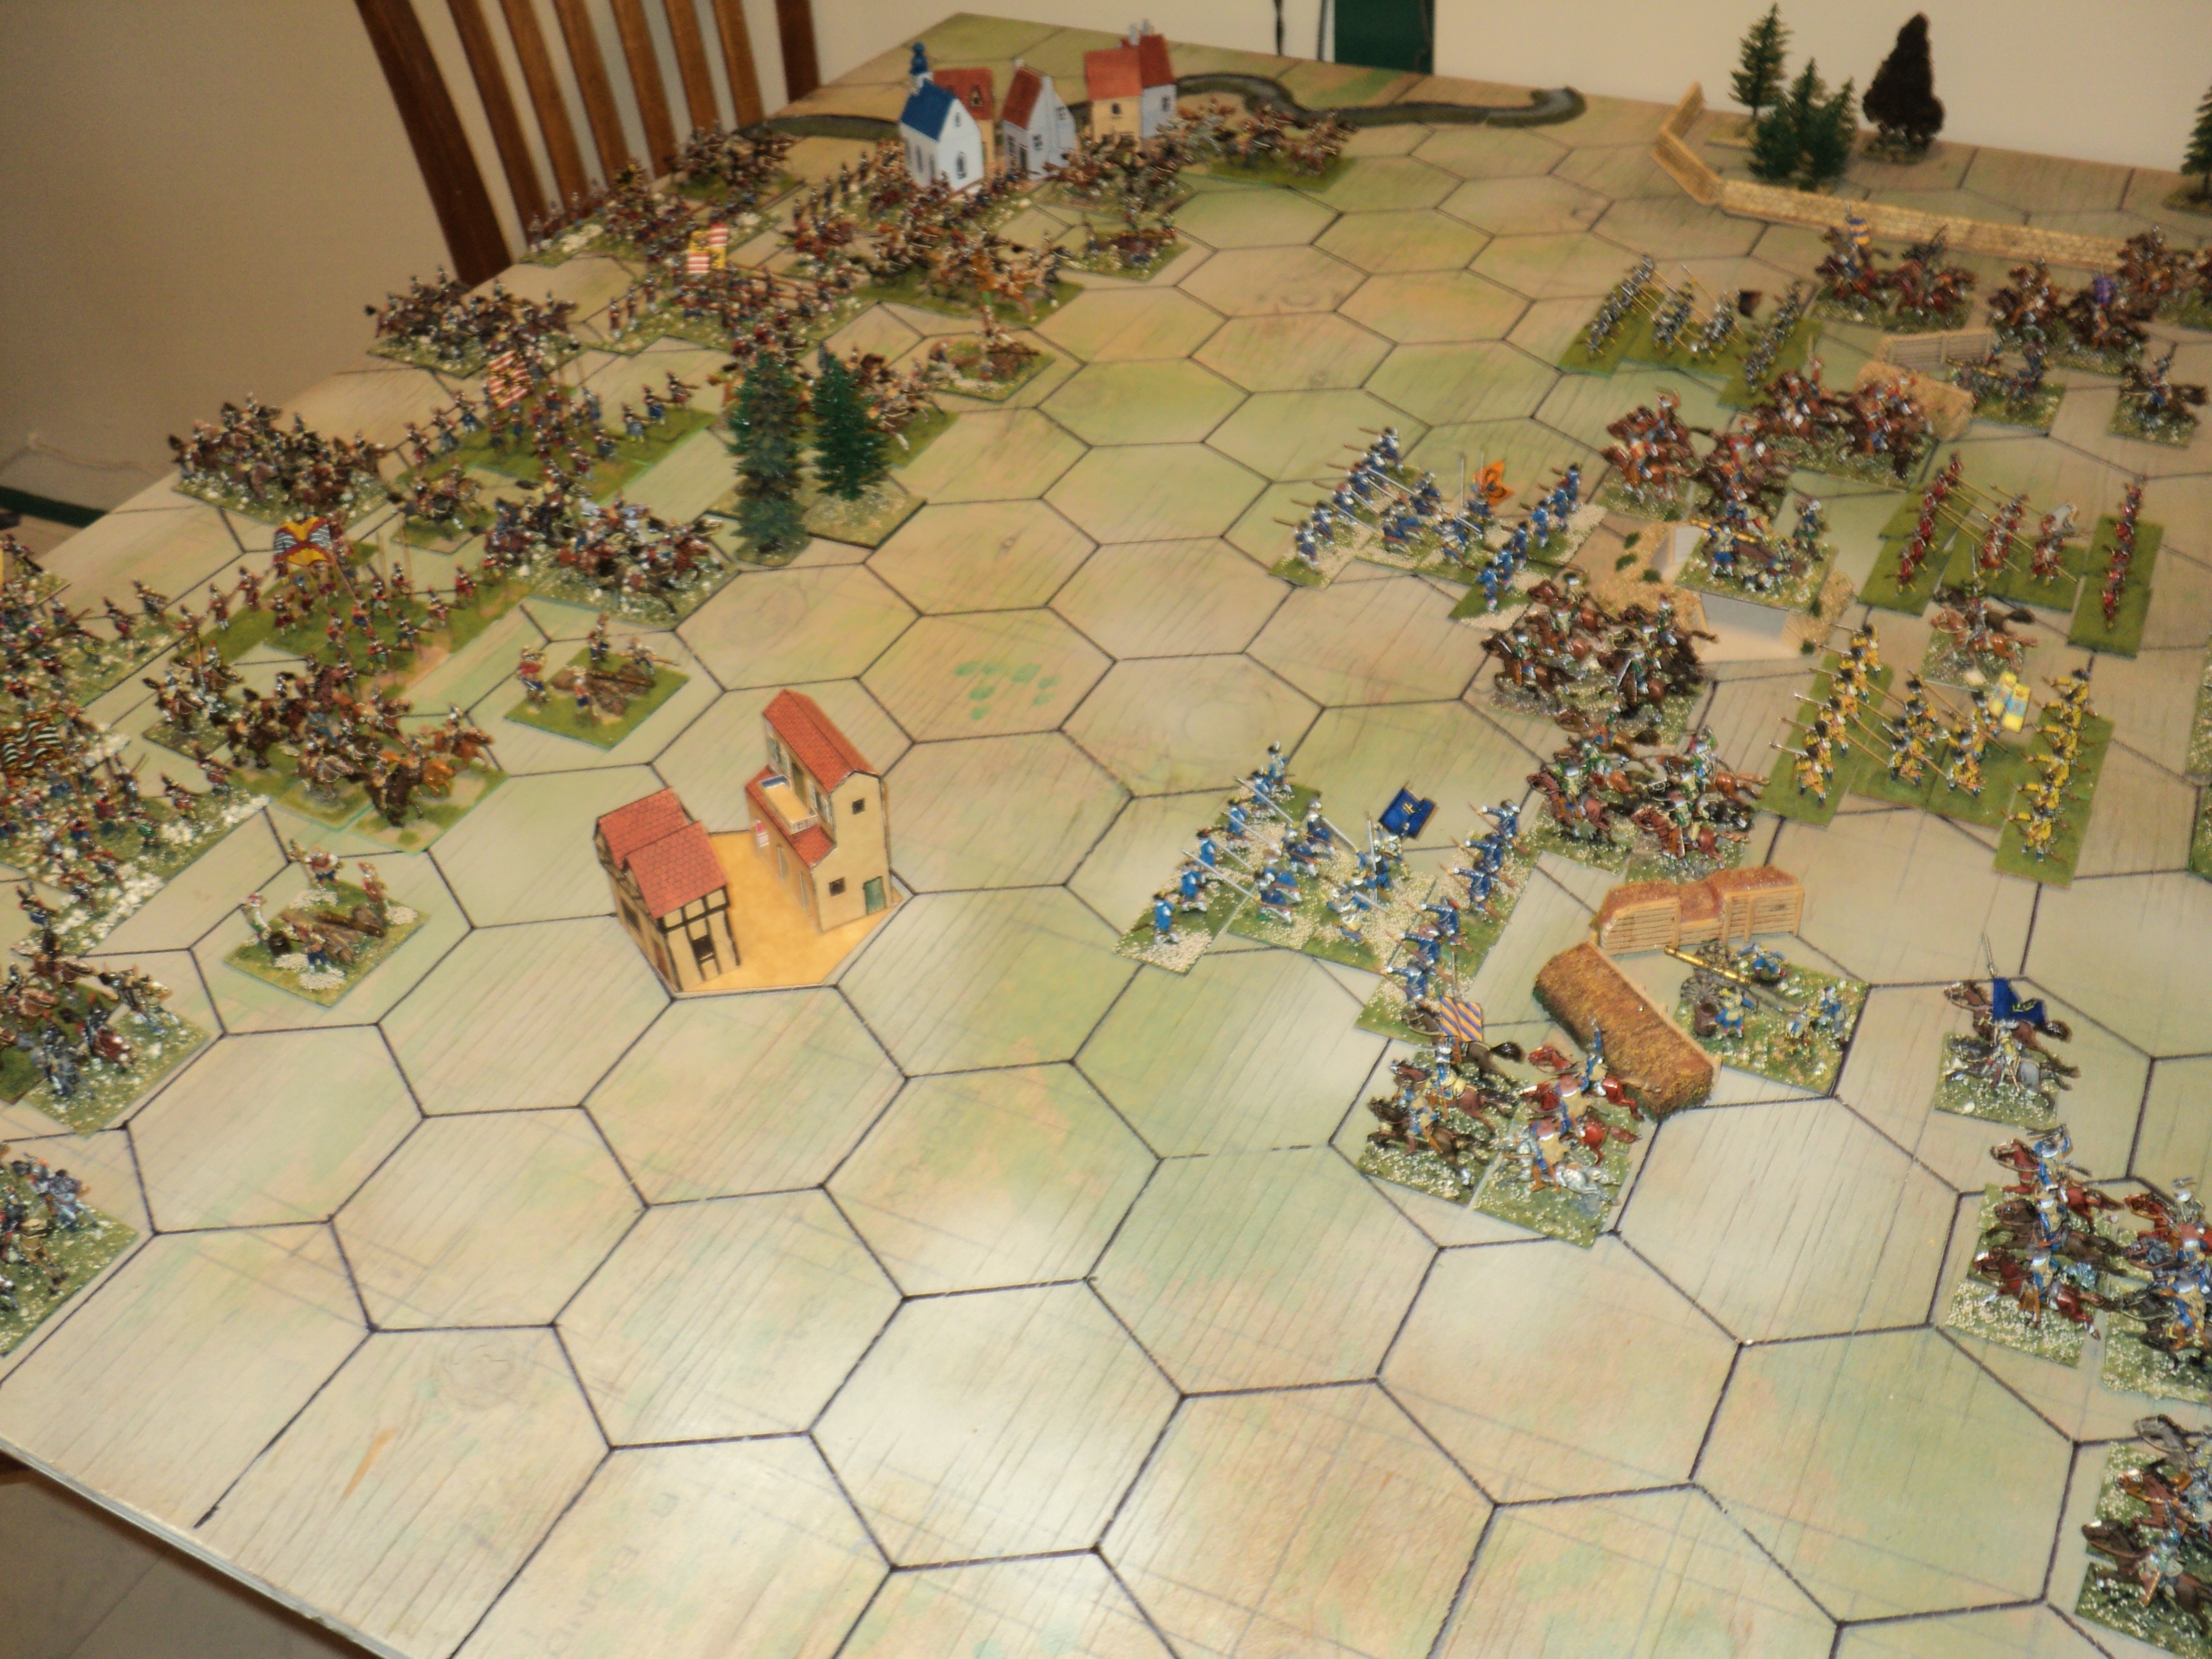
The remaining pictures show the overall situation as the battle sputters to close. Although the Imperialists retain, and have increased, the edge they began with, their sluggishness has deprived them of a decisive victory.


Readers will no doubt be disappointed at the anticlimactic outcome. Most of the cavalry on both sides were in action, but there was no 'push of pike and dint of butt'. Three of the six Confederation tercios saw action, and two of them took 9SP hits between them. One Imperialist tercio got to shoot its muskets, advanced towards the enemy, and took losses to incoming. One only. I suppose that might indicate to what extent the Imperialists did in fact get the better of the fighting.


Thirty-four Strength Points the Confederation lost: ten from the infantry, the remainder from the horse - the equivalent of 8 out of 13 units destroyed. The Imperialist losses were not far short of that: 32SP overall - surprisiongly many in that last Turn.  Take three from the guns and one from the infantry: the Imperialist horse lost 28SP. Wow.


Both sides, then, had reached their exhaustion points, the Confederation on Turn 7, the Imperialists on Turn 8. The temptation is that, one side having reached its exhaustion point, the other gets some extension upon theirs in order that a decisive result might be achieved. On the other hand, although this battle amounted to a lot of costly skirmishing, the overall narrative struck me as altogether plausible. Not all battles end decisively. Have to admit though, it was exciting while it lasted!


'History' would probably record this as a tactical Imperialist victory, but one indecisive and barren of material or moral fruits.  


Wednesday, June 12, 2024

The Portable White Mountain (2)

 So begins the narrative of White Mountain: a refight of the battle that kicked off a European-wide war that lasted 30 years. The text will be by way of captions for the pictures immediately preceding.


Facing the Imperialist host, the Bohemian Confederation Army lines the forward slopes of the Witteberg - White Mountain. Observe the very Swedish look to the Confederation Army. I had to use Swedish 'proxies'. I could instead have called the feature 'Cremefarbenberg' - Off-white Mountain - and the armies the bitter enemies, the Austerian Empire and the Kingdom of Severia.


Before them, the Imperialists advance: gun batteries in front; horse interspersed among the tercios. Note that, absent horsed teams, the guns of neither side can move. A bit of a nuisance for the infantry, but no real obstacle to friendly cavalry.


Beginning with the initiative, the Imperialist activation dice roll is truly dismal. The number of dice rolled is equal to the number of generals (three) plus whole multiples of 6 units (23/6 => 3), that is to say, 6 dice. That score is divided by 2, so the 6 dice must have rolled 14 to get to the 7 displayed in the battle box. All four gun batteries having fired, that left just three units to be activated. The Imperialist right flank cavalry, two cuirassier and one harquebusier units, move forward. That's it.

The second cuirassier unit beginning near the rear of the Imperialist army has a long way to catch up! The hope is that the Confederation's line might be outflanked and rolled up.

Well... the Confederation's activation roll wasn't a whole lot better than the Imperialists'. But as the artillery, masked by tercios in front, didn't fire, the army has a lot more flexibility. Question, then: should they wait on the defensive, or take the fight to the enemy? I'll give you three guesses...


Of course, they take the fight to the enemy. On the left, four cavalry units thunder out to meet the three oncoming Imperialist horse units. Close by the Remy hamlet a swirling cavalry fight develops that was to last more than half  the duration of the battle, with heavy losses on both sides.


In the centre, two Confederation horse units attack one of the Imperialist gun batteries. They do some damage, but are in turn  counter-attacked by couple of harquebusier units.  Partly to clear the front of the centre gun emplacement, the centre Confederation tercio pushes forward and veers to their left, aiming for the gap between Remy and the nearby copse. The Imperialist gun battery there has already taken some toll upon the left hand Confederation tercio, standing guard over the left flank.  


A couple of Confederation cavalry units attack the cuirassier and harquebusier units on the Imperial left in front of the Ruzyne village. Both sides take early hits.

Turn three: the Confederation activation roll is pretty good this time. The situation on the Imperialist left and left-centre: under attack by four Confederation cavalry units, with more coming up. Gradually the forward Confederation tercios also grind forward.


General view after three turns. Cavalry battles have developed all along the Imperialist front, which has the effect of stymying their push forward. The fighting is pretty savage, with most 'hits' being counted as SP losses. They mount up pretty quickly!


Reaching the Imperial battery between Remy and the wood, the Confederation tercio come under attack from two harquebusier units. The harquebusiers don't charge home; they do what they do best: engage the enemy in a fire fight. 


Behind the battle lines about Remy, stand an Imperialist gun battery and tercio, awaiting the outcome...


The cavalry battle on the Imperialist right is thinning out, with fearful losses to both sides. The Imperialist harquebusiers have disappeared, and one of the cuirassiers units is badly depleted. The Confederation cavalry is in not much better shape. One of their cavalry units has also been dispersed, another - faced by a fresh cuirassier unit - is barely staying in the fight.


To the left of the copse, the Imperialists mount a telling fire action counter-attack upon the two Confederation cavalry units there. The latter badly need help, but it is not forthcoming.


The opposite is true about Ruzyne. Somewhat isolated beyond the village, the two Imperialist horse units find themselves under attack by Confederation charging Confederation cavalry. Both have taken hits. 


Much of the Confederation's cavalry having carried the fight to their opponents, they are holding up the Imperialist advance. Meanwhile, the bulk of the Confederation stands to await the outcome. This was partly due to the generally woeful activation rolls on both sides, the Confederation Turn 3 roll being something of an exception. The early exchanges marginally in Imperialist favour, during Turns 3 and 4 the losses were fearful. Both sides lost heavily, but the Imperialists got the worse of it. The 'score' so far: Confederation lost 17SP, the Imperialists 21! 

The larger picture shows the general situation at the end of Turn 3.

By now the Imperialist horse on the right has been badly worn down - just 3SP remaining of the 11 they began with. The Confederation horse still have 7SPs of their original 12.  


Then, at the beginning of Turn 5 (and a reasonable - that is to say, about average - activation roll by the Confederation) one of the cuirassiers breaks and scatters, leaving a tired lone unit facing three, and odds of 6 to one.


Turn 5 and one of the better Imperialist activation
rolls: just half a pip-score below the
statistical average!
Even so, the last remnants of the Imperialist horse don't go without handing out a few licks of their own. Surrounded, facing odds of five to one, they finally break. But just 5SP remain of the Confederation horse, and two of the three units are badly depleted. The fourth unit has long since disappeared.


Meanwhile, on the other flank, matters are also going well for the Confederation. The harquebusiers conquered, three cavalry units assail a lone, battered unit of cuirassiers. The nearby tercio might have plodded around the village to lend a hand, but not whilst the situation nearer the centre remained problematic. 


Instead, a unit of harquebusiers began filing across the river bridges and through the town...


... to fall, betimes, upon the flank rear of the Confederation unit itself attacking the flank of the cuirassiers.


Matters begin looking up for the Imperialists in the left centre as well. Although taking heavy losses themselves, the harquebusiers have been gradually asserting an ascendancy over their adversaries, helped of course by the musketry of the tercio between the two horsed units. 


The encounter between horse, foot and guns near Remy was also stalled in a prolonged fire fight. Between them, the two harquebusier units have lost half their strength. Although having lost 2SP themselves, the Confederation tercio, with another looming up to assist, is maintaining itself amid gunfire and assaults from front and flank.

At this point, the end of Turn 5, we will defer the conclusion for another time. Losses have been heavy on both sides, with the Confederation down 25SPs, the Imperialists down 27. Pretty steep, considering that the Imperialist tercios in particular have hardly seen action!

To be concluded...

Monday, June 10, 2024

The Portable 'White Mountain' - A 30YW Battle.

Early action, from behind Confederation lines:
cavalry fights on both wings and in the centre

Exasperated by the Emperor's project to reassert the authority of the Church of Rome, Bohemia determined to break off from Catholic Austrian Empire and to form its own independent  kingdom. This rebellion against Imperial authority led to the first major battle of the Thirty Years' War: Witteberg, or 'White Mountain'. Led by Count Johann von Tilly, Charles du Bucquoy and Guillermo Verduga of Spain in a thrust towards the home of  Bohemian revolt, the Imperialist Army of the 'Catholic League' found itself intercepted by the forces of the Protestant Confederation at the White Mountain.

Drawing up along the forward slopes trending downwards toward the Scharka Stream, the Confederation emplaced several batteries behind earthworks. These were, it seems, masked by horse and foot, according to some sources I have encountered. This may have been deliberate, possibly to protect the guns and to conserve powder and shot until the Imperialists might have forced their way through, over, or by, the masking forces. The Confederation right was covered by a walled plantation of some sort; the left was open.

The Imperial Army's front was somewhat impeded by a copse or small wood in front of their centre, and slightly further off in front of the right wing, by the hamlet of Repy. The stream covered the Imperialist left, the somewhat isolated left wing reinforceable via the Razyne bridge crossings.

Altogether the Imperialist Army was slightly the larger, with more foot and guns than the Confederation possessed. Although the Imperialist had more horsed troops, the overall strength in this arm was almost equal, and the Confederation had the extra unit. Here are their Orders of Battle:

Lookin along the Imperialist start lines


Imperialists:

4 x Cuirassier (Reiter) 6-figure units @4SP  = 16SP
8 x Harquebusier 9-figure 'Dutch cavalry' units @ 3SP = 24SP
7 x Tercio 8-pike, 12-shot foot units @ 6SP = 42SP
4 x Artillery battery units @ 2SP = 8SP
3 x Commanders (Tilly, Verdugo and Bucquoy) 

23 units + 3 commanders => 6 Activation D6s
Strength Points overall: 90SP 
Exhaustion Point: minus 30SP
Rout Point: minus 45SP


The view from beyond the Confederation left wing


Bohemian Confederation:

13 x Charging Cavalry 6-figure units @ 3SP = 39SP
6 Tercio 8-pike, 12-shot foot units  @ 6SP = 36SP
3 x Artillery battery units @ 2SP = 6SP
3 x Commanders (Anhalt, Schlick and Thurn) 

22 units + 3 commanders => 6 Activation D6s (22/6 + 3 => 3+3 => 6)
Strength Points overall: 81SP (the gun emplacements might add 6SP to strength)
Exhaustion Point: minus 27SP
Rout Point: minus 41SP.

Overall there were 474 figures on the table: 258 Imperialist, 216 Confederation.

Before embarking on the narrative, a comment seems called for about the game system I used for this action. This action used the Portable Pike & Shot rule set but with changes I suggested at the and of April concerning the artillery and the horsed troops.

Artillery:

All were the heavier 4-figure stands that I use, that have a range of 6 (hex) grid areas. The firing arc is the hex immediately in front, and beyond that includes the row of hexes adjacent either side up to a maximum of 6 hexes from the gun. Short range is 2 hexes.

Cavalry:

My sources suggesting that the Confederation horse favoured the 'cold steel charge', I made them cognate to the 'Swedish cavalry' - calling them 'Charging Cavalry' - as defined by the rule set. The Imperialist horse comprised Cuirassiers and 'Dutch cavalry', the latter favouring fire action.


Close combat: Imperialist cuirassiers (4SP) vs 'Bohemian' charging cavalry (3SP).
The Bohemians (white die) score a hit. Had the dice been reversed,
both would have scored hits.

Close combat not being compulsory, the harquebusiers could shoot in their own turn at enemy horse to their front, but were able to contest the close combat in the enemy's turn. The charging cavalry receiving a +1 for fighting other types of cavalry have of course the edge over the other types (even the cuirassiers for all their extra SP). But the harquebusiers able to shoot without reply in their own turn more than makes up for that (between them, a 6% difference in 'hit' probability taken over 1 IGoUGo Turn). Probably the equalising factor is the charging cavalry's option of following up upon successfully destroying or forcing back the enemy. At any rate I am pretty satisfied by the method I have come up with. Note that forcing back the enemy only through fire action does not entitle the victors to follow up.

My convention for bringing on a close combat is to move the attacking unit such that the front edge crosses the hex grid area occupied by the enemy. This counts as a whole hex as part of the attacking unit's move. A cavalry unit beginning 4 hexes from its intended victim takes its whole 3-hex move to stand immediately adjacent to i. v.'s hex. Having completed its move it may not 'move' that extra part-hex to bring on a close combat. It will have to take whatever incoming from the enemy, then charge home. 

What is happening internally is that the cavalry clashes are brief, with the harquebusier pistoleers using their caracole technique as the opportunities present. Their more belligerent opponents will, of course, be gathering themselves for another go at getting themselves within sword-point reach.

Early cavalry action near Remy village. Both sides 
have take some stick.  The Confederation has lost 3SP:
the Imperialists 4SP.

In the course of the action, a large cavalry battle developed upon the Imperialist right flank that absorbed the attentions of three Imperial and four Confederation horse units. The latter were victorious, but badly depleted.  The survivors were eventually driven off by gunfire.

This seems a convenient moment to pause, to begin the battle narrative next time.
To be continued...


Tuesday, May 21, 2024

Hex Shambattle - a Rule Set

Late last year I posted some ideas about playing the Shambattle game on a gridded table.

The Hex-celled Grid:


The gimlet-eyed reader will notice that the Vermilion City and Blueburg I have placed, per the original Shambattle map, right up against the river banks. I'm rather taken with the idea of urban fighting being required to force a crossing.  Whether this adds or detracts from the action, we would have to see.

This being a larger game area, a larger OOB is required, and a commensurate change in shooting ranges as well. Each stand represents a battalion.

OOB Hex-celled Map:

Ruberia:
General Officer Commanding: General Sir Arthur Reddesley 6SP
12 Infantry stands @ 4SP = 48SP - Rifle range: 2 grid areas 
6 Cavalry stands @ 3SP = 18SP - Carbine range: 1 grid area
3 Machinegun stands (Gatlings) @ 2SP =  6SP - Shooting range: 3 grid areas
3 Artillery stands @2SP = 6SP - Shooting range 8 grid areas
1 Engineer stand plus Engineer Train @ 3SP = 6SP - Rifle Range: 2 grid areas
2 Field hospitals (horse-drawn wagons)
1 Fixed hospital (probably in Scarletton).


Azuria: 
Commanding in Chief: Marshal Andre Azuréna
12 Infantry stands @ 4SP - 48SP
6 Cavalry stands @ 3SP = 18SP
3 Mitrailleuse stands (Nordenfeldt) @ 2SP = 6SP
3 Artillery stands @ 2SP = 6SP
1 Engineer stand plus Engineer Train @ 3SP = 6SP
2 Field Logistics stands (horse drawn wagons)
1 Fixed Centre of Operations Logistics unit (most likely in Cerulean City)

Of the 25 units on each side (discounting the logistics units and the Army Command), 12 Strength Points would have to deploy at the outset in the towns, each having at least 3 units by way of a garrison.

Strength Points.

Hex Grid Armies SP values:
12 Rifles @ 4SP: 48SP
6 Cavalry @ 3SP: 18SP
3 MG (Gatlings, Gardners or Maxims) @2SP: 6SP
3 Artillery @2SP: 6SP
1 Engineer plus Engineer Train @3SP: 6SP
1 Fixed location logistics Centre of Operations: 0SP
2 Mobile (commissariat/ordnance/medical) Trains: 0SP
1 Army Commander @6SP : 6SP
Total: 90SP/ Exhaustion Point: -30/ Rout Point -45   


Activation of units: 

The whole game is IGoUGo, but in each pair of turns roll for which side goes first.
 
Procedure:
1.  Artillery and Machinegun fire (both sides, count as simultaneous)

2.  Roll for initiative, high roll going first and completing moves and combats for all units as in 3. and 4.

3. Roll for 'Treachery' in the enemy army:
    See below:
  
4.  For each unit: 
    Movement (artillery and MGs if not having fired this turn)
    Rifle fire and outcomes (moving side only)
    Close Combat and outcomes (both sides)

5. Low initiative roll determines 'treachery' (3) and completes moves and combats (4) for all units.

2 units - infantry, machinegun - and the 
Army Commander in one hex-grid area.


Movement:

Riflemen: 2 hexes in clear areas or on roads; otherwise 1 grid area only.
Cavalry: 3 hexes on roads or clear, otherwise 1 grid area only
Machine guns: 2 hexes on roads or clear, otherwise 1 grid area only.
Artillery: 2 hexes on roads, 1 hex in clear or in towns, otherwise impassible.
Trains: 2 hexes on roads, 1 hex in clear or in towns, otherwise impassible.

In the above picture, the MG could shoot out to 3 grid areas; but at 2 grid area range, the rifles can be added.  The Army Commander's presence putting them on their mettle, would add +1 to the units' SPs for shooting or close combat.

Combat:

I propose using my own version of the 'Command-&-Colours' combat method for shooting or close combat.  A grid area may hold 1 or 2 units, of any type - 2 infantry, say, or 1 infantry and 1 gun).  The following results count only if the target type happens to be present.

1. Artillery, Machineguns, Engineers or Engineer Train lose 1 SP
2. Cavalry retreat 1 grid area, or lose 1 SP
3. Cavalry lose 1 SP 
4. Infantry retreat 1 grid area, or lose 1 SP
5. Infantry lose 1 SP
6. Infantry lose 1 SP, and retreat 1 grid area.  Hazard to Army Command if present.

If Army Commander is in the target grid area, he may be hit.  A separate roll of '6' means the Army Commander is toast (one could roll to determine whether he is KIA, WIA, or POW). Note that in this version, the Army Commander is at hazard only if a '6' is rolled for a hit upon the unit he is accompanying.

Engineers count as infantry for shooting and close combat purposes. The SP value for their Train counts towards its capacity as well as for its combat strength. See below; Engineers.

The number of dice rolled in combat is equal to the stand's SP values. If there is more than one stand in a grid, their combat power may be added together. The following modifications, per stand, apply:

-1 Any of close assaulting across river, up hill, or in or into a town, forest or brush area. Not cumulative.
-1 Any of shooting into cover, or whilst on a bridge or in a river (ford).
-1 Machine guns or artillery under a close assault. Neither may bring on a close assault.
-1 Engineer Train under close assault. May not bring on a close assault. Engineer Train does not shoot.
-1 'Poor' unit shooting or close combat (optional).
+1 Machine guns shooting.  Range: 3 grid areas.
+1 Artillery shooting. Range: 8 grid areas.
+1 'Elite' unit shooting or close combat (optional).
+1 Army Command in same grid area.


Engineers in combat:
As the engineers themselves and their train are always in the same grid area, a combat die roll of '1' will hit one or other of them but not both. SP losses accumulated are taken in turn, beginning with the Train. So two combat rolls of '1' in the same turn will take 1SP from both engineers and their Train.

2 units, plus Army Commander, in one square
 grid area - as much as the area can accommodate.
An enemy attacking this grid area would hit the artillery 
on a '1', the infantry on a '4-6', and possibly Sir Arthur
Reddesley on a '6'.

Close combat
 is initiated by a force attempting to enter a grid area occupied by an enemy force. This is signalled by the front edge of at least one stand being placed slightly over the edge of the target grid area.  Close combats are automatic, both sides rolling, and, if continuing, take place in both sides' turns.  The posture of the respective sides will indicate who is the attacker.

Only the rifle infantry, cavalry and engineers may initiate a close combat. Artillery, machine guns and the Engineers' Train, may never bring on a close assault. The Engineers may shoot, but the Train does not.

Engineers, function:
At all times, the engineers are accompanied by their Train.  Their Train supplies the needs for mine laying, constructing field works, demolition and bridge building. The SP value constitutes their capacity. 

1SP by the Train may, in one turn:
  • Lay minefields in 1 grid area 
  • Construct fieldworks in 1 grid area
  • Prepare 1 bridge or building for demolition
  • Construct 1 pontoon bridge section (2 being required to complete the river crossing).
    Construction occurs in the same grid area where the engineers and train stands, or, in the case of river crossings, in a bridge approach grid area.
Note that at 3SP there is an overcapacity for building one bridge, but insufficient to build two. One has, of course, to take into account losses to enemy action! 
Note also that the rate of construction is fixed, and may not be accelerated by the 'expenditure' of extra SPs in the same turn.

A final note: you will observe that SPs spent upon engineering tasks will add to the overall SP wastage incurred by the battle, and hence towards reaching the Army exhaustion and rout points. 

Treachery...
It is tempting to subvert the adamantine river line by including the possibility of treachery in the enemy ranks.  As I'm playing these games solo, how this is done would have in some way to be programmed. I'm thinking less in terms of 'spy' and more in the way of 'Fifth Column'.

Procedure:
At the beginning of the Game OR (better yet) at the appropriate time each turn (optional), identify the miscreant unit:
  • Roll for arm: 1 = artillery/ machine guns, 2-3 = cavalry, 4-6 = infantry
  • Roll for unit: There being 6 cavalry and 6 guns and machine guns combined, simply allocate a number from 1-6 for each and roll according. There being 12 rifle stands, roll for pair, and then for individual within the pair, or, as I did, 1 roll for which 'brigade' of 4 stands, then roll for the unit within the 'Brigade'. 
1.  Each turn, roll a die to determine whether there is disaffection within the army. See 'Activation of Units' above. A roll of '6' implies a unit's loyalty has come into question. 
(It has suddenly occurred to me that this would be best carried out turn by turn, with the non-phasing side rolling for the enemy army. That way the defecting unit immediately comes under the control of the enemy army)
2.  Unless identified at the beginning of the game, roll to identify the disloyal unit.
3.  Roll to determine what action the disloyal unit will take:
  • 1-2 Mutiny! The unit will refuse to take orders, will neither move nor shoot, except to defend itself and/or stay away from the fighting.  Its SPs are lost to the army, but are not accrued by the enemy.
  • 3-4 Defection! The unit plans to change sides, but will do so only if it contacts or is contacted by an 'enemy' unit.  This is effected by moving into a grid area adjacent to one occupied by the 'enemy' unit. Having thus made contact, the unit is now under the command of the enemy army. Its SPs are lost to their former army and now accrue to their new command.
    (In a 2-player game, the 'enemy' takes over its movements, but the aim is primarily to make contact with an enemy unit. It may not attack its former comrades, nor may be attacked by them). 

    However, the army they are trying to contact may engage them in combat, bearing in mind that any SPs they lose will be SPs foregone. The defecting unit may also be expected to fight back if engaged in close combat. (I make these last remarks for the 'sake of completeness': I doubt in a 2-player game that the receiving army would want to shoot up approaching friends. In a solo game, that is a whole other matter, of course!)
  • 5-6 Fifth Column! The miscreant unit at once changes sides, and will come at once under the command of the enemy army, to carry out moves, fires and close combats as required. The SPs change sides with the unit. There is no change to the starting 'Exhaustion' or 'Rout' points for either side.

Supply and Resupply:

The Centre of Operations, and the two Mobile Logistics Trains', main function is to rebuild units (stands) that have become depleted. This may include stands or units that have been reduced to 0SP, and have therefore been removed from the battlefield. These three logistics units have no intrinsic Strength Points, and, attacked, are captured or destroyed on a 'hit' result for Trains.

During the course of a 'night' Turn the SPs are allocated to units according to arm, each receiving half of their losses incurred during the day. Odd half fractions of 'returned' SPs are rounded up for riflemen and engineers, and down for all the other arms. Special rules apply to the Engineer Train and the Army Command.

Units to be refurbished must be placed in the grid area containing the logistics unit (1 unit only), or in an adjacent grid area (up to 2 in each). This placement takes place in the night move. A replacement Army Command, and the engineer train resupplying, also stand in some such proximity to a logistics unit. The units placed, they then are allocated extra SPs from the replacement pool.

At the dawn of the new day, the units move at standard rates from the grid areas in which they stood for resupply and recovery. One of the effects of this will be to advantage the invaded country. It will therefore be in the interests of the invader to bring his mobile logistics units up close to the front line.

Special Resupply Rules:
Engineers's  Train:

The Engineer's Train may by resupplied up to its full capacity of 3SP.  This will, however, still count against the overall allocation to specialists. 

Army Command:
When the Army Command has been lost, it may be replaced (@6SP) but only at the cost of Strength Points being returned to the Army. However, the 6SP so spent may be drawn from the whole pool, regardless of the arms represented. A likely replacement allocation might be drawn like this: 1SP from the specialists, 2 from the cavalry and 3 from the infantry.

Exhaustion:

An army having reached its 'Exhaustion Point' is treated as follows
Only the cavalry can initiate a close assault 
Units may not advance closer to the enemy than they already are. They may, however, move closer to an enemy stand if the move also brings them closer to the friendly base line.
Units already in close combat may remain so until the close assault is resolved.

Rout:
An Army reduced to its 'Rout Point' must immediately begin to quit the field.
Units move at standard rates towards their own table edge, or the capital city.
Units in close combat, break off, and retreat one grid area.
The army will be stopped, if at all, only by the onset of night, and then resume the next day unless the SP returns bring the army's strength points above the Rout point.

Concluding points:

This rule set will probably require rather closer attention to losses Turn by Turn than is usual among our Grid Wargames. Apart from anything else, only the day's SP losses may be returned 'overnight'. It is possible that an Army will become 'exhausted' during the course of a day, but be revived with SPs overnight. This seems to me a reasonably plausible happening. An Army reduced to a routing condition before nightfall might be rallied overnight to mere 'exhaustion', at least keeping it in the field the following day. 

An army that finds itself having lost a third of its original SP allocation at daybreak remains 'exhausted', must take up a defensive posture. When the army is exhausted, only the cavalry may be permitted to attack to bring on a close combat. An Army reduced to its 'Rout Point' simply flees the field, and the battle ends.

I have a feeling that one of the effects of these establishments is the creation and retention of a reserve, so that depleted units might be withdrawn, and fresh units take their place.  It would be nice to think that this will work, but I haven't tried it yet!