
 |
| Situation on the Austrian right centre, as the Grenadiers of I Reserve Corps assail the ridge line. |
 |
| General view of the Austrians piling the pressure on the French right and centre. |
-
The 'Retreat from Smolensk' as a 'logical' campaign
At the moment, among other war games projects that from time to time capture my attention, I am in the throes of play testing a set of rules for Napoleonic battles for my solo play, and enjoyment. The play testing has taken the form of what I call a 'logical campaign'. No map movement is involved: just the battles.
 |
| Second Hungarian Division ranging up alongside to help the 3rd's battle with the French 4th Division. |
Most examples of such campaigns have created something resembling a fencing piste, with specific scenarios depending upon the outcome of the one preceding and determining the type of action to follow. I've chosen a different method, much more open ended. In effect the campaign runs on three fronts: North (Retreat from Riga), Centre (Retreat from Smolensk) and South (Austria defects). The overall narrative is not random, but generated from my imagination (which, come to think of it, might not be so distinguishable from randomness, at that).
 |
| The Austrians have heaped up a lot of strength on their left flank. |
The reasons for choosing such a big theatre and a fictitious strategic situation has to do with:
- Making use of the range of Allied armies I have available: Austrian, Prussian and Russian;
- The limited size of my Russian army as presently constituted;
- Opportunity for a wide range of military situations and encounters that might be enacted on the table.
Right now, I am really just beginning to build up my Russian army, which at the moment comprises 4 x 24-figure infantry units (Divisions); a small body of Jager (14 figures only) and one cannon (Corps artillery park - four gunners, plus a howitzer). No cavalry. Although the figures I have are metal, I am hoping someone like Perry or Victrix will start doing some Russian Horse soon in 28mm plastics.
 |
| On the east flank, General Reynier finds himself in a dilemma - to counter-attack or to reinforce the centre. There is not much room for the latter option, yet orders seem to obviate a counter-attack that takes him off the high ground. |
The Russian army I plan to build will comprise something like 6 or 8 infantry Divisions, at least 3, possibly 4, cavalry brigades (Cuirassiers [maybe], Dragoons, Hussars, Cossacks), and 3 or 4 cannon. This still leaves my projected Russian army smaller than than the Prussian and Austrian armies, but I am limited in my resources. The fact is, I never envisaged my Austrian army to reach anywhere near the size it now is; and the Prussians resulted from an unlooked-for windfall.
 |
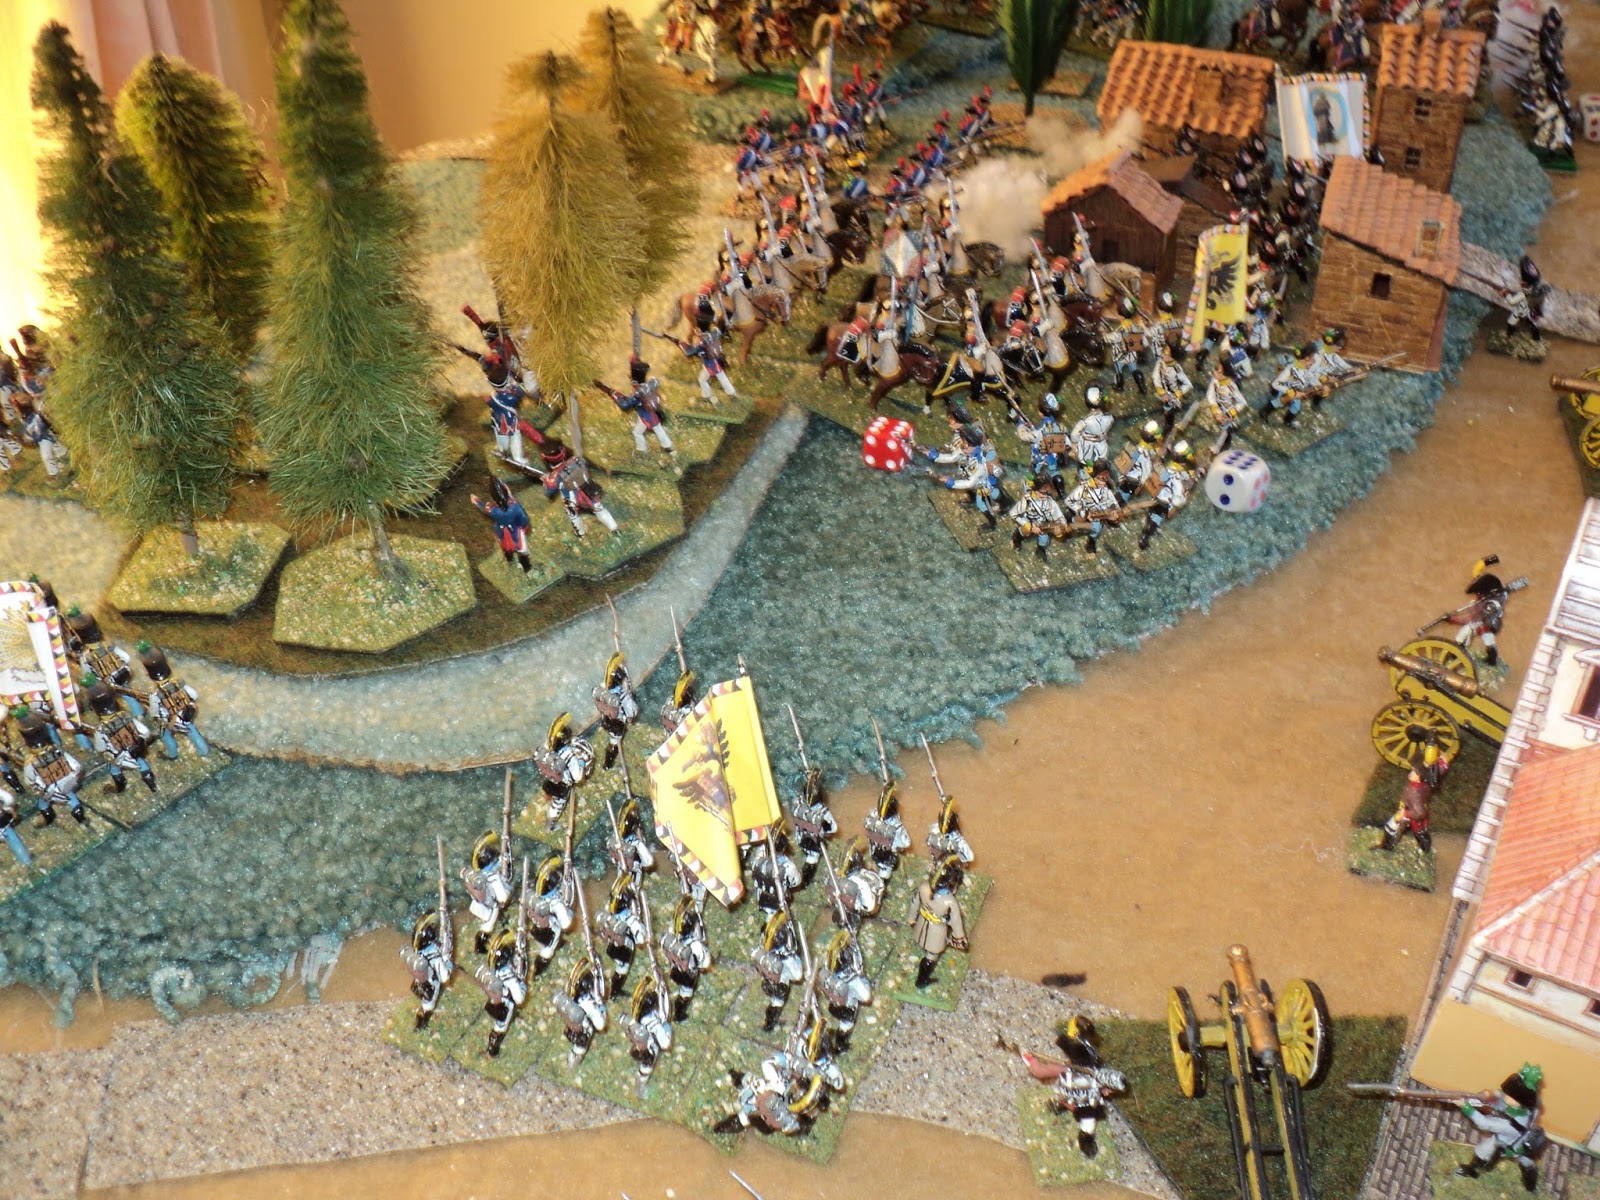
| First Grenadier Division, having carried the centre village, finds it hard in the face of determined French resistance to debouche therefrom. This situation was to remain stymied until almost the close of the action |
Does that mean the Russian army will be relegated to a 'bit part' role in this Retreat from Smolensk campaign? By no means! Already I have in mind the next battle of the series, fought no great distance from the action unfolding here. I had to ask myself:
- What happened to Marshal Davout and two of his Divisions, that he could not be present at this battle?
- Where was Prince Eugene's 3rd Division?
- Where were the I and IV Corps light cavalry?
 |
| Add caption |
The answer was the Russian, Admiral Pavel Vasilievitch Tchitchagov, his army hurrying westward to link up with the Austrians. Getting wind of this, Marshal Davout left the bulk of his infantry with General Morand to support Eugene, and hurried eastwards with two Divisions and the I Corps light horse to intercept Tormasov's advance. By way of reinforcement, he diverted a belated Division and light cavalry of IV Corps, together with some artillery.
In his hurry, the Russian Admiral has allowed his troops to become strung out along the road. This leads to a meeting battle in which the Russians have the superior numbers, but the French, arriving by two roads, build up the faster. I have always liked war gaming encounter battles, with troops being fed into the battle as the arrive, to shore up a crumbling defence or maybe exploit an enemy weakness.
At any rate, the action will smaller than the Austrian battle - smaller even than the earlier Prussian action...
 |
| Ist Corps advancing behind the Hungarians. |
The programming for this 'Hill defence' battle as per C.S.Grant's Programmed Wargame Scenarios book
For this action, I chose the very first scenario, "Hill Line Defence": presenting 'the player with a defensive force occupying a low hill line and an attacker already deployed off the line of march and about to commence the battle'.
 |
| Austrian uhlans, awaiting their chance to stick it to the French. |
Having selected the BLUE (French defenders) and RED (Austrian attackers) forces from the available lists (I could have diced for them, but didn't), I adapted them to my organisations, as indicated in my previous posting. The battlefield itself was randomly drawn from a matrix of 9 'sectors', three each of Left, Centre and Right (from the attackers' point of view). I made the hamlets or farms of the original into something more substantial, which, given the size of the table, probably wasn't so smart. It led to a crowded field being even more crowded.
 |
| French 14th Division caught in flank by Austian heavy cavalry. |
For the rest, both armies' behaviour was largely, though not entirely, governed by the programming of the scenario. As instructed, I began with the RED force. As the approaching Austrians' awareness of the enemy confronting them amounted to no more than their mere presence, and little, if anything, of their dispositions, the commander, the Archduke Charles, formed his plan:
- The light infantry were split into three small bodies of 8 figures, one for each of the three sectors. Re-reading this scenario now, I ought to have included the uhlans and chevau-legers in this distribution, which called for 'all light troops' being 'divided equally across the front' on a die roll of 1-3, or 'divided equally between the flanks' on a die roll of 4-6. I rolled a three.
- The attackers had to choose from 6 options as to plan and distribution of troops, the selection being random:Throw 1 - Attack left: Left 60% Centre 30% Right 10%Throw 2 - Attack left and front: Left 40% Centre 40% Right 20%Throw 3 - Attack front: Left 20% Centre 60% Right 20%Throw 4 - Attack left and right: Left 40% Centre 20% Right 40%Throw 5 - Attack right and front: Left 20% Centre 40% Right 40%Throw 6 - Attack right: Left 10% Centre 30% Right 60%The die roll of '1' determined that the Archduke had decided upon on a massive blow from his left flank.
 |
| French 4th Division having been routed and driven off, The Hungarians advance into the French rear flank. Fifth Division hurried to head them off. Meanwhile the Germans of I Corps swing swing round to roll up the French line. |
3. Then it was a matter of how would the attack proceed. The main attack was pretty clear: advance, drive in the enemy flank, then roll up the line from the west. But what about the Centre and Right? The options were:
- Throw 1-2 - light troops and those not in main attack will advance and cause maximum nuisance and stretch the enemy line;
- Throw 3-4 - light troops ... (etc) ... will do little more than hold their initial line and will be 'cautious' and 'unimaginative';
- Throw 5-6 - light troops ...(etc) ... will be drawn [in the direction of the main attack].
I rolled for the last option, but as it happened the crowded battlefield inhibited moves to the left and the main point of the attack. I interpreted this as the central troops - mainly I Reserve Corps involving itself in an attack immediately to the right of the main attack, that is to say, against the centre village and the high ground to their left of it.
 |
| The brigade squares of the leading Division of Austrian I Corps (Grenadiers) counterattacked by Cuirassiers. Third Division is hurrying to lend a hand. |
Finally, there were two main areas, according to the scenario design, in which RED (Austrians) would have to respond to BLUE (French) activity. They were:
1. "A French unit (formation: Division or Brigade) has broken or falls back creating a gap in the line":
- Throw 1-2: Push all available troops whether cavalry of infantry into the gap regardless of what is happening elsewhere
- Throw 3: Push any available cavalry only into the gap; infantry will continue as ordered or await fresh orders as circumstances indicate;
- Throw 4: Push available infantry only into the gap;
- Throw 5-6: Hesitate 2 moves, then push into the gap if it remains.
 |
| The counter-attack by the French heavy cavalry... |
2. "A French Force of more than one unit (Division or Brigade) counter-attacks off the hill feature".
- Throw 1 - All infantry in small arms, missile and musketry range will recoil out of range;
- Throw 2-3: Push any available cavalry only into the gap [I find this rather odd - unless one supposes that the enemy counter-attack does leave a gap in their line. But I have a feeling something else was intended here];
- Throw 4 - No abnormal action;
- Throw 5 - Any cavalry within range will attempt to charge;
- Throw 6 - All forces within missile, small arms or musketry range will rush forward in an attempt to come to grips.
I confess that in the heat of the action I rather forgot about these situations and responses. They might well have made a big difference to how the action fell out!
 |
| The Austrian foothold upon the ridge feature coming under heavy pressure from the French mounted reserve. |
Having sorted these out - though I left the determining of response for when they arose, then I turned my attention to the French forces adorning the high ground.
1. All forces had to be deployed on the high ground, or behind it. This was interesting as I did think the defenders might have been permitted to deploy skirmishers a little in advance of it. The village in front of the French right flank also seemed to call for some sort of garrison, however small. It didn't get one.
 |
| The French 14th Division having been routed, the lancers have exacted a high toll upon the Austrian dragoons. The 2nd Reserve Corps Division is coming under attack as well |
2. A die roll then determined the distribution of the defenders:
- Whether the light troops were distributed evenly across the whole front or on the flank sectors was supposed to be determined by a die roll. This I ignored as impractical for the French army as I have organised it. In effect that distributed the light troops all across the front; THEN for the whole force-
- Throw 1 - Left 35%, Centre 30%, Right 35%
- Throw 2 - Left 30%, Centre 40%, Right 30%
- Throw 3-4 : Left 25%, Centre 50%, Right 25%
- Throw 5: Left 20%, Centre 60%, Right 20%
- Throw 6: Left or Right (50-50 die roll) 15%, Centre 50%, Remaining flank 35%
From memory, I rolled a 2 for the distribution which meant an approximately even distribution across the front. Given the way the army was organised, the most convenient distribution was 3 Infantry Divisions and an artillery park on each flank, and in the centre, two Infantry Divisions, 1 park and all three cavalry Brigades.
 |
| General Reynier, unclear as to his orders, acts on his own initiative and launches a local counter-attack. Probably an all out attack with his entire Corps might have yielded better results! |
The overall French plan was then to be determined. What was prince Eugene's plan? Here were the options;
- Hold the entire feature well forward, giving up NO ground (sic), and in NO circumstances move off the contour even to follow up
- Hold the entire feature, yielding no ground as in 1, but will follow up off the contour if advantageous to do so;
- Give ground to maintain a line, but in NO circumstances to commit his reserve;
- Give ground to maintain a coherent line, but will commit the reserve to keep the line intact;
- Take the offensive whenever the opportunity offers;
- Retain at least part of the feature at the end of the day, provided the forces are united at that location.
From memory I rolled a '6' for this. Given the choice as a player in this scenario, I would have selected Option 5 every time!

Finally, how would the French respond to events? There were three possible events to which the defenders might have responded:
1. "Enemy flank attack in strength reaches the edge of the ridge." This I took to be making contact with the edge of carpet cutouts that formed the slopes at the foot of the high ground.
- Throw 1-2: Denude the other flank to contain the attack;
- Throw 3-4: Commit the Reserve until prohibited by the orders stated above;
- Throw 5-6: Weaken the centre to strengthen the threatened flank.
In the event throws 3-4 and 5-6 amounted to the same thing. As the Reserve (the cavalry in effect) was in the centre, they were committed to counter-attack and restore the line. The centre infantry, themselves under heavy attack were in no position to intervene elsewhere. I think I rolled for the last option, but can't recall for sure.
 |
| Add caption |
2. "An enemy frontal attack reaches the edge of the ridge"
- Throw 1-2: Concentrate all forces in the centre giving ground on the flanks unless specify otherwise (see Eugene's plan options, above)
- Throw 3-4: Give in the centre in the hope of engaging the enemy on both flanks;
- Throw 5-6: Commit reserve in the centre, unless ordered otherwise (see Eugene's plan options).
These weren't really applicable to the situation that developed from the Austrian attack on one flank. Nor were the following, though I'll add these for completeness.
 |
| Things are looking bad for the French right flank! |
- Throw 1-2: Give ground and retain a line;
- Throw 3-4: Concentrate on likely breakthrough points, withdrawing all forces from areas not threatened;
- Throw 5-6: Launch all the reserve plus whatever is available, on one section of the enemy attack.
 |
| Heavy cavalry versus infantry squares... |
To be continued...
I like your big battle concept Ion, I once did a similar thing using Charlie Wesencrafts rules.
ReplyDeleteI'm looking forward to the next instalment.
Paul.
Thanks, Paul. It's slow going at the moment - going through the war games doldrums... But I think I do have the beginnings of something I can work with!
DeleteI do like your battles Ion. I was wondering though do you have or know of some solo play rules that would work for little battles of this period. Thought I might try a little battle between my Oronegreans and some pirate raiders. I seem to recall you sent me some rules in the past but given that was years ago I have misplaced them.
ReplyDeleteI do mainly solo play myself. But you might look into a book 'One Hour War games' by Neil Thomas. I don't have it myself, and the reviews have been mixed from ho-hum to reasonably enthusiastic.
DeleteOtherwise, I'll have a look at my Corsican Ogre Napoleonic set and what I have for the mid-18th century...
Cheers,
Ion.
Great to see your blog spot back in action, Gowan. I've been enjoying you boat construction...
Deletethanks Ion.
DeleteWell I'm taking a break from models tomorrow to go up to Auckland but I'll be back at it for Wednesday. I'm working slowly on the boats as I am trying to get some Oronegrean Artillery crew done. So expect them to appear in the coming days followed most likely by another small boat.
-Gowan