Wednesday, October 19, 2011

The Blacklands of Kiivar ... A photo essay.

Last weekend was something of a trial run for a several items of equipment: artillery, anti-tanks guns and AFVs of various kinds. The premise was a powerful attempt by Raesharn forces to seize, take or carry a strategic crossroads, in the Blacklands near Kavi (see map - not far northeast of the headwaters of the Firth of Kiivar). The action unfolds in the following series of pictures.

A general view of the Raesharn forces on their startline. They comprised two infantry companies, a tank company (4 tanks) plus 3 other AFVs, a battery of 3 heavy and 3 field artillery pieces, an anti tank gun or two, a reconnaissance section of an armoured car and motorcycle combination, and a section of cavalry.
General view of the battlefield. The bridges were built for a smaller scale (that being used here something like 1:35 or thereabouts), and were a bit narrow for this. They were held to be negotiable by wheeled vehicles, but not tanks or assault guns. The stream itself was crossable, but took time, and vehicles risked bogging down. The stretched lengths of pot scourer served as barbed wire entanglements.
Another general view. The Kiivar defenders had just two AFVs but the infantry company was supported by a 2-gun mixed battery of artillery plus a couple of infantry guns, 4 'medium' antitank guns, a single twin-barrelled AA cannon, and a section of assault engineers, who garrisoned the Crossroads Tavern. Oh, yes: both sides could call upon air strikes...

The formidable array of Raesharn artillery.

Fortunately they were lacking in targets on account of the absence of a forward observer. But they could see the tavern, which was bad luck for the engineers therein. Of eleven men, four survivors evacuated the place after the enemy guns found the range...

Raesharn Cavalry, ready to sweep around the Kiivar southern flank...

The Raesharn tank company, together with its riders, ready to go.
Kiivar left - garnished heavily with anti-tank guns...

Kiivar centre. The assault engineers would soon have to vacate the Tavern...

Kiivar right. Nr 1 Platoon in the woods, supported by an infantry gun overlooking the river bridge.
Raesharn tanks advance on the northern flank...

General view from behind Kiivar lines...

First strike! Raesharn aircraft takes out Kiivar's only tank. Their remaining AFV is an assault gun, off to the left. The AA cannon fails hit the aircraft as it flashes by...

Retaliation! A Kiivar fighter-bomber shoots up the Raesharn artillery. Although Raesharn loses half a dozen gunners, the guns themselves remain intact. This proved something of a distraction for the Raesharn commander, who detailed several infantrymen to man the guns. A rule emendment might have to be looked at here...

Second Raesharn strike destroys the entire Kiivar artillery battery, leaving just two gunners surviving. Bad news for Kiivar...

The armoured thrust reaches the stream and begins to cross. This proved a considerable obstacle that slowed the Raesharn advance. The lead tank bogged down when almost across. Though slowed, the Raesharn were not altogether stopped, however.

In the centre, the assault gun heads for the hill. An antitank rifleman lies in wait...

An assault gun tentatively probes the Kiivar right flank. Where are the cavalry?

Kiivar's second airstrike does immense damage: two tanks knocked out, and 6 infantry bite the dust. Methinks wiping out 2 tanks was a bit punitive. Another rule change in order there, possibly. Mind you, exactly the same odds [taking 1 for 6 and 2 for 5 etc] would have left both tanks intact, and just two infantry casualties...

The Raesharn AFV mounts the hill to take a hull-down position, and comes under the concentric fire of two AT guns and an AT rifle. In the ensuing exchange of fire, the vehicle was hit twice, but managed to take out half the crew of an AT gun before it succumbed. The AT gun on the extreme left of the picture - still in its factory finish (i.e. unpainted) - did the deed.

The AT rifleman takes care of the Raesharn AFV on the right, taking two shots to do so.

General view. Things aren't looking so good for the Raesharn offensive. They have lost 4 AFVs out of 7, and the armoured can was knocked out by an AT gun whilst standing near the bridge.

Raesharn forces push across the stream on the Kiivar northern flank. Kiivar infantry wait anxiously in and behind the woods...

Here come the cavalry...

There go the cavalry... Charging into the woods was always going to be a chancy proposition...

Touched up view of the north flank action. Raesharn tank comes under heavy fire but the Kiivar assault gun delivers the coup-de-flamade...

Another touched up pic of the final moments before the Raesharn commander calls of the action. Raesharn losses amounted to 5 AFVs, and armoured car, 7 cavalrymen, and perhaps a dozen other personnel. Kiivar lost a tank, two artillery pieces, and about 15 men (assault emgineers and gun crew). A fairly comfortable defensive victory, but it was against an inexperienced opponent. The next action - a Kiivar counter-offensive - might tell a different story...

Sunday, October 9, 2011

Battle of Guarda - Part Three


Continuing the narrative of the Prince of Essling, the Marshal Massena to his Emperor, le Tondu in Paris, concerning the French victory over the Army of Portugal at Guarda.

Having determined the location of all our enemies, we were able, Sire, to put into immediate effect our overall plan of enveloping the southern flank. In the meantime, the holding action of Mermet's Division continued to pin the defenders of Guarda itself and the mountain upon which the town stood. By midday, the place was almost surrounded already, and the Portuguese line infantry keeping open the road northwest out of the town was taking heavy losses and barely hanging on. A battalion of 6eme Legere had already infiltrated behind the town and cut the west road.

Meanwhile, it transpired that a battalion of 38th South Staffordshire was waiting behind the northwoods to take in flank any push by our people along the north face of Guarda Hill....
Had 4th division been able to push the Portuguese out of the North Woods, the position of 38th Sth Staffs would certainly have been compromised, but the enemy refused to budge, even after II/25th Legere enveloped their right flank whilst a battalion of Labassee's 8th Brigade engaged them in front.

As the action around the town proceded thus indecisively, events were taking their planned course aloung the stream that flowed westward from the southwest corner of the village. As the Allied infantry hastily scrambled back across to their own side of the stream, General Loison's light infantry were swiftly following up, supported by the battalion columns of line infantry.


Bent in a right-angle as the Allied line had become, naturally a weak point had developed at the point of the angle. Already the Duc d'Elchingen was striking at and through that point. Despite their valiant resistance in that sector, the defending English artillery and infantry (9th Devonshire) were overrun, many of the guns destroyed if not captured, and the English colours taken by 6eme Regiment de Legere. But even before then, as mentioned earlier, elements of our light infantry were established firmly upon the western slopes behind the town.
Fixed as they were along the river line and defending the village and its environs, the allies foung it difficult, despite the presence of large reserves to contain the irruption of French troops into the angle of their position. Brigade General Simon's chasseurs and voltigeurs were bringing the disordered Allied infantry under fire already...
...and soon masses of our troops - Simon's 9th and Marcognet's 6th Brigades were pinning down and wreaking heavy execution among the defenders.
A general view of the battlefield. General Loison (Geoff) and Marshal Beresford (Ross) contemplate their next moves...


Not content simply with holding his position behind the town, Ney ordered Bardet's 7th Brigade to exploit on through the woods at the foot of the far slopes of Guarda Hill. There they dropped into fire action behind an Allied company of Light artillery before either was aware of the other (Fact was, Ross - General Beresford - his attention fixed on the riverside action, hadn't taken enough notice of events in that part of the world, which meant the infantry of 6th Light got into the woods without coming under fire from the guns). Although the Allied guns hastily turned upon the backs of the French skirmishers, their fate was soon sealed when they were overrun by another French unit following up.


As the day drew on with the Allies found themselves under unremitting pressure, the English Marshal suddenly ordered a general withdrawal. The Guarda garrison managed to break out by the last road available out of the town, and the enemy made off after incurring heavy loss.
At a cost of perhaps 1300 casualties on our side, we inflicted, we estimate, three times that number upon the enemy, and took some 450 prisoners (100 of them English). The trophies of the day included 14 guns and two stand of colours (one of them from 9th Devonshire Infantry).
Guarda remains in our hands, and we believe our position between the Allied wings will afford us certain advantages in the coming campaign.

I remain, etc etc
Andre Massena, Prince d'Essling, Duc de Rivoli, commanding L'Armee du Nord.

Tuesday, October 4, 2011

Battle of Guarda - Part 2


From: Marshal, Prince d'Essling, Duc de Rivoli,Andre Massene, commanding 'lArmee du Nord' in Portugal and Spain;
To: Napoleon, Emperor of the French, King of Italy etc etc

Sire -
I have the honour and pleasure to beg to report upon the recent victory by French arms over the forces and allies of the Perfidious Albion. After much manoeuvring, marches and countermarches, the larger portion of the Corps of the Duc d'Elchingen, Marshal Ney, brought to bay at the town of Guarda in north central Portugal that part of the Allies known as the Army of Portugal, under command of a Marshal Beresford of England. Owing to the difficulties of the terrain, the Duc d'Elchingen was instructed to take 3rd and 5th Divisions - the latter in brigade strength only - preceded by Lorges's Dragoons in a sweep into the right rear of the Guarda town, whilst 4th Division and P.Soult's light cavalry conducted a holding action in front. The latter was to become an all out assault if the opportunity presented itself.

The early attacks upon Guarda rapidly spread to both flanks. Soult uncovered a pair of Portuguese battalions in the North Woods; Guarda itself was strongly garrisoned, though a preliminary bombardment by the 12pr guns of the Reserve artillery somewhat reduced the strength of the buildings as strongpoints; the lead elements of 3rd Division ran into an English battalion and a battery flanking the south side of the town. There they discovered elements of another Brigade extending the enemy line into the South Woods.

With the action becoming general along the line, most of 6th Brigade of Marchand's Division, and all of Loison's and Lorges's commands were free to carry on their march deep into the enemy's southern flank. When it became apparent that 26eme Legere (9th Bde, 5th Div.) had swung north prematurely to engage the south face of the woods on their right, I felt it necessary to send to remind their commander of his instructions, which indeed he carried out much to my satisfaction thereafter.
Progress upon Guarda hill and the woods to the north was necessarily slow, given the difficulties of the ground even to light infantry. I and III battalions, 25th Legere (7th Bde) attacked the town itself...

...whilst their companion battalion (II/25eme legere) engaged the Portuguese Brigade to their right,...
...and II and III/6eme Legere attacked along the southern slopes of Guarda Hill.

With parts of 5th and 6th Brigades gradually driving back the enemy, and the rough going on the enemy flank found to be clear of the enemy, Marshal Ney could be seen resolutely striking out with his troops for the distant ridge.

Our earlier appreciation having determined there must be at least as many more enemy foot troops hidden as had already been disclosed, plus his horse and much of his artillery yet to be developed, we had some reason to apprehend what might lie upon the further side of that long and lofty eminence guarding the Anglo-Portuguese right rear...
When at last the lead elements of Ornano's Brigade (15eme Regiment de Dragons)crested the heights, the sight that greeted them was such as to afford considerable relief from the tension of not knowing what lay on the far side of the hill.
A whole brigade was found on the near bank of a stream, hastily forming square. Some distance to the Dragoons' left front, and on the far bank, a redoubt had been built that contained a battery of guns, sited, fortunately for us, facing due south, and so unable to quite to bring the dragoons under fire. Also upon the far side of the stream, could be seen the mass of General Grant's Division of Dragoons, more infantry at least another brigade, and a gun battery that caused some damage to our 15th Dragoon regiment before it could retire behind the crest.


Altogether, what had been disclosed gave us confidence that this action would end favourably to us...


To be continued...

Sunday, October 2, 2011

Battle of Guarda - May 1810


Marshal Massena's first battle as Commander in Chief of l'Armee du Nord, has taken three campaign months of strenuous marching and countermarching to bring about. The Vive l'Empereur Peninsular Wargame campaign has been going on for over a year, now, interrupted from time to time by earthquakes and heavy snowfalls, with very little action in Portugal to show.

In the South, Marshal Soult and his subordinates (Generals Suchet and Sebastiani de la Porta, and I think Marshal Mortier) have been beating the Spanish time and again, though the Iberians seem still to be popping up here and there to create nuisances of themselves. The only involvement of the L'Armee du Nord occurred when Junot's VIII Corps march upon Badajoz was briefly interrupted by a Spanish force defending the sole river crossing of the Guardiana River. Junot's operations in the western parts of Estremadura had to be rethought when the pitifully small garrison in Madrid was driven out by a popular uprising.

Meanwhile, it was looking as though Massena was being forced out of Portugal without a major action. Having fortified Guarda - an important road nexus - Massena reluctantly evacuated the place and fell back upon Almeida, just barely inside the Portuguese frontier with Spain. But then, certain intelligences brought by his aggressively handled cavalry operations suggested there might be at Guarda an Anglo-Portuguese force of a size worth attacking, but not so large as to make the undertaking too hazardous.


The Marshal Prince of Essling at once seized his chance. Wishing to report to Paris that if he had to abandon Portugal it would not have been without a fight, he was prepared to take a chance on the enemy proving even somewhat stronger than his own. The estimates were that numbers in all arms were roughly equal. As it happened, Massena slightly misinterpreted the information, thinking the enemy infantry to be numerically somewhat stronger. As it transpired his overestimation of the enemy foot was matched by his underestimate of the enemy artillery.

Arriving east of the town the Marshal was faced with a formidable position: the place itself crowning a lofty, very difficult, ravine-scarred eminence flanked by woods that presented an almost insuperable obstacle to his cavalry. His initial idea of a sweep around the north he ruled out of court after a close reconnaissance of the terrain. It had to be a left hook - and that didn't look very appetising, neither.

Fortunately, in Marshal Ney (Andrew Taylor, who had under his own hand 9 battalions and the 8pr company of Marchand's Division), and his Divisional commanders (Geoff had Loison's single [9th] Brigade [4 bns], Lorges' sole [2nd] Dragoon Brigade [3 regiments] and an 8pr company), the Prince had subordinates of the same mind. It was a simple matter to draw up the battle plan, based upon the line he expected the enemy to occupy. I (Massena) doubled up by taking the roles of General Mermet (7 battalions of 4th Division), the 12 pr guns of the Reserve artillery, and General Soult (2 light cavalry regiments). That seemed to me a fair division of roles among the three of us.


Directing the Marshal Duke of Elchingen to lead the left hook by Marchand's and Loison's Divisions, preceded by Lorges's dragoons, 'Massena' adopted an overseeing role, content for the most part to let his subordinates to get on with it (What this meant was, the 'Marshal Massena' figure stayed close by 'Marshal Ney' whilst I also took command and spent most of my time as 'General Mermet' of 4th Division and 'General P.Soult's' brigade of chasseurs-a-cheval. Occasionally I would check out how things were going and take pictures. Once I did 'send a message' to 'General Loison' (Geoff) when I thought his troops were swinging north prematurely, but that was much later in the day).

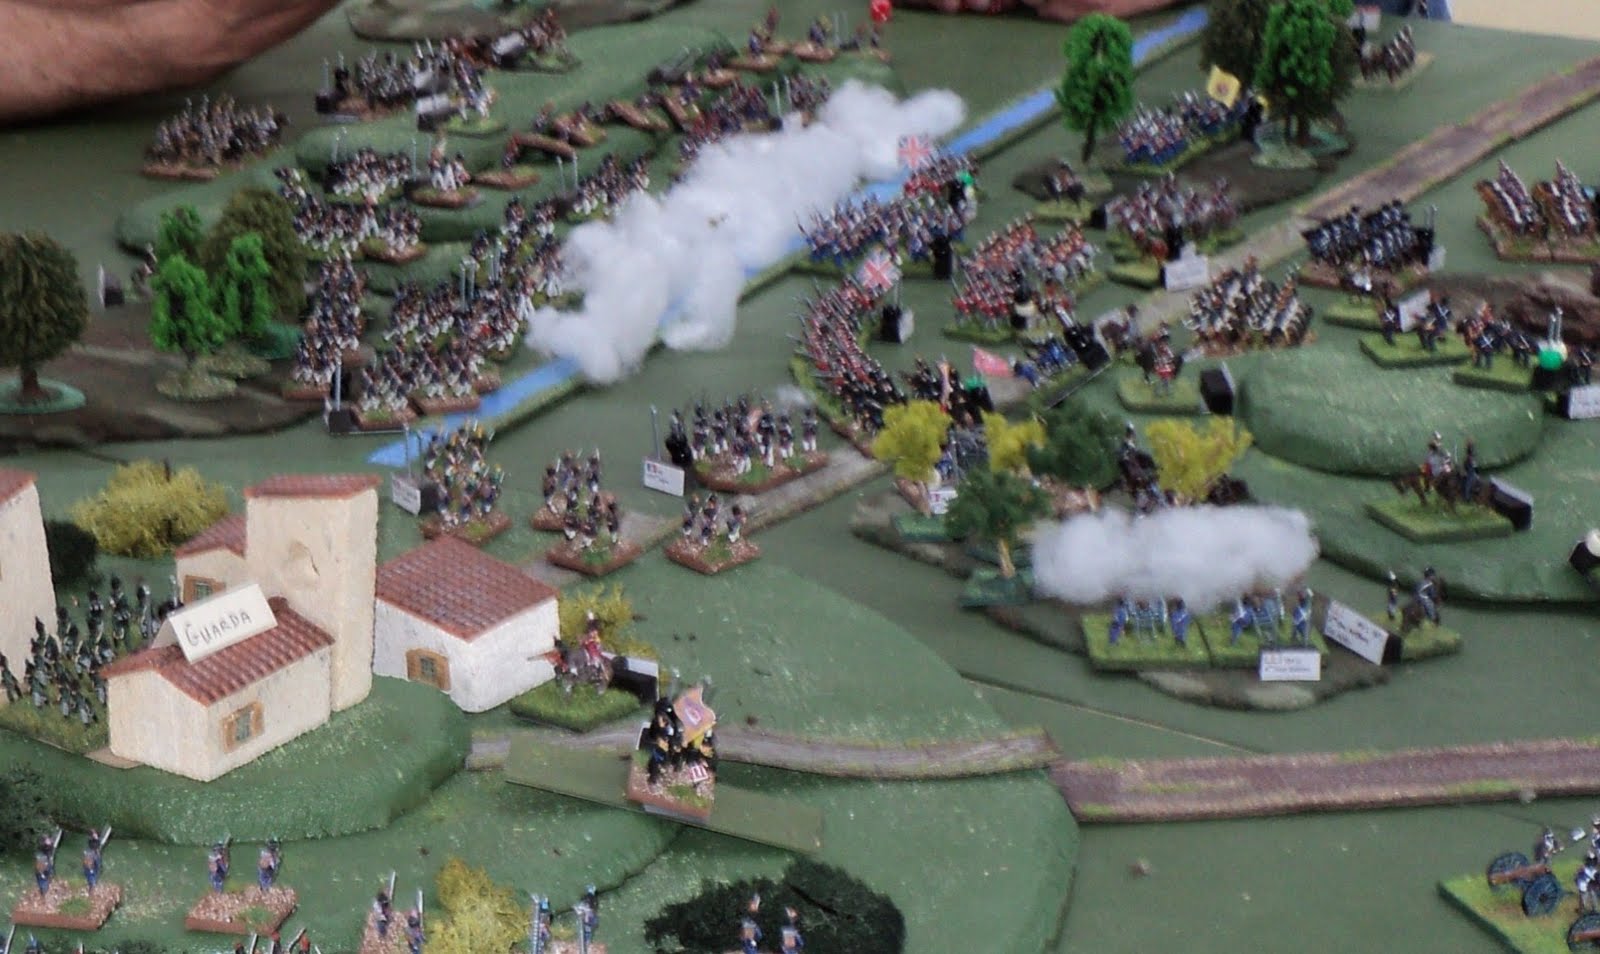
The French general advance shortly before 9:00 a.m. Already the general plan of attack is taking shape. In the foreground, Soult's Chasseurs have discovered two Portuguese battalions lining the woods north of Guarda; and the leading elements of Bardet's 7th Brigade are beginning the climb towards the town itself. Meanwhile the rest of Ney's VI Corps are marching into the Alied left flank and rear...
The first contacts upon Guarda Hill itself, and in the thickish woods (classed as 'medium' in Colin's rule set) to the south. The sole unit of light infantry in the Allied army - a corps of tiradores - were lucky to survive being attacked front and rear by French light troops. They flung back their assailants and managed to extricate themselves behind a unit of Portuguese line infantry (classed as militia in this campaign).

In the Comments to a previous article, I was asked about the little blocks of wood with the two nails sticking out. The rule set we are using have been authored by Colin Foster, the Duke of Wellington in this campaign, and at whose place we fought this action (and as fine a wargaming venue as you could wish).

To the blocks can be pasted labels identifying units and commanders, and the nails hold beads that log information. The black beads (which for some reason we call 'pips') tell us whether and to what extent the unit may act. Each bead signifies an action and is removed when the action is carried out (shooting, moving, changing formation). A unit can continue acting until it runs out of 'pips'. 'Pips' can be carried over into an opponent's bound, which allows it to react to opponent's action. They aren't carried forward any further, but are renewed at the beginning of the player's own bound. In effect you top up unused 'pips' to the unit's maximum allowanc). This allowance, the number they receive, depends upon the unit's quality (raw, experienced, veteran) and whether it in under command (i.e. within the command radius of its brigade commander). Additional 'pips; may be allocated by higher command when certain conditions are met (which is why 'Massena' (the figure) remained close to the main action throughout the day).

The other nail holds beads of other colours, and shows the unit's morale state - from extremely enthusiatic to completely routed. A given unit's 'ground' state is 'beadless'. When a unit takes a hit, it receives a white bead (in addition to any beads signifying atate of morale). A second hit means an element (roughly 100 infantry, 75 cavalry in scale terms) gets removed, along with the bead. The bead signifies a 'helf-element' loss.

I find the system quite simple to use, quickly informative and visually not unappealing. It reminds me somewhat of John Sandars's log-pin system for his Sandskrieg game. Mind you, threading the beads on the nails when one eye doesn't function properly can be a bit... awkward...

To be continued...