Friday, December 12, 2014

Battle of Hughesville.

Although this is kind of a 'Big Battles for Small Tables' gig it isn't really part of my Napoleonics BB4ST project - not even close - I was feeling the need to get a little action in, and something or other reminded me that, since a few articles late last year, I had done nothing more with the Age of Empires figures I had been given.


The important road nexus of Hughesville, looking north.
  Getting wind of the approach of Ruberian troops from the
northwest, General Beauford positions his cavalry on
Abbey ridge. Meanwhile 2nd Corps is hurrying up to help.
There was that about this collection of stuff that I felt not only would not 'go' with my Azuria-Ruberia armies, but that seemed to ask for an entirely separate, map warfare, type of treatment.  The sort of thing I had in mind was expressed in a thrown together 'Gettysburg' action (see April last year) using a few of my ACW figures.  At any rate, what follows was more thoroughgoing play test of my combat mechanics for this ... erm ... Era of Imperialism ...uh ... concept.

The rival nations, Azuria and Ruberia were, as usual, at odds over some trade dispute, which, of course, meant that every other grievance, accumulated over centuries of contention, got an airing. For that reason, war was the usual state between them.  The military theorist, Carl von Clausewitz more than once remarked of the relations between Azuria and Ruberia, that negotiation was 'the continuation of warfare by other means.' So ingrained had become the recourse to war.

Hughesville from the northwest.  The Ruberian III Corps
is approaching the town, but will have to get past the Azurian
Cavalry Corps to reach the place.
Seeking to try conclusions with the double-dealing Azurians, a Ruberian Army was sent marching into Azuria territory under the command of Robert E. Windward.  It comprised the following:

Army of Ruberia, General Windward:
I Corps (Lt-Gen J. Longbottom)- 5 Infantry brigades, 2 Cavalry brigades, 1 Artillery park
II Corps (Lt-Gen R. S. Earwaker) - Ditto
III Corps (Lt-Gen A. P. Ridge) - Ditto
I Cavalry Corps (Maj-Gen Jeb Douglas)- 5 Cavalry Brigades, 1 Artillery Park.

III Corps begins its assault on Abbey Ridge.
To eject the despised invader from the sacred soil of Azuria, the able and aggressive General George Beere was placed in command of an army that comprised:
As the Ruberian attack begins, 2nd Corps is not far off.
But 2nd Corps would never reach Abbey Ridge...

Army of Azuria, Lieut-General Beere:
1st Corps (Maj-Gen Reynard)- 5 Infantry Brigades, 2 Cavalry Brigades, 1 Artillery park
2nd Corps (Maj-Gen Wolowicz) - Ditto
3rd Corps (Maj-Gen Scythes) - Ditto
1st Cavalry Corps (Maj-Gen Beauford) - 5 Cavalry Brigades, 1 Artillery park.

Beauford's Cavalry gives a remarkably good account of itself:
III Corps lose a gunner and a cavalry figure, and two foot units retreat.
The Azurians suffer no loss.
In the following action, each brigade is represented by 1 figure.  A foot figure represents 4000 infantry, a horse figure 2000 cavalry, and each gunner figure, 1000 gunners.  Each gun model represented a park of 80 guns, served by 2000 gunners.  These gunners were supplied by what I think were explorer and surveyor figures from the original AoEmp game set.  You will notice, by the way, that other than receiving green-painted bases, the figures remain in their original state.  My intention is that they remain so, keeping their symbolic nature.  Actually I simply like them that way.

As the battle rages for Abbey Ridge,
 both sides' Second Corps are heading
 for a clash northeast of  Hughesville...
Receiving intelligence of a Ruberian patrol entering the town of Hughesville in the evening of 30 June 1873, General Beauford at first light the following day marched the few miles separating his command from that town, and, passing through it, crested Abbey Ridge, overlooking the northwest road.  Sure enough, there was a strong force, III Ruberian Corps, rapidly approaching (In the following account, Ruberian Corps numbers are in roman numerals; Azurian in arabic).
Both sides' First Corps hurry to the guns via the western
approach roads.
Having sent back a 'Come up, quickly!' message down the road, Beauford could see far to the southeast the head of the 2nd Corps column coming up fast.  All the same, he knew he would have to hold for a couple of hours at least before help would arrive.

Yet it seemed that help would not be needed, for the Azurian cavalry were giving a very good account of themselves.  The first attacks silenced half the enemy artillery, broke a cavalry unit, and forced two infantry brigades to retreat, for no loss to the defenders.


This is the benefit of the Cavalry Corps: having no infantry, it ignores infantry losses.  Its own firepower is less than 2/3 the standard army Corps, so combats between the two can be very chancy. Combats are determined by Corps [or detachments thereof] forming a combat group, in which each infantry gets 2 dice, each gunner gets 2 and each cavalry gets 1.  A combat group gets (quite arbitrarily) two additional dice.  So an army corps of 5 foot, 2 gunners and 2 horse gets 10+4+2+2=18 dice.  

The Ruberian III Corps is getting a serious mauling
from Beauford's cavalry.
Scores of 1 affect artillery, 2 and 3 affect cavalry, and 4,5,6 affect infantry; as follows:
2 ones - gunner retreats (taking the gun with him if he is the lone survivor); 3 ones - gunner lost;
2 twos - cavalry retreats; 3 twos - cavalry destroyed;
2 threes - cavalry retreats; 3 threes - cavalry destroyed;
2 fours - infantry retreats; 3 fours - infantry destroyed;
2 fives - infantry retreats; 3 fives - infantry destroyed;
2 sixes - infantry retreats; 3 sixes - infantry destroyed.


[Just as an aside, an alternative convention comes to mind.  A result is scored for every pair, but only threes destroy cavalry and sixes destroy infantry.  The first gunner hit is destroyed only if three or more ones are rolled.  On reflection, I'm not sure this is any kind of improvement.]

For the heavy losses they have taken, the Ruberians have
small success to show: one cavalry brigade bugging out.
The advent of  Ruberian column descending the northeast road forced 2nd Corps to divert its attention thereto.  This left Beauford's cavalry not only facing III Corps, but a further Ruberian Corps - the Ist - which would clearly be adding its weight before any real help could arrive.  All the same, the Azurian horse was handing III Corps a real drubbing.  After two hours of fighting III Corps had but two brigades remaining in support of its reduced batteries; having driven away only one enemy brigade.

The battle escalates.  Two Corps clash on the NE road,
and the Ruberian I Corps joins the fight for Abbey Ridge.
Last reserves racing to
join the action.
As the Ruberian I and II Corps entered the fight, the Azurian 1st Corps deployed some distance from the action, whilst 3rd Corps was still further off southeast of the town.  At the same time the Ruberian Cavalry corps was hurrying down from the northwest.

3rd corps still some distance from the
town.  By the time they threaded through
 the place, the battle was over.
Though III Corps had been thoroughly mauled, the Azurian cavalry now faced I corps in addition. It seemed likely, too that 1st corps would be intercepted by the fast-moving Ruberian cavalry. With aid still far off, the fight began to turn against the Azurian horse. Although destroying one brigade and forcing another to retreat; although silencing half I Corps' artillery; the Azurian horse artillery was altogether reduced, a cavalry brigade destroyed and another forced back.


Now losses to Azuria's Cavalry Corps begin to mount... 
Considering the odds, this was a fine performance by the Azurian horse - a battle-winning performance, withal.  But the writing was on the wall.  They could not hope much longer to hold out.

...but they continue to give back measure for measure!

Meanwhile, a ferocious battle begins
north of the town.
On the northeastern flank, the respective Second Corps of both armies clashed close by the town.  At once they tore great clumps out of each other, shredding themselves to pieces.
Both sides are reduced within
 the hour to remnants 
Within the hour, barely a rump of both Corps remained to claw away at each other.


The tattered remains of both Corps are still capable of
inflicting damage.
Despite their stout resistance, the Azurian Cavalry Corps was at last driven in - I Corps proved much the more effective in combat than their compatriots in III Corps.  Before 1st Corps could intervene, Abbey Ridge had perforce to be abandoned.  But by now its was becoming apparent to General Windward that victory was already out of reach.  There was one last throw of the dice: to switch I Corps to the right alongside the Cavalry to attack the enemy 1st Corps.
The last pockets of Azurian resistance on Abbey Ridge
are overcome.  But the Ruberians have been made to pay! 
If a decisive result could be obtained here before the battered remains of III Corps came under serious pressure, the day might yet be won.  

As III Corps covers the town, I Corps swing southwards to
join the battle west of the place.
Whilst the fight on the northeastern flank sputtered on, the main action now flared up almost due west of the town.
Though outnumbered, the Azurians once again punch well
above their weight.
Once again the Azurians' rifle and gunfire shredded the Ruberian attackers...
The Azurians rip shreds out of  the Ruberians...
...who, nothing loath, were cutting up the Azurians with equal ferocity.  The Ruberians lost an infantry and cavalry units and half the horse artillery, whilst a further infantry brigade staggered out of the fight.
Whilst the Ruberians tear chunks out of the
Azurians.
In requital they wrecked a foot and two horse units.  Such savagery could not last long.  This had been amply demonstrated on the far flank, with both sides reduced to mere shadows of their former strength. In the final exchange, the Ruberians got rid of the last enemy infantry brigade, but themselves were driven from the field (the remaining foot and artillery units get retreat results).
Closing action north of the town: the Ruberian II Corps is
forced to retreat.
All this was enough for Gen. Windward, who now sounded the withdrawal of his whole army. Leaving the Cavalry Corps to hold back the Azurian 1st Corps,  the Ruberians broke contact and streamed off up the northern roads. Seething with rage at the missed opportunity, the troops of 3rd Corps recovered the crest of Abbey Hill without a fight.
End of the action.  The Cavalry Corps manfully covers
the Ruberian Army's withdrawal from the field.
The rearguard action was a qualified success for the Ruberian Cavalry Corps, driving off two brigades from I Corps, but it cost the entire Corps artillery park. 
The cavalry administer a check, but lose their artillery.

At once the Cavalry Corps made off, following the rest of the Ruberian Army as it quit the field.  The action was over, a clear cut victory to Azuria - the more remarkable for 3rd Corps never having been engaged for the entire action.
Victory!  The Azurian Army watches as the Ruberian
Army quits the field.
Now, during the course of this battle, I took retreated and destroyed units off the table, but only the latter were classed as lost.  So below are the 'actual' casualties of the battle.  The Ruberians lost 8000 horse, 24,000 foot and 2000 gunners - a total of 34,000 casualties out of the 90,000-strong army. 
The Butcher's Bill: Ruberian losses (destroyed).
Among the Azurian Corps engaged, losses were heavy indeed.  Minus 3rd Corps, just 64,000 troops had been engaged.  Of these, 10,000 horse, 16,000 foot and 1000 gunners were laid low: a total of 27,000. A Pyrrhic victory, perhaps, but it ended the invasion at once.  The Ruberian Army was left in no condition to test once more Azurian mettle.

A few points worth (perhaps) mentioning:
1.  Rather than being taken right out of the battle, retreating units should be pulled back, say, 30cm (a foot), and remain there, unable to advance.  Maybe they should be reactivated if the parent Corps falls back to rejoin it, perhaps even subsequent to that to be allowed to advance.  This may, however. make victories much harder to obtain, and certainly would increase casualties.  
The Butcher's Bill: Azurian losses (destroyed).
2.  All combat was by Corps - results between them were not combined, even when applied to the same target.  However, attacked by two Corps as the Azurian Cavalry Corps and 1st Corps was, the total was added and losses selected from among the attacking enemy.  Better might be to split the fire between the two targets as makes sense.  For instance, in its opening action, 1st Corps could have divided its fire with one Cavalry plus two Infantry shooting at I Corps, and three infantry, one cavalry and the guns in combat with the Ruberian Cavalry. 

Both groups would get the arbitrary two dice extra for each combat group (7 and 13 rather than 18 overall), and this would offset partially the disadvantages associated with smaller combat groups.

3.  I haven't explored other kinds of detachments from Corps.  This is definitely weakening, even given the apparent extra firepower (mostly illusory). However, defensive locations, such as built up areas around traffic node points might well be worth garrisoning at the expense of the field army.  At that, some defensive value should be placed upon the strength of such places.

Monday, December 8, 2014

Big Battles for Small Tables: A question of gunfire.

French Army Corps  'medium' (8pr) artillery.  with four
crewmen, this represents a park of 32 cannon.
The core of any war game has to be the manner in which combat is carried out and adjudicated. I thought I would take this in three phases: Artillery, musketry, and close combat.  The last of these will also subsume musketry at very short ranges, but also the effect of two sides attempting, by getting 'up close and personal' to intimidate the enemy into making off towards the skyline.

One of the problems I tend to associate with quite a few rule sets designed for large-scale battles, is the apparently vast numbers of cannon you seem to need.  An example is Age of Eagles, an admirable and well-researched rule set. A scenario like Quatre Bras (in the rule book) is actually quite manageable - involving, all up, 576 foot figures (144 stands),  98 horsed (49 stands) and 16 guns - each gun representing a company-sized battery of 6  or 8 cannon. 

Personally, I think that is a highish sort of ratio of model gun per figure on the war games table.  But one has to bear in mind the 15mm scale, and the whole game design.  I'm having to design my set for 25/28mm figures in the same kind of space.  I could, I suppose, simply mount infantry in pairs and cavalry singly on the 15mm-scale bases (with some trouble in the case of the foot), but then the gun-to-figure ratio gets really weird (288 foot, 49 horse and 16 guns... not a good look, for mine).
A Russian battery of 16 cannon, as indicated by the two crew figures.  The figures are not placed on the gun stand, but
in edge or corner contact with it.  Probably 3"x3" (7.5cmx7.5cm) stands would have been a better choice for several
reasons, but my own armies will soldier on with the 7cmx7cm stands...

But the fact is, I simply don't have so many cannon.  My initial thought was simply to state that one model cannon would represent the Army Corps inventory, with each crew figure counting as eight guns.  A French cannon piece with a crew of 4 figures represents a total of 4 gun batteries of 8 pieces each: 32 cannon overall.  It turns out this is a very flexible method.  A crew of three figures represents a 24-gun inventory, two figures only, 16.  You could then represent a company-sized battery by a gun with a single crew figure, though, to be honest, I would prefer to keep two, even if one is a 'supernumerary'.
Although most of my cannon profiles (stands, sabots) are flocked
 card a few have been fashioned, as here, from carpet tile
off cuts.
Now, for a number of reasons, I want to place my cannon on triangular 'profiles', not fixed thereto, the profiles remaining separate (you could call them sabots, I suppose).  My profiles are 7cm wide by 7 deep (though I now wish I'd made them 3 inches wide and deep - too late!  The immediate problem I had to consider was how long a front was presented by a battery of cannon.  The Age of Eagles rule set allowed 3/16 inch per historical gun, which translates to a 1.5-inch frontage for an 8-gun battery - that is 180 yards.

An Austrian park of 24 cannon - either 3 batteries of 8, or
4 of 6.  One crew figure stands at a front corner to signify
the wider frontage to accommodate the number of cannon.
That seems to me rather a lot of room, and some wider ranging research suggested this sort of dispersion had something to do with the turning circle of the long French caisson. Other figures were quoted here and there, without leading to anything I could regard as definitive, but which seemed to indicate that a 180-yard frontage for an 8-piece battery was more than usually generous.   Now, Terry Wise mentions in his Airfix American Civil War rule set that a 4-gun CSA battery occupied some 55 yards of front; a 6-gun Union battery 82 yards.  Fascinating choice of numbers, this: subtract 1 from both, and the ratio 54:81 is the same as the number of pieces, 4:6 (2:3).  Staying with this, an 8-gun battery might well occupy 108 (109) yards of front, 16-guns - 216 yards (217); 24 guns - 324 (325) yards; 32 - 432 (433) yards.
The French 32-gun park, again.  Again to indicate the wider necessary frontage, a crew figure is placed at either front
corner of the gun stand.  As will be shown below, this does not affect the arc of fire of the battery, defined by the
rear angle.

Well, my 7cm frontage at 1:3600 ground scale represents only 252 metres - 280 yards - enough to accommodate 20 or 21 cannon only, using Terry Wise's system.  There is a way to extend the frontage, though not, as you will see later, the arc of fire.  Now, the gun crew figures are not intended to stand upon the gun profile itself, but in contact alongside, as you will see from the pictures.  Stand a figure at one of the front angles, will extend the battery frontage to 8.5cm (scale 306m or 340 yards), and another at the opposite corner extends it to 360m or 400 yards.  Not quite 432, and a 3" frontage would have brought us closer, but on the whole I regard this as sufficiently satisfactory as to run with it.

Just as well, for the 7cm size stands was chosen originally with aesthetic considerations in mind.  I did not want the piece to be 'lost' on a stand too large;  preferred a size that would enable to place the crewmen close by the piece but not on the gun stand itself; and wanted the angles to indicate the arc of fire.  Having said all that, I am considering making smaller profiles for guns representing single batteries, as an ad hoc measure.  By the by, a park of 4 x twelve-gun Russian batteries, say, would be represented by two guns each with 3 crew men.
32-gun park.  The conventions adopted here are partly for aesthetic
 reasons, involve a certain degree of fudging, but has some
 justification, I think. See text.

As indicated earlier and in the immediately preceding diagram, the frontage added by the flanking crew figures to accommodate the 32 guns on the ground, does not change the arc of fire.  This is quite frankly a matter of convenience.  I don't want 10-cm wide bases.  But I also imagine that the broader the battery, the less capacity - relatively speaking - it has to angle its fire to a flank.  A good deal of this I accept is arbitrary, but is intended to subsume the limitations of Napoleonic artillery concerning target selection.  

Having chosen my battery scale, it remained to decide whether each cannon piece represented artillery in general, or the size of ordnance the piece itself represented.  My first thought was to keep it simple - each piece being treated the same.  But as my armies do have cavalry formations (especially my French Heavy Cavalry Corps), and as heavier calibres tended to be held as Army rather than Corps equipments, it seemed appropriate to separate the capabilities, at least in terms of ranges. At that, I seem to recall reading somewhere that the French never - or hardly ever - employed the heavier 12pr guns and 8-inch howitzers in Spain or Portugal.  I stand to be corrected on this, as with anything else, but given the types of terrain often fought over in Spain, that seems a plausible enough story.

So ordinance will be designated 'Light' (which will include 'Horse'), 'Medium' and 'Heavy.'

Light pieces; 3-4 pr guns, and 'light' 6pr.  The British and the Prussian 'light' (horse) 6-pr guns had shorter barrels than their 'medium' (foot) 6pr, and its ammunition more suited to its light or horse-artillery role.  Also include the type of howitzer used with such batteries (e.g. the British 'light' 5.5-inch, Prussian 7pr).

Medium pieces: 8-9 pr guns and the 'medium' 6pr used as foot artillery; 'Medium' 5.5" or 6" howitzer; 7pr howitzer.

Heavy pieces: 12pr guns and 10-20pr or 8" howitzer.

Ranges
Canister
Effective
Maximum
Light
0" ≤ CAN ≤ 4"  OR
0cm ≤ CAN ≤ 10cm
4"  EFF ≤ 8"  OR
10cm  EFF ≤ 20cm
8"<MAX≤12" OR
20cm<MAX≤30cm
Medium
0"<CAN≤5" OR
0<CAN≤12.5cm
5"<EFF≤10" OR
12.5cm<EFF≤25cm
10"<MAX≤16" OR
25cm<MAX≤40cm
Heavy
0"<CAN≤6" OR
0<CAN≤15cm
6"<EFF≤12" OR
15cm<EFF≤30cm
12"<MAX≤20" OR
30cm<MAX≤50cm

I will leave it here for now, and look into the question of fire effectiveness next time.

Acknowledgements:  To my 113th follower, Pat G.

Further Work in Progress: 
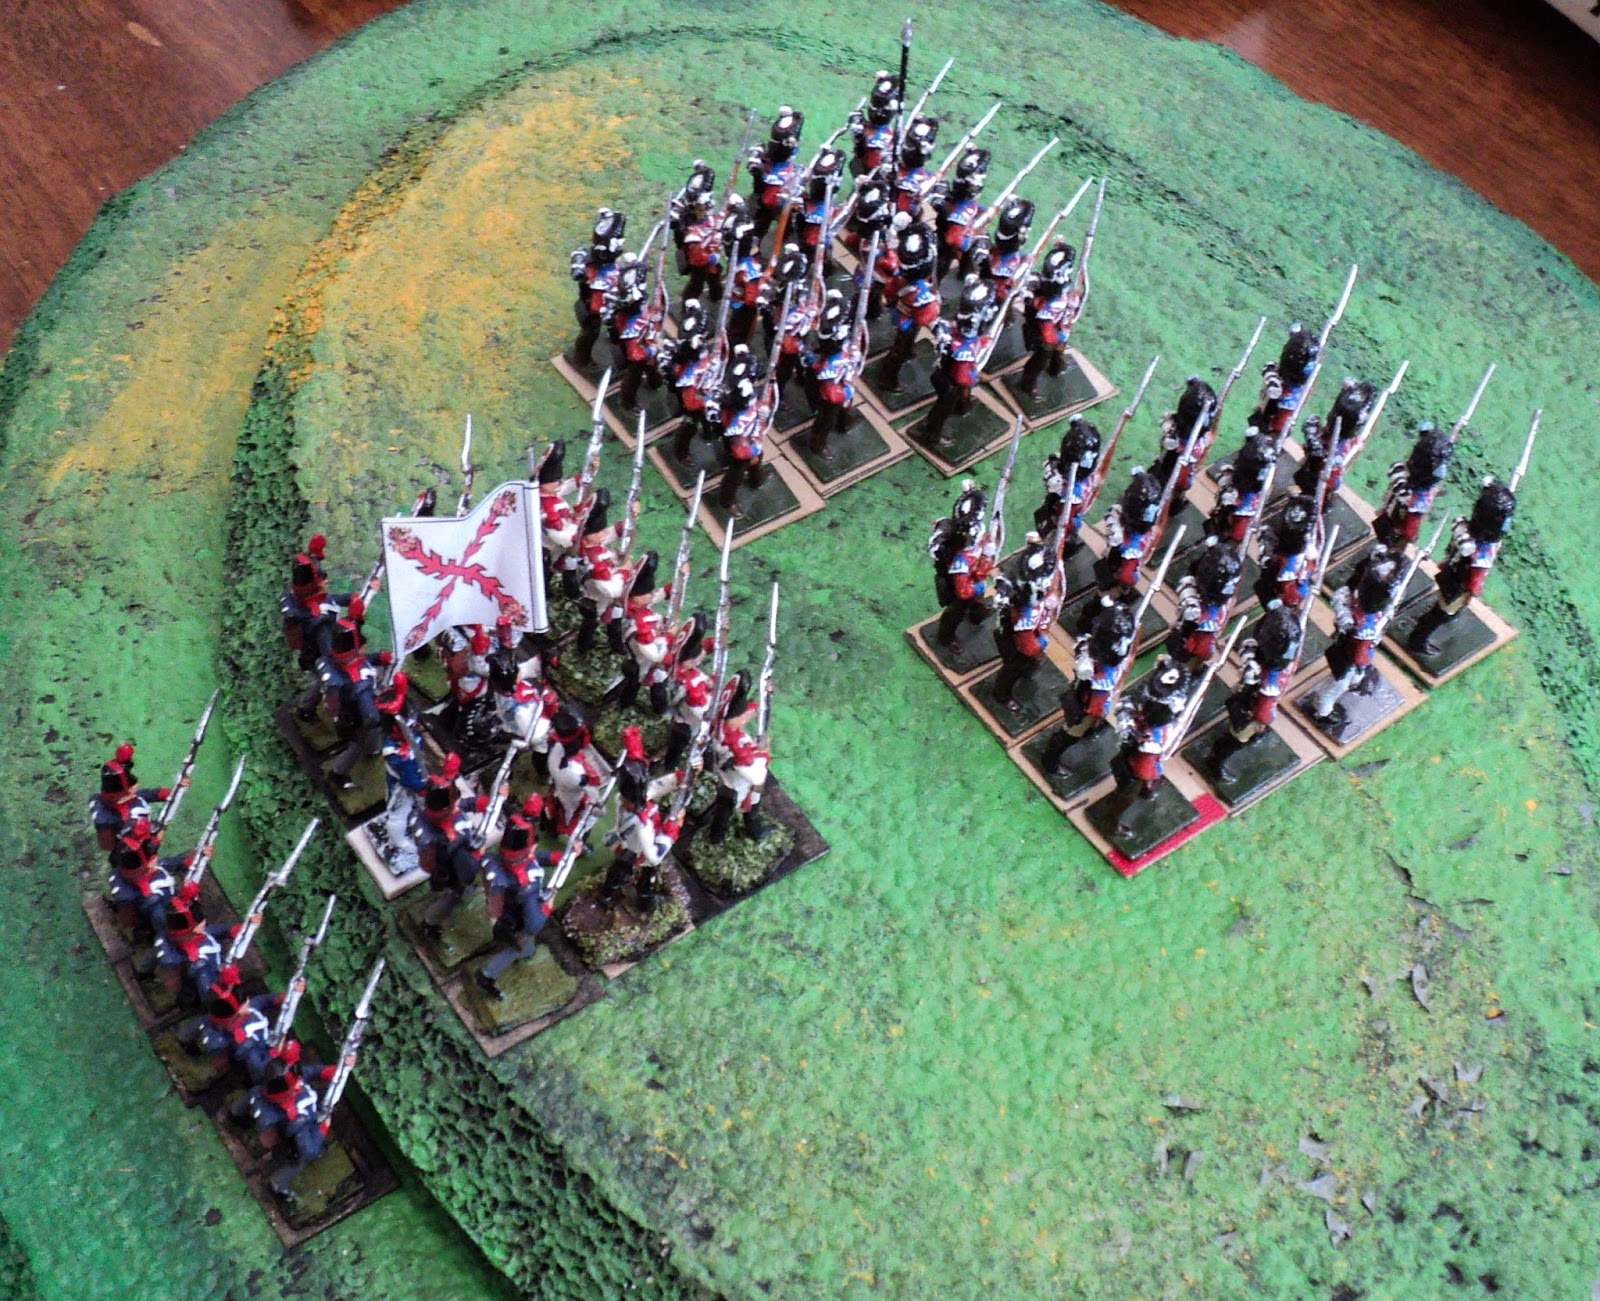
Here are a few pictures of my very fudgy and anachronistic British and Spanish units:
Very much still WIP - but already looking like something.  These were obtained in a bring-and-buy several weeks ago.   A rather more ... erm ... eclectic collection than I realised at the time. 
It turned out that most of the figures sold as British 'Guards' were actually Fusilier figures from the Minifigs range, distinguishable by the discerning and knowledgeable (i.e. not me) not only by the shape of the bearskin cap, but more particularly by the patch ('bag'?) at the rear.  That would have been fine, but only 10 of the 34 figures (33, actually, but I had a spare fusilier figure lacking a bayonet to his musket, now rectified) were Guardsmen.  What I have done for the time being is to form these guys into two units, one of 18 figures, the other of 16.  The genuine guardsmen have gone into the smaller unit.  As it happens, that unit is lacking command figures.  I hope in the fullness of time to add more guardsmen and guards officers to that unit, and transfer the supernumerary fusiliers into the other.  
The Spanish unit, meanwhile, is a mix of 1808 Grenadiers and 1812 ... Line Infantry(?).  In itself, it doesn't look too bad at all.  I guess in the end I'll just have to live with its 'wrongness'.   As I rather like the distinctively Spanish look of the 'ruguly saltire' that was the flag design chosen for this unit. Often I like to alter the downloaded image from oblong to a parallelogram (using the 'skew' feature in Windows Paint), but as the staff is held very nearly upright, I didn't trouble.  All the same, it is a practice I recommend highly, even for upright flag staffs.  For those held at a marked angle from the vertical, 'skewing', in my view, is a must.  Just for variety, I'll vary the skews from a mere 5-degrees to as much as 15.

The acute observer might have observed the marked sheen on the musket barrels and bayonets.  It's a 'thing' I have about gleaming bayonets. Very Freudian, I dare say. To achieve this effect I mix silver with gloss black.  It so happens this particular batch was a bit lean on the black.  Several years of experimentation with this technique has indicated that it works best with Humbrol enamels - I've never got it to work so well with acrylics.  This 'gloss black and silver' concoction I use for anything purporting to be burnished metal or iron or steel weaponry.  It is simple, requires no outlining or dry-brushing, and looks good.
In your face bayonetry...

On a totally unrelated topic, the 'Lonely Bool' depicted alongside is from a bottle of Sangre de Toro vino from way back when.  It has been sitting in a drawer for decades, gone through five or six changes of abode at least, including a move to another city.  High time it found useful employment ... pulling a cart, say. My armies need logistic elements...
A lonely bull fortunately being ignored by Allied infantry
apparently focused upon more important matters.

Wednesday, November 26, 2014

Something a bit ... different.


It was when commenting in my previous posting, and thinking about 'Pickett's Charge' in terms of time elapsed from the order to attack, to General Armistead's crossing the stone wall into the Union postion, that I was reminded of something I have been meaning to for quite some time.  I recalled a National Geographic article in the Gettysburg and Vicksburg centenary issue of  National Geographic (Vol 124, Nr 1, July 1963), which showed some very fine maps of the unfolding action.

Double-plus page spread of Gettysburg, Day One.

Detail of the first day's encounter battle.
Gettysburg: the second day.

Gettysburg: the third day.


Detail of what was to become popularly known as ...
Pickett's Charge.

These images have always been a favorite with me, since seeing this at age 12.  I longed to do something of the sort myself.   Many, many years later, but so long ago now I don't recall precisely when - early 1980s, I think - I did embark on such a project.  And here is the result.
Having read Wiley Sword's (now there's a name!) Shiloh: Bloody April (1974), I meticulously copied, by hand, all the many maps included in the narrative.  I highly recommend that book by the way.  But as I found it very difficult to follow the overall first day action, I made a kind of combined map.   It seemed to me that this map could be given the 'National Geographic' treatment.  The following pictures show details from the map, in a vague chronological order as the events unfolded.
The Confederate Army approaching the somnolent Union Army
early of an April morning, 1862.
Beginning with the bottom left corner, we have the Confederate Army drawn up in successive Army Corps lines, according to the scheme drawn up by General P.G.T. Beauregard.  For the purposes of this map, the brigades of each Corps were identified by their flag designs. Hardee (III Corps) had gone for a blue flag with a white roundel or oval;  Bragg (II Corps) I issued an early 'Stars and Bars' battle flag; Polk's troops (I Corps) have the flag he designed, and I gave Breckinridge (Reserve Corps) a version of the well-known Beauregard-designed flag.
Peabody's and Prentiss's stand against the whole Confederate Army
I have to admit I never did finish the thing properly.  I notice now (having looked at this thing for the first time in years), that the flags of Hardee's Corps (really a Division) were neglected. And a few figures were overlooked as well.
I liked the idea of adding, again comme ça National Geographic, a narrative in panels around the map.  I could have designed them better, but they do help to follow what's going on, I think.
Taken by surprise Sherman's Division, later joined by McClernand's
 is gradually forced back.
Annoyingly, I too hastily drew the trees in with felt pen, a decision I greatly regret.  Nor is there much I can do about it, neither.  For the rest, the figures were drawn with water based ink pens...
The Hornet's Nest.  General Ruggles's 64-gun battery can be seen
upper left of the picture.
 ... and painted with gouache and water colours.The background is simply a watercolour wash.
Envelopment of the Hornet's Nest position.
I don't recall how long this thing took to complete - several days, for certain, but whether mostly in one sustained period of time or off-and-on over some weeks, I can't now be sure.  Probably the bulk of the thing was dome quickly, and it was finished - for a given value of 'finish' - in a more leisurely fashion.  I had no deadlines to fulfil!
The approach of Lew Wallace's Division from Crump's Landing,
off the map to the north.
Overall, I liked the animated effect that the National Geographic artist achieved, not to mention the style of superimposing the figures upon a much smaller ground scale - just as we do with war games, though I did not know that when I first saw the publication.  At any rate, I tried to achieve the same effect here, whilst simultaneously adding a time-lapse effect in the same manner as the Bayeux Tapestry.
Final stand of Lt. Gen U.S. Grant's Army of the Mississippi,
late afternoon, 6 April.
How effective was it?  Well, I was fairly pleased with the overall narrative effect, though a few design glitches presented themselves.  Not knowing what the gunboats looked like, I presented them as 'generic' riverine craft.   But the main design problems came with the textual narrative.
The approach of Lt Gen Don Carlos Buell's Army of the Ohio,
together with the assistance of the gunboats Tyler and
Lexington, saves Gen Grant from total defeat.
I've had this picture rolled up, stashed away, and almost forgotten for perhaps as many as thirty years now, not really sure what to do with it.