
 |
| Genaral Scarlett's Battle Plan. |
As the Pardis River oozes its somnolent journey from Sakhdad, it interrupts its southward course with a wide detour to the northeast, past the town of Hak, until it reaches the village of Abu Rummar. Having discovered what might be seen there - not much - the stream resumes its former direction, which it retains with no further interruptions until it reaches the Gulf of Parthia nearly 300 miles to the south. So, in the opposite direction, one might have observed during August and September, 1875, a flow of a different kind: the advance of Major-General Scarlett's column of Ruberian and Rajistan soldiery - horse, foot and guns - its purpose to visit the Empire's wrath upon the perfidious Turkowaz.
 |
| Overview, facing north. |
It was upon reaching this Pardis 'dogleg', that Scarlett discovered a Turkowaz army awaiting him, a fortified line facing northeast astride the Pardis River, its flanks protected by impassible marshes. Protecting the Turkowaz far left flank were not only the marshes of Suwara, and a larger one just off the map to its north, but fortified strongpoints to the west of them alongside the Dahra irrigation canal. The treacherous Pardis River being crossable, apart from the at the towns (the hexsides of Hak and Abu Rummar), only at the bridges and at the Dahra Tower, the Ruberian main effort was indicated to cross the canal, carry the Turkowaz field works and redoubt, thence to force the river crossing at Hak itself.
 |
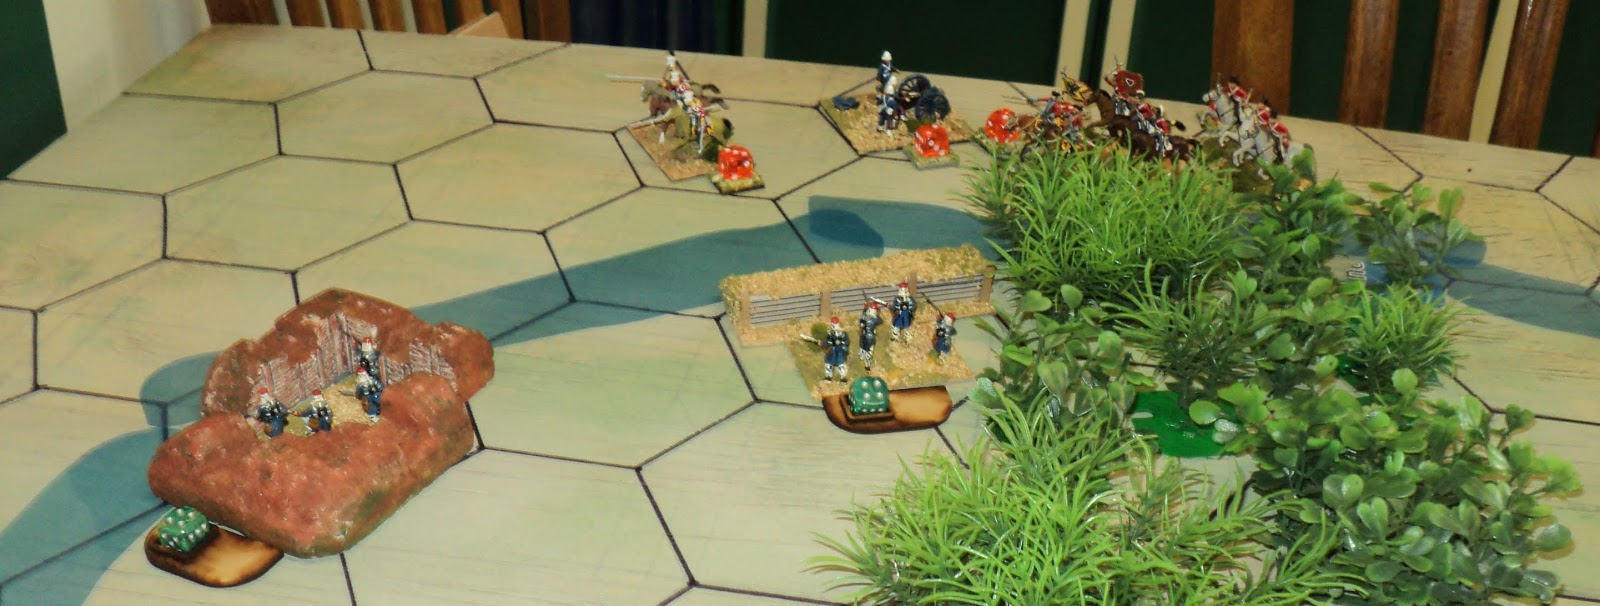
| Ruberian Brigade columns on the march. The two elements per grid area will be explained in the text. |
 |
| Cavalry leading the flanking march. |
Intelligence indicating that 38th Turkowaz Division was rather thinly spread on that side of the river, Scarlett was confident of overrunning the position in short order. Of course it would take time for the main effort, to filter the cavalry and 17th Brigade between the marshes, storm the isolated fieldworks and roll up the enemy flanks, but once underway, the advance upon Hak should meet with little obstruction.
The Turkowaz commander, Nasr-ed-Din Pasha, was not for nothing regarded as the Settee's most able soldier. He was acutely aware of the qualitative inferiority of his cobbled force - cobbled, because time had been too short to bring the regulars all the way to this remote outpost. Two of his Divisions he placed behind field works to face the initial attacks. Behind, he kept a large reserve; one of his three Divisions, and his cavalry as well. As it transpired, he was, almost as the battle began, to commit his cavalry to the left flank.
 |
| Battle joined: 18th (near bank) and 16th (far bank) Brigades closing in on the Turkowaz lines. |
I shall interrupt the narrative at this point to discuss the rule set I was using. This was Bob Cordery's '19th Century' set from The Portable Wargame, but with a few small tweaks to accommodate this scenario.
1. I added a layer of command between GoC and troops, namely the brigade commanders on the Ruberian (RED) side, and the Division commanders on the Turkowaz (BLUE). They seem to want to be there somehow. These command elements gave the same plus to combat as the army commanders do, but could stand as substantive fighting elements in themselves. However, it being held that the HQ escorts could be only company sized, I gave them just the ONE Strength Point; but made them elite. The idea was to discourage their employment as extra independent fighting elements except in extremis, as one might expect.
2. I allowed two elements per grid area for the purposes of movement - effectively columns of manoeuvre.
- In combat, the extra element added no bonus whatever. Under bombardment, however, only the element nearer the enemy took any hit. If forced to retreat, that element passed 'through' that behind in the same grid area. The reason for my adopting this is that, having placed the Turkowaz mountain artillery in the front line, I discovered just how lethal direct fire could be, especially with their local Divisional commander standing over them.
- Provided the two elements remained together in the same grid area, they required just one activation 'point' to move. However, in crossing the canal, only one element could cross from the same grid area in one turn.
- I found these ideas helped the action to rattle along in the early stages, but as the battle developed, these columns split into their constituent elements, with consequent decision making required at activation.

Duel between 18th Brigade and 35th Division.

3. Terrain effects:
- The rivers were impassible, except (a) at the bridge near the confluence of the Pardis and its tributary, (b) at the railway bridge, and (c) at any town or Dahra Tower hex-side, it being assumed that there are sufficient river crossings in those places of one sort or another.
- The marshes are impassible, their reeds and foliage masking line of sight.
- The reeds and foliage lining the rivers have no significance other than to give the rivers a slightly more 'riverine' appearance.
- The canal was crossable by horse and foot, including the Gatling guns. It could not be crossed by field or mountain artillery, except at Abu Rummar and Dahra Tower.
- The Dahra Canal Redoubt and the nearby fieldwork offer all round defence for their grid areas.
 |
| Thirty-seventh Division already being transferred to the western flank. The cavalry Brigade is already across the river. |
4. Combats - Close combat.
Combats in which the opposing elements are in adjacent grid areas are deemed 'close assault' or 'close combat'. All such combats were treated as automatic, requiring no order (and therefore no activation point allocation), and played out in both players' turns. The fortified side counted the benefit of fortifications in their own as well as in their opponents' turn.
5. Turn sequence. I used my 'dice method' of determining which side 'went' first in any pair of turns (higher roll went first), and to determine how many 'elements' could be activated [1,2 - (Median - 1); 3,4 - (Median); 5,6 - (Median + 1)].
6. A comment on play balance:
The forces being fairly close to equal in number - the difference being four Ruberian Gatlings and one Turkowaz field artillery plus fortified position - the armies are quite disparate in quality. This seems to have been so historically, at least at the 'First' Battle of Kut in September 1915. I expected that the Turkowaz defensive posture (with a willingness to counter-attack, given the chance) would go a long way towards balance. We'll see how far this expectation was realised.
 |
| Sixth Cavalry Brigade running the gauntlet of fire from the field works of 151st and 152nd Regiments |
For now, this posting being already of sufficient length, I'll resume the battle narrative another time.
To be continued...
Archduke Piccolo,
ReplyDeleteI like the way the battle is developing ... and your modifications to the rules are very interesting. I'm currently still working on my PORTABLE COLONIAL WARGAME rules, and will be paying close attention to see how well your modifications work.
All the best,
Bob
Hi Bob -
DeleteThe tweaks I made did help swing the action along, though without reaching the point of reducing the thing to a straightforward IGoUGo game.
I tended to figure on the original PW set as geared more of less to a battalion group or small brigade group sized action. I DID consider reducing the scale overall (though with the same numbers of elements) to a brigade group, and each stand representing a company.
There was really no reason not to do so. But even then, that 'second command layer' would insist on inclusion. Probably because I had them, though some Napoleonic commanders had to be roped in on the Turkowaz side. But I didn't want them to be 'just another' fighting element, whilst at the same time having a limited independent fighting ability.
Possibly where it did pose a problem was in the case of 38th Div Artillery being placed in the forward trenches, with the Div commander close by. Over open sights, the arty couldn't miss!
Cheers,
Ion
Wonderful looking game. I like the extra layer of command rules.
ReplyDeleteTHanks - the jury is still out on that extra command layer, but it seemed to work OK.
DeleteVery neat looking game! I await a report from the front.
ReplyDeleteWorking on it... :-)
Delete