Saturday, December 9, 2023

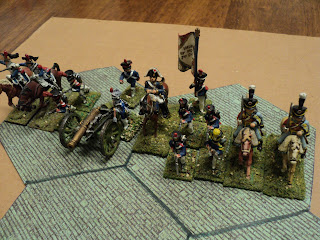
Shambattle on Steroids...


An early preview of my present project - Napoleon's April 1809 Campaign against Austria. So far one  complete plus one half turn have been played out. After early defensive successes at Abensberg and Regensburg, things have not gone well for the French. Once Archduke Charles seized the initiative (the French 'won' the first move initiative, the Austrians the second) he was able to take the fight to the French. For the French, both III Corps columns have suffered reverses (at Abensburg and Wolkering), and Oudinot's II Corps a major defeat on the Ammer River. The French also lost a general at Abensberg.

However, the French response to these adverse events has yet to be determined... 

The battle narrative will be enlarged upon at some future date...


To be continued... after the Purple River Valley Shambattle story...

Friday, December 8, 2023

Shambattle - Treachery!

 As the war trumpets sound and jingoist bombast reverberates throughout the Purple River Valley, little does anyone know of the perfidy, the treachery, the infamy that is about to be unleashed. That is to say: I determined which unit in either army shall be the spy, the turncoat, the shirker.

Redina Horse massed close by the River Purple.
The significance of the blue counter will be 
soon revealed...

For each side, I identified the miscreant unit in this way:

1.  Rolled for arm of service, using my standard method: 1 = artillery, 2-3 = cavalry, 4-6 = infantry
Note that neither force employed engineers.
Redina rolled a 2 => cavalry unit
Bluvia rolled a 4 => infantry unit
2.  Having rolled for service, then rolled for the unit.
Redina has 4 units of cavalry, so a second roll of 1-4 identified the infidels.  A roll of 4 identified the rear-most unit in the column!
Bluvia has 9 infantry units.  As they were arranged in 'brigades' within the environs of the towns, it was easy enough to decide that:
1-2 => unit in and around Blueford
3-4 => unit in and around Cerulean City - the capital
5-6 => unit in and around Blueburg.
The roll was a '3' - so treachery lurked within the Capital City itself.
But which of the three?  
3. The repetition of the process indicated the central unit to be the one to watch...

What treason lies deep with the Bluvian capital 
city? What indeed!

4. As an aide memoire, I placed a blue counter beside the Redina Cavalry and a red counter beside the potentially renegade elements, as indicated in the pictures. 

To be continued...


Thursday, December 7, 2023

Shambattle - Square Grid Set-up

The Purple River valley, looking north from behind 
Cerulean City

In the year dotteen dotty-dot, the border tensions in the Purple River valley between Redina and Bluvia had reached breaking point. Both sides alleged border violations by the other side - some of those allegations true enough - and both sides flung charges of aggression, perfidy and all manner of undiplomatic epithets. Of course, both sides proved the veracity of such allegations by issuing threats and massing troops along the border. It was merely a matter of time before one side or the other would declare - by direct action if not by ambassadorial note of hand - that a state of war existed between the two countries. 


The casus belli has been lost to time, if ever there even was a credible excuse avowed, let alone reasons adduced. On Someday, the umpty-oddth  of Cantremember, dotteen dotty-dot, the President of Bluvia (this was decided by dice roll) gave the go-ahead for Marshal Azurena, commanding the troops already assembled, to cross the river, and to take, secure and hold the territories beyond in the name of la patrie. It was probably just the President's shorter temper that determined who would thus disturb the peace of nations.  History will aver that the Prime Minister, after a visit to the Palace, had in his hand the Royal go-ahead for an invasion of Bluvia at the time breathless aides-de-camp arrived to announce that border had been breached. 

Looking northwest.  The pebbly bits of river identify the fords.

I've finally made a start on my first Shambattle action using my square-grid game surface. We begin with the map table, and the troops deployed. Going a little 'outside' the system, I diced to see whether the river was fordable. On a six the river section in a given section defined by the square widths was fordable. The Bluvians found the river immediately to the left of the centre and the Blueburg bridges could be crossed by all troops (Had sixes been wanting, I was probably going to accept fives.  Had I accepted fives and sixes, the whole stretch of river from Blueburg to the centre bridge would have been fordable. To the right (east) of the centre bridge, the only crossing was the bridge at Blueford - not the aptest of names for that settlement! 
Looking southwest.  Redina hospital wagons wait behind the 
riverine towns to collect the casualties. Azurian 
Nordenfelt mitrailleuses cover the centre bridge.

The wagons you see in the pictures are the mobile hospitals, placed fairly close behind the river towns to be on hand at need. The fixed hospitals are in the regional capitals, the Bluvian in the mosque-like edifice in Cerulean City; the Redina housed in the building close by the peach orchard.

For the composition of the respective armies, please refer to the previous posting on this topic.
Looking towards the south.  The house close by the peach
orchard has been commandeered as a hospital.


I have yet to determine where the treachery lies within the respective armies, and their nature. I think I'll wait until a move by both sides has been made, before using some random(ish) method of determining wherein perfidy lies.

To be continued...

Monday, December 4, 2023

Yet Another Portable Army War game

Riffling - or rifling, take your pick - the other day through the piles of paper that my wargames hobby seems to generate in overabundance, I (re)discovered a map of a battle of which I had long ago made a grid-map for. This one was from the 1814 campaign in France: Montereau, 18 February. So yesterday I put together an order of battle for the Portable Montereau.


My Portable Montereau battle map.  The Seine river
being such a substantial flow, I've run it down the centre 
of the grid areas, rather than the hex-sides.

This hex-map is how my battle board is supposed to look. The second map shows where some of the  the Allied troops - to wit, Wurttemberg's IV Corps - are deployed at the outset. The French arrive from off-table at the entry points A (General Pajol), B (Emperor Napoleon, after several game turns)  or C (Marshal Victor). Feldmarschallleutnant Bianchi's I Corps may arrive at point D.  The lozenge shapes locate the Corps and Division commanders on the table.

Table map with Allied IV Corps deployed


Now, looking back, I seem to have neglected to post the Order of Battle (OOB) for the respective armies for my rendition of the Battle of Ligny. Hiatus maxime deflendus - an unfortunate oversight that I might have to remedy by modifying one of the postings for that battle.

Here is my OOB lists for Montereau.


In the Allied list, Black represents Wurttembergers, Blue are Bavarians (one small brigade), and Red are Austrian.

I have yet to decide the programme of arrivals on the battlefield. In the Age of Eagles scenario from which this is derived, Napoleon arrived at Move 10 with the Imperial Guard. Feldmarschallleutnant Bianchi's Corps was optional, but if taken, started dicing - 50-50 proposition - from Move 11. I rather think matters will develop more quickly using the Portable Napoleonic Wargames rule set, so I'll start dicing for Napoleon's arrival at Move 5 (5 or 6 being required) and Bianchi from Move 6 (6 being required; 5 or 6 after Napoleon's arrival).  

The figure scales are very roughly 600 per foot Strength Point (SP), 300 per horse SP, and 10 cannon per artillery SP.  Probably the Wurttemberger and Bavarian contingents will have Austrian proxies, though I could conceivably use Prussians instead. 

The French have a decided advantage in this scenario, even with Bianchi's arrival.  

Tuesday, November 28, 2023

Projects - Marking Time


Lately feeling under the weather, I've not felt much inclined to follow up on the Shambattle games the previous posting prepared for. Liverish, or something. Do others get that?  One does all the homework and prep work, but one quails at the thought of setting up the table. As if that were a chore!  It will get done... eventually.

But, rather than this blog spot sitting in silence any longer I thought I would do one, or possibly more, on other projects that have been occupying my time instead of fighting out the battles. This posting will focus upon another 'Map Game' - Napoleonic, the opening campaign of 1809.

Although the thought had occurred to me earlier in the year, this 'Campaign in a Day: Crisis on the Danube' was a further inspiration. These projects, posted from time to time in the Blunders on the Danube blog, make for entertaining reading.

Of course the project I have in mind is a campaign on one table. For anyone new to Archduke Piccolo, here's my attempt at the Hundred Days' campaign. Very much an experiment, the whole concept seemed to add a whole new dimension to miniatures war gaming.

For a week beginning 10 April, the Austrian army, under Archduke Charles, had entered Bavarian territory and faced a disorganised response. Held up in Paris by other affairs of State, Emperor Napoleon did not join the Grande Armee until the 17th. At once taking over the reigns of army command, he set about producing order from the disorder created by his chief of staff, Marshal Berthier. 

The action begins with the Army Corps formations located as shown in this map: 


The small lozenge shapes show where Napoleon and the Archduke are standing at the outset of the action.  The following picture is how the map is supposed to look on my hex-board.


There is a small problem with this map: there's a heck of a lot of river.  Partly to save board space, all the rivers, even the large ones like the Danube and the Isar will be laid out along hex-sides.  I'll probably have to extemporise some rivers with something or other.  There must be at least sixteen foot of river on this table.

Adding in the location of the formations: 
How the table will be set up.

Now for the Orders of Battle:

Austrian Army:

Commanding in Chief: Erzherzog Karl - begins at Rohr

I Corps: Graf Bellegarde - begins off table in Bavaria opposite Regensburg (Ratisbon)
6 foot: 4 line infantry, 1 jager, 1 freiwilliger (1)
2 horse: 2 uhlan light horse,
3 gunners (2)

III Corps: F. Hohenzollern-Hechingen - Rohr
5 foot: 3 line infantry, 1 jager, 1 grenzer
3 horse: 2 hussar, 1 chevauleger, 
3 gunners

IV Corps: Rosenberg - Langquaid
5 foot: 3 line infantry, 1 grenzer, 1 legion
2 horse: 2 hussar
3 gunners

V Corps: Archduke Ludwig - Between Pfaffenhausen and Siegensburg
7 foot: 3 German line, 3 Hungarian line, 1 grenzer
2 horse: 1 hussar, 1 uhlan
3 gunners

VI Corps: J. Hiller - Moosburg
7 foot: 3 German line, 3 Hungarian line, 1 Grenzer
3 horse: 2 hussar, 1 chevauleger, 
3 gunners

I Reserve Corps: J. Liechtenstein -  Pfaffenhausen
3 grenadiers,
3 cuirassiers,
2 gunners

II Reserve Corps: M. Kienmayer - Landshut
2 grenadiers,
2 horse: 1 cuirassier, 1 dragoon
2 gunners
The smallest formation: Michael Kienmayer's
II Reserve Corps.


Totals: 35 foot, 17 horse, 19 gunners = 71 figures, 7 guns

Notes:
(1) The infantry types are really what I plan on fielding.  They probably won't have any game significance
(2)  Each army corps gets one gun, but 2 or 3 crew members depending on the OOB.


One of the largest formations: Oudinot's II Corps
spread over two grid areas.  Minifigs, except for the 
Hinchliffe cuirassiers.

French Army:

Commanding in Chief: Emperor Napoleon - begins at Ingolstadt

II Corps: Nicolas Oudinot - begin at Au
6 foot: 5 line, 1 light
3 horse: 1 hussar, 1 chasseur, 1 cuirassier
2 gunners

III Corps: Marshal Davout - begin south of Regensburg
('wing') Friant/Montbrun/ St Hilaire:
5 foot: 1 light, 4 line
3 horse: 2 hussar, 1 chasseur
2 gunners
('wing') Morand/Gudin/St Sulpice:
5 foot: 1 light, 4 line
3 horse: 3 cuirassiers
2 gunners

Totals III Corps: 10 foot, 6 horse, 4 gunners serving 2 guns (3)

IV Corps.
Marshal Massena - begin Pfaffenhofen
9 foot: 2 light, 7 line
1 horse: Baden light horse
3 gunners
1 pontonier

V Corps: Marshal Lannes - begin Vohburg
4 foot: 1 light, 3 line
3 horse: 1 chasseur, 1 cuirassier, 1 cuirassier OR carabinier
3 gunners

VII (Bavarian) Corps (4)
: Marshal Lefebvre - begin Neustadt
5 foot: 1 light, 4 line
2 horse: 1 dragoon, 1 chevauleger
3 gunners

Wurttemberg Corps (4): General Vandamme - begin Ingolstadt
4 foot: 1 light, 3 line
1 horse: 1 Chevauleger
2 gunners 

Totals: 38 foot, 16 horse, 17gunners, 1 pontonier = 72 figures, 7 guns (5)

Notes: 
(3) Marshal Davout's Army Corps being so large won't 'go' on a single hex grid space. Hence the split along the same lines as carried out in the 'Campaign in a day' game. I was going to do the same with Massena's command, but decided it was not too big for a single hex space.

(4) My Grande Armee is pretty much exclusively French - no allies. So, with the possible exception of 1 Nassauer figure, we'll have French standing in for Allies of the French...

(5) I believe the Austrian artillery outnumbered the French by a larger margin than I have given. However, as the Austrian artillery - pretty much le dernier cri 50 years before - was fairly overmatched by the turn of the century by just about all major belligerents.  
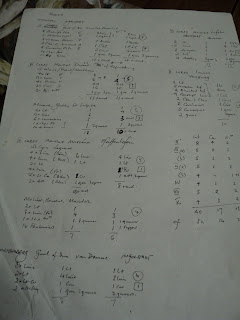
Preliminary OOB notes for the French Army


As usual for these projects, I'll be using my dice combat system, rolling 1D6 for each figure in combat, plus each arm represented. Corps commanders count as one of the figures, but a +1 bonus will be added to Napoleon, Archduke Charles, Davout, Massena and Lannes in person.

1 = artillery hit
2 = cavalry hit (6) 
3 = cavalry hit
4 = infantry hit
5 = infantry hit
6 = infantry hit and/or commander hazard (7)

Formations attempting a forced crossing of the Danube or Isar Rivers halve their combat dice.  
Garrisons may be detached from parent army corps to hold and defend towns and cities.

Notes:
(6)
The thought occurred that 2 could mean light cavalry hit, and 3 heavy cavalry.
Light cavalry = hussars, chavauleger, light dragoons, chasseurs-a-cheval and lancers
Heavy cavalry = dragoons, cuirassiers, carabiniers-a-cheval and cavalry in the strictest sense of the term

Of course, the corollary is that the dice scores for foot might also be distinguished. A roll of 4 means light infantry hit; 5 or 6 means line infantry, landwehr or grenadiers.  Light infantry might include voltigeurs, chasseurs-a-pied, carabiniers-a-pied, jager, riflemen, tirailleurs, cacadores, tiradores, grenzers, and any freikorps...

The jury is out whether it would be worthwhile making these subdivisions, which really apply only for determining combat outcomes.

(7) 
Army and Corps commanders at hazard roll 1D6 to discover their immediate fate. 
The simplest method is to give Corps commanders 6 'health points' (I have just got to come up with a better term than this!). Once this is reduced to zero, the commander is incapacitated - KIA or POW depending upon what seems reasonably to have occurred. The Division ('wing') commanders in Davout's Corps have 4 'health points' only. So when a 6 is rolled for combat, roll again, subtracting that score from the commander's 'health'. Of course a roll of 6 will immediately incapacitate the commander (a 4 being sufficient to knock over a Division ('wing') commander).

I should add here that army corps may be distributed over 2 adjoining grid areas. If both sections - call them wings - are in contact with a single enemy in a single grid area, the figures in both are added together in their own turn. If an enemy corps in one area makes contact with both wings, then it may select one wing as the target.

Attrition:
I have finally decided upon the method I used for the Operation Uranus game of 6 years ago for determining rallying and replacement of losses. For each game turn, losses are halved for each arm (exact halves round up for infantry, round down for horse and foot). Then they are returned to formations that have taken losses, on a 'pro rata' basis.  This might involve a certain amount of paperwork to calculate.

To be continued... 


Saturday, November 18, 2023

Shambattle Maps.

This posting is by way of a 'filler', though inspired, if that is the word, by others' blog posts.  Especially Bob Cordery's. Just to be in the swim, methought to create maps for my gridded tables, to see how they would look.  Having seen what others have done in the Shambattle field, I thought I would look to see how it would go on my table.  Three years ago I took a whole different approach, which led to this clash:
https://archdukepiccolo.blogspot.com/2020/12/an-indulgence.html


A slightly extended Shambattle in a different 
theatre, using very limited forces.

First,  the square-celled grid.


This would be how the thing would be presented on my 10x10 table.  The first thing to observe is that the river would be placed along the sides of the grid cells, and not along a row.  I've changed some of the place names, keeping the chromatic gist, of course!

For both maps, I would use my Ruberian and Azurian armies, of course, though the OOBs would differ in size.  The above map has 100 grid cells, the hex-celled grid has 170-odd.  It would seem reasonable, then, that the army size for the latter to be 50-60% larger than for the former.

OOB Square-celled map:

Ruberia:
Commander in Chief, General Sir Arthur Reddesley
9 Infantry stands - Rifle range: 1 grid area (orthogonal and diagonal)
4 Cavalry stands - Close combat only
2 Machinegun stands (Gatlings) - Shooting range: 2 grid areas measured orthogonally
1 Artillery stand - Shooting range 6 grid areas
2 Field hospitals (horse-drawn wagons)
1 Fixed hospital (probably in Redton).

Azuria: 
Marshal Andre Azuréna
9 Infantry stands
4 Cavalry stands
2 Mitrailleuse stands (Nordenfeldt)
1 Artillery stand
2 Field hospitals (horse drawn wagons)
1 Fixed hospital (most likely in Cerulean City)

Of the 16 units on each side (discounting the hospitals), 8 would have to deploy at the outset in the towns, each having at least 2 units by way of a garrison.

The Spy...

It is tempting to subvert the adamantine river line by including the possibility of treachery in the enemy ranks.  As I'm playing these games solo, how this is done would have in some way to be programmed. I'm thinking less in terms of 'spy' and more in the way of 'Fifth Column'. The procedure (in broad terms) would go something like this:

  1. Select a stand that contains the snake(s)-in-the-grass.  This might be done at random, or simply selected.
  2. This stand will be liable to standing aloof or turning their coats at some point in the battle. A roll of '6' on a D6 will effect the change of loyalty.
  3. At the beginning of the Army's turn, it will dice to determine whether their Fifth Column will switch sides and (possibly) join them.
  4. The Fifth Column will not return to their former allegiance.

Hospitals:

These  go towards restoring Strength Point losses, 1SP per turn, the recipient stand for the whole turn in the same grid area as the hospital, and not engaged in any other activity.  The stand requiring first aid will enter the hospital's grid area, and have 1SP restored at the end of the Army's next turn.

I have a feeling that one of the effects of these establishments is the creation and retention of a reserve, so that depleted units might be withdrawn, and fresh units take their place.  It would be nice to think that this will work, but I haven't tried it yet!

Combat:

I propose using my own 'Command-&-Colours' combat method.  Shooting or close combat.  A grid area may hold 1 or 2 units, of any type - 2 infantry, say, or 1 infantry and 1 gun).  The following results count only if the target type happens to be present.

1. Artillery or Machinegun lose 1 SP
2. Cavalry retreat 1 grid area, or lose 1 SP
3. Cavalry lose 1 SP 
4. Infantry retreat 1 grid area, or lose 1 SP
5. Infantry lose 1 SP
6. Infantry lose 1 SP, and retreat 1 grid area.  Hazard to Army Command if present.
If Army Commander is in the target grid area, he may be hit.  A separate roll of '6' means the Army Commander is toast (one could roll to determine whether he is KIA, WIA, or POW).

The number of dice rolled is equal to the number of SPs in the fighting grid area, plus an extra one if the Army Commander is present.

On the square grid table rifles may shoot across the river into an adjacent grid area, but close combat can be conducted only at the river crossings.  A force attacking across a defended river crossing count half (rounded up) their combat SPs, before adding the Army Commander's +1 if he is present. Whether shooting or close combat, if the enemy is in cover,  or in towns, woods, up hill, combat SPs are halved (rounded up).  Again, the Army Commander's +1 is added after modifying combat SPs.  The halving for terrain is not cumulative. 
2 units, plus Army Commander, in one square
 grid area - as much as the area can accommodate.

Close combat is initiated by a force attempting to enter a grid area occupied by an enemy force. This is signalled by the front edge of at least one stand being placed slightly over the edge of the target grid area.  Close combats are automatic, both sides rolling, and, if continuing, take place in both sides' turns.  The posture of the respective sides will indicate who is the attacker.

Activation of units: 

The whole game is IGoUGo, but in each pair of turns roll for which side goes first. 
Procedure:
1.  Artillery and Machinegun fire (both sides, count as simultaneous)

2.  Roll for initiative, high roll going first and completing moves and combats for all units

3.  Roll for the Fifth Column: a '6' on a D6 means the '5C' stand changes sides and may be used in this turn

4.  For each unit: 
    Movement (artillery and MGs if not having fired this turn)
    Rifle fire  and outcomes (moving side only)
    Close Combat and outcomes (both sides)

5. Low initiative roll completes moves and combats for all units.


Movement:

Riflemen: 2 squares, traced orthogonally (i.e. through square sides, not corners) in clear areas or on roads; otherwise 1 grid area only.
Cavalry: 3 squares on roads or clear, otherwise 1 grid area only
Machine guns: 2 squares on roads or clear, otherwise in grid area only.
Artillery: 2 squares on roads, 1 square in clear or in towns, otherwise impassible.

I appreciate I have rather reversed the usual order of tracing out these rules, but I added the activations and movement more for the sake of completeness.

The Hex-celled Grid:


The gimlet-eyed reader will notice that the Vermilion City and Blueburg I have placed, per the original Shambattle map, right up against the river banks. I'm rather taken with the idea of urban fighting being required to force a crossing.  Whether this adds or detracts from the action, we would have to see.

This being a larger game area, a larger OOB is required, and a commensurate change in shooting ranges as well.

OOB Hex-celled Map:

Ruberia:
Commander in Chief, General Sir Arthur Reddesley
14 Infantry stands - Rifle range: 2 grid areas
6 Cavalry stands - Close combat only
3 Machinegun stands (Gatlings) - Shooting range: 3 grid areas measured orthogonally
2 Artillery stands - Shooting range 8 grid areas
2 Field hospitals (horse-drawn wagons)
1 Fixed hospital (probably in Redton).


Azuria: 
Marshal Andre Azuréna
14 Infantry stands
6 Cavalry stands
3 Mitrailleuse stands (Nordenfeldt)
2 Artillery stands
2 Field hospitals (horse drawn wagons)
1 Fixed hospital (most likely in Cerulean City)

Of the 25 units on each side (discounting the hospitals), 12 would have to deploy at the outset in the towns, each having at least 3 units by way of a garrison.
   

2 units - infantry, machinegun - and the 
Army Commander in one hex-grid area.


Movement:

Riflemen: 2 hexes in clear areas or on roads; otherwise 1 grid area only.
Cavalry: 3 hexes on roads or clear, otherwise 1 grid area only
Machine guns: 2 hexes on roads or clear, otherwise in grid area only.
Artillery: 2 hexes on roads, 1 hex in clear or in towns, otherwise impassible.

In the above picture, the MG could shoot out to 3 grid areas; but at 2 grid area range, the rifles can be added.  The Army Commander's presence putting them on their mettle, would add +1 to the units' SPs for shooting or close combat.

Strength Points.

(I'm following Bob Cordery here:)

Square Grid Armies SP values:
10 Rifles @ 3SP: 30SP
4 Cavalry @ 2SP: 8SP
2 MG @2SP: 4SP
1 Artillery @2SP: 2SP
1 Army Commander @6SP : 6SP
Total: 50SP/ Exhaustion Point: -17/ Rout Point -25.

Hex Grid Armies SP values:
14 Rifles @ 3SP: 42SP
6 Cavalry @ 2SP: 12SP
3 MG @2SP: 6SP
2 Artillery @2SP: 4SP
1 Army Commander @6SP : 6SP
Total: 70SP/ Exhaustion Point: -24/ Rout Point -35

Well, we are in 'suck-it-and-see' country here.  It remains to give these games a burl some time...

Tuesday, November 7, 2023

Portable Napoleonic Wargames: La Souffel (2)

The Allied forces arriving over the first four turns of the battle, the action developed slowly. The first to arrive, along the Lampertheim road, Palombini's Division was soonest in organising an assault upon the 16th Division river defences. Voyrol stood off the first attacks at Lampertheim itself, but a second drove his brigade back across the stream.  A counterattack recovered the village, which the Division's light infantry garrisoned.  Meanwhile, the garrison at Mundolsheim startled the light horse approaching the town's river bridge by a quick attack across it. The chevauleger scuttling back were replaced by half of Koch's infantry (Hohenlohe and Misany's brigades).  Beurmann retired across the river into Mundolsheim.

Allies close up to the Souffel river line

By this time, Prince Adam's cavalry had pushed down rapidly towards Souffelweyersheim, where von Moltke's dragoons tried to bounce the French skirmishers back from the opposite riverbank. In this they were successful, but at prohibitive cost. The depleted dragoons fell back to the north side of the stream. Passing through Reichstett village, the Division's horse artillery deployed into battery along the southern edge of the place, whence they began a bombardment of Montagnier's brigade standing between Souffelweyersheim and the woods a short distance east of the place. Montagnier shuffled his troops into shelter behind the village. 

Prinz Emile coming up to add weight to 
Palombini's assault

So far, matters seemed to be going well enough for the Allies, though Palombini was not strong enough, it seemed, to be sure of forcing the river line. He was encouraged by the arrival of Prince Emile's elite brigade and light troops, including its skirmishing companies.

(Note: I really have no idea, now, where I got the idea that Prince Emile's command included light troops, nor how I overlooked - I even wrote it down - that Hugel's brigade were all of light infantry. Be that as it may, we carry on. I gave Prince Emile a brigade of grenadiers, represented the 'light' brigade by grenzer, and the skirmishers by a pair of jager. It looked a fine little Division, advancing down the Lampertheim road...)

Prince Emile's Division

Not before time. Czollich's brigade attempted several assaults upon the 15th Division artillery position.  Aided by the flanking skirmishers, the artillery threw back several charges, and maintain a devastating fire upon the hapless Hungarians. Suddenly, Palombini's prospects looked much less rosy.
The Hungarians destroyed by gunfire and musketry
from the French skirmishers


They were not improved when Beurmann's aforementioned transpontine counterattack threw back Palombini's light horse brigade.
Beurmann's brigade sees off the Allied light horse


Such early successes were encouraging for the defenders, but the Allies had hardly begun any serious assault upon their lines.
Beurmann's brigade facing odds of at least three to one

The defenders had not much longer to wait. Splitting Koch's Division in two, Prince Eugene ordered Koch himself to lead two brigades to attack the French still on the north side of the Mundolsheim river bridge, whilst the other two brigades were to cross the river west of Souffelweyersheim, thence to attack that village supported by horse and guns.

(Note: Really, this was questionable - violating the 'unit integrity' rule that ought equally at this level to apply to formations. The whole Division ought to have gone one way or the other.  I didn't even notice until after the action.


Facing Koch's resolute advance, Beurmann quickly fell back into Mundolsheim, there to face a direct assault by more than three times their numbers. What remained to attack Souffelweyersheim seemed sufficient although Merlin's cavalry were to be quickly on the scene, and Grandjean's column could at last be seen trudging up the Strasbourg road.

The arrival of Grandjean's 17th Division

Supported by the depleted brigade of dragoons, Lalance's brigade splashed through the river to assault the western face of the village. They were stopped cold. On the other hand, the Allies scored a measure of success, their counter-battery finally silencing Rottembourg's guns.  


In an effort to keep Merlin's cavalry off his attacking infantry, Prince Eugene ordered forward the depleted chevauleger from Palombini's Division, Kinski's brigade (formation integrity be damned), backed up by the fresh light horse of Jett's Brigade (the uhlans in the picture).  Very quickly braving the flanking fore from Allied artillery, Merlin's cavalry, four times the strength Jett had remaining, attacked.  
Attack and counterattack around Souffelweyersheim

Under cover of the cavalry battle nearby, Hugel's brigade was fed through Lalance's depleted formation to renew yet another assault upon the town. By now, however, the lead elements of Grandjean's Division were already deployed east of Souffelweyersheim, and pushing forward. The signs of anxiety were already beginning to etch themselves across the Prince Royal's visage.


He might have been reassured by events upon his right flank. Following up the French withdrawal across the river into Mundolsheim, Koch's command scattered the garrison's hasty defence, passed through the village, and began an assault upon the rear of Albert's gun line. Just then, Emile's light troops were engaging the guns from across the river.  
The fall of Mundolsheim, and the beginning of the 
end of 16th Division

At this time, French skirmishers were still grimly clinging on to Lampertheim - the Allies couldn't buy a six! - whilst Voyrol waited on the opposite river bank.

Before Voyrol could lend his assistance, the Allied light infantry overran the guns.  In an effort to recover something from the battle, Albert led Voyrol's brigade into a counterattack. Outnumbered eight to one, it was always going to be a forlorn hope, and what remained of 16th Division collapsed. The Allies had taken the whole of 16th Division's defence line, barring the skirmishers holed up in Lampertheim.

Matters were not going so well at Souffelweyersheim. It was gradually becoming apparent that the Allies simply lacked the strength to take the place. Even were the town to fall, the strength General Rapp could call upon was rather greater than the attacking Allies could muster. At about this time, Prince Eugene called off the attack.


At the time, I calculated that the Allies had reached their exhaustion point, but looking at the pictures now, it seems that the Allied total losses amount to 18 SP lost - 9 from both wings of attack. For their part, if you could write off the entire Albert Division except its commander - 8SP, Rottembourg lost just 3SP;  Eleven - 14 if you added in Albert himself.  Fourteen was still (just) short of V Corps exhaustion point.  Eighteen would have left 3 more before the Allied corps reached the same condition.  

How do we assess the result, then?  Until I wrote this up, I was certain this was a French victory - unexpected given the disparity of overall strengths. On reflection it seems to have been something of a tactical draw - the Allied undoubtedly carrying the French left, but taking heavy losses for scant reward at Souffelsheim. 

Situation at day's end.
But really, I made a mess of this action, in many respects. In adapting the polyglot Allied III Corps to my own Austrian collection, I made a couple of bad mistakes, although not, at least, in the matter of respective strengths. I also forgot, twice, the issue of formation integrity. Having said that, even if Koch's Division had remained en bloc to take Mundolsheim, Grandjean's Division would have been on hand to counter any attempt to roll up the French river line. So I'm not going to beat myself up too hard about my slip-ups.

For anyone minded to try out this battle in this format I suggest you take a look first at these sites:

https://napoleonicscenarios.weebly.com/uploads/2/3/7/7/2377799/la_souffel_1815.pdf

https://img1.wsimg.com/blobby/go/2b00d6c2-086d-458a-bc05-fc390be0c5a3/downloads/1c0tsdvf3_17723.pdf

I used the former of these two, but I think the latter, which I discovered only today, the more informative perhaps. The Strength Points I calculated by dividing the Age of Eagles SPs by 3. 

In my next posting I'll see what the respective armies would have looked like, adapted from the second AofE scenario.  Otherwise, apart from a 'List of Postings' or 'Table of contents' posting, that will be the end of this occasional series under the overall title 'Hundred Days'.