Sunday, January 21, 2024

Portable Gettysburg - Draft Version Part 2

The July 1 battle at Gettysburg proving as one-sided as it was, the action was to be taken up the 'next' day, July 2.  

In playing out the second day of the Battle of Gettysburg, I had to choose between beginning at daybreak, or waiting for Lt-Genl Longstreet to complete his peregrinations bringing his two available Divisions into line. Historically, it was not until 4:00pm that he was sufficiently satisfied to throw forward the Divisions of Hood and McLaws against Dan Sickles's III Corps. Meanwhile, George Pickett's Division was still somewhere back along the Chambersburg Pike.
For his part, apprehensive of the rising ground before him where he stood in the morning, Maj-Genl Sickles had pushed forward his troops as far as the Emmitsburg Road. There they took up positions in a peach orchard and an adjoining wheat field. Behind them, Trostle Woods and the Devil's Den offered refuge in the event of III Corps being pushed back.


Four o'clock arriving, the troops in place, Longstreet lurched forward, Hood on the right making for the Devil's Den and the Round Tops. To his left, McLaws aimed for the Wheatfield.  Birney's Division would have its hands full. Humphries's Division occupying the Peach Orchard and a length of the Emmitsburg road north of it was the target of Anderson's Division. The I Corps Artillery and half of III Corps' guns supported these attacks.

I didn't bother, by the way, with the 'oblique order' of Longstreet's method of attack, with brigades in pairs lurching forward at 15-minute intervals. For one thing, such intervals fell beneath the grain of the time scale I was using. Even at 1 turn per hour, the time scale was generous relative to the ground scale.

Meanwhile, A.P. Hill's remaining two Divisions: Heth and Pender struck towards Seminary Ridge and the Emmitsburg Road, and the Cemetery eminences beyond. Only half the III Corps artillery supported this attack.

At this point my first 'Note to Self'.  When I do this again, Seminary Ridge will be moved a hex-row westward.  It is far too close to Gettysburg and the Cemetery Ridge.  The Seminary itself will probably remain where it stands, prolonging the ridge's SW-NE alignment.


Although intended to 'go in' at the same time as the attacks from the west, R.S. Ewell's II Corps began rather poorly placed. Johnson's Division stood on the Hanover road, prepared to strike at Slocum's XII Corps lining Rock Creek south of Culp's Hill. But Early, close by the Hanover Road river bridge, and Rodes, in the northern outskirts of Gettysburg itself, were going to require some time to get into battle.

Another 'Note to Self' - bring all three Divisions, and the guns, closer by one hex to the Union lines - Rodes inside Gettysburg.  Probably Early should be standing at the road junction west of the river bridges; and Latimer's artillery on the rising ground (Benner's Hill) over which runs the Hanover Road.  Thos Brown's artillery should stand between the road junction and the town. We will soon see the effect of the piecemeal nature of Ewell's attacks later on.

I might also consider placing Powers Hill beyond Williams's southern flank.  It's not there because I don't have enough hill. 

The late start by Early and Rodes left Johnson's Division alone taking on Slocum's entire XII Corps. Once in action, Latimer's guns redressed some of the balance, but, in effect, it was 5 Strength Points (SP) against 6++. The loss of a quarter of his strength to gunfire before getting fairly to grips did not augur well for Johnson's prospects.

Whilst Slocum was fully engaged with Johnson, on Culp's Hill, Wadsworth's Division had the undivided attention of Early, supported by Brown's artillery. Nor could Doubleday, alongside on Cemetery Hill, lend a hand: Rodes's Division would soon be surging out of the town and up the slopes.

In the centre, Pender's Division was soon surging up Seminary Ridge, with Heth, perhaps a half-mile to their right where the ridge descended to the level of the plain, striking at Robinson. The battle was becoming general all along the front.

Standing in reserve close by the Baltimore Pike creek bridge stood Sykes's V Corps. He soon decided to bring his whole command on behind the Round Tops to form a reserve line behind the embattled III Corps.  Far to the south, the heads of Sedgwick's VI Corps column could just be made out, approaching up the Baltimore Pike.

McLaws and Anderson were very soon in close action. The former scored such heavy early successes that Birney had to draw his Division's reserves out of Devil's Den to maintain a front alongside Humphries. Anderson was finding Humphries devilish hard to shift. Now, here I gave the Union the benefit of cover, which might have been a mistake. The Wheat Field I considered open, but Devil's Den and the wooded Round Tops I intended also to offer benefits to the defender.  I'm inclined to thing that is much too generous to the Union, especially at my chosen ground, time and unit scales.

The fighting in the north was not going the way of the Confederates. Johnson's heavy losses induced Williams to strike across Rock creek on his own account. Nor was Early enjoying overmuch success to begin with.  The fighting on Culp's Hill was settling into a battle of attrition. Rodes was still some distance from the action.

A.P. Hill's attacks were also proving costly - to both sides. In carrying the Seminary Ridge, Pender was reduced to half strength. Heth was in no better state, though there remained little under Robinson's command apart from the Division HQ. All the same, it seemed that the Army of Northern Virginia was making progress on this front.


Mixed fortunes prevailed on Longstreet's front. More accurately things were going his way, pretty much; it was R.H. Anderson who was stalled in front of the Peach Orchard, and taking a beating. Humphries simply would not be shifted.

Humphries was divided between two hexes: 2SP within the orchard, 1+ and the Corps artillery to their right in front of Cemetery ridge, where stood Hancock's II Corps. At least Pegram's (III Corps)  and the Washington Artillery (I Corps) were discouraging any counter-attack from Humphries's right wing.


The sun was close to the horizon as Early finally swept Wadsworth from Culp's Hill, and Rodes began his assault upon Cemetery Ridge. Johnson had been driven well back from Rock Creek, but that left Geary's Division exposed to Early's follow-up attacks towards the Spangler's Spring. Pender and Heth were stalled along Seminary Ridge as Howard's Corps - such as who survived the previous day's debacle - held them off from further advances.


Reduced to shadows of themselves, Pender and Heth desisted from further attacks. Anderson's command practically destroyed (0SP remaining), McLaws swung left to drive Humphries at last from the Peach Orchard. Hood took over the assaults on Devil's Den, the remnants of Birney's Division fled to and over Little Round Top, with the Confederates in close pursuit.


At this point I unexpectedly had to bring this action to a halt and pack it all away.  But I was debating whether or not to play out one more turn anyhow. The four turns that had passed represented four hours' fighting.  It was now 8:00pm, and probably getting dark. I called it at this point.

For all its time limitations and the bits that could have been improved, this turned out to be quite an exciting action. Losses were very heavy - on both sides. Whereas the previous day, the Confederates won a crushing victory, this day losses were close to even, possibly favouring the Confederacy by only the slenderest of margins.

Nothing remained of Anderson's (III Corps) and Johnson's (II Corps) Divisions.  Heth and Pender (III Corps) were both reduced to 1SP each, and Early's Division's strength had been halved. Only Hood and McLaws (I Corps) and Rodes (II Corps) were close to full strength still.

For the Union, little remained of I, XI and III Corps; and Geary's Division of XII Corps had also been destroyed. But plenty of strength remained. Hancock's Corps had hardly been engaged at all, and then only at the end of the day; Sykes and Sedgwick hadn't even fired a shot.

One of the reasons for the heavy losses was that I allowed for few retreats. As units (formations) wore down, it seemed reasonable to allow a remnant to retreat - if it could. Units reduced to 0SP stayed on the table, represented solely by their commander or flag. Note, by the way, that I gave the Union formation flags only to Corps level, whilst CSA Divisions got them. The fact of the tiny size of many Union Divisions simply made giving them a flag most inconvenient. Giving them Division commanders seemed to me sufficient, and probably unnecessary.

When returning the days' losses halved overnight, they were for convenience allocated by CSA Division or USA Corps. They were, however totalled by Army and then halved. I counted two or three 'pluses', by the way, as 1SP.  So an army that lost, say 10SP and 5 'pluses' would get back 5+2=7SP. Unfortunately, the valuable piece of scrap pa document upon which I scribed the losses has been lost to history. I think I threw it out. Definition of trash: what you throw away forty-eight hours before you discover a use for it.

The set-up for 'Pickett's Charge' might have been promising. Johnson and Anderson could have been brought back to 2SP each, Early to 3SP and Heth and Pender also to 2+ or 3SP. The Union Army would have recovered a similar number of Strength points.

So far the experiment was a qualified success insofar as I have a pretty good idea what to do next time.
 

Friday, January 19, 2024

Portable Gettysburg - 'Draft' version part 1

Just on a month ago, 20 December 2023, I wrote up some prep work for a 'Portable Gettysburg'.  I played out at least some of the the thing just over a week ago.   The first pics here are of the battlefield laid out. I had to find some extra hill or ridge from somewhere - e.g. Herr and Cemetery Ridges: must tidy them up a bit. 
The Peach Orchard is a dead giveaway, ain't it though? My peach trees (made more than 30 years ago) are in blossom whatever the season!

 
Here are the armies laid out.  I included the cavalry of both sides, although the main action between them would not 'fit' on my table. Buford's 6-figure Division has a starting role on July 1; and part of Kilpatrick's late July 3. It seems that Gregg put in an appearance at some point, but without being engaged in the main action. Possibly the cavalry action could be reserved for my chessboard (8x8 square grid) as a separate action.


The action starts off promisingly with a 'continuity glitch', that is to say, I used the wrong figures to represent Heth's Division. This formation was split in two - the brigades of Archer and Davis leading (represented by 2+ Strength Points) with Pettigrew and Brockenbrough (2SP) following. Lining McPherson's Ridge stood Buford's Cavalry Division, 2SP, supported by cannon (1SP). 
Just as Buford prepared to hold his line, two army corps, J.F. Reynolds's Ist, followed by O.O. Howard's XIth came marching up the Emmitsburg road.  Somewhere behind them, off the table, was Dan Sickles's IIIrd Corps.

For his part, Harry Heth was supported by part of the III Corps artillery. Divided into two wings, Buford's right was driven off the ridge and routed (1SP destroyed), and part of the ridge captured. The second half of Heth's Division later followed up and united with the rest of the Division, where they were joined by the artillery.


Coming up behind them on the Chambersburg Pike, Dorsey Pender's Division was on the march, followed by the rest of the III Corps Artillery. By this time, Maj-Genl Reynolds was in action, Buford pulling out the remnants of his command back to Seminary Ridge. Wadsworth and Robinson counterattacked the front of MePherson's Ridge, whilst Doubleday occupied the rising ground - part of Oak Ridge - on the other side of the railway cut.

At this point the eagle-eyed reader will observe that the Confederate infantry have suddenly exchanged their blue kepis for brown slouch hats. Having 'colour coded' the CSA formations - blue kepis I Corps, black hats II Corps, and brown for III Corps, I simply forgot, and on came for the first corps to arrive: the blue kepis. 'Yarooh!' says I (or its rough equivalent - remember, this is a family show), and made the amendment.  


Meanwhile, Oliver Howard was bringing up his XIth Corps to form a line extending Reynolds's around the north of Gettysburg. The leading Divisions of Lt-Genl Ewell's II Confederate Corps were arriving, 'Old Jube' Early pushing down the Harrisburg road and Emmett Rodes to their right cresting Oak Ridge.

Suddenly, Doubleday was caught front and flank by Pender and Rodes. Howard led Schurz's Division to aid Doubleday, but even together they were overmatched. Barlow's Division found itself facing almost double their numbers in Early's command, supported as it was by half the II Corps artillery.

In short  order the whole of I Corps was being cut to ribbons, though Schurz was for a time holding his own.

During the course of this day's action, I was using the PW combat system ... sort of. Hits were resolved as 1-3 = -1 SP; 4-6 = 1 SP retreats. Not sure why the whole force within the target hex area weren't retreating, but it seemed right at the time. However, if and when detached SP/elements wished to rejoin, the smaller portion had to join the larger. In the pic below, two of Doubleday's Division had been forced back, leaving the commander himself with just one Brigade (SP). To reunite his Division, Doubleday had to pull back to where his other two brigades (SPs) stood.

For the July 2 action, I found this method wholly impractical, on account of a much more crowded battlefield. Although I tried to use it, eventually I found myself simply 'taking the loss' unless the ground behind were clear. I think now it were better simply to have the whole formation - or the part under close assault - retreat or else all hits are SPs lost. This is a decision for the next time I play out this battle. By the by, you will observe that I use the American 'Month-Day' convention of dating. I use this convention exclusively for ACW and AWI, or any other war games in which US Americans are my 'main' characters. For all other war games, I use 'Day-Month' (For my varsity lecture notes, I began early to label my pages with year-month-day as a six-digit string...very easy to keep things in order, that way).


At any rate, their own losses so far negligible, A.P. Hill's two Divisions drove Reynolds all the way back to Seminary Ridge, where they joined Buford's remnants. Of Howard's Corps, Barlow was driven fairly into the down - blocking Steinmetz's advance, leaving Schurz all alone against the might of three Confederate Divisions.

They could not stay there long. Back and through the town they fled.

Very soon the Confederates were pressing up against the north and west faces of the town, with Heth's Division attempting to storm the Seminary Ridge. East of the town, Early's Division faced Culp's Hill, as yet unoccupied, and not too far distant.
By now, the evening twilight was drawing in. Heth was stalled in front of Seminary Ridge, Pender still some distance off to his left, and the Corps artillery in support from McPherson's Ridge. Rodes was beginning to drive through Gettysburg itself from the Carlisle Road, and early poised to push on to the high ground south of the town.
Such was the situation as nightfall ended the action.

For some reason, my memory had conflated this action into what I thought would be a single posting.  But I find I took a few more pics than I had thought.  Somehow they fetched up in two different places in my archives. So Part 2 will have to await another time.

This first day's action turned out, much to my surprise, very one-sided.  Not only had the Confederates the numbers, the goddess Hexahedra smiled upon them with a benignity reserved solely for the Divinely favoured. Early lost an SP, and I think Heth lost merely his 'plus'. The Union lost both cavalry SPs, and there wasn't very much remaining of Reynolds's corps, either. Howard's, too, had been knocked about, though they had more often than not resulted in retreats through the town.

Now, I had Reynolds and Howard on the road at the beginning of the action, but the battle was to develop according to this schedule:

Turn 1 (08:00-9:30) - Buford in place on McPherson's Ridge, with 1SP cannon. Half of Heth arrives
Turn 2 (09:30-11:00) - Reynolds enters the action.
Turn 3 (11:00-12:30) - Howard forms line to right of Reynolds. 
                                   - Dice for arrival of Rodes: 5 or 6 required
Turn 4 (12:30-14:00) - Rodes and Early arrive, Rodes on Oak Ridge, Early down Harrisburg road
Turn 5 (14:00-15:30) -  Pender arrives with remainder of III Corps artillery down Chambersburg Pike
Turn 6 (15:30-17:00) -
Turn 7 (17:00-18:30) - I Corps Rally on cemetery Ridge.
Turn 8 (18:30-20:00) - Nightfall

At the end of the day - 'overnight' - formations would receive back half the previous days' SP losses. Two lost 'pluses' would count as a whole SP. I kept count of the respective losses by Confederate Division, and by Union Corps. I rather think that when I do this one again, I might have to 'pose code' the Union army corps, or perhaps use some sort of labelling. The question remained how I was to conduct the second day's action. 'Old Pete' Longstreet was up with two of his Divisions; Ewell and Hill, both, also had their 'missing' Divisions ('Alleghany' Johnson's and R.H. Anderson's) in hand. Should it begin at 8a.m - or wait until Longstreet's ponderous preparation were ready? 

I decided upon the latter, but therein lies a further problem: the time scale. Now, I had settled upon 1 turn to 90 minutes. That simply won't do. A three-move battle would take us from 4pm to 8.30 - well after sunset, though it might not yet have been full night. An hour per move isn't much of an improvement: 4 turns only.  

We'll end here with a little bit of an appetiser: early action on July 2.


To be continued...

Tuesday, January 16, 2024

Hot Action at the Woolston Club


A mass of Austrian cavalry.


My spies tell me that, having recently painted a fresh batch of Napoleonic Austrians, Mark was looking to test them in battle. Paul invited me and some of my French forces along to the Woolston Club (I'm still a member) for a pickup action. This was a scenario of his own devising; the rule Mark's own 321 Fast Play Napoleonic Wargaming (I think it's called). It is pretty 'fast play' all right, when a game of well over 700 figures gets fought to a finish in less than 5 hours, with a decent beak for lunch.

Here's a rough diagram of the scenario.  The place names are my own invention.  As I don't recall anyone paying much attention to the roads, I've left them off the map.  North is off to the top.
Rough sketch of the battlefield


Orders of battle:

This was something of an encounter battle 

Austrian: advancing from the Northwest corner of the board - 2 foot along either edge adjacent to that corner.  
Line Brigade - 5 Infantry @ 24 figures plus one skirmisher unit, 12 figures  = 132 figures
Line Brigade - 3 Infantry @ 24 figures = 72 figures
Grenadier Brigade - 2 Grenadier @ 24 figures = 48 figures
Light Brigade - 2 hussar and 1 chevauleger regiments @ 12 figures = 36 figures
Heavy Brigade - 3 cuirassier units @ 12 figures = 36 figures
2 Field Batteries, each 2 guns and 4 crew = 16 figures (attached to infantry brigades)
1 Horse battery, 2 guns, 8 figures

Totals (excluding commanders) = 348 figures and 6 guns
Magnificent Austrian light horse: hussars
and chevauxlegers


French (and Allies): advancing from Southeast corner of the board - 2 foot along either edge adjacent to that corner.
1st Infantry -
    4 Infantry @ 24 figures
    1 skirmisher unit @ 12 figures
    1 battery @ 8 figures and 2 guns

2nd Infantry -
    
4 Infantry @ 24 figures

    1 skirmisher unit @ 12 figures
    1 battery @ 8 figures and 2 guns

3rd Infantry -
    4 Infantry @ 24 figures
    1 skirmisher unit @ 12 figures
    1 battery @ 8 figures and 2 guns

Light Brigade -
    1 Lancer regiment @ 12 figures
    1 Chasseur light horse regiment @ 12 figures

Heavy Brigade -
    1 Cuirassier regiment @ 12 figures
    1 Dragoon regiment @ 12 figures

Totals (excluding 6 commanders) = 396 figures and 6 guns


The disparity in numbers was made up by the Austrian qualitative superiority: cuirassiers and grenadiers.


The action opened with Paul bring his brigade of Italians and Westphalians towards the central village (which I've called Mittelsburg) supported by his light cavalry - lancers and chasseurs.  I brought 1st Brigade to the right of the town, 3 regiments on the far right flank beyond the woods, a skirmisher screen through the woods themselves, and the artillery, with a regiment in support between the woods and the town.
The 'French' advancing from the south, the flank beyond the town was left open, thinly screened by Paul's white-coat skirmishers.


The Austrians led off with their cavalry.  The heavy horse, three formidable regiments of cuirassiers backed by a gun battery formed a line facing the woods, whereat the two lead French regiments east of the woods formed square. That there was neither horse nor guns to support the French foot in this sector was to lead to considerable difficulty in their maintaining this flank.


On the other hand, the Austrian horse was unable to prevent the Westphalians seizing Mittelsburg and placing the town in a state of defence. 

West of the town, the Austrian light horse formed a flank. Whilst the 2nd Chevauxlegers - the Garde du Corps of Prinz Hohenzollern-Hechingen according to a French observer - remained as a flank guard close by the west road, the two Hussar regiments, pushed on beyond the French left flank. 
The 2nd Archduke Joseph Hussars, together with the 10th Stipsisz, eventually formed line facing eastwards into the rear of the French position.

The first Austrian brigade to appear was a large formation of five regiments, together with a battery of guns.
Straight up the road they advanced, directly towards Mittelsburg town. 
In view of the situation developing in the centre and on the left, the newly arrived 3rd French Brigade marched to sustain the Italian battalion squares that were then forming an attenuated and refused flank almost due south of the town. At this point the plan was simply to shovel the enemy hussars out of the way, but that was later, with the arrival of the heavy brigade, to something more ambitious.

Between the squares and the village 2nd Brigade had placed their artillery. There seemed to be little enough real threat to their position, but those Austrian light horse did present a nuisance hindering the Italians from any real positive moves on the west flank.
 
Shortly after the arrival of 3rd Brigade, the French heavy brigade trotted into the field, their attention also being directed towards the enemy hussars hovering in the western distance.
Soon the hussars could discern a formidable array of four infantry and two cavalry regiments, together with a gun battery, heading at no leisurely pace in their direction. About this time, the brigade commander - I do like to assign names, don't you? Let's call him General de Brigade Jean-Luc Dulthud - had begun forming a battle plan for his command.

Meanwhile a huge array of Austrian foot had assembled in front of the town. With little preamble, the lead regiment stormed the north end of the place and within minutes scattered its garrison. This success came with a considerable cost to the Austrians, enough that shortly afterwards, the victorious regiment was withdrawn, relieved by a fresh, grenadier, regiment.  It was thought that further assaults would evict the Westphalians altogether from the town. That, in the end, was to be mistaken.


Meanwhile, General Dulthud was not lollygagging about.  The infantry and guns rolled forward, flanked upon either side by the heavy horse: the cuirassiers on the right, the dragoons on the left. Too late, the hussars realised the danger.


Straight into the Erzherzog Josef Husaren galloped the cuirassiers, their right flank covered by an Italion column. The Dragoons were unable quite to reach the Stipsicz Hussars, but drew close enough to pin them.  This was to be the first step of the French plan to sweep the Austrian right clear of cavalry, and to bring up 3rd Brigade, with such of the 2nd that could be spared in a broad advance deep into the Austrian right wing.

French cuirassiers' first charge.

Victorious over the hussars, the cuirassiers followed up by sweeping aside the Austrian chevauxlegers lingering upon the west road, and fetching up behind the Austrian right, near Nordheim village. Feldmarschallleutnant von Ott had perforce to detach units to occupy Nordheim village and to present a flank against the lone cuirassier unit.
French cuirassiers 'menacing' the Austrian right rear


The French cuirassiers might well have found themselves in a position analogous to that of their defeated enemy, but for the steady advance of the rest of Dulthud's push. The Austrian reaction was sufficiently vigorous to induce the French cuirassiers to retire behind the infantry. 


Although steady, the French advance was not quite fast enough to strike across the west road before the Austrians could form a line. Something of a lull descended upon this flank, the Austrians comfortably enough holding the line against French rather piecemeal attacks.


By this time much had happened on the other side of the town. The French skirmishers had quickly been driven from the woods, whereat an Austrian regiment began marching though it in support of an infantry attack between the town and the wood. I seem to recall a quick attack by the lancers that overran an Austrian battery; at least the pictures seem to indicate the disappearance of some of the Austrian cannon. But the the sole French regiment had been forced back (which allowed room for the lancers' charge).  The lancers in turn pulling back drew in an attack by no fewer than three Austrian infantry regiments against the 1st brigade artillery. 


East of the woods, the earliest probes by the Austrian cuirassiers, easily rebuffed, covered the assembly of Austrian foot as well. Caught in square by the Austrian columns, the lead French unit was overcome.
On this sector the Austrians maintained a steady pressure as French resistance crumbled.

Crumbling French resistance on the right

One by one the Austrians eliminated the French columns. Charging past the second column, a fresh unit crushed the third. When another Austrian column attacked, these victorious troops were in a position to strike the rear of the second French column as they were hit in front. Such as who survived of the surrounded French were forced to surrender.

Had the Austrians enjoyed as much success in the defile between Mittlesburg and the Eichegeholz woods, they might well have claimed the victory overall. Although they forced back part of the line, the French artillery remained steadfast, and even shredded an Austrian battalion. On the whole, however, the French had been forced off their line. They were barely able to form an exiguous defence line between Mittelsburg and the Sudendorf hamlet.

French and Italians form a thin reserve line between 
Mittelsburg town and Sudendorf village

Such was the situation as darkness drew in: both sides enjoying some success upon their left flanks. Mittelsburg itself was still in dispute, neither side able to evict the other from their half of the town. Late in the day, the Austrians had begun to pull back a little on their left. Although the French made no such retrograde gestures west of Mittelsburg, I think on the whole their commanders were glad enough to see the action sputter to a close.

After playing I think 8 turns, a die was then rolled each turn to determine whether it would continue for another. We played a ninth, which mark used to pull back his line a little. Having formed already our right wing reserve line, we didn't press all that hard on the other flank, though a further turn might have led to something of interest. It was a very hot day, so I think after 3-4 hours of action we were glad enough to call it quits!) 
Things look very promising on this wing, before 
nightfall ended proceedings

In the post-battle analysis I think everyone was agreed that the thing was something of a drawn battle. Mark reckoned he had lost 6 units destroyed. We had lost 5 - three of them from 1st Brigade, and one of the Westphalians, plus one other I can't identify (Looking at the final two pictures I think we had lost just 4, but could be mistaken. Possibly Paul or Mark could clarify). 

However, fatalities among formation commanders was a bit of a problem for the Austrians. The French lost one. Before withdrawing from near Nordheim, Brigade General Philippe Vicomte Camelotte met his demise, which put the heavy horse out of action for a short time.

Such was the Battle of Mittelsburg, an incident in one of the Franco-Austrian campaigns of the Napoleonic era.
 * * * * *

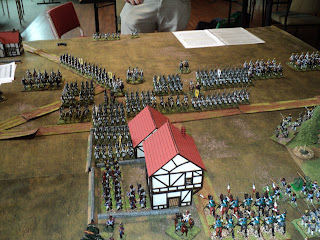
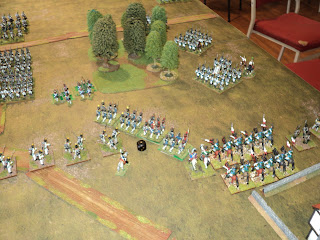
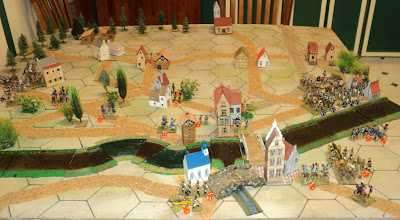
In the meantime, I have still to publish my accounts of the Portable Wargames versions of the  Montereau and Gettysburg battles. Although the Montereau battle was played out almost a fortnight back, I think I'll post the Gettysburg action first as the more quickly told narrative. For reasons I shall relate in due course, I'll want to revisit that little project! Although I began the write-up of Montereau a week ago, this one will require, I think, several instalments, unless I decide to abbreviate the whole thing!  For the moment: a pictorial sneak preview...

Gettysburg: second day. Confederates about to launch their
late afternoon assaults.


Montereau: arrival of Pajol's and Victor's Corps
from west and east...