
 |
| Government forces (18th Battalion) advancing on the left (northern) flank and ('D' and 'C'/17th up the road. |
(Eventually I will post the Table of Contents in a panel beside this main column)
 |
| Machine gun platoon, anti-tank gun and mortar positions - north flank. |
 |
| 'A' Company, 1st BARFist Volunteers. 'B' Coy in the town |
 |
| Rebel centre covered by barbed wire |
This action, as for the whole 'Long Live the Revolution' campaign, was fought using Bob Cordery's Developing the Portable Wargame rule set, and the conventions, modified to 'fit' my 'hex' table, of his mini-campaign example of the same name. One of those conventions involved rolling for each force's Strength Points (SP), adding the dice score to a basic minimum. As my table is rather larger than Bob's standard one, I added 50% to the starting minima and added dice rolls with the results you will now see.
 |
| Rebel southern wing. The minefield and anti-tank obstacles will force any eenemy right up against the end of the BARFist line. |
Number of SPs: (16+2D6) + 50% = 24 + 3D6 = 24 + 11 (OK roll - about average) = 35SP
Government, Attacking:
Number of SPs: (20+4D6) + 50% = 30 + 6D6 = 30 + 30 (what a roll!!) = 60SP(!)
That was a huge roll for the Government, and I think the first time anything of the sort happened so far in this whole affair. As had become my habit in this campaign, I permitted the defending side half the difference in SPs 'worth' of defence works: field works and barbed wire to cover one hex at 1SP each, and minefields and fortifications at 2SP.
 |
| A very effective salvo from the Government artillery! |
Baluchistan (Brotherhood) Armed Revolutionary Front:
Commander: Col Buttahjars, staffs etc = 6SP
1st 'Volunteers of the Revolution' Brigade
4 Rifle Companies @ 4SP
2 MG Platoons @ 2SP
1 Mortar Platoon @ 2SP = 22SP
'Tulwars of the Revolution' Armoured Group
1 Squadron Light Tanks (1xM3 Stuart) = 3SP
Fixed Anti-tank gun positions:
1 6pr medium AT gun troop = 2SP
1 2pr light AT gun troop = 2SP
Totals:
11 units, activation mean = 6
35 SP, exhaustion point = -12SP
This garrison was augmented by 4 stretches of barbed wire covering the approaches to the town from the west, 5 field works extending north and south outwards from the town, one fortified machinegun post, and a set of mined antitank obstacles far out from the south flank placed to draw any enemy trying to skirt around the place closer to the entrenchments.
 |
| ... and the end of the BARFist 'C' Company, its remaining strength destroyed |
Rajistan Government:
Commander: Lieutenant-Colonel E. Mugglethwaite = 6SP
17th Choklit Ghandhi Infantry
4 Rifle Companies (A-D) @ 4SP
HQ Company, 1 Vickers Machine Gun @ 2SP = 18SP
18th Siliputti Infantry
4 Rifle Companies (A-D) @ 4SP
4 Rifle Companies (A-D) @ 4SP
HQ Company, 1 x 3-inch Mortar (2SP) plus carrier (2SP) = 20SP
6th Bananarahmaputra Hussars
4 Squadrons (A-D) Sherman medium tanks @3SP = 12SP
1st Tchagai Artillery Regiment
2 Batteries, 25pr field guns @ 2SP = 4SP
Totals:
17 Units, activation mean = 9
60SP; exhaustion point = -20SP
On the southern flank, the entrenched defenders came under fire from the machine guns of the whole of the 6th Armoured Regiment. The infantry - 'A' and 'B' Companies and the machineguns of 'HQ' company - were rather slower moving up. A long-distance tank and anti-tank duel opened up, with the sole rebel tank squadron engaging the heavier Shermans with their popgun 37mms. As the more dangeous weapon, the Shermans were inclined to concentrate their fire upon the 6pr AT guns, which, without the means to withdraw, were eventually destroyed.
With the focus of action in the south, the assault on the northern front developed in a more piecemeal fashion. After its success against the town's defenders, the artillery joined 18th Battalion's mortar fire against the entrenched position of 'A' Company 1st BARF Volunteers. Under cover of this barrage, 'D' Company of the 18th brought the enemy position - its defenders already somewhat depleted - under a close assault.
The close assault by 'C' Company against the fortified rebel machine guns allowed 'B' Company to come up and join the action, bypassing the remaining barbed wire. Meanwhile, the gunnery duel was going rather the Government's way, despite the rebel entrenchments.
The light tanks driven from the line, and the anti-tank guns overwhelmed, 'A' and 'B' squadrons tried to force the gap between the manned field works at the end of the rebel line, and the minefield a short distance south from it. This was precisely why Colonel Buttuhjars had ordered it placed there - to force the armour up close against his own 'D' Company. After all the early successes by the Government forces, they were to find what remained of the Revolution were not going to go out easy.
Just about all along the rebel line, now, the defenders were closely engaged: 'A' company - much reduced - under mortar fire as well as a close assault; 'B' Company in a duel with equal numbers in the town; the machine-gun nest under assault by two Government companies, and 'D' Company in a short-ranged duel with Government armour.
4 Squadrons (A-D) Sherman medium tanks @3SP = 12SP
1st Tchagai Artillery Regiment
2 Batteries, 25pr field guns @ 2SP = 4SP
Totals:
17 Units, activation mean = 9
60SP; exhaustion point = -20SP
 |
| 18th Battalion taking a while to move up ... |
Already the pictures will have conveyed something of the narrative. Mugglethwaite massed his armour on his extreme right (the southern flank), with the intention of sweeping around or over the field works there, into the rear of the town. The tanks were to be supported and joined by A, B, and HQ Companies of 17th Battalion. The remaining two rifle companies were to approach the town directly up the road, clear way some of the wire, then storm the eastern suburbs. For this attack, they were given the immediate support of the 25pr artillery.
This left the whole of 18th Battalion to attack the entrenchments north of the town.
 |
| 'D' and 'C'/17th Bn about to clear away the wire... |
This left the whole of 18th Battalion to attack the entrenchments north of the town.
Though action developed rather more swiftly on the southern flank. the first contacts came in the centre. There the town's precincts formed a salient - a species of bastion against attack - covered by barbed wire entanglements. As the 25pr artillery bombarded the defenders of this section of the line - 'C' Company of 1st Volunteers, 'C' and 'D' companies of 17th Choklit Ghandhi Battalion drew up to the wire. they might have found the clearing of the wire difficult under fire, but the artillery support proved overwhelmingly effective (see the 'double sixes' in the pic earlier). The pounding proved too much, and the whole defending company dissolved and vanished from the line. 'C' Company was able to clear the wire unimpeded, and 'D' Company had to endure only a minor nuisance.
The wire cleared, they were able to penetrate the western suburbs where 'D' Company made contact with the rebel 'B' Company, and 'C' was able to bring under fire the rebel machine gun nest in the southwestern corner.
The wire cleared, they were able to penetrate the western suburbs where 'D' Company made contact with the rebel 'B' Company, and 'C' was able to bring under fire the rebel machine gun nest in the southwestern corner.
 |
| 'D' and 'C' having cleared the wire find little to oppose their entry into the town |
 |
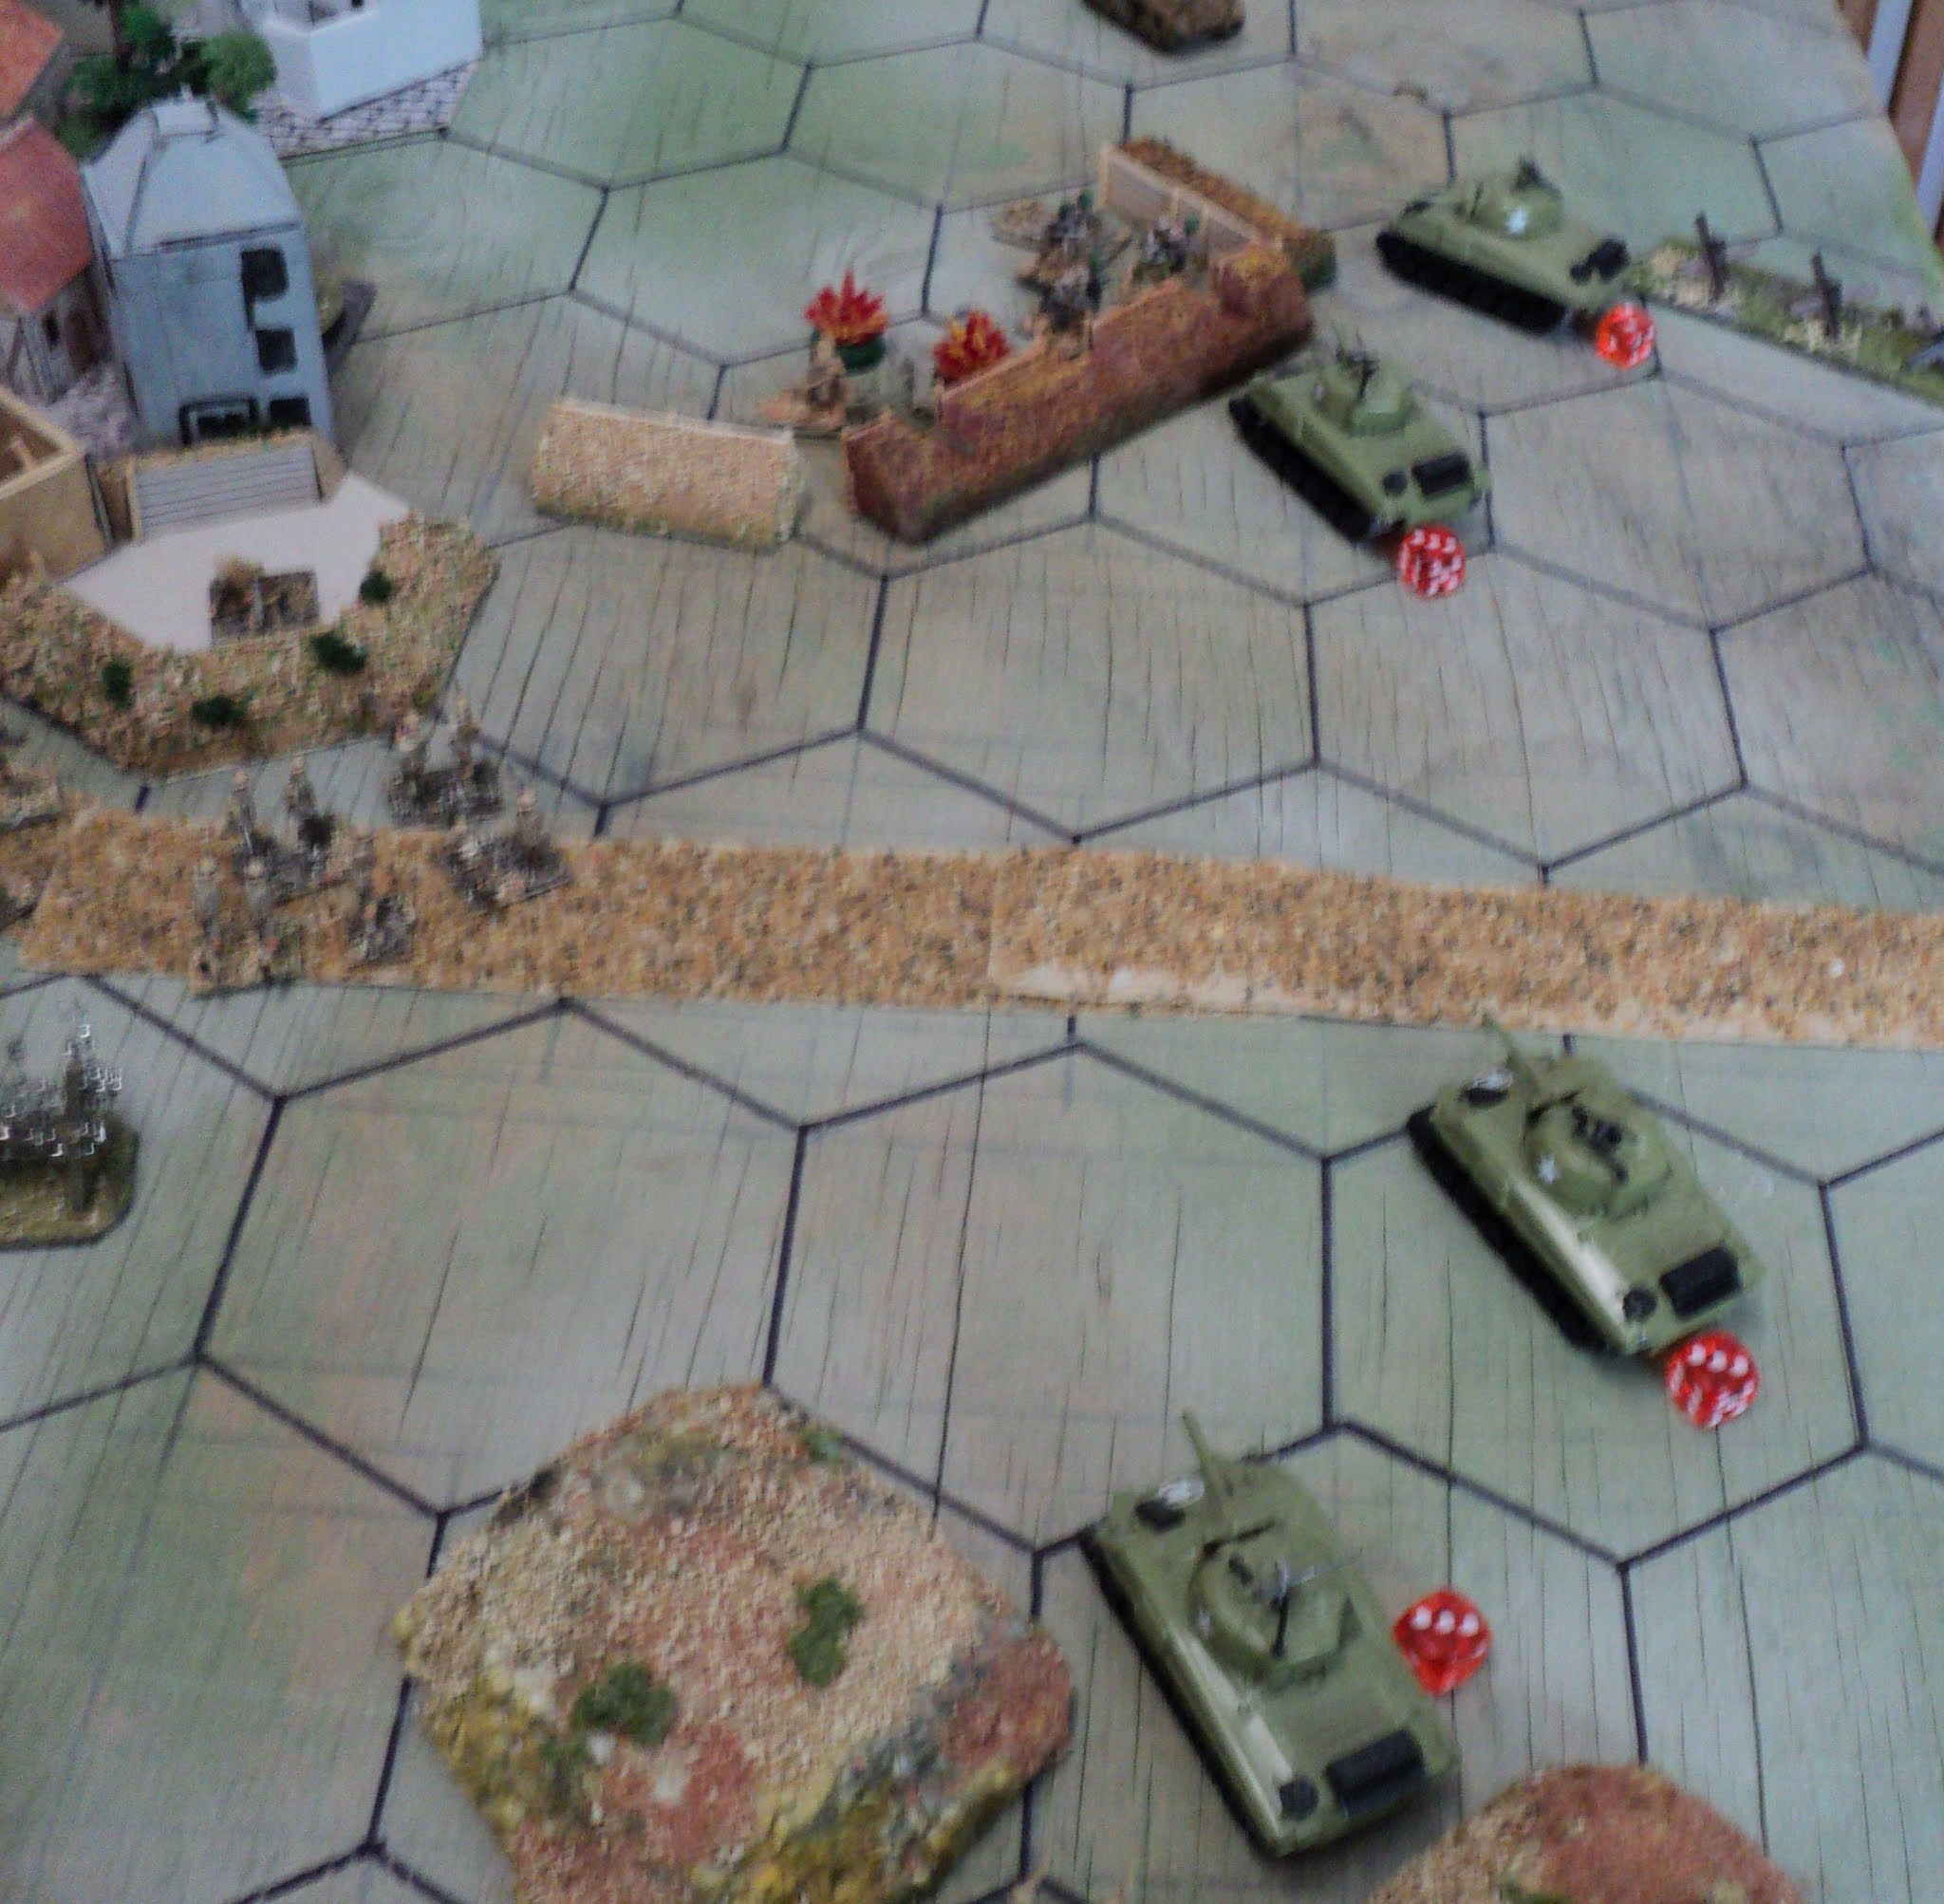
| 6th Armoured rolling forward... |
 |
| ... and running up against strong defences. |
 |
| Under cover of mortar fire 'D'/18th attempt s to storm the BARFist entrenchments |
 |
| 'B'/17th moving up to aid 'C' Coy. |
 |
| Tank vs anti-tank... At the moment the Rebel light tanks don't have the range! |
 |
| The 6pr guns overwhelmed, despite their protective fieldworks. |
 |
| Fighting at the edge of town. Three companies of the Choklit Ghandhi Battalion held up |
Could the Revolution yet hold out against such a seemingly overwhelming assault?
To be continued...
To be continued...
A cracking game Ion, I look forward to the conclusion.
ReplyDeleteRegards,
Paul.
Hi Paul -
DeleteComing up...
Cheers
Archduke Piccolo
Archduke Piccolo,
ReplyDeleteYou are so cruel! Fancy leaving your loyal readers in a situation where they have to wait for the concluding part of your wonderful narrative!
(It’s yet another great battle report!)
All the best,
Bob
Hi Bob -
DeleteOne is tempted to essay a 'Bwaahahahaha!' here, but methought it better to publish half the narrative earlier than the whole narrative later. I'm nor sure whether this is cruelty in my kindness, or just kinda cruel...
Cheers,
Archduke Piccolo.