
 |
| Imperial beach landing near Brindisi |
"After due preparation, the Imperial army, accompanied by the Emperor, and carried by fleet transports escorted by droman warships, made a safe landfall close by the city of Brindisi, on the east coast of Apulian peninsula. So rapid was the imperial response to the sedition of George Kantankeros, that the rebel had not betimes gathered all his strength. Yet he was determined to stop the imperial army on the beaches if he could, and drive it into the sea." Michael Psellophanes, Byzantiad
.jpg) |
| Imperial marines landing near Brindisi |
The size of the Rebel army in this first battle of the 'Apulian War' was determined by die roll. These 'wars' go for three battles at a time, representing maybe a month's campaigning. Of course, it may continue subsequently, depending upon the 'attitudinal' changes that might occur xenographically or domestically - that is to say, as determined by the campaign move dice rolls. It is assumed that the attacker has available his full strength, 6 units. The defender begins with 4 to 6, adding one in subsequent battles to a maximum of 6. Against the Fatimid raid, the defending provincial army began with 5, and in the subsequent battle its 6 units drove the Fatimids back across the Orontes River.
 |
| First blood to the Rebel Army |
For this expedition, I departed slightly from my 'standard' Imperial army, substituting for the light horse unit a body of 'marines', spear and javelin armed sea-going soldiers capable of fighting at sea. Lighter than their closer-order brethren, the skoutatoi, they were better suited to fighting in bad or difficult going. Here is the organisation:
Byzantine Imperial Army:
Commander: Emperor Dementius Katanyxis with Heavy Cavalry, 3SP (elite)Cataphracts, 3SP (elite)
Heavy Cavalry, 2SP (average)
Varangian Guard spearmen, 3SP (elite)
Skoutatoi 'protected bowmen' (spear, bow), 2SP (average)
Marines from the fleet, loose order spearmen, 2SP (average)
6 units, 15SP
This is a very powerful force!
 |
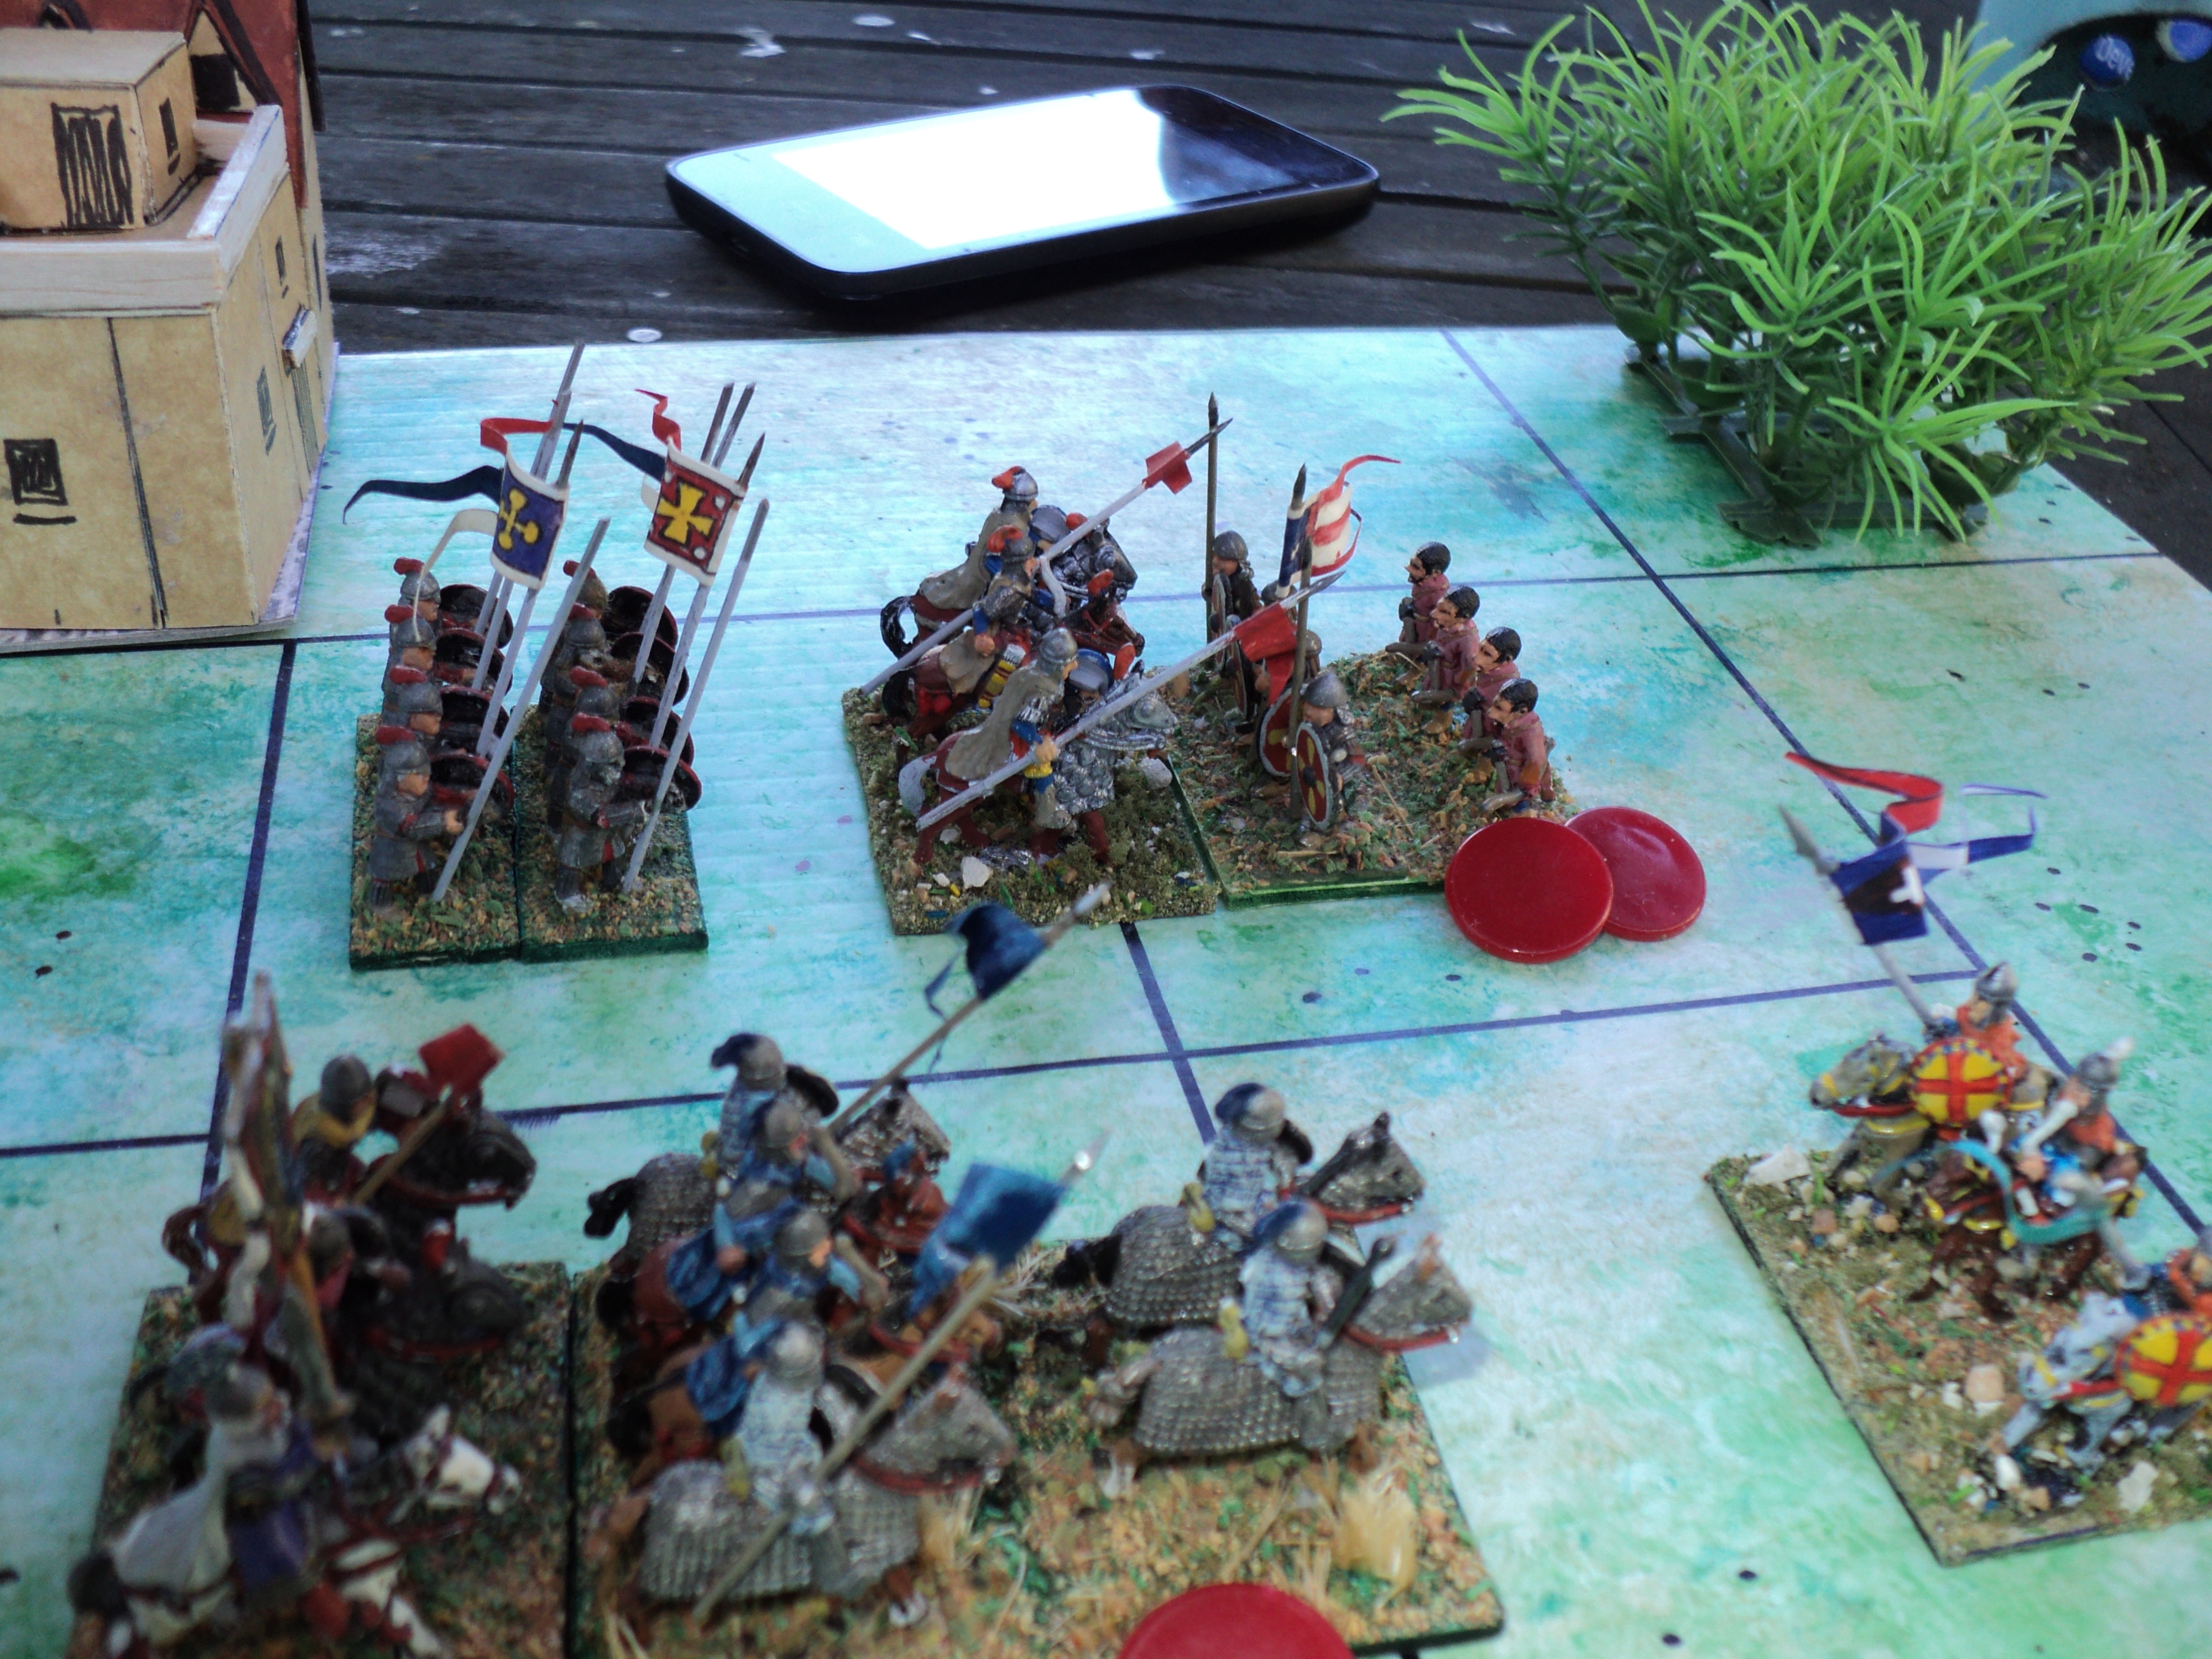
| Imperial cavalry charge rebel foot... |
Kantankeros brought with him:
Commander: Kantankeros, heavy cavalry 3SP (average)Heavy Cavalry, 2SP (average)
Light horse (lance, bow), 2SP (average)
Protected spearmen (spear, bow), 2SP (average)
4 units, 9SP
You would think, wouldn't you, that so overmatched this army wouldn't last long. Nor did the early events indicate otherwise. But... you never know...
 |
| ... and scatters them to the wind. |
Now, as my standard practice, the 'invading' force begins with the initiative, and goes first, the initiative being rolled for in subsequent turns. There is some argument in favour of reversing that for seaborne landings, or maybe subjecting the first move also to a die roll. Bear in mind, though, that there is a 50-50 chance the defenders will win the second initiative roll, and so be the first to get two moves in a row.
 |
| Imperial drive in the centre |
A quick word on the board. The terrain rolled for was blank - I rolled a '1'. But it did occur to me that the corner sections of the board could at least give the impression of a plain set among other accidental features - hills, woods ... towns. So the town you see - let's call it Brindisi, or a suburb thereof - has no game significance other than to make the board visually a bit more interesting. The battle took place close by a city, shall we say.
 |
| Looking desperate for the rebel Kantankeros |
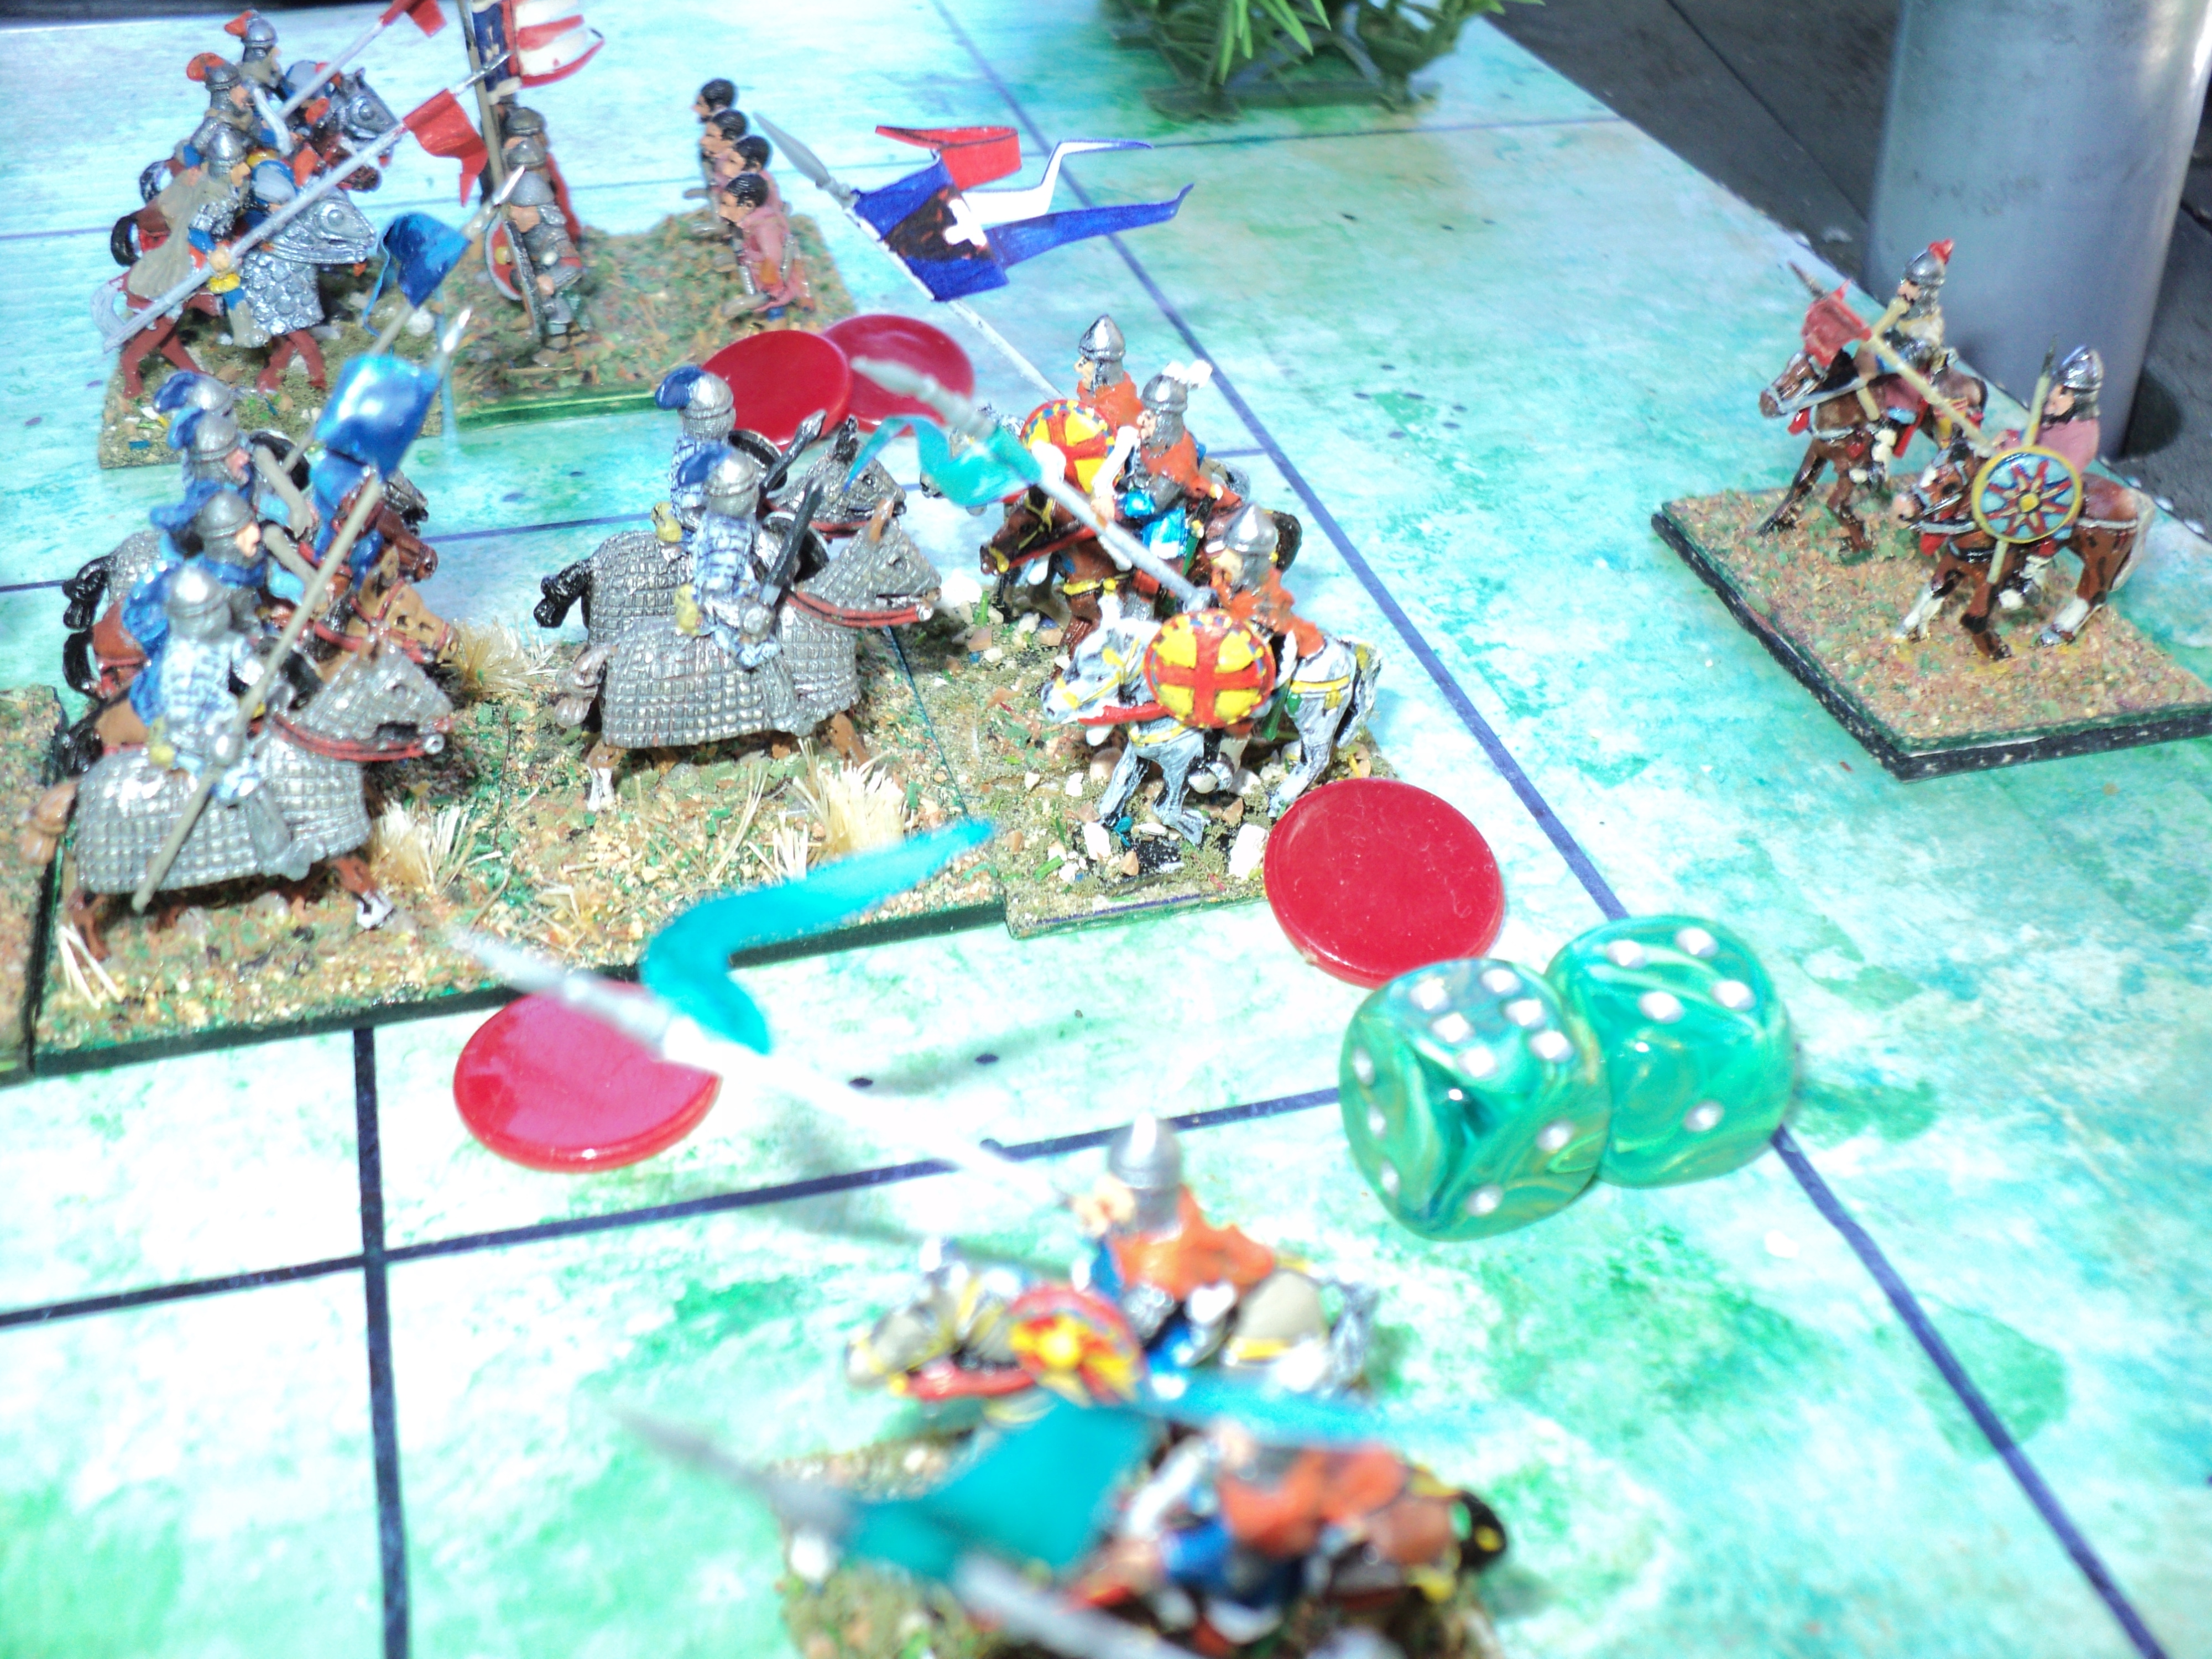 |
| Kantankeros barely escapes capture |
Although first blood went to the rebel army - a hit upon the kataphraktoi - fortunes rapidly turned against them. The imperial heavy cavalry quickly rode down the rebel foot, forcing the early commitment of the light horse to try and preserve the line. Kantankeros's own cavalry unit also took some hurt, the rebel leader himself barely escaping capture (the 10 rolled on the green dice above). Only on the left were the rebels holding.
 |
| Rebel light horse stops Imperial left from breaking through. |
 |
| Imperial right wing driven almost to the landing beaches |
After such heavy early losses, it seemed that the rebel army must surely suffer a quick and early defeat. Not these fellows. The light horse pitched into their heavier adversaries and, to everyone's shock and horror fairly routed them from the field. They had taken some loss themselves, and still had the Varangian Guard facing them, but the light horse had, by some miracle, restored the line.
 |
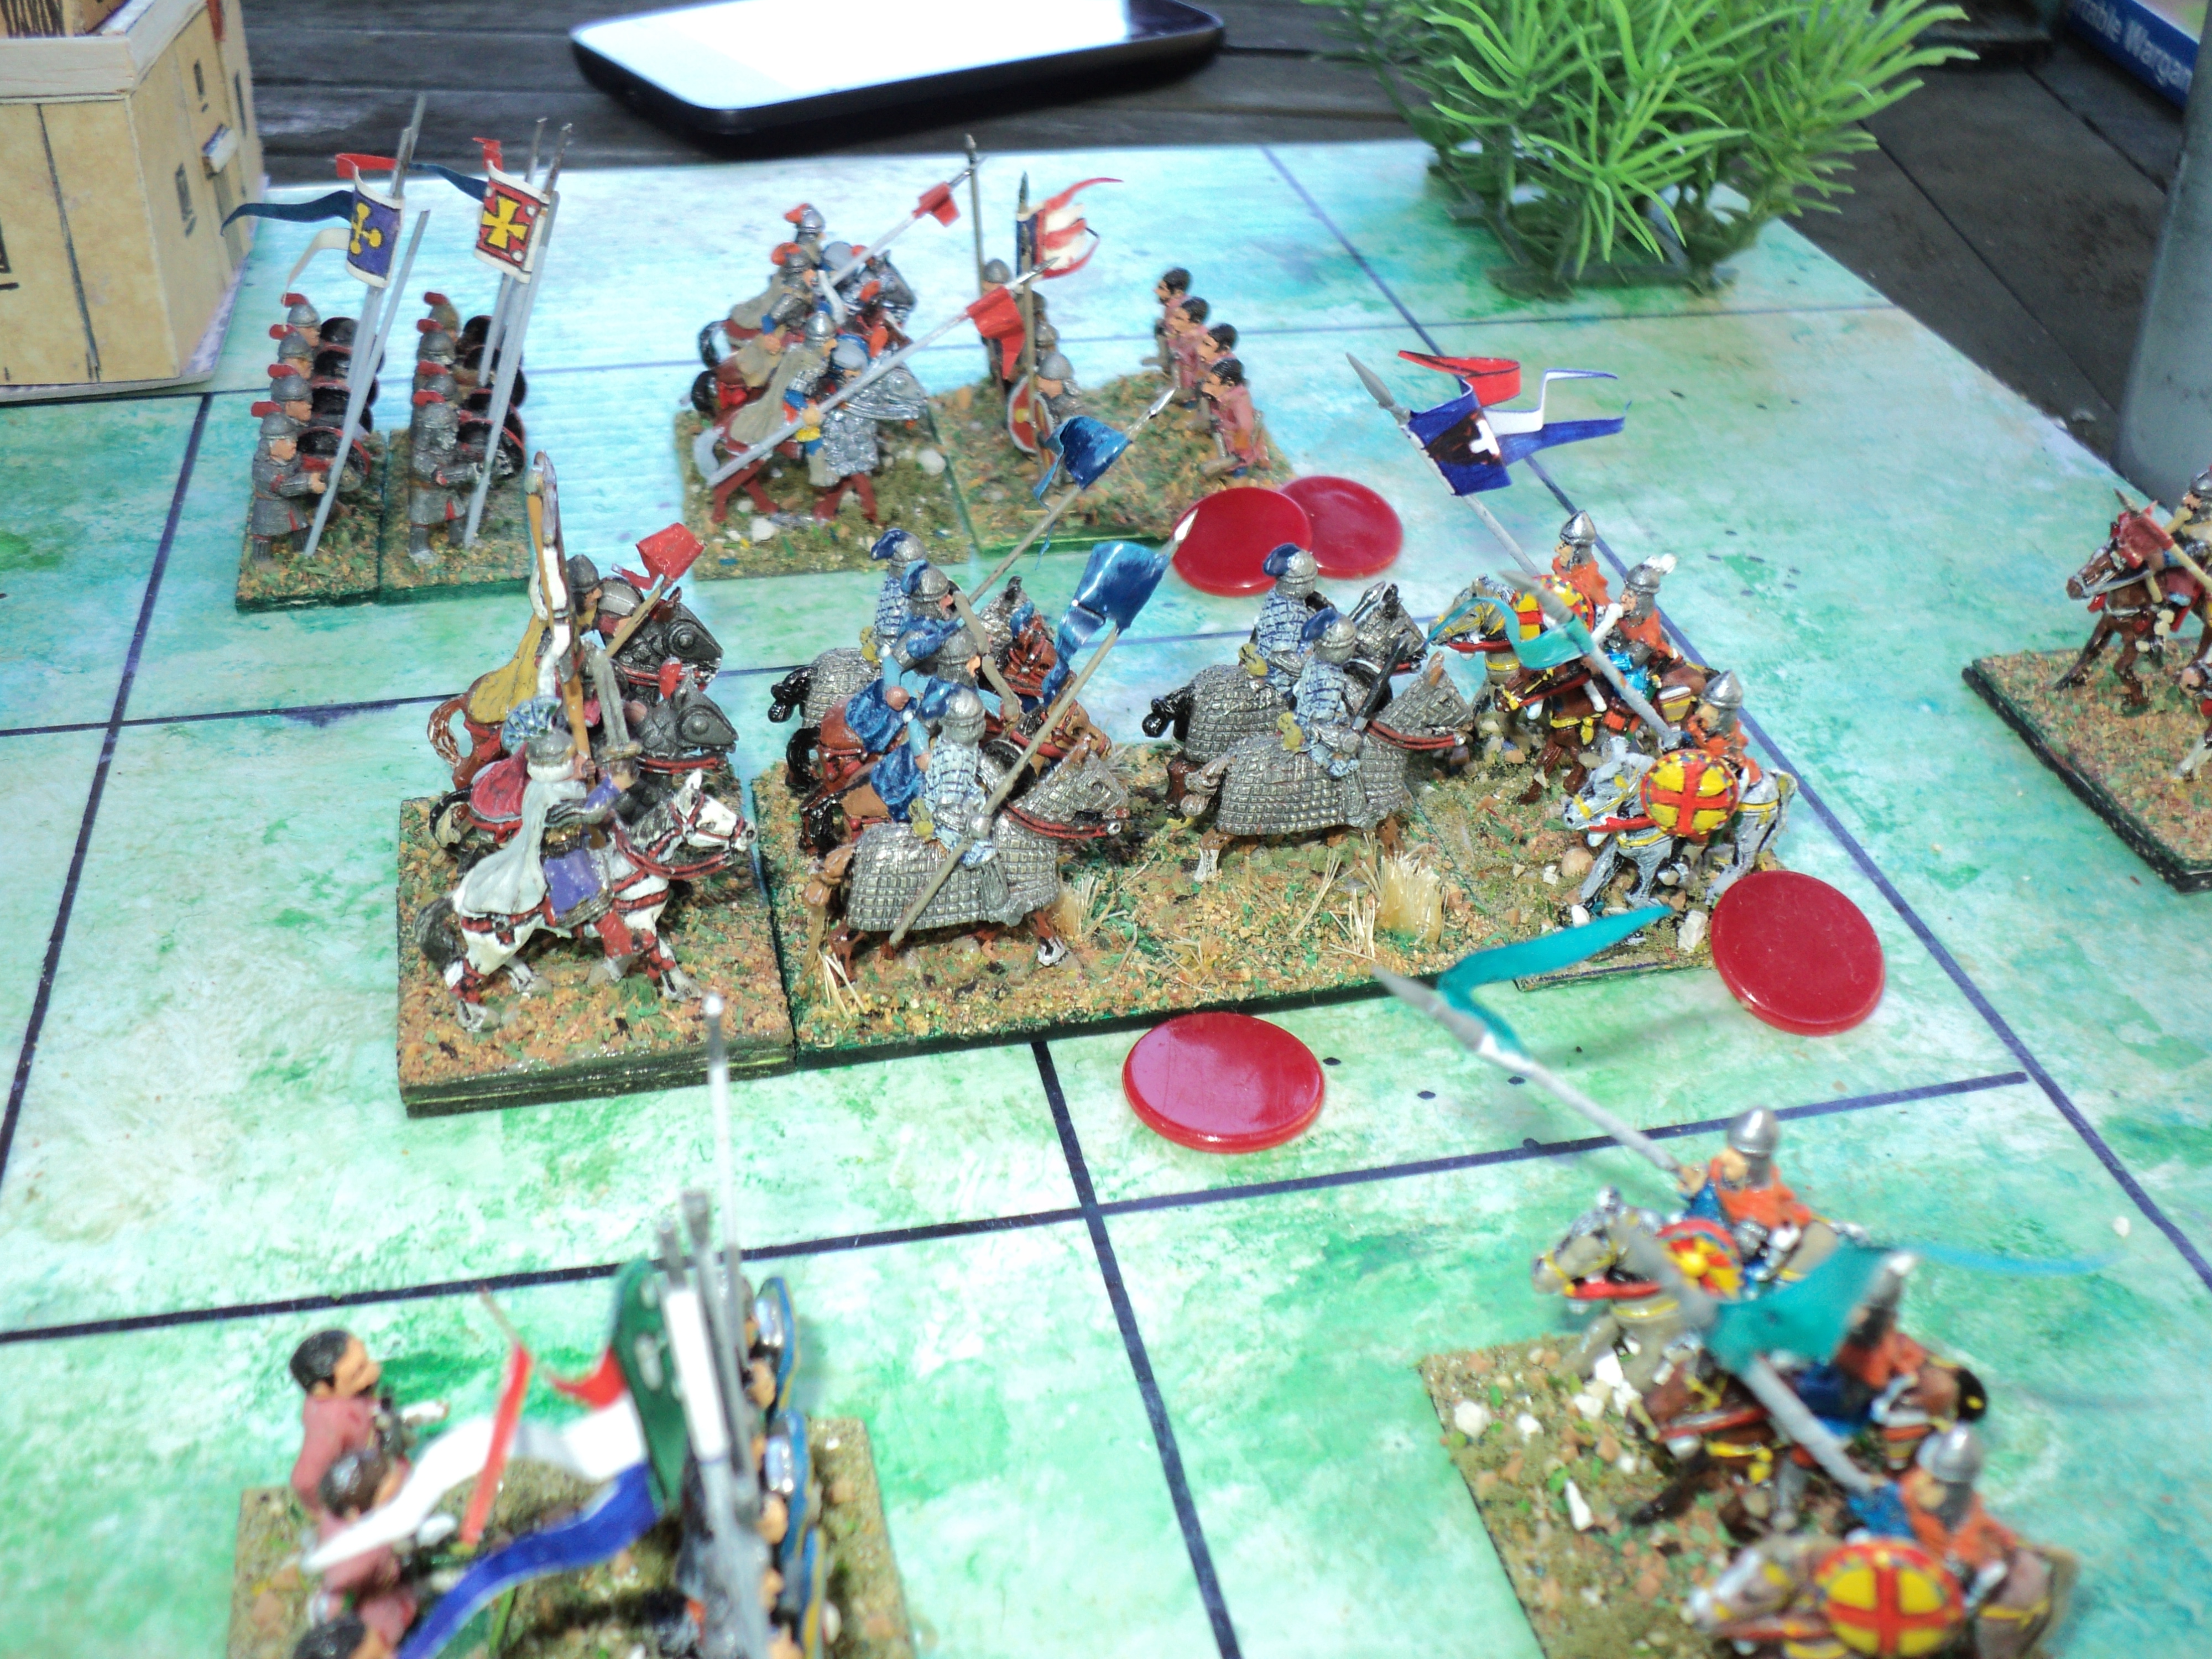
| Imperial left flank kavallarioi routed |
So had Kantankeros's personal cavalry unit, driving back the heavier cataphracts behind the Emperor's own horse. So the battlefront had become skewed, the Imperial left on the brink of breaking through the light horse, the centre stymied for the moment, and the right driven back almost to the shore.
 |

The Rebel resurgence didn't end there. The fight in the centre found the Emperor himself driven back towards the landing beaches, but the Rebel cavalry were too exhausted to follow up. The close combat had resulted in 'force back' results for both sides - not unexpected with the pluses for generals and supports.
Such good fortune could not last, of course. With the support of the marines, the skoutatoi fended off their attackers, and drove them back to their start line. (About to dice out the combat on the Rebel right, I noticed the Imperial cavalry there ought to have been removed. Fortunately I saw this before the close combat dice rolls!)
 |
| Imperial centre and right driven back to the landing beaches |
Now the Imperial army seemed to catch its second wind. Lumbering forward, the kataphraktoi thundered into Kantankeros's personal command and forced it back from the field. The Varangian Guard forced back the light horse. The battle might have ended there, but the rebels still had one chance of keeping the field. Back came the last ditch counterattack.
 |
| Imperial centre renews attacks |
It was the last throw of a gambler left with little more to lose. The Light horse broke upon the spears of the Varangian Guard, and scattered into the countryside. Kantankeros's own command failed to make any impression agaist the powerful Imperial centre, and they also drew off - in good order still, but the battle decisively lost.
 |
| Rebel army finally defeated; Kantankeros escapes to fight another day... |
Considering the disparity of force, this proved a remarkable battle. The early indications were that the Imperialists were in short order about to sweep the rebels from the field. Then the latter's counter-attacks drove more than half the Imperial Army almost back to the beaches. But there was never really any doubt as to the final outcome.
So now the Emperor had reestablished at least a foothold upon the separatist province of Apulia. The victory had cost 4 Strength Points; the Rebel army had lost 6. The following day, the Imperial Army marched northwest, toward the the Langobardian seaport of Tarentum.
To be continued, the Battle of Langobardia
Great report Archduke - the rebellion is in trouble!
ReplyDeleteHi Maudlin Jack -
DeleteIt ain't looking good! But that was a magnificent fight they put up, when all seemed lost.
Cheers,
Ion
Another fine battle report….what fate awaits Kantankeros??!! Awaiting the next report with some anticipation 👍🏼👍🏼⚔️⚔️
ReplyDeleteMartin S -
DeleteHe has certainly cast his dice, burned his bridges and has the saw half way through the limb upon which he sits... His chances don't look good, right now!
Cheers,
Ion
Yet another hard-fought battle with plenty of twists and turns. Well done Ion. You’re really knocking ‘em out at a fair pace. Keep it up (please). 👏👏
ReplyDeleteKantankeros and the rebels fought well, but were finally ground down by the sheer numerical advantage of the Imperial army. As expected I suppose.
Of course, Kantankeros continues to resist - as the consequences of failure would surely be harsh. I look forwards to reading more…
Cheers,
Geoff
Hi Geoff -
DeleteIt's the write-ups that take the time. I think once I've sorted this 'campaign month(?)' I'll probably reduce the battle narratives to a couple of paragraphs, and concentrate more on the 'big picture'.
You could regard the Imperial Army as 'plot armour' - very hard to beat, though not impossible.
Cheers,
Ion