
 |
| Ineffective opening volleys of Fatimid arrows |
"Following the inconclusive action at the hill of St Symeon, the Byzantine and Fatimid Egyptian armies hung around the area for the next few days. The Strategos of the region, Constantine Constantinopoulos, awaited a reinforcement of heavy cavalry; the Amir Doumai Ed Din, continued, rather cautiously, to raid and rieve the countryside about. Satisfied he could now face the Egyptians on roughly equal terms, the Strategos once more advanced to offer battle. The armies met, as before, at the hill of St Symeon.
 |
| Byzantines' first attacks |
The opposing forces were the same as those of the previous battle, but for the addition of a body of heavy cavalry to the Byzantine army..."
Michael Psellophanes, Byzantiad
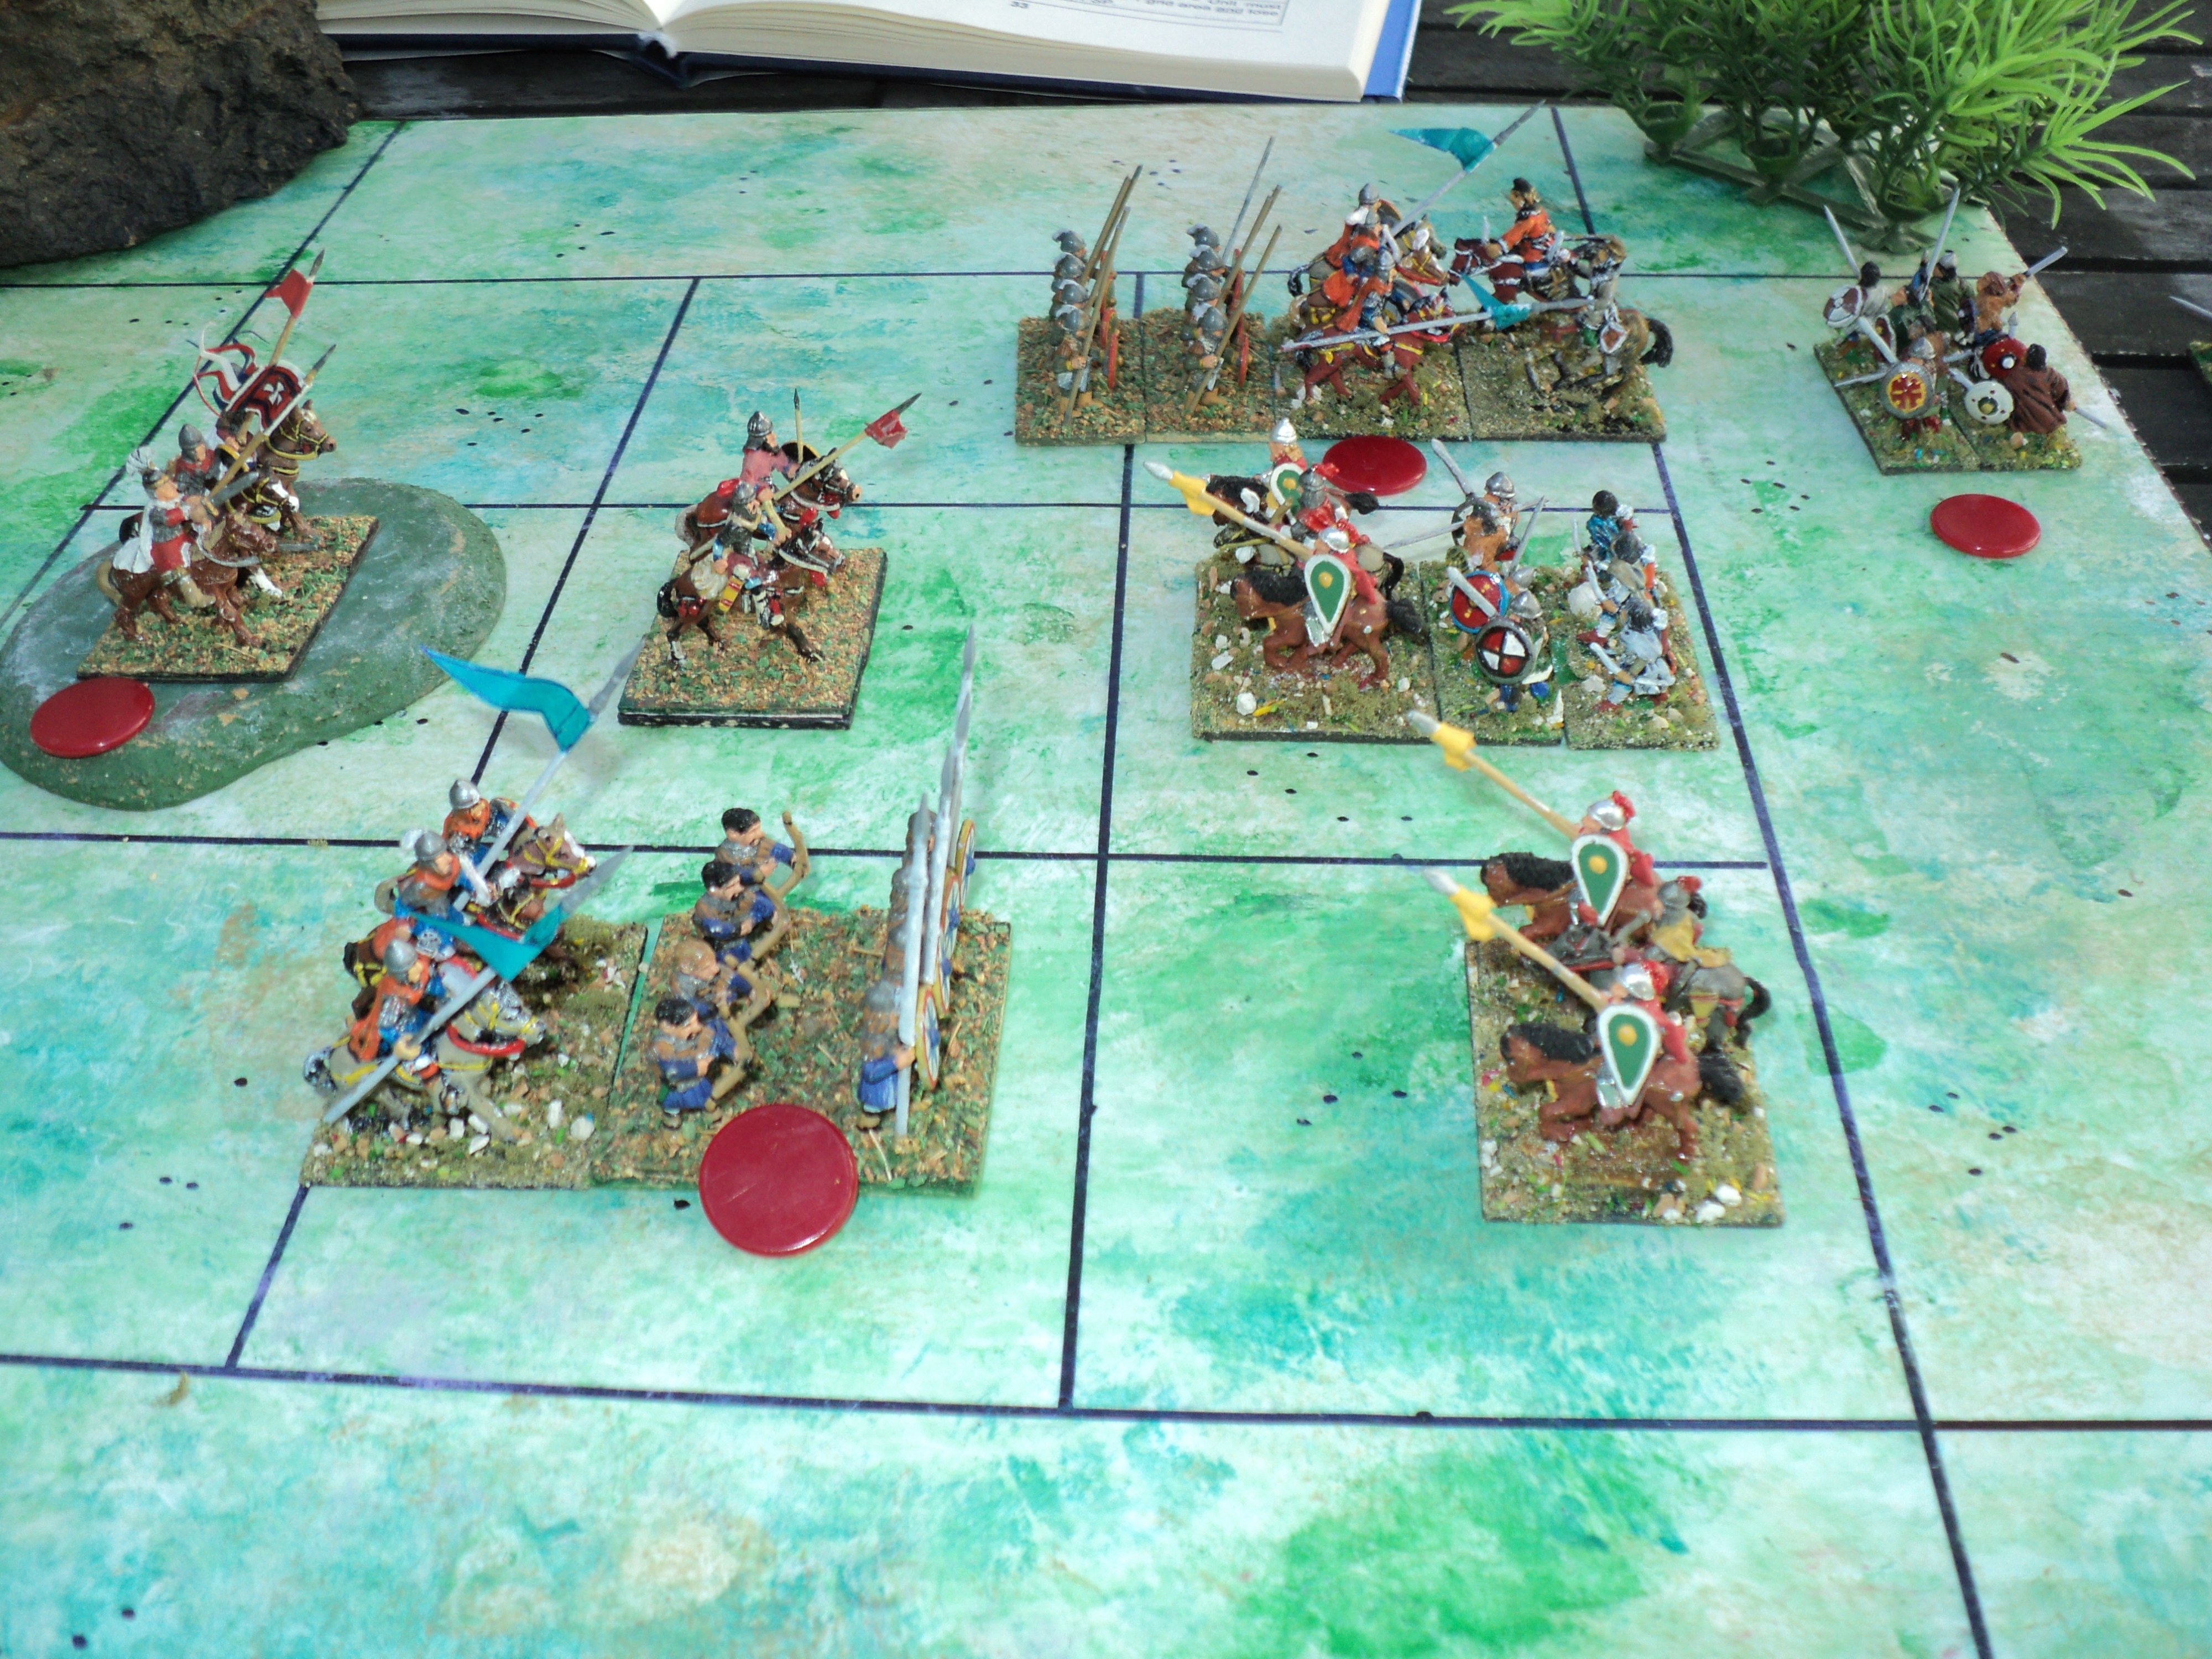
Seizing the early initiative, the Egyptians advanced in two waves, the 'abid at left and centre with their spears and bows, and the light horse on the right, where they pelted the peltastoi with arrows. The Egyptian archery proving wholly ineffective, Constantine unleashed his plan. He had formed up as before with the infantry on the flanks, and the prokoursatores light horse covering the centre. But these were merely a screen behind which lay his striking cavalry.
Michael Psellophanes, Byzantiad
 |
| losses mount on both sides |
Seizing the early initiative, the Egyptians advanced in two waves, the 'abid at left and centre with their spears and bows, and the light horse on the right, where they pelted the peltastoi with arrows. The Egyptian archery proving wholly ineffective, Constantine unleashed his plan. He had formed up as before with the infantry on the flanks, and the prokoursatores light horse covering the centre. But these were merely a screen behind which lay his striking cavalry.
The return archery covered the charge of the heavy cavalry all along the front, passing through the gaps in the columns of infantry. On the left, the Berber horse incontinent fled behind the Dailami spearmen. The following up kavallarioi crashed into the loose order formation taking and inflicting some loss. On the other flank, the 'abid were equally discomfited, though the Byzantine horse did not follow up quite so vigorously. In the centre, Constantine's charge failed to break down the 'abid foot, who met the initial onset stolidly.
 |
| Fatimid counterattack on their left and centre |
Thus encouraged, the 'abid on the left advanced to restore the line, whilst the Amir himself brought his personal command forward to bolster the centre. Heavy fighting continued with the Egyptian right refusing to give more ground. When the centre 'abid finally drew back, Doumai Ed Din (Doumayyeddin) charged to cover their withdrawal. Although outnumbered, he gave Constantine several moments of anxiety, and inflicted some loss, though without forcing him back.
 |
| Fatimid 'abid driven in... |
 |
| ... but Constantine's horse takes a knock |
Gradually, however, the Byzantines began to assert a dominance over the field. Backed up by the peltastoi on the left, the kavallarioi drove in the Dailami spears, and struck the light horse behind them. In the centre, although Constantine's cavalry were driven back to the hill covered by his light horse, the Amir himself was glad to pull back onto his 'abid line. On the right, the skoutatoi took up the cudgels against the advancing 'abid. Both sides' infantry suffered heavy losses, but they were too much for the Egyptians, who finally broke and fled.
 |
| Left flank 'abid take heavy losses and are routed |
From now on, indications were that the Byzantine tide was on the make, beginning on their right, where only a single unit of ghulam cavalry stood between the advancing skoutatoi and kavallarioi and the open country beyond. Seizing the initiative, they ramped up the pressure all along the line.
 |
| A lull in the battle |
 |
| Byzantines seize the initiative |

The Byzantines now piled in all along the line, giving and taking heavy losses. The left flank cavalry broke and routed, but not before dealing heavy blows upon the Berber light horse. In the centre, the Amir's cavalry took some stick, and on the right, the Egyptian ghulams were just barely holding the Byzantine onslaught. At this point losses amounted to 4SP to the Byzantines, 6SP to the Fatimids.
 |
| Fatimids, desperately hanging on, drive off left wing Byzantine cavalry |

 On the right, the exiguous Egyptian front gave way as the Byzantines drove the ghulams from the field. In the centre, Doumayyeddin's cavalry fell back also, to be joined by the retreating 'abid, as the following up Byzantine horse chivvied them back. At this point, there were now three Fatimid units in the reserve zone, which under the rules, might accommodate two. Probably as 'last in' the 'abid foot ought to have been the unit removed. But, not having any real basis for a decision subjected the matter to divine arbitration by the goddess Hexahedra - I rolled a die. The result was that the Amir's own cavalry departed the scene. This did not count for SP loss, merely that the army commander (unhurt in all the fighting) was no longer available to let the light of his countenance encourage the troops. Oddly enough, the SP score was still 6-4 in favour of the Byzantines.
 |
| One too many units in the Fatimid rear zone |
Now it was a matter of who won this initiative this time. It was the Byzantines. Given not even a problematical chance to recover their fortunes, the Egyptians drew off in defeat.
 |
| Byzantines retain the initiative to keep the Fatimids from counterattack. |
An exciting game and great battle report.
ReplyDeleteThe Byzantines had most of the luck in this episode. There was nothing qualitatively to choose between the two sides.
DeleteArchduke Piccolo,
ReplyDeleteThis campaign setup lends itself to an ongoing series of games that could literally last for years! Each campaign ‘year’ could see the Byzantines having to marshal their limited resources to protect their frontiers from incursions whilst dealing with internal tensions.
This has the potential to become a wargaming classic!
All the best,
Bob
Bob -
DeleteThat's a nice thought! But I was already beginning to notice that one could make a whole hobby out of just this one campaign - provided, of course, one didn't get bored with it...
At some point I may do some 'larger board' battles based on this same 'campaign'. For the FP3x3PW, though, I'll 'do' the revolt battles (up to 3), then, that resolved, one more 'xenographical' move and the initial battles (if any) for those. I'll probably leave it there.
Cheers,
Ion
Something you could come back to when the mood strikes you, A year in the long and checkered history of the Empire.
ReplyDeleteMark -
DeleteIt is certainly something very easy to pick up and set aside. And something that lends itself to an ongoing chronicle of events - a never-ending story, to which one may from time to time return.
Ion
Gosh, that was decisive; sent them right to the 'edge of the world'!
ReplyDeleteThis has been a fantastic series of posts Ion (with more to come too). I really like the gridded tabletop and your figures. The addition of a political phase to include the nuances of alliances/self-interest is tops, and then there are your occasional, marvellous sketches... Superb!
Regards, James
Thanks, James.
DeleteIf you haven't yet seen it, you might check out the 'Portable Wargames' group on facebook. Mark Cordone came up with the Fastplay 3x3 game system. I thought it well adapted to a 'campaign game' of this type.
Cheers,
Ion
Ion - I’m sorry I was “late for the party” at Antioch, but I’d been away on holiday & only arrived home late yesterday. No wi-fi in rural Northumberland ☹️ but, on the positive side, I did manage to visit a couple of castles 👍👍.
ReplyDeleteIt’s good to see the Fatimids were eventually driven back. Yet again, there was a fair bit of to-and-fro in these battles, but you did a great job of making it all hang together in a sensible, coherent manner as part of the battle narrative. Well done!!
I’m sure the Emperor will be glad the Fatimids were given a bloody nose - but the upstart Kantankeros still needs to be dealt with…
I look forwards to reading more.
Cheers,
Geoff
Hi Geoff -
DeleteSounds as though you had a nice trip away - free from the entanglements of Wifi etc. The affair of Kantankeros's revolt has been settled - the narratives have yet to be written and posted. The events of the following month have also been set in train - not an easy life for the Emperor!
Cheers,
Ion
It sounds all go, go, go Ion. Good stuff!!
ReplyDeleteI saw the “taster” on the PW Facebook page and eagerly await the full battle report and pics.
Cheers,
Geoff
It's done. Now for the second battle... :-D
Delete