Thursday, March 18, 2021

The First Blacklands War - Table of links

The First Blacklands War having reached a conclusion, here is a 'Table of Contents' series of links to the thirty-four (!) postings that made up the campaign narrative.  My thanks go to Bob Cordery whose idea this was. 

The first week of the war


Fleet action


First battle


Each successive line is a separate link, the list following the chronological order of their posting.  Just 'left-click' on a line to link to the blog article.

Tuesday, March 16, 2021

The First Blacklands War - The End


The Storm of Scutari

The besiegers have infiltrated the town,
aided by anti-Imperialist townsmen


General situation in the Blacklands
after five weeks of war.


Having apparently inserted themselves into besieged Scutari through obscure postern gates left open in the southwest quarter of the fortifications, the infiltrating Black Mountaineers thought to have effected a surprise as they advanced along the line of the west wall. In this I allowed the attackers a kind of 'free hit', attacking the defenders in flank, the close proximity of the south wall defenders to be ignored for one turn. All it required was for them to score a '4' upon a D6 to effect a hit, and possibly to eliminate the defender altogether.  
 
Attacks against the north face of the town

The signal to attack was given by a salvo from the Black Mountains' sole artillery - their mountain guns, proper siege weapons not to be had. It was owing to this lack that the siege, already of two weeks' duration, had been unlikely to end by breaching the walls. Upon the signal the infiltrators began their charge, whilst at the same time, the whole of the remainder of the army, concentrating in the north and east of the town began their storm.

Attacks against the east face.

The first, most easily reached, objectives were the demi-lunes before the walls. The east demi-lune threw back the first attack with loss, but were unable to sustain the second that quickly followed. The northern demilune, subjected to as much gunfire as the Mountaineers could fling at it, also succumbed early on.
Failing to achieve surprise, the infiltrators face a
counterattack by twice their numbers.


Had events within the town fallen out as favourably, no doubt the place would have been overrun and the garrison surrendered in due course. It appears that the hoped for surprise was incomplete - if the whole emprise had not been betrayed, withal - for the infiltrators were met by a surprisingly resolute resistance (they failed to roll the necessary '4'). Unable to push on, they were themselves assailed in flank, and pushed into the unoccupied southwest bastion. There they were to remain bottled up for the duration of the battle.
Infiltrators driven into an unoccupied bastion.

The capture of the demi-lunes had neither of them been achieved without heavy loss, but the attacks continued to be pressed with determination, against both northern bastions.

The East demi-lune is the first to fall, but not 
without cost to the Mountaineers.

..then falls the north demi-lune.

In the face of stiff resistance the Mountaineers pushed their way into the northeast bastion, the defending artillery out, and into the main town.  
The northeast bastion now falls...

Following up, they inflicted some loss upon the gunners and their guns, but were themselves driven in rout from the bastion (the attackers lost their second and remaining SP; the artillery, lacking a retreat, also lost one).
... but the attackers driven out.

The first wave having receded from the contested bastion, the second wave surged in before the guns could be brought in to reoccupy it.  Once again the fighting was fierce and bloody.  The combat dice were the duplicates of the previous (a 5 and a 6 rolled). Both side lost SPs, enough to eliminate the Garrison's artillery, and to halve the attackers' strength. 

The second wave of attackers overrun the bastion 
before the garrison can reoccupy.

As they overran the guns and surged into the town, prospects seemed to be looking bright for the besiegers. The northwest bastion had also fallen, albeit with heavy loss. But along the main north wall itself, the attackers remained held up in the ditch behind the demi-lune. General Bogotan was soon to insert himself into the action there, in the hope that his presence might tip the balance.


The battle for the Northeast sector of the town.  
Meanwhile the Northwest bastion has also fallen.

Nothing loth, the Garrison Commander also thought his august presence might be the thing to sustain a desperate defence. For the moment at least, the Mountaineers seemed on the brink of victory, if they could but press further into the town. The garrison's resistance seemed to be weakening. It had reached its exhaustion point - 6SP lost - but the attackers, with no great superiority in numbers to begin with, were themselves beginning to flag. They had also lost 6SP; just one more, and that would be the end of the attack, unless the garrison surrendered betimes. Three bastions and two demi-lunes having fallen, that seemed by no means improbable.

The commanders join the fight for the north wall.

There was to be no surrender. Exhausted though they were, the garrison brought the close quarter fighting at the southwest bastion to a successful conclusion...

... which is reoccupied by the garrison.


The infiltrators driven out from the southwest bastion...

... just as, aided by the protection of the walls, the on-going close combats to right and left drawing off threats to either flank, and encouraged by their commander, the defenders of the north face of the town threw off their assailants. Lucky to survive, General Bogotan was caught up and carried along in the rout, back to his own lines.  
The defeat of the north wall attack - the '4' is
enough at least to force back the attackers...

The storm has failed. Just barely, but the failure was as complete as it was dire. The Allied plenipotentiaries in Genevra were to be left with nothing more than a tenuous hold upon Vardar province to bring to the council.
... but the 'hit resolution' destroys the attacking unit.
General Bogotan is forced to flee.

The End of the War

In their capitals, Kings and Princes were aghast, the negotiators in Genevra left without any worthwhile leverage, the whole six-week war having achieved nothing towards the territorial aggrandisement of even one of the Allies.  In Ionople, of course, the Sultan would have been cock-a-hoop, had cock-a-hoop-ness been in the style of Sultanry, and the grins of his representatives in Genevra reduced their opposites to incoherent, spluttering rage.  

Much blame was to be heaped upon the General who failed at Scutari.  Despite the insistence of the other potentates, the Black Mountains Prince was rather disinclined even to admonish, let alone cashier or execute his army commander, who might be difficult to replace with one with equal ability.  He knew as none other, that his peremptory order handed his commander a near-impossible task.

Ship carrying Turcowaz plenipotentiaries up the 
Illyrian Sea on the way to Genevra 
(detail from old Diplomacy map)

For his part, the Sultan was inclined to forbearance in the peace negotiations that were to follow. Insisting upon the acceptance of the status quo ante bellum, he permitted himself to be overborne upon the subject of reparations, accepting the barest minimum that, in his view at least, accorded with his honour and dignity as ruler of the Settee Empire. The instructions he had relayed to his Genevra embassy were to demand treble that minimum, but to allow themselves, of course with 'extreme reluctance' to be beaten down to his 'line in the sand.' The World in general agreed that His Imperial Magnificence might justly have stood out for settling upon more than he did.

Even so leniently treated, in the following months the Allies rather chafed under their financial treaty obligations. Persuading themselves they had been harshly and unreasonably treated, they once more began to harbour against the Settee Empire resentments that seemed to justify their casting covetous eyes upon the Imperial provinces. The murmur towards a second attempt against the Settee Empire were not long in being heard once more in the Blacklands' capitals...

To be continued?  Maybe. 


Saturday, March 13, 2021

The First Blacklands War - the Final Act...

By the beginning of the fifth week of the war, the four Allies, The Black Mountains, Bejela, Chervenia and Hellenica, were beginning to perceive they had caught a Tartar - very nearly literally. Several defeats, relieved only by the rare victory, had left two of the Allies with nary a foothold in Settee lands, one (Bejela) whose presence was permitted solely by the lack of a Turcowaz army near enough to hand to evict them, and the fourth barely maintaining a siege of a far-flung Imperial provincial capital.  

How might the Allies back gracefully out of the conflict with their honour intact and perhaps some territorial acquisition at least to offer a semblance of success? The more farsighted statesmen of all the belligerents had agreed that talks might lead to some sort of agreement. The Allied plenipotentiaries hoped that verbal shots might supply the deficiencies of artillery and rifles; the Turcowaz, of course, stood upon the integrity of Empire, arguing that the Allies ought to have been satisfied with what they had already won for themselves decades ago.

So the representatives of the warring states forgathered in Genevra, the capital city of neutral Helvetica. For a while it was thought that Lutetia in Azuria would be the venue, but already war clouds were gathering over that city, massing from the direction of Ruberia. For a couple of weeks the talks seemed to be leading to nothing, as the Allied officials saw their position weakening day by day; and the Turcowaz grew more assured of the strength of theirs. Finally, as November entered its second week, the Allies, disappointed at the indecisive outcome of the latest action in North Macedonia, could hope only for the outcome of the unlikely siege of Scutari, near the Illyrian coast.  

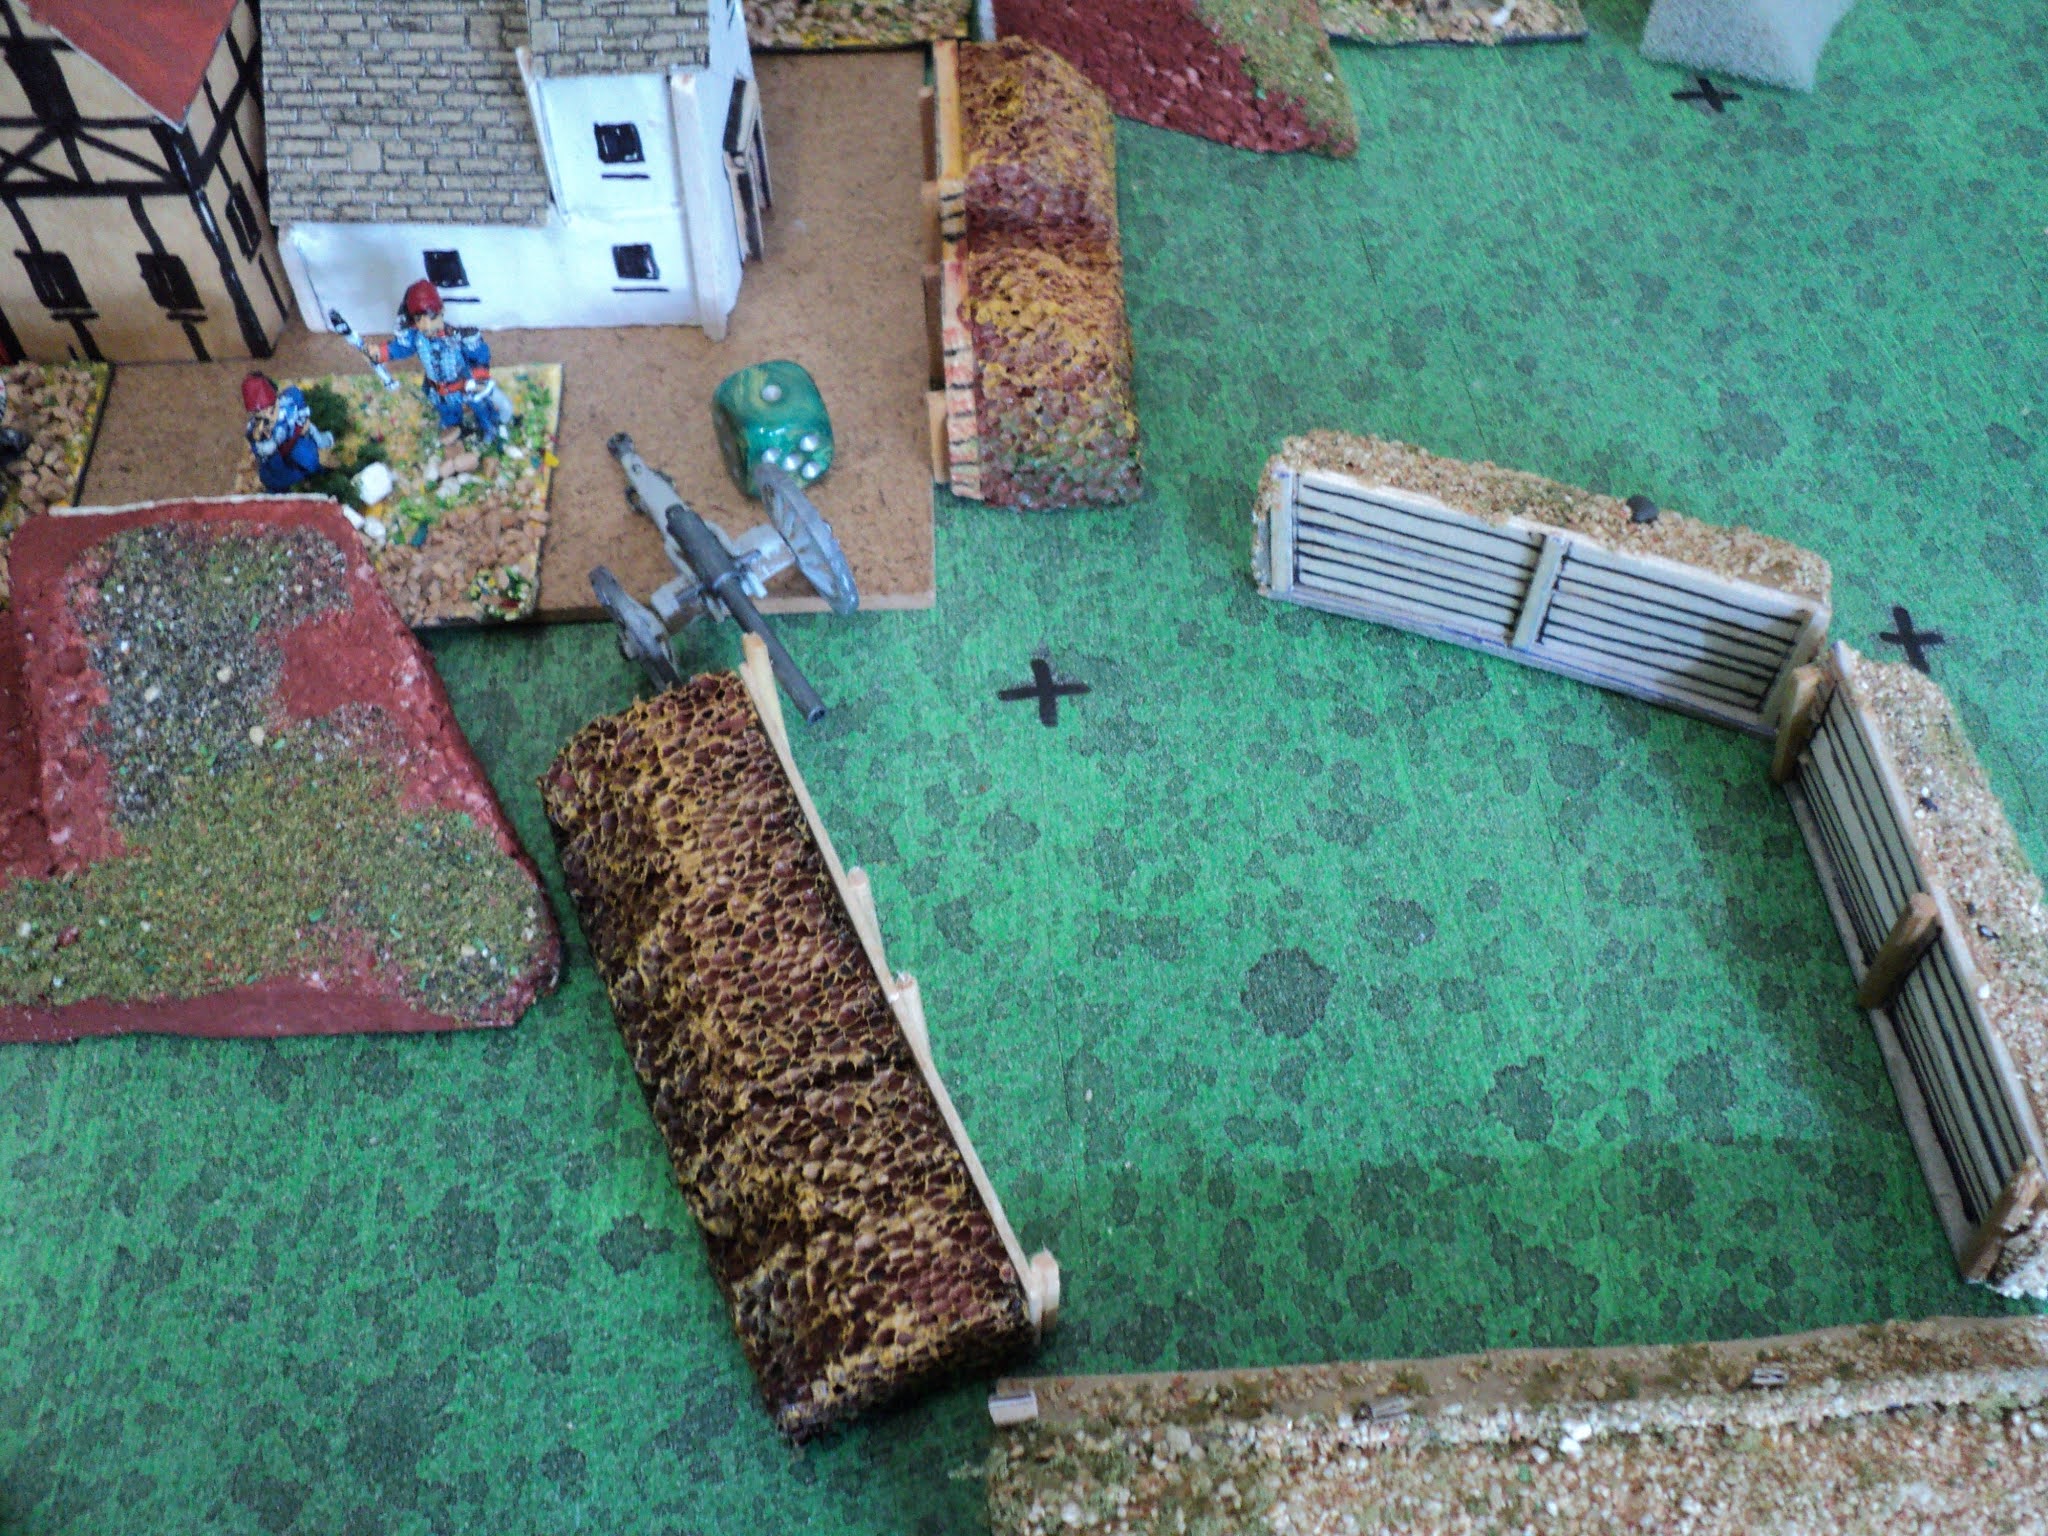
Now, before resuming the narrative, permit me to apologize for the poor quality of the set-up. I had to extemporise, the materials I thought I had having been thrown out years ago. The only virtue is that at least the fortification are easy to trace. Least said the better.
A view of Scutari, with the infiltrating unit
at the southwest corner.

Now, the forces involved were very small. I had earlier decided that the garrison of a provincial capital should comprise 16SP, made up of commander, 2 infantry stands and an artillery stand. It so happened that the Black Mountains army besieging the place was little stronger. Given the small numbers, I decided to expand things a little, splitting the stands whilst keeping to the given strength points. So the opposing forces comprised:

Turcowaz Garrison of Scutari:
  • Commander ... (Poor) = 6SP
  • 8 Infantry stands @ 1SP = 8SP
  • 1 Artillery stand = 2SP
Totals:
10 Units - Median activation 5-1 (Poor Command) = 4
16 SP - Exhaustion Point = 6 SP

Army of the Black Mountains Principality:
  • Commander, General Bogotan (Good) = 6SP
  • 5 Infantry @ 2SP = 10SP
  • 1 Infantry = 1SP*
  • 1 Artillery = 1SP**
  • 1 Transport = 1SP
Totals: 
9 Units - Median activation 5+1 (Good Command) = 6
19 SP - Exhaustion point = 7 SP
* This unit might have had 2 or 3 SP instead.  See later for explanation
** The pictures will show 2SP, but as the Black Mountains artillery never came under fire, it didn't make any difference.
General view of Scutari, with the northern and 
eastern Black Mountains lines of circumvallation.


The siege having made no progress over two weeks a number of the townspeople, longing for the end of Turcowaz rule, contacted the besiegers and agreed to open the gates to the Black Mountains Army. Having entered the town, this desperate band was to attack the garrison from within whilst the main body stormed the walls from without.  

This circumstance was generated by a die roll that determined there would be an 'event', and that the event would, from a range of possibilities (e.g. an attempted sortie, or the garrison seeking terms), be the attempted coup-de-main as so far related. It appears that pressure was placed upon the Prince, who in turn issued a peremptory order to his general to take, carry or storm the town by the middle of November.

How much of General Bogotan's army might be infiltrated into the town. I allowed as many as 3SP, based in a die roll. The roll was a '2', so just 1SP was inserted into the town, ready at once to attack in flank a defending unit.  

Some further points need to be made.
1.  I made one change to the rules concerning communication between squares being solely along the sides, NOT the corners. This concerns the bastions at each corner of the town. The corner at which the bastion adjoined the town (the 'gorge') was treated as if it were a side, not a corner, for movement, and for close assaults. 


2.  Only the town, bastion and demi-lune (ravelin) walls offered cover or protection to the people behind it. When defending the gorge of a bastion, or within the town, there was no cover for either side. The unit within the town begins by attacking a unit in flank, and therefore requiring a 4 to hit.

3.  I had earlier planned on the town itself occupying 4 squares only. I found this altogether impractical, and decided instead upon a nine-square 'footprint'. That permits the addition of demilunes or ravelins in a realistic manner.

The narrative, and the outcome of the Genevra talks will be related next time.

Wednesday, March 3, 2021

Speaking of gunboats...

Recently I came across some interesting articles concerning riverine operations in New Zealand - especially during the 1860s campaign into the Waikato region.  That region is dominated by the river Waikato, which, issuing from Lake Taupo, emerges into the Tasman Sea south of Auckland.   It is a fairly sizeable river, navigable - give or take the bar at its mouth, a hazardous feature of many New Zealand's west coast rivers - for a considerable distance inland.  


Some links:
Waikato River Gunboats: 'The Ironclads'

Dressing the Lines blog spot.  There's plenty more on New Zealand's colonial wars to be found here.  Including this book review:

Grant Middlemiss, The Waikato River Gunboats, Cambridge, NZ, (2014)


A fine addition to a war games New Zealand wars campaign along the Waikato, or possibly the Whanganui, rivers.  


Tuesday, March 2, 2021

First Blacklands War - Ship Stats

 Following my last posting, with its closing comments on modifying the naval units' Flotation Points values to be based up the weight of the vessels, Bob Cordery reminded me of the system he developed in his Portable Colonial Wargame.  

How could I have forgotten?  I'd used them myself for my HRMS Blunderer and the battle with the ironclads.  So I thought here to recalculate those 'stats' in accordance with his system.  The following is based upon the beam and waterline length of the models, not the originals from which they were modelled.  I also calculated the carrying capacity of the warships and merchant vessels, both.

A reminder:
A Warship's Flotation Points are determined by the expression

FP(WS) = (W x B x C x A)/2  Where;
W = waterline length (I've taken this as overall length, the difference being trivial on my toys)
B = Beam
C = Construction: 0.25 for wooden; 0.5 for iron or steel. 
A = Armour, graded from none (A=1), to light (A=1.25), medium (A=1.5) to heavy (A=2).

As all my vessels for the Blacklands war are held to have iron or steel construction, I've simplified the formula for the warships to:

FP(WS) = (W x B x A)/4.

The formula for the merchant vessels is:

FP(MS) = (W x B x C)/4, which simplifies to (W x B)/8.  As I am classing the armed merchant ship as a warship, its FP will be determined by the 'WS' formula.

I have also calculated the carrying capacity of my warships and merchant vessels.  

Hellenic (Greek):

  • Lemnos: FP = (10 x 4 x 2)/4 = 80/4 => 20
  • Georgios Averof: FP = (10.5 x 3.5 x 2)/4 = 73.5/4 => 18 
  • Hydra: FP = (10 x 3.5 x 1.5)/4 = 52.5/4 => 13
  • Psara: FP = (10 x 3.5 x 1.5)/4 = 52.5/4 => 13
  • Thiros Class Destroyer: FP = (9 x 2 x 1.25)/4 = 22.5/4 => 6


Turcowaz (Turk):

  • Turgut Reis: FP = (10 x 3.5 x 2)/4 = 70/4 => 18
  • Hayreddin Barbarossa: FP = (10 x 3.5 x 2)/4 = 70/4 => 18
  • Masudiye: FP = (10 x 4 x 1.5) = 60/4 => 15
  • Hamidiye: FP = (9 x 3 x 1.5) = 40.5/4 => 10
  • Muavenet Class Destroyer: FP = (7 x 2 x 1.25)/4 = 17.5/4 => 4
Merchant Ships:
  • Armed MS: FP = (8 x 3 x 1)/4 => 6
  • Black: FP = (8.5 x 3.5)/8 = 29.75/8 => 4
  • Blue: FP = (9 x 3)/8 = 27/8 => 3
  • Green: FP = (9.5 x 3.5)/8 = 33.25/8 => 4
Carrying Capacity:
Merchant vessels have double the carrying capacity than do warships of a comparable size.   

CC(WS) = (W x B)/8
CC(MS) = (W x B)/4

Hellenic (Greek): 
  • Lemnos: CC = (10 x 4)/8 = 40/8 => 5
  • Georgios Averof: CC= (10.5 x 3.5)/8 = 36.75/8 => 5
  • Hydra: CC = (10 x 3.5)/8 = 35/8 => 4
  • Psara: CC = 4
  • Thiros Class: CC = (9 x 2)/8 = 18/8 => 2

Turcowaz (Turk):
  • Turgut Reis: CC = (10 x 3.5)/8 = 35/8 => 4
  • Hayreddin Barbarossa: CC = 4
  • Mesudiye: CC = (10 x 4)/8 = 40/8 = 5
  • Hamidiye: CC = ( 9 x 3)/8 = 27/8 = 3
  • Muavenet Class: CC = (7 x 2)/8  = 14/8 => 2

Merchant ships:
  • Armed MS: CC = (8 x 3)/8 => 3 OR (8 x 3)/4 => 6
  • Black: CC = (8.5 x 3.5)/4 = 29.75/4 => 7
  • Blue: CC = (9 x 3)/4 = 27/4 => 7
  • Green: CC = (9.5 x 3.5)/4 = 33.25/4 => 8

According to these numbers, the Hellenic/ Greek fleet is very slightly more powerful than the Turcowaz/ Turkish one. 

River gunboat,  Aithiops Empress: 

Now, how about this work in progress, destined perhaps for activities around Madasahatta, Zanzingabar or the East Aithiopian coasts and rivers?  Bear in mind, this vessel has been constructed to a different scale from the vessels so far discussed.  In 'real life', it would be no larger than the Turcowaz torpedo boat destroyers.

Aithiops Empress:
FP = (10x4x1)/4 = 10 (actually the vessel is 14cm, but as it is supposed to 'fit' a 10cm-wide grid area, it counts as 10cm)
CC = (10x4)/8 = 5.  


Sengoku - 'Thought Points'

When I set up the scenario for the battle described in my previous posting ('Sengoku - A Diversion'), I was inclined to think the balance was in favour of 'Clan Oda'. So the result was unexpected, and even now I think the Ikko-Ikki victory was due largely to a run of luck in the latter stages. Mind you, it is also likely that the rather leisurely early handling of Clan Oda's relief column didn't help their cause!

A few days after this fight, I could not help but set up a straightforward, head-on battle featuring the same armies.

Clan Oda: 

'Red' Army.

Ikko-Ikki:

'Every colour but Red' Army. 

The observant reader might guess that, apart from the 2-figure command element of daimyo and standard bearer,  the figures represent the strength (points) within each unit. Loss of SP means the loss of a figure, in much the same manner as losses accrue in the Memoir '44 game systems.  
Army board for the RED faction in  Shogun
(Milton Bradley) now called Ikusa. As I was 
using the figure with the hexagonal base, Clan Oda 
the army was.


Shortly after the loss of Castle Dajji, the head of Clan Oda summoned one of his nephews to command a punitive expedition to take and burn the Jodo Shinshu temple that lay in one of the innumerable little valleys on the fringes of Oda lands.  So generally popular was the sect, that such a project could not possibly be kept secret, and so it was that, as Nephew Oda advanced up the valley, he encountered a considerable force of warrior monks, armed peasants and disaffected Ronin stretched right across the valley floor and blocking the way to the temple.

通ることならず 
'You shall not pass!'

Now, I really expected that the qualitative superiority of the red army to bash their way through the barrier - or at least, that it had that capability. However, rather than wait around to be hit, the Ikko-Ikki took the fight to their opponents, the first clashes at about the red line on the map. The narrative may be quickly told in the picture captions that follow.

As Clan Oda push forward their flanks to clear the woods,
nothing can restrain the Ikko-Ikki lead lines from
surging forward.

First clash - a unit of ashigaru yari give as 
good as they get against the Diamyo's bodyguard

The first clashes have driven back the Ikko-Ikki with 
loss, except for a determined band of Ronin, in 
close quarter action on their left (grey figures
partially obscured in the distance).
The Daimyo leads another mounted attack against
Ikko-Ikki spearmen.  Again, it seems, religious fervour 
makes up for differentials in martial skill: both 
sides achieve hits...


... and those hits result in 'kills'. 
What happens to the Daimyo? 
That 'six' tells the story!

Now leaderless, the Clan loses much of its 
coordination...

Ikko-Ikki insurgents continue to press,
though losses are heavy.  In the distance, that ferocious 
band of Ronin, with some ashigaru support  are about to 
break through the Clan's line.


Having reached its exhaustion point, Clan Oda 
begins slowly to withdraw; covered by units 
still in contact with the enemy.


Clan Oda's fighting withdrawal finally discourages  
further pursuit. They break clear, the mission a failure. 


Though a victory for the Ikko-Ikki, it was a costly one - a pyrrhic success, withal. Both sides reached their exhaustion points, some 14SPs lost to Clan Oda, 20SP to Ikko-Ikki. Clan Oda reached its E.P. a few turns sooner that Ikko-Ikki, but, the units  remaining in contact with the enemy (as permitted by the rules) were able to inhibit pursuit and to inflict losses, whilst the rest of the army withdrew. Then those units were able themselves to break off the action and put some distance between themselves and the enemy.

Now to the 'Thought Points'

1.  Commanders.
So far, the Portable Wargames systems have assigned an arbitrary 6SP to commander units.  Having no fighting capacity in themselves, they go to augmenting other units', and to sustaining their army's morale, the loss of the commander taking an army a long way towards its 'exhaustion point'.

This Sengoku rule set assigns 0SP to the commander, his loss diminishing the army's coordination and control, rather than bringing it closer to exhaustion.  I'll come to this further in the section on Unit Activation.  

Although not explicitly stated, there seems to be a suggestion that one might have more than one commander in a given army.  I have used the idea of sub-commanders in many of my past PW actions, of course, assigning 2,3, or 4 SPs to them depending upon the command levels within the armies overall.  These, however were pretty big armies by PW standards!

Sengoku is a little different: the generals very much going towards command and control, rather than 'army morale'. 

2. Unit Activation.
The system used in this rule set is a deal more elaborate than used in most of the other PW rule sets. Now, the initiative roll is the same as that I have used consistently over the last several years. But the unit activation system developed for this rule set is something new - more elaborate. I'll go through it here as it has several features I wish to discuss.

Method:
  1. Sum the army's units still in action [I have so far assumed including the general(s) as unit(s) but this might be mistaken].  
  2. Divide by 6 and 'round down' by which I think is meant 'truncate' - take the integer part only of the quotient.  This is the base line number of D6 to be rolled
  3. Add 1 D6 for an extant (sic) general. Now, I am supposing this means 'for each', given the existence of more than one general (e.g. sub-commanders), but stand to be corrected on this.
  4. Roll these D6s, then halve the sum of the pip scores.  Ignore fractions again.
Let us take take the respective armies above:
  1.  Including the commander, Ikko-Ikki comprised 19 units, Clan Oda, 12 units.  
  2.  Divide by 6 and 'round down: Ikko-Ikki -> 3; Clan Oda -> 2
  3.  Add generals: Ikko-Ikki -> 4; Clan Oda -> 3
  4.  Statistical expectation of units activated (halved dice rolls): Ikko-Ikki -> 14/2 -> 7; Clan Oda -> 10.5/2 -> 5
In both cases, most of the time less than half the units will be activated.  In Clan Oda's case, even the loss of just one unit will seriously decrease its overall control: 11/6 -> 1D6; then 7/2 -> 3 - a statistical expectation that just 3 units may be activated out of 11.  

Aside from possibly misinterpreting some aspects, I have a feeling that such a constraint upon control of the army, although going towards 'chance' perhaps, might tend to frustratingly piecemeal battles. If using this system I would suggest (without yet going so far as to recommend):
  1. Ignore generals in the unit count
  2. Round fractions - exact halves being rounded up.  [Or even go 1D6 per 6 units or part thereof might be worth a look].
  3. Loss of units and general(s) still may affect command and control.
How, then, would this look? As it happens, given the armies featured in this article, it would make no difference at all to begin with, but it would mitigate against very early subtractions in command and control as losses mount. Even then, though, I find it hard to get my head around the relative unlikelihood of activating more than half the army at any time; and the huge advantage likely to accrue when it does happen!

3.  Missilery Ranges.
These are very short under this rule set, so short, withal, that close combats simply have to be 'voluntary'. Bow-armed samurai can shoot to 1 grid area range; arquebusiers and cannon to 2 and 3 grid areas, with 1 area being 'short' range. By the way, I notice that the game system assumes a square grid, but I see no reason so far to suppose it to be unsuited to a hex gridded battlefield.

The effect of this is, that units in contact with enemy have to be activated to engage in shooting or hand-to-hand combat. One might conduct a 'holding attack' by marching up to the enemy and standing in front of them, the only combats taking place in one's opponent's turn.  Meanwhile reinforcements are coming up, or one develops some other, potentially decisive, attack. One has to bear in mind that the enemy is under the same constraint. I believe attackers would have to accept heavy losses until the main attack develops decisively.

An interesting effect of the game system is this particular Close Combat D6 modifier: "+2 for Mounted Samurai attacking a Tepo unit." This must be in the Samurai own turn. What happens in the Tepo turn? They are not going to be so silly as to engage in close combat, are they? - even though the Samurai +2 modifier won't apply. The Tepo will shoot, with the Samurai unable to respond until their own turn. For their part the Samurai could choose in their turn to shoot; a fire fight would still be a winning proposition, but the close combat would be a 'winninger' one.  

I have been tempted to add 1 to all the missilery ranges, but before so doing, I guess one has to examine the potential of the existing game mechanics. Methinks there will be a couple more Clan Oda vs Ikko-Ikki actions before the jury comes in.

This is looking like a game set that requires a deal of action in order to get the best out of them, and thence to come at a fair assessment.  Tricky!

Thursday, February 25, 2021

Sengoku - A Diversion

Every so often, one finds, despite having plenty to write about, there sets in a disinclination to 'put pen to paper' - I suppose one should say now: 'put finger to keyboard'. Hence the three week hiatus, which, absent the imaginary shotgun I'm holding to my head, could easily extend to as many months.

Having recently accepted delivery of the latest Portable Wargame volume - The Portable Pike & Shot Wargame; I'm building a considerable library of Bob Cordery books! - I was most interested in it, I thought, for the 30YW and ECW game systems. As it turned out, the 'Sengoku Variant' (by Antoine Bourguilleau) caught my eye. Without wishing to embark upon a whole new project with a whole new collection of figures I had no storage room for, it occurred to me that I have a whole range of figures that I could use - the figures from the Shogun board game that has been sitting idly doing nothing for nigh on 20 years. All that was wanting was the mounted arm (represented by a dismounted Daimyo figure I have supposed).  

So, I bought a box of Zvezda mounted samurai (I've long known them to be superb figures, but had resisted so far in getting any), and hope soon to acquire a couple more. Now, not wanting to wreck the board game by painting the figures, but also not happy with the thought of painting the mounted figures an overall colour, I  undercoated them black, dry-brushed overall with white, and painted red all the tassels and fringes I could find. I'll probably add some extra details here and there later on.

Early moves - 


So, to battle.  

The first outing for the 'Sengoku Portable Wargame'  was a pickup action played with Paul 'Jacko' Jackson one evening just over 3 weeks ago. Clan Oda was in combat against an Ikko-Ikki insurgent army. Hideoshi Oda himself led a relief column to rescue an adherent's castle from attack.

  • Board: Memoir '44, with terrain pieces (woods, walls and home-made 'castle') added.
  • Foot figures: From the 'Shogun' board game, left 'as is'. The red figures were Clan Oda; the 'every other colour but red' were the Ikko-Ikki. The grey figures were Ronin.
  • Mounted figures: Superb 'Zvezda' mounted samurai, given a black undercoat, white drybrush and red details.
  • Artillery: Souvenir piece from the Tower of London (I have 4 of these).
Forces:
Clan Oda garrison:
  • 1 unit each foot samurai, elite, 4SP
  • 1 unit ashigaru yari (spearmen), average, 3SP
  • 1 unit ashigaru tepo (gunners), average, 2SP
  • 1 unit artillery, average, 2SP
Clan Oda relief column:
  • Hideoshi Oda (Daimyo), 0SP
  • 2 units mounted samurai, elite, @3SP = 6SP
  • 1 unit foot samurai, elite, 4SP
  • 3 units ashigaru yari, average, @3SP = 9SP
  • 1 unit ashigaru tepo, 2SP
Totals: 12 units (including Daimyo) -> Activation = Int(3D6/2)* 32 Strength Points: Exhaustion @ -11SP; Rout @ -16SP.
Ikko-Ikki:
  • Commander (a certain Ori Gami, high priest of Jodo Shinshu), 0SP
  • 2 units ronin, average, @3SP = 6SP
  • 12 units ashigaru yari @3SP = 36SP
  • 4 units ashigaru tepo @2SP = 8SP
S = Samurai
T = Ashigaru Tepo (arquebusiers)
Y = Ashigaru Yari (spearmen)
Totals: 19 units (including leader) ->
Activation = Int(4D6/2)* 50 Strength points: Exhaustion @ -17SP;
Rout @ -25SP. * Int(expression) = the integer part of of a given rational number. It is a way of expressing truncation, rather than rounding. For example Int([1+3+4+5]/2) = Int(13/2) = Int(6.5) = 6. The table was set up in the map, the board being from the Memoir '44 game set - very useful for battlefields it is! Paul was offered the choice of army; he surprised me by taking the Ikko-Ikki.
So it was that in the first year of Tomohito Emperor, the Ikko-Ikki of Etchu province essayed an assault upon Clan Oda, beginning with a attack upon an outlying adherent Matsu Diron's residence, Dajji Castle. Matsu Diron could count upon his personal retinue of foot samurai, some cannon, and his entourage of ashigaru spearmen and gunners, but one sight of the hordes descending upon his lands led him hastily to dispatch runners to call for help from the nearest Clan leader. For their part, Dajji was to be the Ikko-Ikki beginning of the total obliteration of the hated Samurai class and what they stood for, according to the ideology and aim of the insurgents. Well - maybe this little action could be a generating circumstance for a campaign! The tale is soon told. The Ikko-Ikki launched an immediate attack upon the Dajji walls, where they were met by a hail of shot from arquebus and cannon. As the attack lapped around the walls, the Samurai bodyguard came into action. Boldly daring, the defending ashigaru spearmen sortied into the open and into left flank of the attackers.

For long the assailants struggled to secure a lodgment over the walls. The defenders exacted a steep toll, but the heaviest attacks were pushed against the apparently weakest of them. But each time the attacks against the guns and gunners met a check or repulse, the latter followed up their success with shot. Yet for all their losses, nothing would dismay the Ikko-Ikki. At last overcoming the cannoneers, the insurgent Ronin swarmed into the defenders' positions.
Meanwhile, the relieving column had become strung out along the road, the samurai and hand gunners having opened up a gap before the trailing spearmen. At that, the Diamyo permitted himself to be distracted by insurgent spearmen flanking the move towards the castle. Having got entangled in petty skirmishes, the samurai found it difficult to extricate themselves and resume the march.
That dilatoriness turned the action. Having incurred heavy losses storming into the castle, the Ikko-Ikki now began to exact a heavy vengeance. At one point the whole Samurai force had lost just 5 strength points against at least 12 Ikko-Ikki. The cannon lost, the isolated arquebusiers fell back into the castle. There the warrior monk leader, Ori Gami led the victorious ronin and spearmen in smashing their way into the stronghold. Outnumbered five to one, the defenders reeled out the back door. For their part the samurai defenders were still able to present a solid front.


Having freed themselves from the attentions of the more distant ashigaru, the mounted samurai made rapid progress to the aid of the castle, somewhat protected on their right flank by ashigaru tepo in a small wood not far from the castle walls. Riding down a band of spearmen, they appeared on the brink of victory despite the momentary loss of the castle, as much of the garrison was still fighting in the grounds. At about this point, the Ikko-Ikki had lost 15SP - just two more would bring their attack to an end. Clan Oda had taken barely 50% losses so far. How a battle can turn! The main castle won, the triumphant assailants began hunting the Clan Oda defenders in the grounds. The arquebusier remnants they quickly dispatched, then surrounded the samurai, who refused to abandon their charge. Losses quickly mounted, as the garrison samurai were whittled away to nothing. In his hurry to bring help, pushing his way through swarms of ashigaru spearmen, Hideoshi Oda received an unlucky spear thrust that laid him low. In striving to finish off the insurgent army, Clan Oda had brought about its own discomfiture. Although the Clan continued to press on for a time, they too keenly felt the loss of their leader. Attacks became disjointed, the ashigaru spearmen were still somewhere down the road, all despaired of regaining the castle. Exhausted, Clan Oda gave up the battle.

This was quite a turn up. Although the castle was lost only after the garrison had exacted a heavy toll, and well into the action a clear samurai victory seemed likely (6 or 7 SP lost against 15 SP), the massacre near its close quickly narrowed the margin, and it was Clan Oda that reached its exhaustion point first. So the castle was lost, and Clan Oda defeated. This was quite an interesting first outing for the rule set, with some 'thought points' emerging owing to its own particular game mechanics, in particular the unit activation system, and the 'missilery' ranges. A discussion of these I'll leave over for another time.